Table of Contents
Advertisement
Quick Links
Advertisement
Table of Contents

Related Manuals for Honeywell HCU 23


Summary of Contents for Honeywell HCU 23
-
Page 3: Table Of Contents
Contents Overview Application Operating elements and display Start-up Inserting batteries (optional) Connecting setpoint adjuster HCU 23 Assigning temperature zone Installation Dimensions Operation Changing operating mode Changing setpoint temperature with adjustment dial Disabling setpoint adjuster (child-proofing) Adjusting settings Temperatures and control periods... - Page 4 Contents Glossary Technical data Help with problems Notes...
-
Page 5: Overview
Technical terms are explained in the glossary (Page 20). They are identified in the text by an *. The setpoint adjuster HCU 23 is a component of the storey controller system HCE 40 from Honeywell. It controls the setpoint temperature* of a room. -
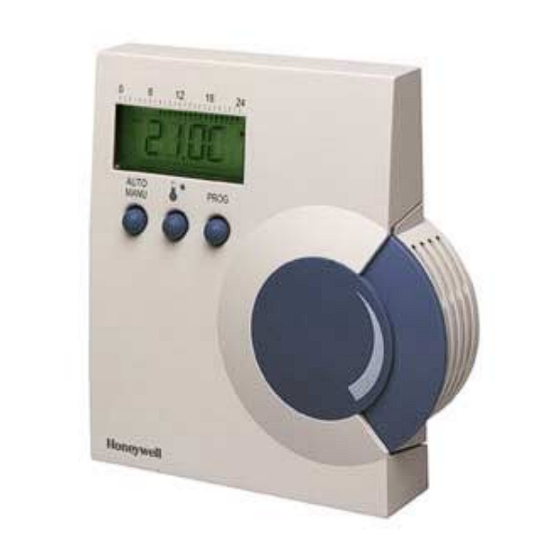
Page 6: Operating Elements And Display
Overview À Á Å Â Ã Ä Æ 1. Display of the set heating and economy period* 2. Display of the operating mode: AUTO, MANU or PROG button for changing between AUTO and MANU mode button for setting the comfort and economy temperature* button for setting the time program* 6. -
Page 7: Start-Up
Start-up Batteries are not included in the scope of supply. Batteries allow the unit to function in the event of a power failure. If batteries are not inserted, the time must be reset after a power failure. ► Open the housing by pressing in the latching nose on the bottom of the housing while lifting the cover at the same time. - Page 8 Start-up Setpoint adjusters of type HCU 23 are hard-wired. Observe the zoning plan* of the storey controller and the switching of the time programs when connecting the setpoint adjuster. Example: Connection to temperature zone 5 1. Setpoint adjuster HCU 23 Á...
-
Page 9: Assigning Temperature Zone
Start-up You can assign each temperature zone* of the storey controller to the setpoint adjuster. Connection and assignment occur via the cabling. The HCU 23 functions as a setpoint adjuster* and time program transmitter*. Assigning setpoint adjuster as setpoint transmitter ►... - Page 10 2. Temperature zone 1 9. Temperature zone 5 3. Temperature zone 2 4. Temperature zone 3 Temperature selector input 5. Temperature zone 4 Room sensor input ⊥ 6. Setpoint adjuster HCU 23 Ground  Á Ã Ä TW RF TW RF...
- Page 11 Attach the connector of the setpoint adjuster (if only one is intended) to the connectors of the storey controller as shown in the following diagram. Á 1. Setpoint adjuster HCU 23 À 2. HAC 30 P1 P2 (window contact) 3. Storey controller...
-
Page 12: Installation
Installation Final installation is not to be carried out until start-up has been fully completed. ► Mark and drill the fastening holes as shown in the drilling scheme. ► Screw on the setpoint adjuster. ► Insert the batteries (optional). ► Position the housing cover correctly at the top and latch it into the latching nose on the housing bottom. -
Page 13: Dimensions
Installation... -
Page 14: Operation
Operation The setpoint adjuster has 3 operating modes: • Automatic mode (AUTO) • Manual mode (MANU) • Programming mode* (PROG) The automatic mode is the standard mode of the setpoint adjuster. Temperatures and heating periods* are controlled by the time program. -
Page 15: Changing Setpoint Temperature With Adjustment Dial
Operation You can also change the setpoint temperature in automatic mode with the adjustment dial at any time. The change remains in effect until it is overwritten by a heating or economy period of the time program. HINT: When on holiday: Change to manual mode and set a setpoint with the adjustment dial. -
Page 16: Adjusting Settings
You can exit the menus by pressing the button. The setpoint adjuster then returns to automatic mode. All changes are rejected. The HCU 23 changes between 2 setpoint temperatures... • Comfort temperature* Normal living temperature • Economy temperature During absence or at night ... -
Page 17: Factory Settings
Adjusting settings Comfort temp. 21 ° Economy Heating period period Economy temperature 16 ° 6:00 22:00 ► Press the button. The current comfort temperature is displayed flashing. ► Turn the adjustment dial until the desired comfort temperature is displayed. ► Press the button again. -
Page 18: Adjusting Heating And Economy Periods
Adjusting settings You can set a first heating and economy period and, if required, a second one for each weekday. Each heating period must also have an economy period assigned to it. HINT: First adjust the heating and economy period for all the weekdays simultaneously. - Page 19 Adjusting settings --:-- ► Turn the adjustment dial until is displayed. ► Press the button. The new heating and economy periods are effective for all the weekdays. If you want to set a second heating and economy period: ► Turn the adjustment dial until the desired second heating period is displayed.
- Page 20 Adjusting settings ► Press the button again. ► Turn the adjustment dial until the desired first economy period is displayed. ► Press the button again. If you do not want to set a second heating and economy period: --:-- ► Turn the adjustment dial until is displayed.
-
Page 21: Setting Date And Time
Adjusting settings Deleting heating and economy period Whenever a heating period is deleted, the corresponding economy period must also be deleted and vice versa. ► Proceed as described in the above sections on "Changing heating and economy periods". Turn the adjustment dial to the right until --:-- is displayed. -
Page 22: Restoring Factory Settings
Adjust the day, hour and minute by the same method until the current setpoint temperature is displayed. The date and time are set. All settings are lost when you restore the factory settings of the setpoint adjuster HCU 23. ► Remove the batteries from the setpoint adjuster. ►... - Page 23 Glossary Comfort temperature Automatic mode Set temperature accessed by the Standard operating mode of the time program. Refer to economy setpoint adjuster. The time program temperature. controls the room temperature. Manual mode Heating period No time program active. Setpoint Period which comfort adjustment via adjustment dial.
- Page 24 Technical data Sensor element NTC termistor Resistor 20 kOhm at 25 °C Operating range 0 °C to +40 °C 103 × 98 × 28 mm Dimensions (H x W x D) Type of installation Wall installation Max. ambient temperature / humidity 0 °C to 50 °C / 5 % to 90 % rel.
- Page 25 Help with problems Problem/ Cause Remedy Display ► Connect setpoint No display Setpoint adjuster not adjuster correctly. connected properly ► No power to storey Connect HCE 40 to controller HCE 40 voltage supply ► Check voltage supply. ► Set time after Power failure changing the (year) flashes...
- Page 26 Help with problems Problem/ Cause Remedy Display ► Close window Window contact opened ► Replace window contact ► Install a jumper to disable window contact ► Restore factory settings.
- Page 27 Notes...
- Page 28 Honeywell AG Böblinger Straße 17 D – 71101 Schönaich Tel. (01801) 466 390 This company is certificated to The right is reserved to make modifications. This document is definitive for the enclosed product and replaces all previous publications. No. 7157589...