Table of Contents
Advertisement
Quick Links
Advertisement
Table of Contents

Related Manuals for AEG BSK774121M


Summary of Contents for AEG BSK774121M
- Page 1 BSK774121M User Manual Steam oven USER MANUAL...
-
Page 2: Table Of Contents
FOR PERFECT RESULTS Thank you for choosing this AEG product. We have created it to give you impeccable performance for many years, with innovative technologies that help make life simpler – features you might not find on ordinary appliances. Please spend a few minutes reading to get the very best from it. -
Page 3: Safety Information
SAFETY INFORMATION Before the installation and use of the appliance, carefully read the supplied instructions. The manufacturer is not responsible for any injuries or damage that are the result of incorrect installation or usage. Always keep the instructions in a safe and accessible location for future reference. -
Page 4: Safety Instructions
Disconnect the appliance from the power supply before • carrying out any maintenance. If the mains power supply cable is damaged, it must be • replaced by the manufacturer, its Authorised Service Centre or similarly qualified persons to avoid an electrical hazard. WARNING: Ensure that the appliance is switched off before •... - Page 5 • Connect the mains plug to the mains socket only at the end of the installation. Cabinet depth 550 (550) mm Make sure that there is access to the Height of the front of the 594 mm mains plug after the installation. appliance •...
- Page 6 • Do not change the specification of this door is never closed when the appliance appliance. operates. Heat and moisture can build up • Make sure that the ventilation openings behind a closed furniture panel and cause are not blocked. subsequent damage to the appliance, the •...
-
Page 7: Installation
The appliance becomes very hot and hot – Open the appliance door with care air is released from the front cooling after the steam cooking operation. vents. 2.7 Internal lighting • Pyrolytic cleaning is a high temperature operation that can release fumes from cooking residues and construction WARNING! materials, as such consumers are strongly... - Page 8 3.1 Building in www.youtube.com/electrolux www.youtube.com/aeg How to install your AEG/Electrolux Oven - Column installation (*mm) min. 550 min. 560 (*mm) min. 550 min. 560 ENGLISH...
-
Page 9: Product Description
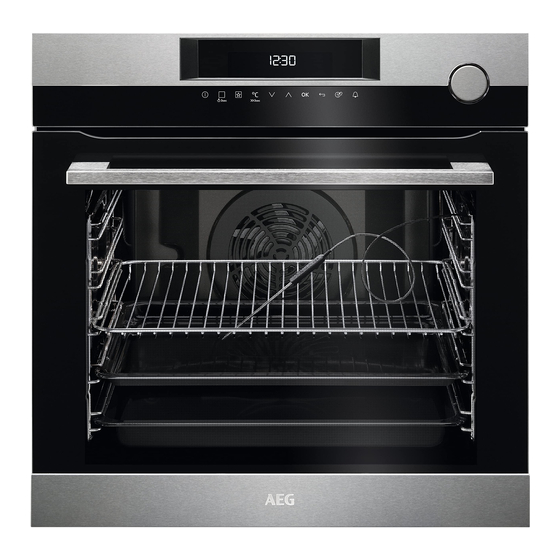
3.2 Securing the oven to the cabinet 4. PRODUCT DESCRIPTION 4.1 General overview Control panel Electronic programmer Water drawer Socket for the food sensor Heating element Lamp Shelf support, removable Draining pipe Water outlet valve Shelf positions Steam inlet 4.2 Accessories •... -
Page 10: Control Panel
5. CONTROL PANEL 5.1 Electronic programmer Use the sensor fields to operate the appliance. Sensor Function Comment field Display Shows the current settings of the oven. ON / OFF To turn the oven on and off. Heating Functions or Press the sensor field once to choose a heating function or the Assisted Cooking menu: Assisted Cooking. - Page 11 Sensor Function Comment field Minute Minder To set the function: Minute Minder. 5.2 Display A. Heating function B. Time of day C. Heat-up indicator D. Temperature E. Duration time or end time of a function Other indicators of the display: Symbol Function Minute Minder...
-
Page 12: Before First Use
6. BEFORE FIRST USE 6.1 Initial Cleaning WARNING! Refer to Safety chapters. Step 1 Step 2 Step 3 Clean the oven and the accessories Remove all accessories and remov‐ Place the accessories and the re‐ with a soft cloth, warm water and a able shelf supports from the oven. - Page 13 7.3 Setting a steam function 7.4 Tank Empty indicator The water drawer cover is in the control The display shows: Water required and a panel. signal sounds when the tank is empty and must be refilled. WARNING! For more information refer to "Daily use" Use only cold tap water.
- Page 14 3. Open the oven door and put the connector (B) into the outlet valve (A). Symbol / Menu Application 4. Push the connector again and again item when you empty the water tank. Contains a list of cleaning The tank can have some programmes.
- Page 15 Symbol / Menu Description Heating function Application item To bake and roast food on one shelf position. Sets the language for the display. Set Language Conventional Cook‐ Adjusts the volume of press- tones and signals by de‐ To make convenience food Buzzer Volume grees.
- Page 16 7.14 Assisted Cooking Heating function Application Food Category: Fish / Seafood To preheat plates for serv‐ Dish ing. Fish Fish, baked Plate Warming Fish fingers To preserve vegetables (e.g., pickles). Fish fillet, frozen Preserving Whole small fish, grilled To dry sliced fruit, vegeta‐ Whole fish, grilled bles and mushrooms.
- Page 17 Food Category: Pizza / Quiche Dish Dish Spare ribs Pizza, thin Pork knuckle, pre-cooked Pizza, extra topping Pork joint Pizza, frozen Pork Pizza Loin of pork Pizza American, frozen Pork neck Pizza, chilled Pork shoulder Pizza snacks, frozen Veal knuckle Baguettes au gratin Loin of veal Veal...
-
Page 18: Clock Functions
Dish Dish Apple strudel, frozen Ciabatta Sponge dough Bread crown Cake on tray Yeast dough Bread Yeast plait Cheese cake, tray Unleavened bread Brownies Food Category: Side dishes Swiss roll Dish Yeast cake French fries, thin Crumble cake French fries, thick Sugar cake French fries, frozen Short pastry flan base... -
Page 19: Automatic Programmes
5. Press any symbol to stop the signal. When the function ends, a signal sounds. 8.3 Heat + Hold 8.4 Time Extension Conditions for the function: The function: Time Extension makes the heating function continue after the end of • The set temperature is more than 80 °C. Duration. -
Page 20: Using The Accessories
10. USING THE ACCESSORIES 3. Turn on the oven. WARNING! The display shows the food sensor symbol. Refer to Safety chapters. 4. Press in less than 5 seconds to set the core temperature. 10.1 Food sensor 5. Set the heating function and, if necessary, the oven temperature. - Page 21 Wireshelf: Push the shelf between the guide bars of the shelf support and make sure that the feet point down. Baking tray / Deep pan: Push the tray between the guide bars of the shelf support. Wireshelf, Baking tray / Deep pan: Push the tray between the guide bars of the shelf support and the wire shelf on the guide bars above.
- Page 22 10.4 Accessories for steam cooking The dietary baking dish for steam cooking functions The steam kit accessories are Dietary Baking dish consists of a glass bowl not supplied with the oven. For (A), a lid (B), injector tube (C), injector (D), more information, please contact and a steel grill (E).
-
Page 23: Additional Functions
Injector, injector tube, and a steel grill. Steel grill (E) • Do not put the hot baking dish on cold / • Do not clean the baking dish with wet surfaces. abrasives, scourers and powders. • Do not pour cold liquids into the baking 10.5 Steam cooking in a dietary dish when it is hot. - Page 24 11.3 Function Lock 3. Press again and again until the display shows: SAVE. This function prevents an accidental change of the heating function. You can turn it on 4. Press to confirm. only when the oven works. The display shows the first free memory position.
-
Page 25: Hints And Tips
11.5 Automatic switch-off 11.7 Cooling fan For safety reasons the oven turns off after When the oven operates, the cooling fan some time, if a heating function works and turns on automatically to keep the surfaces of you do not change any settings. the oven cool. - Page 26 To prevent too much smoke in the oven Initially, monitor the performance when you during roasting, add some water into the cook. Find the best settings (heat setting, deep pan. To prevent the smoke cooking time, etc.) for your cookware, recipes condensation, add water each time after it and quantities when you use this appliance.
- Page 27 (°C) (min) Poached meat, 0.25 baking tray or dripping pan 35 - 45 Shashlik, 0.5 kg baking tray or dripping pan 25 - 30 Cookies, 16 pieces baking tray or dripping pan 20 - 30 Macaroons, 24 pieces baking tray or dripping pan 25 - 35 Muffins, 12 pieces baking tray or dripping pan...
-
Page 28: Care And Cleaning
(°C) (min) Sponge Conventional Wire shelf 40 - 50 Preheat the oven for cake, cake Cooking 10 minutes. mould Ø26 Sponge True Fan Wire shelf 40 - 50 Preheat the oven for cake, cake Cooking 10 minutes. mould Ø26 Sponge True Fan Wire shelf 2 and 4... - Page 29 Clean the cavity after each use. Fat accumulation or other residue may cause fire. Moisture can condense in the oven or on the door glass panels. To decrease the condensa‐ tion, let the oven work for 10 minutes before cooking. Do not store the food in the oven for longer than 20 minutes.
- Page 30 Step 1 Step 2 Step 3 Turn on the oven. Press: Menu / Pyrolysis. Set the cleaning mode. Press: Option Cleaning mode Duration Quick Light cleaning Normal Normal cleaning 1 h 30 min Intense Thorough cleaning 2 h 30 min When the cleaning starts, the oven door is locked and the lamp is off.
- Page 31 Water hardness Test strip Calcium deposit Water classi‐ Clean the wa‐ (mg/l) fication ter tank every Level 0 - 7 0 - 50 soft 75 cycles - 2.5 months 8 - 14 51 - 100 moderately hard 50 cycles - 2 months 15 - 21 101 - 150...
- Page 32 Step 5 Hold the door trim (B) on the top edge of the door at the two sides and push inwards to re‐ lease the clip seal. Step 6 Pull the door trim to the front to remove it. Step 7 Hold the door glass panels by their top edge and carefully pull them out one by one.
-
Page 33: Troubleshooting
13.6 How to replace: Lamp Always hold the halogen lamp with a cloth to prevent grease residue from burning on the lamp. WARNING! Risk of electric shock. The lamp can be hot. Before you replace the lamp: Step 1 Step 2 Step 3 Turn off the oven. - Page 34 Problem Possible cause Remedy The lamp does not operate. The lamp is defective. Replace the lamp. The food sensor does not operate. The plug of the food sensor is not Put the plug of the food sensor as correctly installed into the socket. far as possible into the socket.
-
Page 35: Energy Efficiency
15. ENERGY EFFICIENCY 15.1 Product Information and Product Information Sheet* Supplier's name Model identification BSK774121M 949494749 Energy Efficiency Index 81.2 Energy efficiency class Energy consumption with a standard load, conventional mode 0.93 kWh/cycle Energy consumption with a standard load, fan-forced mode 0.69 kWh/cycle... -
Page 36: Environmental Concerns
warm. The residual heat indicator or When you use this function the lamp temperature appears on the display. automatically turns off after 30 sec. You may turn on the lamp again but this action will Cooking with the lamp off reduce the expected energy savings. - Page 40 www.aeg.com/shop...