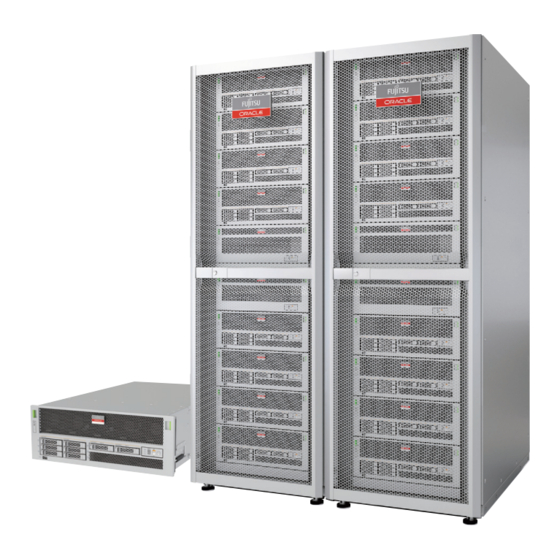
Fujitsu M10 Product Notes
Hide thumbs
Also See for M10:
- Installation manual (374 pages) ,
- Product notes (216 pages) ,
- Installation planning manual (136 pages)

Related Manuals for Fujitsu M10


Summary of Contents for Fujitsu M10
- Page 1 Fujitsu M10/SPARC M10 Systems Product Notes for XCP Version 2043 Manual Code: C120-E701-02EN October 2013...
- Page 2 The furnishings of this document to you does not give you any rights or licenses, express or implied, with respect to the product or technology to which it pertains, and this document does not contain or represent any commitment of any kind on the part of Oracle or Fujitsu Limited or any affiliate of either of them.
-
Page 3: Table Of Contents
Web Browser 4 Chapter 2 XCP 2043-Related Information 5 Latest Information on XCP 2043 5 SPARC M10 System Lineup 5 Notes and Restrictions 6 Notes on OpenBoot PROM 6 Notes on maintenance for CPU memory unit and motherboard unit 6... - Page 4 Problems with Hardware and Workarounds 62 Chapter 6 Information on SPARC M10-4S Hardware 63 Notes and Restrictions 63 Notes on using external DVD drive 63 Notes on using USB memory 63 Fujitsu M10/SPARC M10 Systems Product Notes for XCP Version 2043 ・ October 2013...
- Page 5 Removing Crossbar Cable (Electrical) 112 Installing Crossbar Cable (Electrical) 113 Removing Crossbar Cable (Optical) 113 Installing Crossbar Cable (Optical) 114 Contents of Revision of PCI Expansion Unit for SPARC M10 Systems Service Manual 115 Accessing link board 115 Precautions for Replacement 116...
- Page 6 Enabling Removal of Cable Kit 138 Removing Cable Kit 139 Removing cable for connecting crossbar backplane unit and terminal board 139 Removing cable for connecting terminal board and fan backplane 144 Fujitsu M10/SPARC M10 Systems Product Notes for XCP Version 2043 ・ October 2013...
- Page 7 Installing Cable Kit 152 Installing the crossbar backplane unit-terminal board cable 152 Installing terminal board-fan backplane cable 153 Restoring System 159 Contents...
- Page 8 Fujitsu M10/SPARC M10 Systems Product Notes for XCP Version 2043 ・ October 2013 viii...
-
Page 9: Preface
■ http://jp.fujitsu.com/platform/server/sparc/manual/ Global site ■ http://www.fujitsu.com/global/services/computing/server/sparc/downloads/manual/ Fujitsu M10 is sold as SPARC M10 Systems by Fujitsu in Japan. Fujitsu M10 and SPARC M10 Systems are identical products. This preface includes the following sections: Audience ■ How to Use This Document ■... - Page 10 How to Use This Document This document supports all models of SPARC M10 systems. Depending on the server you use, read the related items listed in the following table. Chapter titles in this document SPARC M10-1 SPARC M10-4 SPARC M10-4S...
- Page 11 Global site http://www.fujitsu.com/global/services/computing/server/sparc/downloads/manual/ Note - This document is given priority over the information in the SPARC M10 systems- related documents. The following table lists the documents related to the SPARC M10 systems. Read the related documents carefully when you use this product.
- Page 12 PROM firmware, Power-On Self Test firmware, and Hypervisor firmware. Disposal and Recycling Note - This information is not applied to SPARC M10 systems sold outside of Japan. For product disposal and recycling (paid service), contact your sales representatives. Documentation Feedback...
-
Page 13: Chapter 1 Software Requirements
Chapter 1 Software Requirements This chapter describes the software requirements for using SPARC M10 Systems. XCP/Oracle Solaris and Essential SRU/Patch ■ How to Obtain XCP and Oracle Solaris SRU/Patch/Oracle VM Server for SPARC ■ Web Browser ■ XCP/Oracle Solaris and Essential... - Page 14 *2: Required only for the control domain. Included in group/system/solaris-large-server and group/system/solaris-small-server. *3: Required only for the control domain. *4: For Oracle Solaris 11. *5: For Oracle Solaris 10. Fujitsu M10/SPARC M10 Systems Product Notes for XCP Version 2043 ・ October 2013...
- Page 15 Note - When installing or booting Oracle Solaris 11.1 from the DVD media in a SPARC M10 system, the following two types of messages appear. Ignore these messages because they have no impact on installation work. [Message example 1] Dec 21 02:18:22 solaris genunix: NOTICE: core_log: ldmd[1978] core dumped: /tmp/core Dec 21 02:18:22 solaris svc.startd[9]: ldoms/ldmd:default failed...
-
Page 16: Sparc
XSCF Web, see "Notes and restrictions on XSCF Web." Table 1-2 Version of web browser of which operation has been confirmed Web browser Version Microsoft Internet Explorer 8.0 and 9.0 Firefox 10.0 or later Fujitsu M10/SPARC M10 Systems Product Notes for XCP Version 2043 ・ October 2013... -
Page 17: Chapter 2 Xcp 2043-Related Information
■ XCP 2043 Problems and Workarounds ■ Latest Information on XCP 2043 This section describes newly added functions for XCP 2043. It became possible to connect multiple SPARC M10-4Ss through crossbar boxes. ■ For details, see "SPARC M10 System Lineup."... -
Page 18: Notes And Restrictions
CPU core activation key, it is necessary to save the setting information of the CPU core activation and CPU core activation key beforehand, using the dumpconfig(8) Fujitsu M10/SPARC M10 Systems Product Notes for XCP Version 2043 ・ October 2013... -
Page 19: Notes On Cpu Core Activation
-c factory -r activation option. For the information of changes of the restoredefaults command, see "Contents of Revision of SPARC M10 Systems XSCF Reference Manual." XSCF setting information saved by the dumpconfig(8) command contains CPU ■... -
Page 20: Notes On Firmware Update
ID and password. If you save the login ID and password, the saved data may be displayed on LDAP, SMTP, and REMCS web pages. Note - Remote Customer Support System (REMCS) is not supported on SPARC M10 systems sold outside of Japan. -
Page 21: Other Notes And Restrictions
Telnet and SSH is as follows: M10-1: 20 users ■ M10-4: 40 users ■ M10-4S (without crossbar box): 40 users ■ M10-4S (with crossbar box): 70 users ■ Even if the maximum number of users is exceeded, access is not rejected. - Page 22 Depending on the system configuration, it may take time to reboot. [SPARC M10-4S] ■ If you add a SPARC M10-4S to the SPARC M10-4S on which XCP 2032 is installed, update to the latest firmware in advance. Restrictions Data input/output using SSH, HTTP, HTTPS, or FTP is not possible with the ■...
- Page 23 ■ The poweroff(8) and reset(8) commands may not be executed normally if all XSCF have not been restarted due to an error in a XSCF in the SPARC M10-4S that is composed of more than two cabinets. To disconnect the power of a physical partition (PPAR), login to the control domain of the PPAR and execute the shutdown(1M) command on Oracle Solaris.
-
Page 24: Xcp 2043 Problems And Workarounds
"Problems that might occur with XCP 2043 and workarounds" for information on problems that can occur with XCP 2043. See "Problems resolved in XCP 2043" for information on problems resolved in XCP 2043. Fujitsu M10/SPARC M10 Systems Product Notes for XCP Version 2043 ・ October 2013... -
Page 25: Chapter 3 Information On Software
Chapter 3 Information on Software This chapter describes special instructions and problems concerning the SPARC M10 Systems software. Notes and Restrictions ■ Problems with XCP and Workarounds ■ Problems with Oracle Solaris and Workarounds ■ Notes and Restrictions Notes on Oracle VM Server for SPARC If you operate a guest domain with the reset(8) command of the XSCF firmware ■... -
Page 26: Notes On A Case Where Openssl Is Used
# openssl speed -engine pkcs11 -evp AES-256-CBC Applications which are using OpenSSL libraries (libssl, libcrypto) for optimized ■ digest or encryption methods in PKCS11 engine, must enable EVP interfaces Fujitsu M10/SPARC M10 Systems Product Notes for XCP Version 2043 ・ October 2013... -
Page 27: Notes On Remote Maintenance Service
Enhanced Support Facility User's Guide for REMCS for how to set and use REMCS. Before setting the remote maintenance service To use the remote maintenance service with SPARC M10 Systems, you must perform settings for the REMCS agent function by using XSCF Web. In addition, the REMCS agent uses timezone information of XSCF. - Page 28 PPAR while the power of Then, execute the deleteboard the PPAR is being disconnected (8) command. using the poweroff(8) command. Fujitsu M10/SPARC M10 Systems Product Notes for XCP Version 2043 ・ October 2013...
- Page 29 RTIF2- When maintaining SPARC After switching between the M10-4S with a slave XSCF, if master XSCF and the standby 130219-002 you incorrectly connect the XSCF by using the switchscf(8) standby XSCF and the slave...
- Page 30 Because of this, the error information displayed with the showlogs error command is not displayed in the Fault Report output by the fmdump command. Fujitsu M10/SPARC M10 Systems Product Notes for XCP Version 2043 ・ October 2013...
- Page 31 RTIF2-130305- When an XSCF unit of SPARC Replace the unit again after the M10-4S or crossbar box is replacefru(8) command is replaced using the replacefru(8) completed. command, the replacement may If replacement still fails, stop the fail with the following message system and then replace the unit.
- Page 32 XSCF Web, APCS, or the power supply interlocking. Not powering on : An internal error has occurred. Please contact your system administrator. Fujitsu M10/SPARC M10 Systems Product Notes for XCP Version 2043 ・ October 2013...
- Page 33 -a may not be completed. command or disconnect the input power supply of all the WARNING: Unable to SPARC M10-4S cabinets and connect to Domain then power on again. Service providers RTIF2-130305- If the poweroff(8) command is There is no effective workaround.
- Page 34 (PPAR) is performed with the poweroff(8) command, "SCF:PPAR issued power-off request (PPARID X)" may be registered many times. Fujitsu M10/SPARC M10 Systems Product Notes for XCP Version 2043 ・ October 2013...
- Page 35 M10-4Ss comprising PPAR is reset. 2. Switching of the master XSCF and standby XSCF occurs. 3. XSCF of SPARC M10-4S that was reset in 1. is reset again. RTIF2-130329- When you turn on the input There is no effective workaround.
- Page 36 PPAR-ID as a SubNodeID, and then register the power supply interlocking setting with the setremotepwrmgmt -c config. Fujitsu M10/SPARC M10 Systems Product Notes for XCP Version 2043 ・ October 2013...
-
Page 37: Problems Resolved In Xcp 2043
The following table lists the problems resolved in XCP 2043. Table 3-2 Problems resolved in XCP 2043 SPARC SPARC SPARC RTI No. M10-1 M10-4 M10-4S Description Workaround RTIF2-130410- The power may not be turned If you power on from the XSCF on/off from the operation panel. - Page 38 If you fail to forcefully turn off the power of a PPAR, power off the input power supply and then turn on the power again (AC OFF/ON). Fujitsu M10/SPARC M10 Systems Product Notes for XCP Version 2043 ・ October 2013...
-
Page 39: Problems Resolved In Versions Prior To Xcp 2043
The following table lists the problems resolved in versions prior to XCP 2043. Table 3-3 Problems resolved in versions prior to XCP 2043 SPARC SPARC SPARC RTI No. M10-1 M10-4 M10-4S Description Workaround RTIF2-121113- After setting an invalid value There is no effective workaround. - Page 40 XCP Web without restarting XSCF, with XSCF Web, restart XSCF. uploading of XCP will fail and the XSCF Web session will time out. Fujitsu M10/SPARC M10 Systems Product Notes for XCP Version 2043 ・ October 2013...
- Page 41 Table 3-3 Problems resolved in versions prior to XCP 2043 (continued) SPARC SPARC SPARC RTI No. M10-1 M10-4 M10-4S Description Workaround RTIF2-121113- When the following error is There is no effective workaround. registered in the error log, the mark (*) showing a failure state...
- Page 42 00ffff0000ff0000ff- 030000020000000000000000 use the ldm start command to start the guest domain. Status: Notice Occurred: Nov 16 16: 55:25.518 JST 2012 FRU: /UNSPECIFIED Msg: Boot process failed Fujitsu M10/SPARC M10 Systems Product Notes for XCP Version 2043 ・ October 2013...
- Page 43 SPARC M10-4S cabinets. is composed of multiple SPARC Remove and connect the power M10-4S cabinets. cables of all the cabinets again when there is a SPARC M10-4S cabinet that is not recognized. RTIF2-121219- While powering on/off the Execute the power supply interlocking...
- Page 44 ■ started" is not displayed in the event log, enter "f" in response to "Please select[f:finish]" and continue the replacement according to the instructions on the screen. Fujitsu M10/SPARC M10 Systems Product Notes for XCP Version 2043 ・ October 2013...
- Page 45 (PPAR). RTIF2-121219- If a SPARC M10-4S cabinet is There is no effective workaround. powered off after an error log is registered because a memory error occurred in BB#00 or BB#01, the same error log may be registered again.
- Page 46 PSU is supply unit (PSU), "Indispensable removed. Ignore it. parts are not installed (PSU)" may be registered in the event log. Fujitsu M10/SPARC M10 Systems Product Notes for XCP Version 2043 ・ October 2013...
- Page 47 CMUU is mounted. CMUU mounted, an error log of So, ignore it. Hardware access error is generated for CMUU. The same phenomenon occurs when you add or replace SPARC M10-4S. Chapter 3 Information on Software...
- Page 48 PSB that is being diagnosed command. may enter an abnormal state If a PSB becomes unavailable, and become unavailable. power off the entire system and then power it on again. Fujitsu M10/SPARC M10 Systems Product Notes for XCP Version 2043 ・ October 2013...
- Page 49 PPAR in the SNMP MIB is not updated. RTIF2-130219- If you turn on the input power Power on the input power supply to a SPARC M10-4S supply to all the crossbar boxes cabinet while a physical and SPARC M10-4S cabinets partition (PPAR) is being...
- Page 50 PSB is mounted "Unmount" and the addboard using the showboards(8) (8) command or the poweron(8) command. Then execute the command may fail. addboard(8) or poweron(8) command. Fujitsu M10/SPARC M10 Systems Product Notes for XCP Version 2043 ・ October 2013...
- Page 51 PowerOff), an complete. SRAM serious error occurs in any of the SPARC M10-4Ss in If any problem occurs, restore the PPAR when you power on the configuration with the the input power supply next...
-
Page 52: Problems With Oracle Solaris And Workarounds
Fujitsu M10/SPARC M10 Systems Product Notes for XCP Version 2043 ・ October 2013... - Page 53 CR ID M10-1 M10-4 M10-4S Description Workaround 15825208 In SPARC M10 Systems, the This has been modified with scp(1), sftp(1), and ssh(1) Solaris 11.1 SRU1.4. commands of Oracle Solaris may generate an error or [Workaround] installation of Oracle RAC may For details, see "An error...
- Page 54 XSCF the settings that were saved with no mirror mode set, to the environment where the mirror mode is used. Fujitsu M10/SPARC M10 Systems Product Notes for XCP Version 2043 ・ October 2013...
- Page 55 15887244 When you start the SunVTS 7.0 SunVTS is not supported for ps14 and ps15 tests in a SPARC SPARC M10 systems. M10 system, they may terminate with an error. Chapter 3 Information on Software...
- Page 56 # /usr/bin/lgrpinfo lgroup 12 (intermediate): Children: 10, Parent: 0 CPUs: 0 1 Memory: installed 520M, allocated 494M, free Lgroup resources: 1 (CPU); 10 11 (memory) Latency: 21 Fujitsu M10/SPARC M10 Systems Product Notes for XCP Version 2043 ・ October 2013...
- Page 57 Table 3-4 Problems that might occur in any versions of Oracle Solaris and their workarounds (continued) SPARC SPARC SPARC CR ID M10-1 M10-4 M10-4S Description Workaround 16292272 If you configure many guest We recommend that you do domains in a system where 16...
- Page 58 "TOSHIBA MBF2600RC", "f_sym"; For Oracle Solaris 10 ■ device-type-scsi- options-list = "TOSHIBA MBF2600RC", "sym-opt"; sym-opt = 0x1000000; 3. Use the stmsboot(1M) command to enable MPxIO. # stmsboot -e Fujitsu M10/SPARC M10 Systems Product Notes for XCP Version 2043 ・ October 2013...
- Page 59 Table 3-4 Problems that might occur in any versions of Oracle Solaris and their workarounds (continued) SPARC SPARC SPARC CR ID M10-1 M10-4 M10-4S Description Workaround - When a logical domain Ignore all these outputs. mounted with a 10 Gigabit...
-
Page 60: Problems With Oracle Solaris 10 And Workarounds
UseOpenSSLEngine no Problems with Oracle Solaris 10 and Workarounds The following table shows problems that might occur with Oracle Solaris 10 being supported and workarounds for them. Fujitsu M10/SPARC M10 Systems Product Notes for XCP Version 2043 ・ October 2013... - Page 61 Table 3-5 Problems that might occur with Oracle Solaris 10 and workarounds SPARC SPARC SPARC CR ID M10-1 M10-4 M10-4S Description Workaround 16024646 If both of the following Perform the following conditions are met, the control procedure: domain panic may occur with 1.
- Page 62 Fujitsu M10/SPARC M10 Systems Product Notes for XCP Version 2043 ・ October 2013...
-
Page 63: Chapter 4 Information On Sparc M10-1 Hardware
Information on SPARC M10-1 Hardware This chapter describes special instructions and problems concerning the SPARC M10-1 hardware. Notes and Restrictions ■ Device Paths of SPARC M10-1 ■ Problems with Hardware and Workarounds ■ Notes and Restrictions Notes on using external DVD drive USB bus power drive is not supported for external DVD drives connected via USB. -
Page 64: Notes On Hardware Raid
Notes on hardware RAID There are the following precautions when you use hardware RAID. About hardware RAID management utility When you use the hardware RAID function of a SPARC M10 system, we ■ recommend using the RAID management utility (sas2ircu: SAS2 Integrated RAID Configuration Utility) provided by the LSI Corporation, in order to manage the hardware RAID environment. -
Page 65: Device Paths Of Sparc M10-1
6. Restore data from a backup media. Device Paths of SPARC M10-1 The following shows the device paths identified in SPARC M10-1. Table 4-1 I/O device paths in a SPARC M10-1 cabinet and at the PCI expansion unit side Device Device path Internal SAS... - Page 66 Table 4-1 I/O device paths in a SPARC M10-1 cabinet and at the PCI expansion unit side (continued) Device Device path PCI#1 /pci@8000/pci@4/pci@0/pci@8/pci@0/pci@0/pci@0/pci@1/pci@0/pci@0/****@0 PCI#2 /pci@8000/pci@4/pci@0/pci@8/pci@0/pci@0/pci@0/pci@1/pci@0/pci@1/****@0 PCI#3 /pci@8000/pci@4/pci@0/pci@8/pci@0/pci@0/pci@0/pci@1/pci@0/pci@8/****@0 PCI#4 /pci@8000/pci@4/pci@0/pci@8/pci@0/pci@0/pci@0/pci@1/pci@0/pci@10/pci@0/pci@0/****@0 PCI#5 /pci@8000/pci@4/pci@0/pci@8/pci@0/pci@0/pci@0/pci@1/pci@0/pci@10/pci@0/pci@1/****@0 PCI#6 /pci@8000/pci@4/pci@0/pci@8/pci@0/pci@0/pci@0/pci@1/pci@0/pci@10/pci@0/pci@10/****@0 PCI#7 /pci@8000/pci@4/pci@0/pci@8/pci@0/pci@0/pci@0/pci@1/pci@0/pci@10/pci@0/pci@11/****@0 PCI#8 /pci@8000/pci@4/pci@0/pci@8/pci@0/pci@0/pci@0/pci@1/pci@0/pci@11/pci@0/pci@0/****@0 PCI#9 /pci@8000/pci@4/pci@0/pci@8/pci@0/pci@0/pci@0/pci@1/pci@0/pci@11/pci@0/pci@1/****@0 PCI#10...
-
Page 67: Problems With Hardware And Workarounds
Table 4-1 I/O device paths in a SPARC M10-1 cabinet and at the PCI expansion unit side (continued) Device Device path PCI#11 /pci@8100/pci@4/pci@0/pci@9/pci@0/pci@0/pci@0/pci@1/pci@0/pci@11/pci@0/pci@11/****@0 Problems with Hardware and Workarounds There is no problem that has been confirmed as of this moment. - Page 68 Fujitsu M10/SPARC M10 Systems Product Notes for XCP Version 2043 ・ October 2013...
-
Page 69: Chapter 5 Information On Sparc M10-4 Hardware
Information on SPARC M10-4 Hardware This chapter describes special instructions and problems concerning the SPARC M10-4 hardware. Notes and Restrictions ■ Device Paths of SPARC M10-4 ■ Problems with Hardware and Workarounds ■ Notes and Restrictions Notes on using external DVD drive USB bus power drive is not supported for external DVD drives connected via USB. -
Page 70: Notes On Hardware Raid
Notes on hardware RAID There are the following precautions when you use hardware RAID. About hardware RAID management utility When you use the hardware RAID function of a SPARC M10 system, we ■ recommend using the RAID management utility (sas2ircu: SAS2 Integrated RAID Configuration Utility) provided by the LSI Corporation, in order to manage the hardware RAID environment. -
Page 71: Device Paths Of Sparc M10-4
Note - The following device paths are applied when the configuration is changed from a two-CPU to a four-CPU. I/O device paths in SPARC M10-4 cabinet Table 5-1 I/O device paths in SPARC M10-4 cabinet (at initial implementation: a two-CPU) Device Device path LSB#0... - Page 72 Table 5-1 I/O device paths in SPARC M10-4 cabinet (at initial implementation: a two-CPU) (continued) Internal LAN#2 /pci@8000/pci@4/pci@0/pci@a/network@0 Internal LAN#3 /pci@8000/pci@4/pci@0/pci@a/network@0,1 Internal USB port (rear: USB1.1) /pci@8000/pci@4/pci@0/pci@1/pci@0/usb@4/****@1 Internal USB port (rear: USB2.0) /pci@8000/pci@4/pci@0/pci@1/pci@0/usb@4,1/****@1 Internal USB port (front: USB1.1/2.0) /pci@8000/pci@4/pci@0/pci@1/pci@0/usb@4,1/hub@2/****@1 PCI#0...
-
Page 73: When The Cpu Configuration At The Initial Implementation Is A Four-Cpu
Note - The following device paths are applied when the configuration is reduced from a four-CPU to a two-CPU. I/O devices in SPARC M10-4 cabinet Table 5-3 I/O devices in SPARC M10-4 cabinet (at initial implementation: a four-CPU) Device Device path LSB#0... -
Page 74: Problems With Hardware And Workarounds
PCI#7 /pci@vvvv/pci@4/pci@0/pci@u/pci@0/pci@0/pci@0/pci@1/pci@0/pci@10/pci@0/pci@11/****@0 PCI#8 /pci@vvvv/pci@4/pci@0/pci@u/pci@0/pci@0/pci@0/pci@1/pci@0/pci@11/pci@0/pci@0/****@0 PCI#9 /pci@vvvv/pci@4/pci@0/pci@u/pci@0/pci@0/pci@0/pci@1/pci@0/pci@11/pci@0/pci@1/****@0 PCI#10 /pci@vvvv/pci@4/pci@0/pci@u/pci@0/pci@0/pci@0/pci@1/pci@0/pci@11/pci@0/pci@10/****@0 PCI#11 /pci@vvvv/pci@4/pci@0/pci@u/pci@0/pci@0/pci@0/pci@1/pci@0/pci@11/pci@0/pci@11/****@0 Problems with Hardware and Workarounds There is no problem that has been confirmed as of this moment. Fujitsu M10/SPARC M10 Systems Product Notes for XCP Version 2043 ・ October 2013... -
Page 75: Chapter 6 Information On Sparc M10-4S Hardware
Information on SPARC M10-4S Hardware This chapter describes special instructions and problems concerning the SPARC M10-4S hardware. Notes and Restrictions ■ Device Paths of SPARC M10-4S ■ Problems with Hardware and Workarounds ■ Notes and Restrictions Notes on using external DVD drive USB bus power drive is not supported for external DVD drives connected via USB. -
Page 76: Notes On Hardware Raid
Notes on hardware RAID There are the following precautions when you use hardware RAID. About hardware RAID management utility When you use the hardware RAID function of a SPARC M10 system, we ■ recommend using the RAID management utility (sas2ircu: SAS2 Integrated RAID Configuration Utility) provided by the LSI Corporation, in order to manage the hardware RAID environment. -
Page 77: Restrictions On Active/Hot Addition Of Sparc M10-4S
6. Restore data from a backup media. Restrictions on active/hot addition of SPARC M10-4S Active/hot addition of SPARC M10-4S is not supported at present. Perform inactive/hot addition. For the procedure for inactive/hot addition, see "8.2.1 Active/hot addition" in the SPARC M10 Systems Installation Guide and read Step 10 as follows: 10. -
Page 78: Restrictions On Adding Expansion Rack 2
Addition of a crossbar box using the addfru(8) command is not supported at present. To add a crossbar box, see the "8.4 Adding the Expansion Rack 2" in the SPARC M10 Systems Installation Guide and read Steps 17 and 18 as follows:... -
Page 79: Device Paths Of Sparc M10-4S
17. Connect all power cords of the crossbar box and SPARC M10-4S to the input power supply. For details, see "5.2 Connecting Cable to SPARC M10-4/SPARC M10-4S" and "5.4 Connecting Cable to Crossbar Box." 18. Update the firmware to the same version as the master XSCF. - Page 80 Table 6-1 I/O device paths in SPARC M10-4S cabinet (at initial implementation: a two-CPU) (continue d) Internal HDD#5 /pci@8000/pci@4/pci@0/pci@0/scsi@0/disk@p5 Internal HDD#6 /pci@8000/pci@4/pci@0/pci@0/scsi@0/disk@p6 Internal HDD#7 /pci@8000/pci@4/pci@0/pci@0/scsi@0/disk@p7 Internal LAN#0 /pci@8000/pci@4/pci@0/pci@9/network@0 Internal LAN#1 /pci@8000/pci@4/pci@0/pci@9/network@0,1 Internal LAN#2 /pci@8000/pci@4/pci@0/pci@a/network@0 Internal LAN#3 /pci@8000/pci@4/pci@0/pci@a/network@0,1 Internal USB port (rear: USB1.1) /pci@8000/pci@4/pci@0/pci@1/pci@0/usb@4/****@1 Internal USB port (rear: USB2.0)
- Page 81 I/O device paths of LSB#1 to LSB#15 (at initial implementation: a two-CPU) LSB number Device path LSB#1 /pci@8800/… /pci@8900/… /pci@8a00/… /pci@8b00/… LSB#2 /pci@9000/… /pci@9100/… /pci@9200/… /pci@9300/… LSB#3 /pci@9800/… /pci@9900/… /pci@9a00/… /pci@9b00/… LSB#4 /pci@a000/… /pci@a100/… /pci@a200/… /pci@a300/… LSB#5 /pci@a800/… /pci@a900/… /pci@aa00/… /pci@ab00/… Chapter 6 Information on SPARC M10-4S Hardware...
- Page 82 /pci@c800/… /pci@c900/… /pci@ca00/… /pci@cb00/… LSB#10 /pci@d000/… /pci@d100/… /pci@d200/… /pci@d300/… LSB#11 /pci@d800/… /pci@d900/… /pci@da00/… /pci@db00/… LSB#12 /pci@e000/… /pci@e100/… /pci@e200/… /pci@e300/… LSB#13 /pci@e800/… /pci@e900/… /pci@ea00/… /pci@eb00/… LSB#14 /pci@f000/… /pci@f100/… Fujitsu M10/SPARC M10 Systems Product Notes for XCP Version 2043 ・ October 2013...
-
Page 83: Four-Cpu
Note - The following device paths are applied when the configuration is reduced from a four-CPU to a two-CPU. I/O devices in SPARC M10-4S cabinet Table 6-4 I/O devices in SPARC M10-4S cabinet (at initial implementation: a four-CPU) Device Device path LSB#0... - Page 84 PCI expansion unit under PCI#X PCI#1 /pci@vvvv/pci@4/pci@0/pci@u/pci@0/pci@0/pci@0/pci@1/pci@0/pci@0/****@0 PCI#2 /pci@vvvv/pci@4/pci@0/pci@u/pci@0/pci@0/pci@0/pci@1/pci@0/pci@1/****@0 PCI#3 /pci@vvvv/pci@4/pci@0/pci@u/pci@0/pci@0/pci@0/pci@1/pci@0/pci@8/****@0 PCI#4 /pci@vvvv/pci@4/pci@0/pci@u/pci@0/pci@0/pci@0/pci@1/pci@0/pci@10/pci@0/pci@0/****@0 PCI#5 /pci@vvvv/pci@4/pci@0/pci@u/pci@0/pci@0/pci@0/pci@1/pci@0/pci@10/pci@0/pci@1/****@0 PCI#6 /pci@vvvv/pci@4/pci@0/pci@u/pci@0/pci@0/pci@0/pci@1/pci@0/pci@10/pci@0/pci@10/****@0 PCI#7 /pci@vvvv/pci@4/pci@0/pci@u/pci@0/pci@0/pci@0/pci@1/pci@0/pci@10/pci@0/pci@11/****@0 PCI#8 /pci@vvvv/pci@4/pci@0/pci@u/pci@0/pci@0/pci@0/pci@1/pci@0/pci@11/pci@0/pci@0/****@0 PCI#9 /pci@vvvv/pci@4/pci@0/pci@u/pci@0/pci@0/pci@0/pci@1/pci@0/pci@11/pci@0/pci@1/****@0 PCI#10 /pci@vvvv/pci@4/pci@0/pci@u/pci@0/pci@0/pci@0/pci@1/pci@0/pci@11/pci@0/pci@10/****@0 PCI#11 /pci@vvvv/pci@4/pci@0/pci@u/pci@0/pci@0/pci@0/pci@1/pci@0/pci@11/pci@0/pci@11/****@0 Fujitsu M10/SPARC M10 Systems Product Notes for XCP Version 2043 ・ October 2013...
- Page 85 LSB number Device path LSB#1 /pci@8800/… /pci@8900/… /pci@8a00/… /pci@8b00/… /pci@8c00/… /pci@8d00/… /pci@8e00/… /pci@8f00/… LSB#2 /pci@9000/… /pci@9100/… /pci@9200/… /pci@9300/… /pci@9400/… /pci@9500/… /pci@9600/… /pci@9700/… LSB#3 /pci@9800/… /pci@9900/… /pci@9a00/… /pci@9b00/… /pci@9c00/… /pci@9d00/… /pci@9e00/… /pci@9f00/… LSB#4 /pci@a000/… Chapter 6 Information on SPARC M10-4S Hardware...
- Page 86 /pci@ab00/… /pci@ac00/… /pci@ad00/… /pci@ae00/… /pci@af00/… LSB#6 /pci@b000/… /pci@b100/… /pci@b200/… /pci@b300/… /pci@b400/… /pci@b500/… /pci@b600/… /pci@b700/… LSB#7 /pci@b800/… /pci@b900/… /pci@ba00/… /pci@bb00/… /pci@bc00/… /pci@bd00/… /pci@be00/… /pci@bf00/… LSB#8 /pci@c000/… /pci@c100/… /pci@c200/… Fujitsu M10/SPARC M10 Systems Product Notes for XCP Version 2043 ・ October 2013...
- Page 87 LSB#9 /pci@c800/… /pci@c900/… /pci@ca00/… /pci@cb00/… /pci@cc00/… /pci@cd00/… /pci@ce00/… /pci@cf00/… LSB#10 /pci@d000/… /pci@d100/… /pci@d200/… /pci@d300/… /pci@d400/… /pci@d500/… /pci@d600/… /pci@d700/… LSB#11 /pci@d800/… /pci@d900/… /pci@da00/… /pci@db00/… /pci@dc00/… /pci@dd00/… /pci@de00/… /pci@df00/… LSB#12 /pci@e000/… /pci@e100/… /pci@e200/… /pci@e300/… /pci@e400/… Chapter 6 Information on SPARC M10-4S Hardware...
-
Page 88: Problems With Hardware And Workarounds
LSB number Device path /pci@e500/… /pci@e600/… /pci@e700/… LSB#13 /pci@e800/… /pci@e900/… /pci@ea00/… Problems with Hardware and Workarounds There is no problem that has been confirmed as of this moment. Fujitsu M10/SPARC M10 Systems Product Notes for XCP Version 2043 ・ October 2013... -
Page 89: Chapter 7 Information On Pci Expansion Unit Hardware
The following table shows problems that might occur with PCI expansion units and workarounds for them. Table 7-1 Problems with PCI expansion units and workarounds SPARC SPARC SPARC RTI No. M10-1 M10-4 M10-4S Description Workaround - When installing a PCI This is just a display problem expansion unit by PCI hot plug and does not affect operation. - Page 90 If the PCI expansion unit is not expansion unit with PCI hot recognized after installing it plug (PHP), the PCI expansion with PHP, reinstall the PCI unit may not be recognized. expansion unit. Fujitsu M10/SPARC M10 Systems Product Notes for XCP Version 2043 ・ October 2013...
-
Page 91: Chapter 8 Contents Of Revision Of Documentation
Contents of Revision of SPARC M10 Systems Getting Started Guide ■ Contents of Revision of SPARC M10 Systems Installation Guide This section describes the currently confirmed contents of revision of the SPARC M10 Systems Installation Guide. Table 8-1 Contents of revision of SPARC M10 Systems Installation Guide... -
Page 92: Changing Crossbar Cable
Hold the connector part of the crossbar cable (optical) and insert it straight into the opening. Do not hold the cable part when inserting the cable. The note in Step 1 in "5.2 Connecting Cable to SPARC M10-4/SPARC M10-4S" will be changed as follows. - Page 93 crossbar unit #2. Implement the cables according to the labels. Hold the connector part of the crossbar cable (optical) and insert it straight into the opening. Do not hold the cable part when inserting the cable. Note-There are two types of crossbar cables (optical). Connect cables of the same type to the same port number.
-
Page 94: Connecting Cable To Pci Expansion Unit
Hold the connector part of the link cable (electrical) or link cable (optical) and insert it straight into the opening. Do not hold the cable part when inserting the cable. Fujitsu M10/SPARC M10 Systems Product Notes for XCP Version 2043 ・ October 2013... -
Page 95: Contents Of Revision Of Sparc M10-1 Service Manual
Contents of Revision of SPARC M10-1 Service Manual This section describes the currently confirmed contents of revision of the SPARC M10-1 Service Manual. Chapter 8 Contents of Revision of Documentation... - Page 96 Installing motherboard unit." For details, see "Storing Cables in Cable Guide." Chapter 16 "Chapter 16 Maintaining Cable Kit" will be added. For details, see "Appendix A Maintaining SPARC M10-1 Cable Kit." Fujitsu M10/SPARC M10 Systems Product Notes for XCP Version 2043 ・ October 2013...
-
Page 97: Storing Cables In Cable Guide
Storing Cables in Cable Guide Store cables of the motherboard unit in the cable guide. Figure 8-4 Location of cable guide Location number Component Cable guide a. Store the cable (red/black) (A in the figure) connecting the HDD backplane to the PSU backplane in the cable guide from the middle of the clamp. Chapter 8 Contents of Revision of Documentation... - Page 98 (D in the figure). Then, store the cables (black/yellow/ white) (B in the figure) connecting the operation panel to the motherboard unit in the cable guide. Fujitsu M10/SPARC M10 Systems Product Notes for XCP Version 2043 ・ October 2013...
- Page 99 Figure 8-6 Storing cables (black/yellow/white) c. Push up one side of the clamp at upper part of the cable guide from the middle to open it (D in the figure). Then, store the cable (black) (C in the figure) connecting the operation panel to the motherboard unit in the cable guide.
- Page 100 Figure 8-7 Storing cable (black) d. Confirm that each cable is stored in the cable guide, as shown in Figure 8-8. Fujitsu M10/SPARC M10 Systems Product Notes for XCP Version 2043 ・ October 2013...
-
Page 101: Contents Of Revision Of Sparc M10-4/M10-4S Service Manual
Figure 8-9 Attaching fan unit cover Contents of Revision of SPARC M10-4/M10-4S Service Manual This section describes the currently confirmed contents of revision of the SPARC M10-4/M10-4S Service Manual. Chapter 8 Contents of Revision of Documentation... - Page 102 Note - There is no problem if you remove the crossbar cables at the crossbar box side when electricity is supplied. Steps 1 and 2 will be changed. For details, see "Removing Crossbar Cable (Optical)." Fujitsu M10/SPARC M10 Systems Product Notes for XCP Version 2043 ・ October 2013...
-
Page 103: Removing Pci Express Cable
Table 8-3 Contents of revision of SPARC M10-4/M10-4S Service Manual (continued) Section number or name Contents of revision 25.5 The following note will be added in "25.5 Installing Crossbar Cable (Optical)." Note - There is no problem if you connect the crossbar cables at the crossbar box side when electricity is supplied. - Page 104 Loosen the two screws from the upper part of the rear side of the CPU memory unit lower. Then, remove the rear cover (A in the figure) by pulling it to the direction of arrow. Fujitsu M10/SPARC M10 Systems Product Notes for XCP Version 2043 ・ October 2013...
- Page 105 Figure 8-11 Removing rear cover Remove the XSCF board. For SPARC M10-4S, remove the four screws fixing the XSCF board (A in ■ the figure). Then, lift the right side of the XSCF board to release connection of the connector.
- Page 106 Figure 8-12 Releasing connected XSCF board For SPARC M10-4, remove the four screws fixing the XSCF board (A in the ■ figure) and rear cover. Tilt the right lever of the XSCF mount by fingers about 5 mm (0.2 in.) to the right (B in the figure). Lift up the right side of the XSCF board and release connection of the connector (C in the figure).
- Page 107 Figure 8-13 Releasing connection of XSCF board (for SPARC M10-4) Pull out the XSCF board obliquely to the right direction (arrow). Note - Place the removed XSCF board on a grounded static-removal ESD mat. Chapter 8 Contents of Revision of Documentation...
- Page 108 Pulling out XSCF board (for SPARC M10-4S) Figure 8-15 Pulling out XSCF board (for SPARC M10-4) Remove the one screw fixing the XSCF mount (A in the figure). Fujitsu M10/SPARC M10 Systems Product Notes for XCP Version 2043 ・ October 2013...
- Page 109 Figure 8-16 Screw fixing XSCF mount (for SPARC M10-4S) Chapter 8 Contents of Revision of Documentation...
- Page 110 2 mm (0.1 in.) (B in the figure) and slide it to the front about 8 mm (0.4 in.) (C in the figure). Then, remove it upward (D in the figure). Fujitsu M10/SPARC M10 Systems Product Notes for XCP Version 2043 ・ October 2013...
- Page 111 Figure 8-18 Removing XSCF mount (for SPARC M10-4S) Chapter 8 Contents of Revision of Documentation...
- Page 112 Remove the one black screw (A in the figure) fixing the center part of the radiator on the front side and the four screws fixing the CPU memory unit board (B in the figure). Fujitsu M10/SPARC M10 Systems Product Notes for XCP Version 2043 ・ October 2013...
- Page 113 Figure 8-20 Positions of screws fixing CPU memory unit board Insert your fingers under the board of the connector unit located at the center of the right and left sides of the CPU memory unit board. Lift the CPU memory unit board, and disconnect and remove the connector.
- Page 114 You can expand the CPU memory unit upper with the operations you have done so far. You do not have to perform Step 10. Figure 8-22 Removing sheet 10. Remove the three PCIe cables. Fujitsu M10/SPARC M10 Systems Product Notes for XCP Version 2043 ・ October 2013...
-
Page 115: Installing Pci Express Cable
Figure 8-23 Removing PCIe cable Installing PCI Express cable When expanding the CPU memory unit upper or when replacing the PCIe cable, connect the PCIe cable. You can reduce the CPU memory unit upper by performing the procedure from Step 2. Note - When expanding the CPU memory unit upper, connect the PCIe cable in advance to the CPU memory unit lower. - Page 116 Figure 8-24 Installing PCIe cable Install a sheet (A in the figure). Figure 8-25 Installing sheet Fujitsu M10/SPARC M10 Systems Product Notes for XCP Version 2043 ・ October 2013...
- Page 117 Install the CPU memory unit board with the right guide (A in the figure) on the front side of the board as a guide. Press the connector unit (B in the figure) at the center of right and left sides of the CPU memory unit board to connect the connector.
- Page 118 For SPARC 10-4S, insert the XSCF board into the left guide (A in the ■ figure), and press down the right connector unit (B in the figure) to connect the connector. Then, fix it with two screws. Fujitsu M10/SPARC M10 Systems Product Notes for XCP Version 2043 ・ October 2013...
- Page 119 Figure 8-28 Installing XSCF board For SPARC M10-4, insert the XSCF board into two positions (A in the ■ figure) on the guide of the mount (B in the figure), and press the right lever of the mount about 5 mm (0.2 in.) to the right (C in the figure) to connect the connector unit (D in the figure).
- Page 120 Installing XSCF board (for SPARC M10-4) Attach the rear cover with two screws from the upper part of the rear side of the CPU memory unit lower. Fujitsu M10/SPARC M10 Systems Product Notes for XCP Version 2043 ・ October 2013...
- Page 121 Screws for rear cover Install the eight screws at both ends of the XSCF cable connection port on the rear side of the CPU memory unit lower. For SPARC M10-4, this procedure is not necessary. Chapter 8 Contents of Revision of Documentation...
-
Page 122: Installing Cpu Memory Unit Upper
Each guide has four clips. Install the unit on the clips on each side, and slide the guide while pushing its lock. Note-Be careful not to damage the PCIe cable when installing the right and left side guides. Fujitsu M10/SPARC M10 Systems Product Notes for XCP Version 2043 ・ October 2013... - Page 123 Figure 8-32 Clip positions of right and left side guides Chapter 8 Contents of Revision of Documentation...
-
Page 124: Removing Crossbar Cable (Electrical)
Remove two crossbar cables (electrical) from the other cabinet. Hold the tab (A in the figure) of the crossbar cable (electrical), and pull it straight Fujitsu M10/SPARC M10 Systems Product Notes for XCP Version 2043 ・ October 2013... -
Page 125: Installing Crossbar Cable (Electrical)
Do not hold the cable part when inserting the cable. Removing Crossbar Cable (Optical) Remove two crossbar cables (optical) from SPARC M10-4S. Hold the tab (A in the figure) of the crossbar cable (optical), and pull it straight... -
Page 126: Installing Crossbar Cable (Optical)
Description Hold the connector part of the crossbar cable (optical), and insert it straight into the opening. Do not hold the cable part when inserting the cable. Fujitsu M10/SPARC M10 Systems Product Notes for XCP Version 2043 ・ October 2013... -
Page 127: Manual
This section describes the currently confirmed contents of revision of the PCI Expansion Unit for SPARC M10 Systems Service Manual. Table 8-4 Contents of revision of PCI Expansion Unit for SPARC M10 Systems Service Manual Section number or name Contents of revision The certification standards on the standard label described in "1.2 Labels/Tags"... -
Page 128: Precautions For Replacement
For state of the labels correctly attached, see Figure 8-37. For attachment positions, see Figure 8-38 and Figure 8-39. Figure 8-37 State of labels correctly attached Fujitsu M10/SPARC M10 Systems Product Notes for XCP Version 2043 ・ October 2013... - Page 129 Figure 8-38 Label position of link cable (electrical) Number in figure Description Label Figure 8-39 Label position of link cable (optical) Number in figure Description Label Chapter 8 Contents of Revision of Documentation...
-
Page 130: Contents Of Revision Of Sparc M10 Systems System Operation And
0XSCF> When an end value of the showresult(8) command is 0, the firmware can be updated. Appendix A The list of device paths for SPARC M10 systems is added to Appendix A. For details, see "Device Paths of SPARC M10-1" for SPARC M10-1, see "Device Paths... -
Page 131: Contents Of Revision Of Sparc M10 Systems Domain Configuration Guide
Contents of Revision of SPARC M10 Systems Domain Configuration Guide This section describes the contents of revision of the SPARC M10 Systems Domain Configuration Guide. Table 8-6 Contents of Revision of SPARC M10 Systems Domain Configuration Guide Section number Contents of revision Preface The URL of Fujitsu documents provided in "Related Documentation"... -
Page 132: Contents Of Revision Of Sparc M10 Systems Xscf Reference Manual
This section describes the contents of revision of the SPARC M10 Systems XSCF Reference Manual. Note that the contents of revision of the SPARC M10 Systems XSCF Reference Manual are also applied to documentation pages, if not otherwise specified. Furthermore, the descriptions here have priority over information described in documentation pages. -
Page 133: Appendix A Maintaining Sparc M10-1 Cable Kit
Appendix A Maintaining SPARC M10-1 Cable Kit This section describes the maintenance procedure of the cable kit. Location of Cable Kit ■ Before Maintaining Cable Kit ■ Enabling Removal of Cable Kit ■ Removing Cable Kit ■ Installing Cable Kit ■... - Page 134 Figure A-1 Location of cable kit Location number Component Cable kit Fujitsu M10/SPARC M10 Systems Product Notes for XCP Version 2043 ・ October 2013...
-
Page 135: Before Maintaining Cable Kit
For details, see "3.3.5 Checking log information." Stop the system. For details, see "5.2 Stopping System." Open the rack door. Remove all power cords from the power supply unit. For details, see "5.3.1 Removing power cord." Appendix A Maintaining SPARC M10-1 Cable Kit... -
Page 136: Removing Cable Kit
For details, see "5.3.4 Removing upper cover." Remove the air duct and the PSU backplane cover. For details, see "5.3.5 Removing air duct and PSU backplane cover." Fujitsu M10/SPARC M10 Systems Product Notes for XCP Version 2043 ・ October 2013... -
Page 137: Removing Cable Kit
Note - Write down the connection positions for the cables before removing them to restore them correctly. Figure A-2 Cables of motherboard unit Loosen one screw that fixes the PSU backplane. Appendix A Maintaining SPARC M10-1 Cable Kit... - Page 138 Screws for PSU backplane Slide the PSU backplane to the rear side of the cabinet and remove it from the two fixing pins (A in the figure). Fujitsu M10/SPARC M10 Systems Product Notes for XCP Version 2043 ・ October 2013...
- Page 139 Figure A-4 Fixing screws for PSU backplane Lift the PSU backplane and remove the four cables (A in the figure). Appendix A Maintaining SPARC M10-1 Cable Kit...
- Page 140 Note - Write down the connection positions for the cables before removing them to restore them correctly. Note - Place the removed PSU backplane on the ESD mat for static electricity removal. Figure A-5 Cable for PSU backplane Fujitsu M10/SPARC M10 Systems Product Notes for XCP Version 2043 ・ October 2013...
-
Page 141: Installing Cable Kit
Installing Cable Kit This section describes the procedure to install the cable kit. Installing Cable Kit Hold the PSU backplane and connect the four cables (A in the figure). Appendix A Maintaining SPARC M10-1 Cable Kit... - Page 142 PSU backplane to the rear side of the cabinet. Tighten the one screw that fixes the PSU backplane. Connect the three cables connecting the PSU backplane with the motherboard unit. Fujitsu M10/SPARC M10 Systems Product Notes for XCP Version 2043 ・ October 2013...
-
Page 143: Restoring Cabinet
Install the upper cover. For details, see "6.3.2 Installing upper cover." Close the fan cover. For details, see "6.3.3 Closing fan cover." Install all power supply units. For details, see "9.5 Installing Power Supply Unit." Appendix A Maintaining SPARC M10-1 Cable Kit... -
Page 144: Restoring System
Switch the mode switch on the operation panel to the Locked mode. For details, see "2.2.2 Operation panel switches." Log in to the XSCF shell. Start the system. For details, see "6.2 Starting System." Close the rack door. Fujitsu M10/SPARC M10 Systems Product Notes for XCP Version 2043 ・ October 2013... -
Page 145: Appendix B Maintaining Cable Kit Of Crossbar Box
Appendix B Maintaining Cable Kit of Crossbar Box This chapter describes the procedure for maintaining the cable kit mounted on the crossbar box. Configuration of Cable Kit ■ Before Maintaining Cable Kit ■ Enabling Removal of Cable Kit ■ Removing Cable Kit ■... - Page 146 Cable for connecting the crossbar backplane unit and terminal board (PWR) Figure B-2 Cable (PWR) (Between crossbar backplane unit and terminal board) Location number Component Connector (terminal board (PWR) side) Connector (crossbar backplane unit side) Fujitsu M10/SPARC M10 Systems Product Notes for XCP Version 2043 ・ October 2013...
-
Page 147: Cable For Connecting Terminal Board And Fan Backplane
Cable for connecting terminal board and fan backplane Cable (PWR) ■ Cable for connecting the terminal board and fan backplane (PWR) Figure B-3 Cable (PWR) (Between terminal board and fan backplane) Location number Component Connector (terminal board side) Connector (fan backplane (PWR) side) Appendix B Maintaining Cable Kit of Crossbar Box... -
Page 148: Location Of Cable Kit
Connector (terminal board side) Connector (fan backplane (SIG) side) Connector (operation panel side) Location of cable kit The connection positions of the cable kit are as follows. Fujitsu M10/SPARC M10 Systems Product Notes for XCP Version 2043 ・ October 2013... -
Page 149: Before Maintaining Cable Kit
Figure B-5 Location of cable kit Location Component Connection number Cable (SIG) Crossbar backplane unit and terminal board (SIG) Cable (PWR) Crossbar backplane unit and terminal board (PWR) Terminal board Cable (SIG) Terminal board (SIG) and fan backplane Cable (PWR) Terminal board (PWR) and fan backplane Before Maintaining Cable Kit This section describes the types and the flow of maintenance of the cable kit. -
Page 150: Maintenance Flow
Power off all the physical partitions. For details, see "5.2 Powering Off Physical Partition under Maintenance." Execute the replacefru command to release the maintenance-target crossbar backplane unit from the system. Fujitsu M10/SPARC M10 Systems Product Notes for XCP Version 2043 ・ October 2013... -
Page 151: Removing Cable Kit
XSCF> replacefru For details, see "5.1 Releasing FRU from System with replacefru Command." Remove all power cords from the power supply unit of the maintenance-target crossbar box. For details, see "5.4.2 Removing power cord." Note - When receiving power from the dual power supply, be sure to disconnect the power cord after taking notes on the connection position in order to reconnect the cord correctly. - Page 152 Figure B-7 Removing lower cover Remove the two cables connected to the fan shelf from the connectors. Arrange the removed cables in the center. Fujitsu M10/SPARC M10 Systems Product Notes for XCP Version 2043 ・ October 2013...
- Page 153 Figure B-8 Removing cables Loosen three screws of the fan shelf and partially pull out the fan shelf. Figure B-9 Removing fan shelf Support the fan shelf from the bottom with one hand and remove it carefully from the cabinet. Note - Remove the fan shelf with careful attention to the two cables arranged in the center.
- Page 154 Figure B-10 Removing cable (cable (SIG)) Fujitsu M10/SPARC M10 Systems Product Notes for XCP Version 2043 ・ October 2013...
- Page 155 Figure B-11 Removing cable (cable (PWR)) Remove the cable from the clamps. Appendix B Maintaining Cable Kit of Crossbar Box...
-
Page 156: Removing Cable For Connecting Terminal Board And Fan Backplane
Loosen two screws (A in the figure) of the upper cover and slide the right and left stoppers (B in the figure) inward. Then, remove the upper cover (C in the figure). Fujitsu M10/SPARC M10 Systems Product Notes for XCP Version 2043 ・ October 2013... - Page 157 Figure B-13 Removing upper cover Loosen one screw (A in the figure) of the lower cover and slide the lower cover to the left to remove it. Figure B-14 Removing lower cover Remove the two cables connected to the fan shelf from the connectors. Arrange the removed cables in the center.
- Page 158 Note - Remove the fan shelf with careful attention to the two cables arranged in the center. Note - Place the removed fan shelf on a grounded antistatic ESD mat. Remove the cable connected to the fan backplane from the connector. Fujitsu M10/SPARC M10 Systems Product Notes for XCP Version 2043 ・ October 2013...
- Page 159 Figure B-17 Removing cable (cable (PWR)) Figure B-18 Removing cable (cable (SIG)) Remove the cable connecting the fan shelf and operation panel from the Appendix B Maintaining Cable Kit of Crossbar Box...
- Page 160 Confirm that the lower latch (A in the figure) is pushed into the inside of the terminal board. Push the connector toward the far end, while pushing the upper latch downward with the flathead screwdriver. Fujitsu M10/SPARC M10 Systems Product Notes for XCP Version 2043 ・ October 2013...
- Page 161 Figure B-20 Removing cable (cable (PWR)) For the cable (SIG), remove the two screws of the cable connector with a ■ Phillips screwdriver (bit No. 1), and then remove the cable from the terminal board. Appendix B Maintaining Cable Kit of Crossbar Box...
- Page 162 Figure B-21 Removing cable (cable (SIG)) 11. Remove the cable from the clamps. Fujitsu M10/SPARC M10 Systems Product Notes for XCP Version 2043 ・ October 2013...
- Page 163 Figure B-22 Removing cable (cable (PWR)) Appendix B Maintaining Cable Kit of Crossbar Box...
- Page 164 Connect the cable to the connector of the crossbar backplane unit. Install the cable that has the same shape as that of the removed cable. Fujitsu M10/SPARC M10 Systems Product Notes for XCP Version 2043 ・ October 2013...
- Page 165 Figure B-24 Connector shape (cable (SIG)) Fix the cable with the clamps. Support the fan shelf from the bottom with one hand and insert it carefully into the cabinet. Arranging the cables in the center makes it easier to install the fan shelf. Tighten three screws of the fan shelf.
- Page 166 Phillips screwdriver (bit No. 1). When installing the connector, orient the connector so that the dot mark (A in the figure) shown in Figure B-26 is to the left. Fujitsu M10/SPARC M10 Systems Product Notes for XCP Version 2043 ・ October 2013...
- Page 167 Figure B-26 Installing cable (cable (SIG)) Connect the cable to the connector of the fan backplane. Connect the cable connecting the fan shelf and operation panel to the connector on the operation panel side. Perform this step only when you install the cable (SIG). If you install the cable (PWR), proceed on to Step 4.
- Page 168 Figure B-27 Operation panel cables Front Fix the cable with the clamps. Fujitsu M10/SPARC M10 Systems Product Notes for XCP Version 2043 ・ October 2013...
- Page 169 Figure B-28 Fixing cable (cable (PWR)) Appendix B Maintaining Cable Kit of Crossbar Box...
- Page 170 11. Install all the fan units. For details, see "19.5 Installing Fan Unit." 12. Install the front cover. For details, see "6.4.3 Installing front cover." Fujitsu M10/SPARC M10 Systems Product Notes for XCP Version 2043 ・ October 2013...
- Page 171 Restoring System This section describes the procedure for restoring the system after installing the cable kit. Connect all power cords to the power supply unit of the maintenance-target crossbar box. For details, see "6.4.1 Installing power cord." Note - In a dual power feed, be sure to connect the power cord to the original position correctly according to the notes written down before maintenance.
- Page 172 Fujitsu M10/SPARC M10 Systems Product Notes for XCP Version 2043 ・ October 2013...