Advertisement
Quick Links
Installation
This chapter contains the following topics:
•
•
•
•
•
•
•
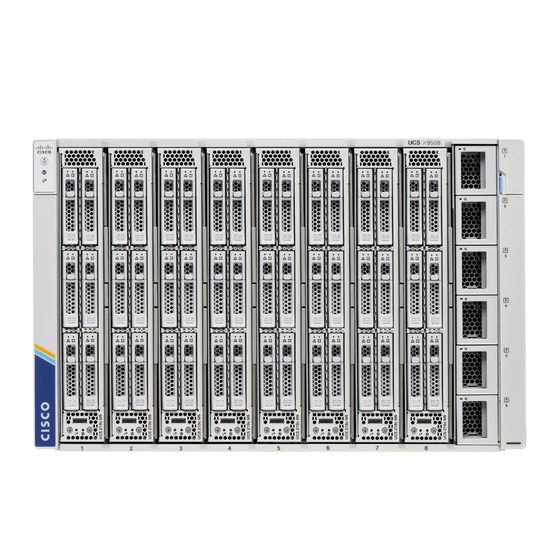
Installation Notes and Warnings for the Cisco UCS X9508 Server
Chassis
The following notes and warnings apply to all installation tasks:
Note
Warning
Warning
Installation Notes and Warnings for the Cisco UCS X9508 Server Chassis, on page 1
Rail Installation Templates, on page 12
Installing Cage Nuts, on page 14
Rail Kits, on page 17
Installing the Chassis, on page 20
Removing the Chassis from a Rack, on page 54
Repacking the Chassis, on page 54
Before you install, operate, or service the system, see the
Cisco UCS
for important safety information.
IMPORTANT SAFETY INSTRUCTIONS
This warning symbol means danger. You are in a situation that could cause bodily injury. Before you work
on any equipment, be aware of the hazards involved with electrical circuitry and be familiar with standard
practices for preventing accidents. Use the statement number provided at the end of each warning to locate
its translation in the translated safety warnings that accompanied this device. Statement 1071
SAVE THESE INSTRUCTIONS
This unit is intended for installation in restricted access areas. A restricted access area can be accessed only
through the use of a special tool, lock and key, or other means of security. Statement 1017
Regulatory Compliance and Safety Information for
Installation
1
Advertisement

Related Manuals for Cisco UCS X9508


Summary of Contents for Cisco UCS X9508
-
Page 1: Table Of Contents
Installation This chapter contains the following topics: • Installation Notes and Warnings for the Cisco UCS X9508 Server Chassis, on page 1 • Rail Installation Templates, on page 12 • Installing Cage Nuts, on page 14 • Rail Kits, on page 17 •... - Page 2 Cisco UCS is compliant with any EIA-310-D/E compliant rack. Your equipment racks must also be compliant with EIA-310-D/E standard. The Cisco UCS X9508 chassis can be installed in either a 9.5 mm square-hole rack or a 7.1 mm unthreaded round-hole rack. These racks require either square-hole cage nuts or round-hole cage nuts (also called spring nuts), respectively.
- Page 3 Installation Airflow Considerations Caution Always use blanking panels to fill all remaining empty front panel U-spaces in the rack. This arrangement ensures proper airflow. Using a rack without blanking panels results in improper cooling that can lead to thermal damage. The rack must also meet the following requirements: •...
- Page 4 As a best practice, handle the chassis when it is empty, and use either a scissors jack or multiple people to bear the weight. The Cisco UCS X9508 has defined areas for holding the chassis (grasp points). Grasp points are not indicated on the chassis itself, but facilitate handling or moving the chassis.
- Page 5 Installation Handling the Chassis Use the following grasp points when handling the chassis. • Front grasp points, horizontal Installation...
- Page 6 Installation Handling the Chassis • Rear grasp points Note Do not lift or handle the chassis by the top rear sheet metal, as indicated by the DO NOT LIFT label on the top rear surface. Installation...
- Page 7 Avoid UPS types that use ferroresonant technology. These UPS types can become unstable with systems such as the Cisco UCS, which can have substantial current draw fluctuations due to fluctuating data traffic patterns.
- Page 8 Installation Required Equipment • Use the following torque values when installing the chassis: • M6 x 20 mm screws: 48 +/- 5 in-lb Required Equipment Before you begin the installation, ensure that you have the following items: • Scissor jack or other lift device capable of bearing the weight of a fully loaded chassis, which is 400 lbs (181.43 kg).
- Page 9 Make sure to read and understand the preceding warnings in this topic, as well as the information in the following topics: • Installation Notes and Warnings for the Cisco UCS X9508 Server Chassis, on page 1 • Handling the Chassis, on page 4 •...
- Page 10 Installation Unpacking and Inspecting the Chassis Step 8 Using a 13-millimeter socket driver, remove the four M8 hex-head securing bolts (two per side). Note Save the securing bolts. Installation...
- Page 11 Installation Unpacking and Inspecting the Chassis Step 9 With two or more people, grasp the handles, lift the empty chassis off of the bottom palette, and set the chassis onto a lift or scissor jack that can support the chassis weight. Step 10 Before installing the chassis into an equipment rack, use a #2 Phillips screwdriver to remove the two M5 screws (two per handle) that secure the handles to the chassis.
-
Page 12: Rail Installation Templates
Installation Rail Installation Templates Chassis handles, two per side M5 screws, two per handle Rail Installation Templates Two rail kits are available, and each shipping container will contain a left and right rail as a matched set. For each rail kit, a corresponding template is provided for reference through the following sections of this document. The templates show the locations on the rack for cage nuts, rail kit locator pegs, and screws should be installed. - Page 13 Installation Front Install Template Front Install Template Use this installation to locate the correct spacing and alignment for chassis mounting hardware on the rack. This template shows the rack locations for mounting the front of the chassis. Align the Chassis Top of the template with the location in the rack where the top of the chassis will be and install the cage nuts and other hardware as shown.
-
Page 14: Installing Cage Nuts
Installing Cage Nuts The Cisco UCS X9508 chassis can be installed in standard size, untapped equipment racks that have either square or round-holes. For more information, see Rack Requirements, on page 2. - Page 15 Installing Cage Nuts, Square-Hole Rack Use the following task to install twelve, M6x1.00 square-hole cage nuts into a 9.5 mm unthreaded square-hole rack. Spring nuts are not supplied by Cisco. They should have accompanied your equipment rack. Before you begin This document provides illustrations of installation templates for the front and rear of the chassis.
- Page 16 Installing Cage Nuts, Round-Hole Rack Use the following task to install twelve, M6x1.00 round-hole cage nuts (also called spring nuts) into a 7.1 mm unthreaded round-hole rack. Spring nuts are not supplied by Cisco. They should have accompanied your equipment rack.
-
Page 17: Rail Kits
Verify that the cage nut is fully and correctly installed before installing the remaining cage nuts. Rail Kits The Cisco UCS X9508 supports two rail kits, Type 1 and Type 2. • Each rail kit consists of two stationary rails that facilitate rack installation of the chassis and stabilize the chassis in the rack. - Page 18 Both sides must be installed in the rack to securely support the chassis. If you ordered multiple UCS X9508 chassis, you might receive both types of rail kit. For example, in a shipment of 4 chassis, the shipment might have all one type of rail kit, or a few chassis with each type of rail kit.
- Page 19 Installation Rail Kits Figure 4: Two Types of Rail Kits The rail kits are similar in size, function, and construction with a few exceptions: • the type of release tab at the top corner of the rail • the type of locator pegs, either round or square depending on whether you have a round-hole or square-hole rack.
-
Page 20: Installing The Chassis
Note To complete the installation, the chassis must be connected to earth ground, which requires a ground lug that Cisco provides, or an equivalent. See "Ground Lug" in Earth Ground Considerations, on page Where applicable, the following installation topics have options for square-hole and round-hole racks. Pick the appropriate topic based on your rack type. - Page 21 Installation Installing the Rails, Square-Hole Rack Before you begin Make sure that you have marked the correct cage nut and rail locations on the rack by using the illustrations of the rack installation templates. See Rail Installation Templates, on page Step 1 Adjust the length of the rail by sliding the ends of the rail back and forth until they match the depth of the rack.
- Page 22 Installation Installing the Rails, Square-Hole Rack Figure 6: Secure the Rail at the Front to the Rack Step 7 At the rear of the rack, refer to the template, then insert a screw in each rear rail to secure each rail to the rack at the correct location.
- Page 23 Installation Installing the Rails, Round-Hole Rack Step 8 Figure 7: Secure the Rail at the Rear of the Rack What to do next Verify that the rails are correctly installed. See Rail Installation Layout, Square-Hole Rack, on page Installing the Rails, Round-Hole Rack Use the following task to install the rail kit into a round-hole unthreaded equipment rack by using twelve, M6x1.00 round-hole spring nuts.
- Page 24 Installation Installing the Rails, Round-Hole Rack Figure 8: Install Rails into Front of the Rack Step 5 (Optional) Use a tape measure and level to verify that the rack rails are horizontal and at the same height. Step 6 At the front of the rack, refer to the template, then insert a screw in each front rail to secure each rail to the rack at the correct location.
- Page 25 Installation Installing the Rails, Round-Hole Rack Figure 9: Secure the Rail at the Front to the Rack Step 7 At the rear of the rack, refer to the template, then insert a screw in each rear rail to secure each rail to the rack at the correct location.
- Page 26 Installation Rail Installation Layout, Square-Hole Rack Step 8 Figure 10: Secure the Rail at the Rear of the Rack What to do next Verify that the rails are correctly installed. See Rail Installation Layout, Round-Hole Rack, on page Rail Installation Layout, Square-Hole Rack Before installing the chassis in the rack, compare the rail installation in the rack against the following layout images.
- Page 27 Installation Rail Installation Layout, Square-Hole Rack Figure 11: Front Rail Layout, Both Rail Kits Installation...
- Page 28 Installation Rail Installation Layout, Round-Hole Rack Figure 12: Rear Rail Kit Layout, Both Rail Kits Rail Installation Layout, Round-Hole Rack Before installing the chassis in the rack, compare the rail installation in the rack against the following layout images. If the rail installation is different than what is shown in each layout, remove the rails and reinstall them.
- Page 29 Installation Rail Installation Layout, Round-Hole Rack Figure 13: Front Rail Layout, Both Rail Kits Installation...
- Page 30 Installation Installing the Top Cable Management Arms Figure 14: Rear Rail Layout, Both Rail Kits Installing the Top Cable Management Arms The accessory kit contains two cable management assemblies, each one consisting of three cable management arms and three cable ties. The cable management assemblies facilitate gathering and organizing the chassis power cables.
- Page 31 Installation Installing the Top Cable Management Arms Step 1 Align the captive screws in the cable management sheet metal with the threaded standoffs on the chassis. Step 2 Using a #2 Phillips-head screwdriver, attach the cable management arms to the server chassis by tightening the captive screws.
- Page 32 Installation Installing the Ground Bracket and Bottom Cable Management Arms Figure 16: Gathering Power Cables What to do next Attach the remaining cable management arms. See Installing the Ground Bracket and Bottom Cable Management Arms, on page Installing the Ground Bracket and Bottom Cable Management Arms The cable management for the bottom set of PSUs installs on top of a ground bracket that provides earth grounding for the chassis.
- Page 33 Also, make sure to review Installation Notes and Warnings for the Cisco UCS X9508 Server Chassis, on page The chassis must be grounded by a ground lug that Cisco provides, or an equivalent. See "Ground Lug" in Earth Ground Considerations, on page...
- Page 34 Installation Inserting the Chassis into a Square-Hole Rack Important Watch your hands and fingers whenever you handle the chassis, modules, compute nodes, and components! Narrow vertical or horizontal spaces in situations including, but not limited to, moving the chassis into or out of the shipping container or equipment rack can cause pinch hazards for your hands and fingers.
- Page 35 Installation Inserting the Chassis into a Square-Hole Rack Figure 18: Detach the Chassis Side Trim Panels Step 4 At the front of the chassis, use a #3 Phillips-head screwdriver to insert and tighten the eight M6 x 20mm screws through the front mounting flanges.
- Page 36 Installation Inserting the Chassis into a Square-Hole Rack Figure 19: Securing the Front of the Chassis to the Rack Step 5 Choose the appropriate option: a) If your chassis will ship per-installed in a rack, attach the rear mounting brackets. If you plan to install and ship your chassis in a shippable rack, attach the rear mounting brackets.
- Page 37 Also, make sure to review Installation Notes and Warnings for the Cisco UCS X9508 Server Chassis, on page The chassis must be grounded by a ground lug that Cisco provides, or an equivalent. See "Ground Lug" in Earth Ground Considerations, on page...
- Page 38 Installation Inserting the Chassis into a Round-Hole Rack Figure 20: Inserting the Chassis into the Rack Step 3 At the front of the chassis, remove each of the side trim panels from the chassis. The side trim panels are attached magnetically, so you should be able to easily pull them off. Removing the side trim panels exposes the screw holes in each of the front mounting brackets.
- Page 39 Installation Inserting the Chassis into a Round-Hole Rack Figure 21: Detach the Chassis Side Trim Panels Step 4 At the front of the chassis, use a #3 Phillips-head screwdriver to insert and tighten the eight M6 x 20mm screws through the front mounting flanges.
- Page 40 Installation Installing Rear Mounting Brackets, Square-Hole Rack Figure 22: Securing the Front of the Chassis to the Rack Step 5 Choose the appropriate option: a) If your chassis will ship pre-installed in a rack, attach the rear mounting brackets. If you plan to install and ship your chassis in a shippable rack, attach the rear mounting brackets.
- Page 41 Installation Installing Rear Mounting Brackets, Square-Hole Rack Before you begin If the chassis is shipped pre-installed in a rack, the rear mounting brackets are already attached. Step 1 At the rear of the chassis, use your hands to install each rear mounting bracket, which has a folded tab at the top and a folded metal hook at the bottom.
- Page 42 Installation Installing Rear Mounting Brackets, Round-Hole Rack Figure 24: Securing the Rear of the Chassis to the Rack What to do next Complete installing the chassis into the rack. Go to Completing Installation, on page Installing Rear Mounting Brackets, Round-Hole Rack Use this procedure to install the rear mounting (tie down) brackets (UCSX-9508-RACKBK) for a chassis that is not pre-installed in a rack.
- Page 43 Installation Installing Rear Mounting Brackets, Round-Hole Rack Before you begin If the chassis is shipped pre-installed in a rack, the rear mounting brackets are already attached. Step 1 At the rear of the chassis, use your hands to install each rear mounting bracket, which has a folded tab at the top and a folded metal hook at the bottom.
- Page 44 Installation Completing Installation Figure 26: Securing the Rear of the Chassis to the Rack What to do next Complete installing the chassis into the rack. Go to Completing Installation, on page Completing Installation Continue with installing the chassis. Installation...
- Page 45 For more information, see Connecting Rear-Mount Earth Ground, on page The facility ground cable must be terminated with the ground lug provided by Cisco, or an equivalent. For more information, see "Ground Lug" in Earth Ground Considerations, on page...
- Page 46 Installation Connecting Side-Mount Earth Ground Step 1 Locate the two screw holes for the side-mount attachment point for earth ground. The side-mount attachment point is designated with the earth ground symbol ( Step 2 Assemble the ground cable. a) Use a wire-stripping tool to remove approximately 0.75 inches (19 mm) of the covering from the end of the grounding cable.
- Page 47 Connecting the chassis to facility earth ground is supported through the chassis ground bracket, which installed at the side of the bottom set of PSUs. The facility ground cable must be terminated with the ground lug provided by Cisco, or an equivalent. For more information, see "Ground Lug" in Earth Ground Considerations, on page Use this procedure to connect the chassis to earth ground.
- Page 48 Installation Connecting Rear-Mount Earth Ground Earth Ground Symbol Ground Bracket, terminal holes for attaching the ground cable Step 2 Assemble the ground cable. a) Use a wire-stripping tool to remove approximately 0.75 inches (19 mm) of the covering from the end of the grounding cable.
- Page 49 IFM's cables. There are no specific cable management trays for the top and bottom of the chassis. You can use one tray for each IFM installed in the Cisco UCS X9508 server chassis but Cisco recommends that you use one tray for all IFM cables.
- Page 50 Installation Installing the Cable Management Tray To install or remove the cable management tray, use the following procedures: • Installing the Cable Management Tray, on page 50 • Removing the Cable Management Tray, on page 52 Installing the Cable Management Tray For IFM cables, you can use the cable management tray to gather and organize the cables.
- Page 51 Installation Installing the Cable Management Tray Step 3 Repeat this procedure as needed to install the other cable management trays, if needed. Installation...
- Page 52 Installation Removing the Cable Management Tray Step 4 Attach any IFM cables as needed. Removing the Cable Management Tray Use the following procedure to remove the cable management tray(s). Step 1 (Optional) Remove or lift the cables to allow easier access to the cable management tray. Step 2 Detach the cable management tray from the chassis.
- Page 53 Installation Removing the Cable Management Tray b) Holding the cable management tray level, pull it towards you to detach the tray from the chassis. Installation...
-
Page 54: Removing The Chassis From A Rack
If possible, use the original packing materials and container to pack the chassis. If needed, you can order spare packaging from Cisco by using PID UCSX-9508-PKG=. If you are returning the chassis to Cisco, contact your Cisco customer service representative to arrange for return shipment to Cisco.