Table of Contents
Advertisement
Maintaining the Server
•
•
•
•
Status LEDs and Buttons
This section contains information for interpreting front, rear, and internal LED states.
Front-Panel LEDs
Figure 1: Front Panel LEDs
Table 1: Front Panel LEDs, Definition of States
LED Name
Status LEDs and Buttons, on page 1
Preparing For Component Installation, on page 6
Removing and Replacing Components, on page 11
Service Headers and Jumpers, on page 79
States
Maintaining the Server
1
Advertisement
Table of Contents

Related Manuals for Cisco UCS C220 M5


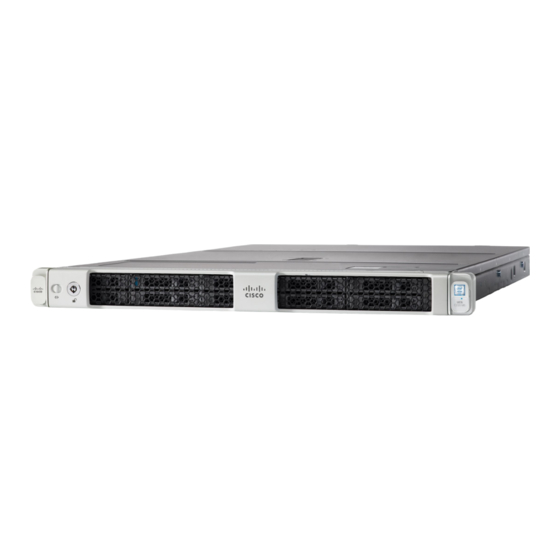
Summary of Contents for Cisco UCS C220 M5
- Page 1 Maintaining the Server • Status LEDs and Buttons, on page 1 • Preparing For Component Installation, on page 6 • Removing and Replacing Components, on page 11 • Service Headers and Jumpers, on page 79 Status LEDs and Buttons This section contains information for interpreting front, rear, and internal LED states. Front-Panel LEDs Figure 1: Front Panel LEDs Table 1: Front Panel LEDs, Definition of States...
- Page 2 Power button/LED • Off—There is no AC power to the server. • Amber—The server is in standby power mode. Power is supplied only to the Cisco IMC and some motherboard functions. • Green—The server is in main power mode. Power is supplied to all server components.
- Page 3 Maintaining the Server Front-Panel LEDs System health • Green—The server is running in normal operating condition. • Green, blinking—The server is performing system initialization and memory check. • Amber, steady—The server is in a degraded operational state (minor fault). For example: •...
-
Page 4: Rear Panel Leds
Maintaining the Server Rear-Panel LEDs Rear-Panel LEDs Figure 2: Rear Panel LEDs Table 2: Rear Panel LEDs, Definition of States LED Name States 1-Gb/10-Gb Ethernet link speed (on both LAN1 and • Amber—Link speed is 100 Mbps. LAN2) • Amber—Link speed is 1 Gbps. •... -
Page 5: Internal Diagnostic Leds
Maintaining the Server Internal Diagnostic LEDs Power supply status (one LED each power supply unit) AC power supplies: • Off—No AC input (12 V main power off, 12 V standby power off). • Green, blinking—12 V main power off; 12 V standby power on. -
Page 6: Preparing For Component Installation
Maintaining the Server Preparing For Component Installation Figure 3: Internal Diagnostic LED Locations Fan module fault LEDs (one behind each fan DIMM fault LEDs (one behind each DIMM socket connector on the motherboard) on the motherboard) • Amber—Fan has a fault or is not fully seated. These LEDs operate only when the server is in standby power mode. -
Page 7: Shutting Down And Removing Power From The Server
If a service procedure instructs you to completely remove power from the server, disconnect all power cords from the power supplies in the server. Shutting Down Using The Cisco IMC GUI You must log in with user or admin privileges to perform this task. -
Page 8: Shutting Down Using The Cisco Imc Cli
If a service procedure instructs you to completely remove power from the server, disconnect all power cords from the power supplies in the server. Shutting Down Using The Cisco UCS Manager Equipment Tab You must log in with user or admin privileges to perform this task. -
Page 9: Shutting Down Using The Cisco Ucs Manager Service Profile
Maintaining the Server Shutting Down Using The Cisco UCS Manager Service Profile Step 7 If a service procedure instructs you to completely remove power from the server, disconnect all power cords from the power supplies in the server. Shutting Down Using The Cisco UCS Manager Service Profile You must log in with user or admin privileges to perform this task. -
Page 10: Serial Number Location
Maintaining the Server Serial Number Location Figure 4: Removing the Top Cover Top cover Locking cover latch Serial number label location Serial Number Location The serial number for the server is printed on a label on the top of the server, near the front. See Removing the Server Top Cover, on page Hot Swap vs Hot Plug... -
Page 11: Removing And Replacing Components
LED on both the front and rear panels of the server. This button allows you to locate the specific server that you are servicing when you go to the opposite side of the rack. You can also activate these LEDs remotely by using the Cisco IMC interface. This section describes how to install and replace server components. - Page 12 Maintaining the Server Serviceable Component Locations Figure 5: Cisco UCS C220 M5 Server, Serviceable Component Locations Front-loading drive bays 1–10 support SAS/SATA Power supplies (hot-swappable when redundant as drives. 1+1) • UCSC-220-M5SX: Drive bays 1 and 2 support NVMe PCIe SSDs.
-
Page 13: Replacing Sas/Sata Hard Drives Or Solid State Drives
• Cisco UCS C220 M5 (UCSC-220-M5SX)—Small form-factor (SFF) drives, with 10-drive backplane. Supports up to 10 2.5-inch SAS/SATA drives. Drive bays 1 and 2 support NVMe SSDs. • Cisco UCS C220 M5 (UCSC-220-M5SN)—SFF drives, with 10-drive backplane. Supports up to 10 2.5-inch NVMe-only SSDs. -
Page 14: Sector Format Sas/Sata Drives Considerations
Maintaining the Server 4K Sector Format SAS/SATA Drives Considerations Figure 6: Small Form-Factor Drive Versions, Drive Bay Numbering Figure 7: Large Form-Factor Drive Version, Drive Bay Numbering Observe these drive population guidelines for optimum performance: • When populating drives, add drives to the lowest-numbered bays first. •... -
Page 15: Replacing A Sas/Sata Drive
Maintaining the Server Replacing a SAS/SATA Drive c) Under Boot Option Priorities, verify that the OS you installed is listed as your Boot Option #1. Replacing a SAS/SATA Drive Step 1 Remove the drive that you are replacing or remove a blank drive tray from the bay: a) Press the release button on the face of the drive tray. -
Page 16: Replacing A Front-Loading Nvme Ssd
Maintaining the Server Replacing a Front-Loading NVMe SSD Ejector lever Drive tray screws (two on each side) Release button Drive removed from drive tray Replacing a Front-Loading NVMe SSD This section is for replacing 2.5-inch or 3.5-inch form-factor NVMe solid-state drives (SSDs) in front-panel drive bays. -
Page 17: Enabling Hot-Plug Support In The System Bios
Save your changes and exit the utility. Enabling Hot-Plug Support Using the Cisco IMC GUI Step 1 Use a browser to log in to the Cisco IMC GUI for the server. Step 2 Navigate to Compute > BIOS > Advanced > PCI Configuration. - Page 18 Maintaining the Server Replacing a Front-Loading NVMe SSD Step 1 Remove an existing front-loading NVMe SSD: a) Shut down the NVMe SSD to initiate an OS-informed removal. Use your operating system interface to shut down the drive, and then observe the drive-tray LED: •...
-
Page 19: Installing A Pcie Cable For Front-Loading Nvme Ssds
Maintaining the Server Installing a PCIe Cable For Front-Loading NVMe SSDs Figure 9: Replacing a Drive in a Drive Tray Ejector lever Drive tray screws (two on each side) Release button Drive removed from drive tray Installing a PCIe Cable For Front-Loading NVMe SSDs The front-loading NVMe SSDs interface with the server via the PCIe bus. -
Page 20: Replacing Hhhl Form-Factor Nvme Solid State Drives
Maintaining the Server Replacing HHHL Form-Factor NVMe Solid State Drives Step 1 Connect the two connectors on one end of the cable to the PCIE-A1 and PCIE-A2 connectors on the drive backplane. Step 2 Route the cables through the chassis cable guides to the rear of the server as shown below. Step 3 Connect the single connector on the other end of the cable to the PCIE-FRONT connector on PCIe riser 2. -
Page 21: Replacing An Hhhl Form-Factor Nvme Ssd
Maintaining the Server Replacing an HHHL Form-Factor NVMe SSD • You cannot boot from an HHHL form-factor NVMe SSD. • You cannot control HHHL NVMe SSDs with a SAS RAID controller because NVMe SSDs interface with the server via the PCIe bus. •... -
Page 22: Replacing Fan Modules
Maintaining the Server Replacing Fan Modules Figure 11: PCIe Riser Assembly PCIe slot 1 rear-panel opening Hinged card retainer (one each slot) External riser handle PCIe connector for cable that supports front-panel NVMe SSDs PCIe slot 2 rear-panel opening Replacing Fan Modules The seven fan modules in the server are numbered as shown in Figure Each fan module has a fault LED next to the fan connector on the motherboard. -
Page 23: Replacing Cpus And Heatsinks
Xeon Scalable processors are as follows: Table 3: Minimum Requirements For Second Generation Intel Xeon Scalable processors Software or Firmware Minimum Version Server Cisco IMC 4.0(4) Server BIOS 4.0(4) Cisco UCS Manager (UCS-integrated servers only) 4.0(4) Do one of the following actions: Maintaining the Server... -
Page 24: Cpu Configuration Rules
• If your server's firmware and Cisco UCS Manager software are already at the required minimums shown above (or later), you can replace the CPU hardware by using the procedure in this section. • If your server's firmware and Cisco UCS Manager software are earlier than the required levels, use the instructions in the... -
Page 25: Replacing A Cpu And Heatsink
One cleaning kit can clean up to four CPUs. • Thermal interface material (TIM)—Syringe supplied with replacement CPU. Use only if you are reusing your existing heatsink (new heatsinks have a pre-applied pad of TIM). Orderable separately as Cisco PID UCS-CPU-TIM=. - Page 26 Maintaining the Server Replacing a CPU and Heatsink Figure 12: Removing the CPU/Heatsink Assembly Heatsink CPU socket on motherboard Heatsink captive nuts (two on each side) T-30 Torx driver CPU carrier (below heatsink in this view) Step 2 Separate the heatsink from the CPU assembly (the CPU assembly includes the CPU and the CPU carrier): a) Place the heatsink with CPU assembly so that it is oriented upside-down as shown below.
- Page 27 Maintaining the Server Replacing a CPU and Heatsink Figure 13: Separating the CPU Assembly From the Heatsink CPU carrier CPU-carrier inner-latch nearest to the TIM breaker slot #1 flat-head screwdriver inserted into TIM breaker slot TIM BREAKER slot in CPU carrier b) Pinch inward on the CPU-carrier inner-latch that is nearest the TIM breaker slot and then push up to disengage the clip from its slot in the heatsink corner.
- Page 28 Maintaining the Server Replacing a CPU and Heatsink Step 3 The new CPU assembly is shipped on a CPU assembly tool. Take the new CPU assembly and CPU assembly tool out of the carton. If the CPU assembly and CPU assembly tool become separated, note the alignment features shown below for correct orientation.
- Page 29 Maintaining the Server Replacing a CPU and Heatsink • If you are installing a new heatsink, it is shipped with a pre-applied pad of TIM. Go to step 5. • If you are reusing a heatsink, you must remove the old TIM from the heatsink and then apply new TIM to the CPU surface from the supplied syringe.
- Page 30 Maintaining the Server Replacing a CPU and Heatsink Figure 16: Installing the Heatsink/CPU Assembly to the CPU Socket Guide hole in assembly (two) Angled corner on heatsink (pin 1 alignment feature) CPU socket alignment post (two) Angled corner on socket (pin 1 alignment feature) CPU socket leaf spring c) Set the heatsink with CPU assembly down onto the CPU socket.
-
Page 31: Additional Cpu-Related Parts To Order With Rma Replacement Cpus
Additional CPU-Related Parts to Order with RMA Replacement CPUs When a return material authorization (RMA) of the CPU is done on a Cisco UCS C-Series server, additional parts might not be included with the CPU spare. The TAC engineer might need to add the additional parts to the RMA to help ensure a successful replacement. -
Page 32: Additional Cpu-Related Parts To Order With Rma Replacement System Chassis
Additional CPU-Related Parts to Order with RMA Replacement System Chassis When a return material authorization (RMA) of the system chassis is done on a Cisco UCS C-Series server, you move existing CPUs to the new chassis. - Page 33 Maintaining the Server Moving an M5 Generation CPU Figure 17: Removing the CPU/Heatsink Assembly Heatsink CPU socket on motherboard Heatsink captive nuts (two on each side) T-30 Torx driver CPU carrier (below heatsink in this view) Step 2 Transfer the CPU socket covers from the new system to the system that you are returning: a) Remove the socket covers from the replacement system.
- Page 34 Maintaining the Server Moving an M5 Generation CPU Figure 18: Removing a CPU Socket Dust Cover Finger-grip areas marked "REMOVE" b) With the wording on the dust cover facing up, set it in place over the CPU socket. Make sure that all alignment posts on the socket plate align with the cutouts on the cover.
- Page 35 Maintaining the Server Moving an M5 Generation CPU Figure 19: Installing a CPU Socket Dust Cover Press down on the two circular marks next to the word INSTALL. Step 3 Install the CPUs to the new system: a) On the new board, align the assembly over the CPU socket, as shown below. Note the alignment features.
- Page 36 Maintaining the Server Moving an M5 Generation CPU Figure 20: Installing the Heatsink/CPU Assembly to the CPU Socket Guide hole in assembly (two) Angled corner on heatsink (pin 1 alignment feature) CPU socket alignment post (two) Angled corner on socket (pin 1 alignment feature) CPU socket leaf spring b) On the new board, set the heatsink with CPU assembly down onto the CPU socket.
-
Page 37: Replacing Memory Dimms
DIMMs and their sockets are fragile and must be handled with care to avoid damage during installation. Caution Cisco does not support third-party DIMMs. Using non-Cisco DIMMs in the server might result in system problems or damage to the motherboard. - Page 38 Maintaining the Server DIMM Population Rules and Memory Performance Guidelines Note The table below lists recommended configurations. Using 5, 7, 9, 10, or 11 DIMMs per CPU is not recommended. Table 4: DIMM Population Order Number of Populate CPU 1 Slot Populate CPU2 Slots DIMMs per CPU Blue #1 Slots...
-
Page 39: Replacing Dimms
Maintaining the Server Replacing DIMMs DIMM type You cannot mix DIMM types in a You cannot mix DIMM types in a channel. bank. RDIMMs or LRDIMMs Memory Mirroring The CPUs in the server support memory mirroring only when an even number of channels are populated with DIMMs. -
Page 40: Intel Optane Dc Persistent Memory Module Population Rules And Performance Guidelines
Maintaining the Server Intel Optane DC Persistent Memory Module Population Rules and Performance Guidelines Caution DCPMMs and their sockets are fragile and must be handled with care to avoid damage during installation. Note To ensure the best server performance, it is important that you are familiar with memory performance guidelines and population rules before you install or replace DCPMMs. -
Page 41: Installing Intel Optane Dc Persistent Memory Modules
Maintaining the Server Installing Intel Optane DC Persistent Memory Modules • DCPMMs require Second Generation Intel Xeon Scalable processors. You must upgrade the server firmware and BIOS to version 4.0(4) or later and then install the supported Second Generation Intel Xeon Scalable processors before installing DCPMMs. -
Page 42: Server Bios Setup Utility Menu For Dcpmm
Potential data loss: If you change the mode of a currently installed DCPMM from App Direct or Mixed Mode to Memory Mode, any data in persistent memory is deleted. DCPMMs can be configured by using the server's BIOS Setup Utility, Cisco IMC, Cisco UCS Manager, or OS-related utilities. - Page 43 • To use Cisco IMC, see the configuration guides for Cisco IMC 4.0(4) or later: Cisco IMC CLI and GUI Configuration Guides • To use Cisco UCS Manager, see the configuration guides for Cisco UCS Manager 4.0(4) or later: Cisco UCS Manager CLI and GUI Configuration Guides The server BIOS Setup Utility includes menus for DCPMMs.
-
Page 44: Replacing A Mini-Storage Module Carrier
The Cisco IMC firmware does not include an out-of-band management interface for the M.2 drives installed in the M.2 version of this mini-storage module (UCS-MSTOR-M2). The M.2 drives are not listed in Cisco IMC inventory, nor can they be managed by Cisco IMC. This is expected behavior. -
Page 45: Replacing An Sd Card In A Mini-Storage Carrier For Sd
• You can use one or two SD cards in the carrier. • Dual SD cards can be configured in a RAID 1 array through the Cisco IMC interface. • SD slot 1 is on the top side of the carrier; SD slot 2 is on the underside of the carrier (the same side as the carrier's motherboard connector). -
Page 46: Replacing A Micro Sd Card
Maintaining the Server Replacing an M.2 SSD in a Mini-Storage Carrier For M.2 a) Insert the new SD card into the socket with its label side facing up. b) Press on the top of the SD card until it clicks in the socket and stays in place. Step 4 Install the mini-storage module carrier back into the server and then power it on as described in Replacing a Mini-Storage... - Page 47 Maintaining the Server Replacing a Micro SD Card Caution To avoid data loss, we do not recommend that you hot-swap the Micro SD card while it is operating, as indicated by its activity LED turning amber. The activity LED turns amber when the Micro SD card is updating or deleting.
-
Page 48: Replacing An Internal Usb Drive
Maintaining the Server Replacing an Internal USB Drive Micro SD card socket under plastic retainer Micro SD activity LED Replacing an Internal USB Drive This section includes procedures for installing a USB drive and for enabling or disabling the internal USB port. -
Page 49: Enabling Or Disabling The Internal Usb Port
Maintaining the Server Enabling or Disabling the Internal USB Port Figure 26: Location of Internal USB Port Location of horizontal USB socket on motherboard Enabling or Disabling the Internal USB Port The factory default is that all USB ports on the server are enabled. However, the internal USB port can be enabled or disabled in the server BIOS. -
Page 50: Replacing The Rtc Battery
The real-time clock (RTC) battery retains system settings when the server is disconnected from power. The battery type is CR2032. Cisco supports the industry-standard CR2032 battery, which can be purchased from most electronic stores. Step 1... -
Page 51: Replacing Power Supplies
Maintaining the Server Replacing Power Supplies Figure 27: RTC Battery Location on Motherboard RTC battery in vertical socket Replacing Power Supplies The server can have one or two power supplies. When two power supplies are installed they are redundant as 1+1. -
Page 52: Replacing Ac Power Supplies
Maintaining the Server Replacing AC Power Supplies Replacing AC Power Supplies Note If you have ordered a server with power supply redundancy (two power supplies), you do not have to power off the server to replace a power supply because they are redundant as 1+1. Note Do not mix power supply types or wattages in the server. - Page 53 Maintaining the Server Replacing DC Power Supplies Warning A readily accessible two-poled disconnect device must be incorporated in the fixed wiring. Statement 1022 Warning This product requires short-circuit (overcurrent) protection, to be provided as part of the building installation. Install only in accordance with national and local wiring regulations. Statement 1045 Warning Installation of the equipment must comply with local and national electrical codes.
-
Page 54: Installing Dc Power Supplies (First Time Installation)
Maintaining the Server Installing DC Power Supplies (First Time Installation) Figure 29: Replacing DC Power Supplies Keyed cable connector PSU status LED (CAB-48DC-40A-8AWG) Keyed DC input socket Installing DC Power Supplies (First Time Installation) Note This procedure is for installing DC power supplies to the server for the first time. If you are replacing DC power supplies in a server that already has DC power supplies installed, see Replacing DC Power Supplies, on page... -
Page 55: Grounding For Dc Power Supplies
Step 1 Turn off the DC power source from your facility’s circuit breaker to avoid electric shock hazard. The required DC input cable is Cisco part CAB-48DC-40A-8AWG. This 3-meter cable has a 3-pin connector Note on one end that is keyed to the DC input socket on the power supply. The other end of the cable has no connector so that you can wire it to your facility’s DC power. -
Page 56: Replacing A Pcie Card
Replacing a PCIe Card Note Cisco supports all PCIe cards qualified and sold by Cisco. PCIe cards not qualified or sold by Cisco are the responsibility of the customer. Although Cisco will always stand behind and support the C-Series rack-mount servers, customers using standard, off-the-shelf, third-party cards must go to the third-party card vendor for support if any issue with that particular card occurs. - Page 57 Note Riser 2/Slot 2 is not available in single-CPU configurations. Replacing a PCIe Card Note If you are installing a Cisco UCS Virtual Interface Card, there are prerequisite considerations. See Cisco Virtual Interface Card (VIC) Considerations, on page Note RAID controller cards install into a separate mRAID riser. See...
- Page 58 Maintaining the Server Replacing a PCIe Card Figure 32: PCIe Riser Assembly PCIe slot 1 rear-panel opening Hinged card retainer (one each slot) External riser handle PCIe connector for cable that supports front-panel NVMe SSDs PCIe slot 2 rear-panel opening d) Position the PCIe riser over its two sockets on the motherboard and over the two chassis alignment channels.
-
Page 59: Cisco Virtual Interface Card (Vic) Considerations
This section describes VIC card support and special considerations for this server. Note If you use the Cisco Card NIC mode, you must also make a VIC Slot setting that matches where your VIC is installed. The options are Riser1, Riser2, and Flex-LOM. See NIC Mode and NIC Redundancy Settings more information about NIC modes. -
Page 60: Replacing An Mlom Card
Maintaining the Server Replacing an mLOM Card Cisco UCS VIC 1455 2 PCIe PCIe 1 PCIe 1 PCIe 1 4.0(1) UCSC-PCIE-C25Q-04 PCIe 2 Cisco UCS VIC 1495 2 PCIe PCIe 1 PCIe 1 PCIe 1 4.0(2) UCSC-PCIE-C100-04 PCIe 2 Cisco UCS VIC 1387... -
Page 61: Replacing An Mraid Riser (Riser 3)
Replacing an mRAID Riser (Riser 3) The server has a dedicated internal riser that is used for either a Cisco modular storage controller card (RAID or HBA) or the SATA interposer card for embedded software RAID. This riser plugs into a dedicated motherboard socket and provides a horizontal socket for the installed card. - Page 62 Maintaining the Server Replacing an mRAID Riser (Riser 3) See also Replacing a SATA Interposer Card , on page • The NVMe-optimized, SFF 10-drive version, UCSC-220-M5SN, supports NVMe drives only and so does not use SAS or SATA RAID. This version of the server comes with an NVMe-switch card factory-installed in the internal mRAID riser to support NVMe drives in front-loading bays 3 - 10.
-
Page 63: Storage Controller Card Firmware Compatibility
Cisco Host Upgrade Utility (HUU) for your firmware release to bring it to a compatible level. See the HUU guide for your Cisco IMC release for instructions on downloading and using the utility to bring server components to compatible levels: Guides. -
Page 64: Replacing A Sas Storage Controller Card (Raid Or Hba)
Replace the server in the rack, replace cables, and then fully power on the server by pressing the Power button. Step 8 If your server is running in standalone mode, use the Cisco UCS Host Upgrade Utility to update the controller firmware and program the correct suboem-id for the controller. -
Page 65: Replacing A Boot-Optimized M.2 Raid Controller Module
This issue does not affect servers controlled in UCSM mode. See the HUU guide for your Cisco IMC release for instructions on downloading and using the utility to bring server components to compatible levels: Guides. - Page 66 The Cisco Boot-Optimized M.2 RAID Controller is not supported when the server is used as a compute-only node in Cisco HyperFlex configurations. • The minimum version of Cisco IMC and Cisco UCS Manager that support this controller is 4.0(4) and later.
-
Page 67: Replacing A Cisco Boot-Optimized M.2 Raid Controller
• The server BIOS includes a configuration utility specific to this controller that you can use to create and delete RAID volumes, view controller properties, and erase the physical drive contents. Access the utility by pressing F2 when prompted during server boot. Then navigate to Advanced > Cisco Boot Optimized M.2 RAID Controller. - Page 68 Install the single screw that secures the end of the M.2 SSD to the carrier. g) Turn the controller over and install the second M.2 drive. Figure 38: Cisco Boot-Optimized M.2 RAID Controller, Showing M.2 Drive Installation Step 6...
-
Page 69: Replacing The Supercap (Raid Backup)
Maintaining the Server Replacing the Supercap (RAID Backup) Step 8 Replace the server in the rack, replace cables, and then fully power on the server by pressing the Power button. Replacing the Supercap (RAID Backup) This server supports installation of one supercap unit. The unit mounts to a bracket that is in the middle of the row of cooling fan modules. -
Page 70: Replacing A Sata Interposer Card
Maintaining the Server Replacing a SATA Interposer Card Figure 39: Replacing Supercap Securing tab Hinged latch Replacing a SATA Interposer Card For software-based storage control that uses the server's embedded SATA controller, the server requires a SATA interposer card that plugs into a horizontal socket on a dedicated mRAID riser (internal riser 3). Note You cannot use a hardware RAID controller card and the embedded software RAID controller at the same time. - Page 71 Maintaining the Server Replacing a SATA Interposer Card a) Shut down and remove power from the server as described in Shutting Down and Removing Power From the Server, on page b) Slide the server out the front of the rack far enough so that you can remove the top cover. You might have to detach cables from the rear panel to provide clearance.
-
Page 72: Replacing A Chassis Intrusion Switch
Maintaining the Server Replacing a Chassis Intrusion Switch Figure 40: mRAID Riser (Internal Riser 3) Location External blue handle Card-ejector lever Two pegs on inner chassis wall Replacing a Chassis Intrusion Switch The chassis intrusion switch in an optional security feature that logs an event in the system event log (SEL) whenever the cover is removed from the chassis. -
Page 73: Installing A Trusted Platform Module (Tpm)
Maintaining the Server Installing a Trusted Platform Module (TPM) Step 3 Install a new intrusion switch: a) Slide the switch mechanism down into the clips on the chassis wall so that the screwhole lines up. b) Use a #1 Phillips-head screwdriver to install the single screw that secures the switch mechanism to the chassis wall. c) Connect the switch cable to the socket on the motherboard. -
Page 74: Installing And Enabling A Tpm
Maintaining the Server Installing and Enabling a TPM • If the TPM 2.0 becomes unresponsive, reboot the server. Installing and Enabling a TPM Note Field replacement of a TPM is not supported; you can install a TPM after-factory only if the server does not already have a TPM installed. - Page 75 Maintaining the Server Enabling the TPM in the BIOS Step 5 Replace the server in the rack, replace cables, and then fully power on the server by pressing the Power button. Figure 42: Location of the TPM Socket TPM socket location on motherboard below any card in PCIe riser 2 Step 6 Continue with...
- Page 76 Maintaining the Server Enabling the Intel TXT Feature in the BIOS b) Log into the BIOS Setup utility with your BIOS Administrator password. c) Choose the Advanced tab. d) Choose Trusted Computing to open the TPM Security Device Configuration window. e) Verify that TPM SUPPORT and TPM State are Enabled.
- Page 77 Maintaining the Server Removing the Trusted Platform Module (TPM) Removing the Trusted Platform Module (TPM) The TPM module is attached to the printed circuit board assembly (PCBA). You must disconnect the TPM module from the PCBA before recycling the PCBA. The TPM module is secured to a threaded standoff by a tamper resistant screw.
- Page 78 Maintaining the Server Removing the PCB Assembly (PCBA) Step 3 Remove the TPM module and dispose of it properly. What to do next Remove the PCBA. See Removing the PCB Assembly (PCBA), on page Removing the PCB Assembly (PCBA) The PCBA is secured to the server's sheet metal. You must disconnect the PCBA from the tray before recycling the PCBA.
-
Page 79: Service Headers And Jumpers
Using the Boot Alternate Cisco IMC Image Header (J39, Pins 1 - 2), on page 84 • Using the Reset Cisco IMC Password to Default Header (J39, Pins 3 - 4), on page 84 • Using the Reset Cisco IMC to Defaults Header (J39, Pins 5 - 6), on page 85... -
Page 80: Using The Clear Cmos Header (J38, Pins 9 - 10)
J39 pin 1 arrow printed on motherboard Clear CMOS: J38 pins 9 - 10 Boot Cisco IMC from alternate image: J39 pins 1 - Recover BIOS: J38 pins 11 - 12 Reset Cisco IMC password to default: J39 pins 3 -... -
Page 81: Using The Bios Recovery Header (J38, Pins 11 - 12)
• If it is a non-BootBlock corruption, a message similar to the following is displayed: ****BIOS FLASH IMAGE CORRUPTED**** Flash a valid BIOS capsule file using Cisco IMC WebGUI or CLI interface. IF Cisco IMC INTERFACE IS NOT AVAILABLE, FOLLOW THE STEPS MENTIONED BELOW. -
Page 82: Procedure 1: Reboot With Recovery.cap File
During the BIOS update, Cisco IMC shuts down the server and the screen goes blank for about 10 minutes. Note Do not unplug the power cords during this update. Cisco IMC powers on the server after the update is complete. Procedure 2: Use BIOS Recovery Header and bios.cap Recovery File Step 1 Download the BIOS update package and extract it to a temporary location. -
Page 83: Using The Clear Password Header (J38, Pins 13 - 14)
During the BIOS update, Cisco IMC shuts down the server and the screen goes blank for about 10 minutes. Do not unplug the power cords during this update. Cisco IMC powers on the server after the update is complete. Step 12 After the server has fully booted, power off the server again and disconnect all power cords. -
Page 84: Using The Boot Alternate Cisco Imc Image Header (J39, Pins 1 - 2)
Step 10 Remove the jumper that you installed. Note If you do not remove the jumper, the server will boot from an alternate Cisco IMC image every time that you power cycle the server or reboot Cisco IMC. Step 11 Replace the top cover, replace the server in the rack, replace power cords and any other cables, and then power on the server by pressing the Power button. -
Page 85: Using The Reset Cisco Imc To Defaults Header (J39, Pins 5 - 6)
Step 10 Remove the jumper that you installed. If you do not remove the jumper, the server will reset the Cisco IMC password to the default every time that Note you power cycle the server. The jumper has no effect if you reboot Cisco IMC. - Page 86 Step 10 Remove the jumper that you installed. If you do not remove the jumper, the server will reset the Cisco IMC to the default settiings every time that Note you power cycle the server. The jumper has no effect if you reboot Cisco IMC.