
Related Manuals for Makita XVJ04


Summary of Contents for Makita XVJ04
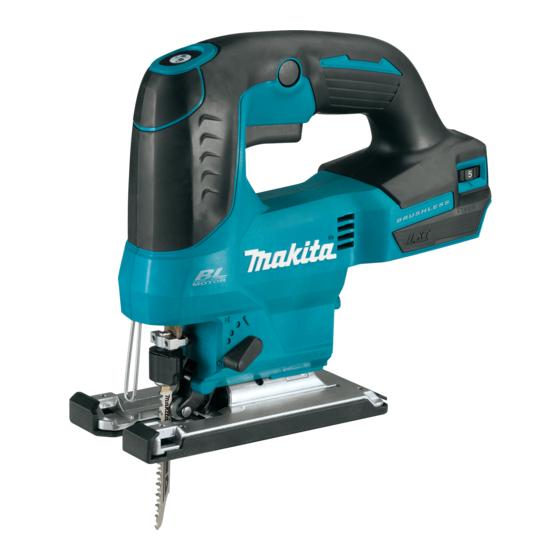
- Page 1 INSTRUCTION MANUAL MANUAL DE INSTRUCCIONES Cordless Jig Saw Sierra Caladora Inalámbrica XVJ04 IMPORTANT: Read Before Using. IMPORTANTE: Lea antes de usar.
-
Page 2: Specifications
ENGLISH (Original instructions) SPECIFICATIONS Model: XVJ04 Length of stroke 23 mm (7/8") Strokes per minute 0 - 3,000 /min Blade type B type Max. cutting capacities Wood 135 mm (5-5/16") Mild steel 10 mm (3/8") Aluminum 20 mm (25/32") Overall length 259 mm (10-1/4") - Page 3 Personal Safety Maintain power tools and accessories. Check for misalignment or binding of moving parts, Stay alert, watch what you are doing and use breakage of parts and any other condition that common sense when operating a power tool. may affect the power tool’s operation. If dam- Do not use a power tool while you are tired or aged, have the power tool repaired before use.
- Page 4 Never service damaged battery packs. Service Symbols of battery packs should only be performed by the manufacturer or authorized service providers. The followings show the symbols used for tool. Follow instruction for lubricating and chang- ing accessories. volts Do not modify or attempt to repair the appli- ance or the battery pack except as indicated in direct current the instructions for use and care.
-
Page 5: Functional Description
Use of non-genuine Makita batteries, or batteries that have been altered, may result in the battery bursting causing fires, personal injury and damage. It will also void the Makita warranty for the Makita tool and Fig.1 charger. ► 1. Red indicator 2. Button 3. Battery cartridge... -
Page 6: Overload Protection
Charge the battery(ies) or replace it/them with recharged battery(ies). Let the tool and battery(ies) cool down. If no improvement can be found by restoring protection system, then contact your local Makita Service Center. Indicating the remaining battery Fig.3 capacity ► 1. Cutting action changing lever... - Page 7 To change the cutting action, just turn the cutting action Lighting up the front lamp changing lever to the desired cutting action position. Refer to the table to select the appropriate cutting CAUTION: action. Do not look in the light or see the source of light directly.
-
Page 8: Electronic Function
Electric brake This tool is equipped with an electric brake. If the tool consistently fails to quickly stop after the switch trigger is released, have the tool serviced at a Makita service Fig.7 center. ► 1. Jig saw blade holder 2. Blade clamp lever (released position) 3. -
Page 9: Operation
Hex wrench storage When not in use, store the hex wrench as shown in the figure to keep it from being lost. Fig.10 ► 1. Hex wrench OPERATION Fig.8 ► 1. Jig saw blade holder 2. Jig saw blade 3. Roller CAUTION: Always hold the base flush with the workpiece. -
Page 10: Bevel Cutting
Bevel cutting Front flush cuts CAUTION: Always be sure that the tool is switched off and the battery cartridge is removed before tilting the base. With the base tilted, you can make bevel cuts at any angle between 0° and 45° (left or right). Fig.15 ►... -
Page 11: Plunge Cutting
Plunge cutting Metal cutting Always use a suitable coolant (cutting oil) when cutting metal. Failure to do so will cause significant jig saw blade wear. The underside of the workpiece can be greased instead of using a coolant. Dust extraction Installing or removing the dust cover Optional accessory Install the dust cover as shown in the figure. -
Page 12: Rip Fence
► 1. Dust cover Installing or removing the dust nozzle Country specific Fig.23 You can connect this tool to a Makita vacuum cleaner by attaching the dust nozzle. Rip fence Insert the dust nozzle all the way into the tool. Optional accessory... -
Page 13: Cover Plate
To install, insert the rip fence into the rectangular hole Slide the rip fence to the desired cutting radius, on the side of the base with the fence guide facing and tighten the bolt to secure it in place. Then move the down. -
Page 14: Optional Accessories
These accessories or attachments the production of fast and clean cuts. To install the guide rail are recommended for use with your Makita tool adapter, insert the rule bar into the square hole of the base specified in this manual. The use of any other as far as it goes. -
Page 15: Especificaciones
ESPAÑOL (Instrucciones originales) ESPECIFICACIONES Modelo: XVJ04 Extensión de la carrera 23 mm (7/8") Carreras por minuto 0 cpm - 3 000 cpm Tipo de cuchilla Tipo B Capacidad máx. de corte Madera 135 mm (5-5/16") Acero suave 10 mm (3/8") Aluminio 20 mm (25/32") - Page 16 No exponga las herramientas eléctricas a la Si dispone de dispositivos para la conexión de lluvia ni a condiciones húmedas. La entrada de equipos de extracción y recolección de polvo, asegúrese de conectarlos y utilizarlos debida- agua en una herramienta eléctrica aumentará el mente.
- Page 17 Mantenga los mangos y superficies de asi- Advertencias de seguridad para la miento secos, limpios y libres de aceite o sierra caladora inalámbrica grasa. Los mangos y superficies de asimiento resbalosos no permiten una manipulación segura Sujete la herramienta eléctrica por las super- ni el control de la herramienta en situaciones ficies de asimiento aisladas cuando realice inesperadas.
- Page 18 No clave, corte, aplaste, lance o deje caer el lesiones personales y daños. Asimismo, esto inva- cartucho de batería, ni golpee un objeto sólido lidará la garantía de Makita para la herramienta y el contra el cartucho de batería. Dicha acción cargador Makita.
-
Page 19: Descripción Del Funcionamiento
Consejos para alargar al máximo Para instalar el cartucho de batería, alinee la lengüeta sobre el cartucho de batería con la ranura en la carcasa la vida útil de la batería y deslícela hasta su lugar. Insértelo por completo hasta que se fije en su lugar con un pequeño clic. - Page 20 Deje que la herramienta y la(s) batería(s) se enfríen. Si no hay ninguna mejora al restaurar el sistema de protección, comuníquese con su centro local de servi- cio Makita. Indicación de la capacidad restante de la batería Únicamente para cartuchos de batería con el indicador Fig.3...
- Page 21 Accionamiento del interruptor AVISO: Cuando la herramienta se sobrecaliente, la lámpara parpadeará. Permita que la herra- mienta se enfríe por completo antes de volver a Para encender la herramienta, oprima el botón de usarla. bloqueo/desbloqueo. La herramienta se pondrá en el modo en espera.
-
Page 22: Montaje
Freno eléctrico La herramienta está equipada con un freno eléctrico. Si la herramienta falla constantemente en detenerse tras soltar el gatillo interruptor, lleve la herramienta a mante- nimiento a un centro de servicio Makita. MONTAJE PRECAUCIÓN: Asegúrese siempre de que la herramienta esté... -
Page 23: Operación
Almacenamiento de la llave hexagonal Cuando no la utilice, guarde la llave hexagonal tal como se muestra en la figura para evitar que se pierda. Fig.10 ► 1. Llave hexagonal OPERACIÓN Fig.8 ► 1. Portacuchilla de la sierra caladora 2. Segueta caladora 3. -
Page 24: Corte En Bisel
Corte en bisel Cortes con tope en la parte delantera PRECAUCIÓN: Asegúrese siempre de que la herramienta esté apagada y que el cartucho de batería haya sido extraído antes de inclinar la base. Con la base inclinada, podrá hacer cortes en bisel a cualquier ángulo entre 0°... -
Page 25: Extracción De Polvo
Corte de penetración Extracción de polvo Instalación o extracción de la cubierta contra polvo Accesorio opcional Instale la cubierta contra polvo tal como se muestra en la ilustración. Fig.17 No es necesario que perfore un orificio inicial o rea- lice un corte de entrada si hace cuidadosamente lo siguiente. - Page 26 Fig.23 Específico del país Tope lateral de corte Puede conectar esta herramienta a una aspiradora Makita colocando la boquilla para polvo. Accesorio opcional Inserte la boquilla para polvo completamente en la herramienta. PRECAUCIÓN: Asegúrese siempre de que la herramienta esté...
- Page 27 Para instalarlo, inserte el tope lateral de corte en el orificio rec- Deslice el tope lateral de corte hasta el radio de tangular en la parte lateral de la base con la guía lateral orientada corte deseado y apriete el perno para asegurarlo en hacia abajo.
-
Page 28: Mantenimiento
Para mantener la SEGURIDAD y FIABILIDAD del pro- ducto, las reparaciones, y cualquier otra tarea de man- tenimiento o ajuste deberán ser realizadas en centros de servicio autorizados o de fábrica Makita, empleando siempre repuestos Makita. ACCESORIOS OPCIONALES Fig.30... - Page 32 Para reducir la exposición a estos productos químicos: trabaje en un área bien ventilada y póngase el equipo de seguridad indicado, tal como las máscaras contra polvo que están especialmente diseñadas para filtrar partículas microscópicas. Makita Corporation 3-11-8, Sumiyoshi-cho, Anjo, Aichi 446-8502 Japan 885957-941...