Table of Contents
Advertisement
Quick Links
- 1 Recommended Installation Sequence
- 2 Step 1 - Install the Disk Drives
- 3 Step 2 - Install the Ethernet Link
- 4 Step 1 - Access the Nss When There Is no Dhcp Server Present on Your Network
- 5 Step 2 - Log into the Nss Configuration Interface
- 6 Windows Users: Accessing the Nss Storage Using Cifs/Smb
- Download this manual
See also:
Administration Manual
Advertisement
Table of Contents

Related Manuals for Cisco NSS2000 Series


Summary of Contents for Cisco NSS2000 Series
- Page 1 GETTING STARTED GUIDE Cisco Small Business NSS2000 Series Network Storage System...
- Page 2 © 2008 Cisco Systems, Inc. All rights reserved. OL-17953-01...
-
Page 3: Table Of Contents
Chapter 1: Introduction Chapter 2: Setting up the Hardware Chapter 3: Configuring the Network Storage System (NSS) Chapter 4: Instructing your End Users NSS2000 Getting Started Guide Benefits About this Guide Recommended Installation Sequence Step 1 — Install the Disk Drives Approved Vendor List for Drives Step 2 —... - Page 4 Appendix A: LEDs & Buttons Appendix B: Environmental Specifications Appendix C: Additional Information Appendix D: Contacts NSS2000 Getting Started Guide Power LED/Button (Front Panel) System LED (Front Panel) Reset Button (Front Panel) LAN LED (Front Panel) Hard Disk Drive LEDs (Front Panel) USB LED (Front Panel) UPS LED (Back Panel) Regulatory Compliance and Safety Information...
-
Page 5: Chapter 1: Introduction
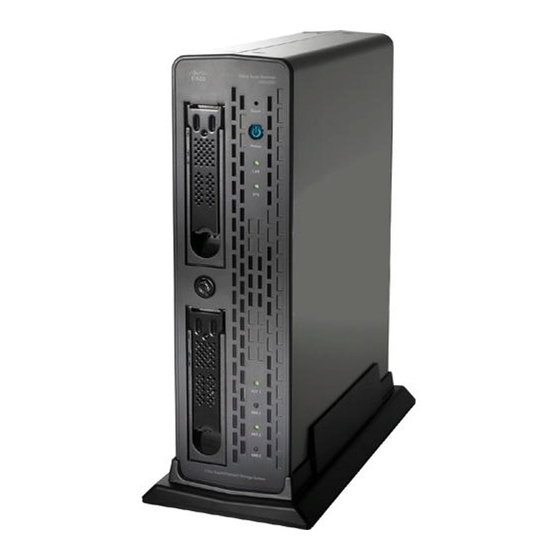
The NSS lets you install up to two physical disk drives. The NSS uses the most common file-based protocols such as NFS, CIFS, and FTP for file sharing. The NSS2000 Series includes the NSS2000 and NSS2050 models. Check www.cisco.com/go/smallbiz Benefits The NSS offers the following main advantages to your business: •... -
Page 6: About This Guide
Introduction About this Guide About this Guide The Getting Started Guide contains the step-by-step details for getting your NSS up and running for the first time---from hooking up the hardware to doing the basic configuration steps to get the NSS running. Users are shown how to log into the NSS to access storage. -
Page 7: Chapter 2: Setting Up The Hardware
Setting up the Hardware This chapter provides details for installing the NSS hardware. The installation is broken down into the following steps: • • • NSS2000 Getting Started Guide Step 1 — Install the Disk Drives: If your NSS does not have disk drives already installed, follow the steps in this section to insert disk drives into the NSS chassis. -
Page 8: Step 1 - Install The Disk Drives
Setting up the Hardware Step 1 — Install the Disk Drives Step 1 — Install the Disk Drives After you remove the NSS from the packaging, you are ready to set up the hardware. If your NSS already has disk drives installed, skip this step. To install the disk drives into the NSS: Remove a disk tray from the front of the NSS chassis by pushing in the tab on the STEP 1... -
Page 9: Approved Vendor List For Drives
Setting up the Hardware Step 1 — Install the Disk Drives Apply even pressure to the both corners of the tray while you insert the tray fully STEP 4 into position in the chassis. When the disk drive is inserted all the way in, close the latch on the disk drive tray. STEP 5 Repeat steps 1 to 5 for each disk drive you want to install. -
Page 10: Step 2 - Install The Ethernet Link
Setting up the Hardware Step 2 — Install the Ethernet Link Step 2 — Install the Ethernet Link After the disk drives are installed in the chassis, you are ready to connect the Ethernet cable. To connect the Ethernet cable to the NSS: Install the Ethernet cable to the Ethernet port at the back of the NSS chassis. -
Page 11: Step 3 - Install The Power
Setting up the Hardware Step 3 — Install the Power Step 3 — Install the Power After you connect the Ethernet cable, you are ready to power up the NSS. There are several possible power configurations. We suggest that a UPS be used since a sudden loss of power can cause RAID corruption and possible data loss. -
Page 12: Chapter 3: Configuring The Network Storage System (Nss)
Configuring the Network Storage System (NSS) There are a variety of ways to configure the NSS, depending on your specific storage needs and your unique networking environment. This section covers the steps you need to follow to get the NSS configured so that you can start using its storage. -
Page 13: Step 1 - Access The Nss When There Is No Dhcp Server Present On Your Network
Configuring the Network Storage System (NSS) Step 1 — Access the NSS when there is no DHCP Server Present on your Network • • Step 1 — Access the NSS when there is no DHCP Server Present on your Network This step depends on whether there is a DHCP server on the network to which you are connecting the NSS (this could be the router). -
Page 14: Step 2 - Log Into The Nss Configuration Interface
Configuring the Network Storage System (NSS) Step 2 — Log into the NSS Configuration Interface To set up your computer to communicate with the NSS: Set your computer’s network settings to the following: STEP 1 • • After you configure your computer, you can log into the NSS configuration interface. - Page 15 Configuring the Network Storage System (NSS) Step 2 — Log into the NSS Configuration Interface • • The splash screen appears. NSS2000 Getting Started Guide You can find the NSS devices by using the Cisco NSS Discovery Tool. Download this tool from the www.cisco.com/go/smallbiz install it on your PC.
- Page 16 Configuring the Network Storage System (NSS) Step 2 — Log into the NSS Configuration Interface • • Enter the administrator login information. When you first log into the configuration STEP 3 interface or if you reset the factory defaults, both the username and password are set to admin.
-
Page 17: Step 3 - Use The Quick Setup Wizards To Configure The Nss
Configuring the Network Storage System (NSS) Step 3 — Use the Quick Setup Wizards to Configure the NSS It is a good idea to do a quick check of the information on the System Status page STEP 5 to ensure that your hardware installation was successful and that this system is not reporting any errors. -
Page 18: Step 4 - Save The Current Configuration
Configuring the Network Storage System (NSS) Step 4 — Save the Current Configuration • Step 4 — Save the Current Configuration You can save a copy of the NSS configuration that can be used should you need to restore the settings at a later time. When you save the configuration file, it saves a date-stamped version of the current configuration settings to the specified volume on the NSS. - Page 19 Configuring the Network Storage System (NSS) Step 4 — Save the Current Configuration The Configuration Manager page appears. Select the location where the backup is saved from the Stored Configuration STEP 3 Location drop-down menu. To save the configuration file to a USB flash device, select the AUX-1 port as the location.
- Page 20 Configuring the Network Storage System (NSS) Step 4 — Save the Current Configuration Click Unmount. STEP 7 When the AUX-1 LED on the front of the chassis is off, you can safely remove the STEP 8 unmounted USB flash device from the AUX-1 port. NSS2000 Getting Started Guide NOTE: Removing the USB flash device in a mounted state means that you risk causing file...
-
Page 21: Chapter 4: Instructing Your End Users
Instructing your End Users Logging into a Share End users, using a Windows, UNIX, Linux, or Mac computer can easily access NSS storage. Once the end user logs into the NSS using their username and password, the shares to which the end user has read or read-write privileges appear. The NSS supports three file-sharing protocols: CIFS, NFS, and FTP. -
Page 22: Windows Users: Accessing The Nss Storage Through Ftp
Instructing your End Users Windows Users: Accessing the NSS Storage through FTP If your user profile is set up locally (that is, through the NSS configuration interface) STEP 2 and the NSS is joined to a Windows domain, in the User name field, enter the following: <NSS hostname>\<username>. -
Page 23: Unix/Linux Users: Accessing Storage Through Nfs
Instructing your End Users UNIX/Linux Users: Accessing Storage through NFS To access the NSS storage using FTP: From your FTP client application, connect to the NSS. Enter the IP address or STEP 1 hostname of the NSS. For more information about using your FTP client application, refer to its documentation. -
Page 24: Unix/Linux Users: Accessing Storage Through Ftp
Instructing your End Users UNIX/Linux Users: Accessing Storage through FTP You should now have access to the share via the mount point directory on your client. You have the privileges to the share as are defined for the NSS. UNIX/Linux Users: Accessing Storage through FTP UNIX and Linux users who have a user profile set up can access any shares to which they have privileges on the NSS storage using NFS or FTP. -
Page 25: Mac Users: Accessing Storage Through Cifs/Smb
Instructing your End Users Mac Users: Accessing Storage through CIFS/SMB Mac Users: Accessing Storage through CIFS/SMB Mac users who have a user profile can access any shares to which they have privileges on the NSS storage using CIFS/SMB. To access the NSS storage via CIFS/SMB: From the Finder’s Go menu, click Connect to Server. -
Page 26: Mac Users: Accessing Storage Through Ftp
Instructing your End Users Mac Users: Accessing Storage through FTP Mac Users: Accessing Storage through FTP Mac users who have a user profile can access any shares to which they have privileges on the NSS storage using FTP. Note that when using FTP to access the NSS storage, users cannot rename folders. -
Page 27: Appendix A: Leds & Buttons
LEDs & Buttons The LEDs on the front and back of the NSS chassis help you troubleshoot a variety of conditions on the NSS---from normal operating conditions, alerts, to serious error conditions. The Reset button lets you restore the network defaults in situations where you can no longer log into the configuration interface. -
Page 28: System Led (Front Panel)
LEDs & Buttons System LED (Front Panel) The Power button lets you do a graceful or hard shutdown of the NSS: • • System LED (Front Panel) The System LED can be in any of the following conditions, depending on the current type of system error on the NSS: •... -
Page 29: Reset Button (Front Panel)
LEDs & Buttons Reset Button (Front Panel) Reset Button (Front Panel) The Reset button lets you restore the network setting system defaults or reset the box. • • LAN LED (Front Panel) The LEDs on the front panel indicate the status of the LAN link: •... -
Page 30: Hard Disk Drive Leds (Front Panel)
LEDs & Buttons Hard Disk Drive LEDs (Front Panel) Hard Disk Drive LEDs (Front Panel) The ACT and Error LEDs associated with each of the installed disk drives indicate disk-drive activity, or an error condition. The various states of the ACT LED indicates the drive activity: •... -
Page 31: Ups Led (Back Panel)
LEDs & Buttons UPS LED (Back Panel) UPS LED (Back Panel) The UPS LEDs on the back panel indicate the status of the UPS function: • • NSS2000 Getting Started Guide Off: There is either no UPS attached to the NSS or the UPS function has been disabled in the System Power page in the configuration interface. -
Page 32: Appendix B: Environmental Specifications
Environmental Specifications Device Dimensions Unit Weight Power Certification Operating Temp Storage Temp Operating Humidity Storage Humidity NSS2000 Getting Started Guide 11.42” x 9. 1 7” x 3.23 (290 x 233 x 82 mm) 6.61 lb (3 kg) 60W, 12V external AC power FCC Class B °... -
Page 33: Appendix C: Additional Information
Additional Information Regulatory Compliance and Safety Information Regulatory Compliance and Safety Information for this product is available on Cisco.com at the following location: www.cisco.com/go/smallbiz Warranty Warranty information that applies to this product is available on Cisco.com at the following location: www.cisco.com/go/smallbiz End User License Agreement (EULA) Licensing information that applies to this product is available on Cisco.com at the... -
Page 34: Appendix D: Contacts
Contacts Support contact information for this product is available on Cisco.com at the following location: www.cisco.com/go/smallbiz NSS2000 Getting Started Guide...