Table of Contents
Advertisement
Quick Links
Advertisement
Table of Contents

Related Manuals for AEG FSK73677P


Summary of Contents for AEG FSK73677P
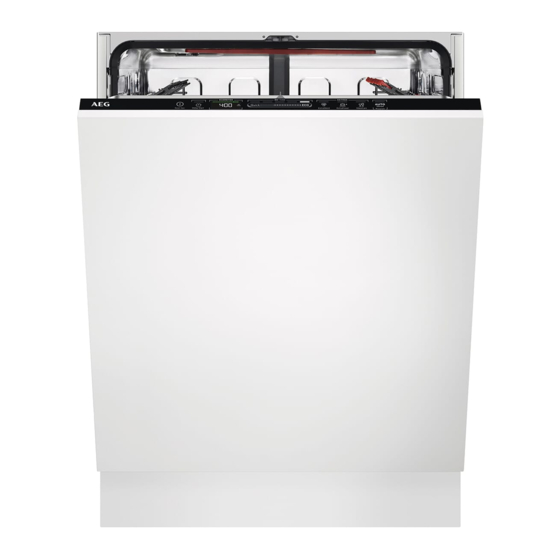
- Page 1 FSK73677P User Manual Dishwasher USER MANUAL...
-
Page 2: Table Of Contents
13. ENVIRONMENTAL CONCERNS..............28 FOR PERFECT RESULTS Thank you for choosing this AEG product. We have created it to give you impeccable performance for many years, with innovative technologies that help make life simpler – features you might not find on ordinary appliances. Please spend a few minutes reading to get the very best from it. - Page 3 ENGLISH responsible for any injuries or damage that are the result of incorrect installation or usage. Always keep the instructions in a safe and accessible location for future reference. 1.1 Children and vulnerable people safety This appliance can be used by children aged from 8 •...
-
Page 4: Safety Instructions
If the supply cord is damaged, it must be replaced by • the manufacturer, its Authorised Service Centre or similarly qualified persons in order to avoid a hazard. WARNING: Knives and other utensils with sharp • points must be loaded in the basket with their points down or placed in a horizontal position. - Page 5 ENGLISH 2.4 Use be replaced, this must be carried out by our Authorised Service Centre. • Do not put flammable products or • Connect the mains plug to the mains items that are wet with flammable socket only at the end of the products in, near or on the appliance.
-
Page 6: Product Description
They are not spare parts are relevant for all intended to be used in other models. applications and are not suitable for •... -
Page 7: Control Panel
ENGLISH 3.1 Internal light The lamp goes off when you close the door or switch the appliance off. The appliance has an internal lamp. It Otherwise, it goes off automatically after comes on when you open the door or some time to save energy. switch the appliance on while the door is open. -
Page 8: Programme Selection
Indicator Description Drying phase indicator. It is on when you select a programme with the dry‐ ing phase. It flashes when the drying phase operates. Refer to "Pro‐ gramme selection". Delay Start indicator. It is on when you set the delay start. Refer to "Daily use". - Page 9 ENGLISH The appliance senses the degree of soil It adjusts the temperature and quantity of and the amount of dishes in the baskets. water as well as the wash duration. 5.4 Programmes overview Pro‐ Type of load Degree of Programme phases EXTRAS gramme soil...
-
Page 10: Basic Settings
Consumption values Water (l) Energy (kWh) Duration (min) 1) 2) Programme Quick 10.4 0.600 11.7 0.845 1h 30min 11.5 1.000 2h 40min 12.0 1.009 10.5 0.835 AUTO Sense 11.9 0.964 Machine Care 0.636 1) The pressure and the temperature of the water, the variations of the mains supply, the options, the quantity of dishes and the degree of soil can change the values. - Page 11 ENGLISH Settings Values Description Latest prog. selec‐ Enable or disable the automatic selection of tion OFF (default) the most recently used programme and op‐ tions. Display on floor ON (default) Activate or deactivate TimeBeam. Brightness From level 0 to level Adjust the brightness of the display.
- Page 12 6.2 The water softener The water softener should be adjusted according to the hardness of the water in The water softener removes minerals your area. Your local water authority can from the water supply, which would have advise you on the hardness of the water a negative effect on the washing results in your area.
- Page 13 ENGLISH 6.3 Rinse aid level Water softener lev‐ Amount of water The rinse aid helps to dry the dishes without streaks and stains. It is automatically released during the hot rinse phase. It is possible to set the released quantity of rinse aid. When the rinse aid dispenser is empty, In case of the high water softener setting, the display shows the indicator...
-
Page 14: Before First Use
The duration of the drying phase and the TimeBeam displays the following door opening time vary depending on the information on the floor below the selected programme and options. appliance door: • The programme duration when the When AirDry opens the door, the display programme begins. - Page 15 ENGLISH 3. Fill the rinse aid dispenser. 4. Open the water tap. 5. Start the programme Quick to remove any residuals from the manufacturing process. Do not use detergent and do not put dishes in the baskets. After starting the programme, the appliance recharges the resin in the 6.
-
Page 16: Daily Use
4. Close the lid. Make sure that the lid Fill the rinse aid dispenser locks into position. when the indicator (A) is clear. 8. DAILY USE 1. Open the water tap. For information about the 2. Press and hold... - Page 17 ENGLISH • The ECOMETER indicates the When the countdown is complete, the updated level of energy and water programme starts. consumption. 8.6 Opening the door while By default, options must be the appliance operates activated every time before you start a programme. Opening the door while a programme is If the latest programme running pauses the wash cycle.
-
Page 18: Hints And Tips
• After 5 minutes if a programme was Make sure that there is not started. detergent in the detergent dispenser before you start a 8.10 End of the programme new programme. When the programme is complete, the 8.9 The Auto Off function display shows Dishes clean. - Page 19 ENGLISH hardness. Refer to the instructions on • The correct quantity of detergent is the detergent packaging. used. • Always use the correct quantity of 9.5 Loading the baskets rinse aid. Insufficient dosage of rinse aid decreases the drying results. •...
-
Page 20: Care And Cleaning
10. CARE AND CLEANING 10.2 Internal cleaning WARNING! Before any maintenance • Clean the appliance interior with a soft other than running the damp cloth. programme Machine Care, • Do not use abrasive products, deactivate the appliance and abrasive cleaning pads, sharp tools, disconnect the mains plug strong chemicals, scourer or solvents. - Page 21 ENGLISH 5. Make sure that there are no residues of food or soil in or around the edge 1. Turn the filter (B) counterclockwise of the sump. and remove it. 6. Put back in place the flat filter (A). Make sure that it is correctly positioned under the 2 guides.
- Page 22 10.6 Cleaning the lower spray 10.7 Cleaning the upper spray arm We recommend to clean the lower spray We recommend to clean the upper spray arm regularly to prevent soil from arm regularly to prevent soil from clogging the holes.
-
Page 23: Troubleshooting
ENGLISH 1. Move the upper basket to the lowest level to reach the spray arm more easily. 2. To detach the spray arm (C) from the delivery tube (A), turn the mounting element (B) counterclockwise and pull the spray arm downwards. 3. - Page 24 Problem and alarm code Possible cause and solution You cannot activate the ap‐ • Make sure that the mains plug is connected to the mains pliance. socket. • Make sure that there is no damaged fuse in the fuse box.
- Page 25 ENGLISH Problem and alarm code Possible cause and solution Technical malfunction of the • Switch the appliance off and on. appliance. The display shows iC0 or iC3. The level of water inside the • Switch the appliance off and on. appliance is too high.
- Page 26 Problem and alarm code Possible cause and solution The appliance is switched • Power supply is out of the operating range. The wash on but does not operate. cycle is temporarily interrupted and resumes automati‐ The display shows Power cally once the power is restored.
- Page 27 ENGLISH Problem Possible cause and solution There are stains and dry water • The released quantity of rinse aid is not sufficient. Ad‐ drops on glasses and dishes. just the rinse aid dosage to a higher level. • The quality of the rinse aid can be the cause. The interior of the appliance is •...
-
Page 28: Technical Information
Refer to "Before first use", "Daily use", or "Hints and tips" for other possible causes. 12. TECHNICAL INFORMATION Dimensions Width / height / depth (mm) 596 / 818 - 898 / 550 Voltage (V) 200 - 240 Electrical connection... - Page 32 www.aeg.com/shop...