Table of Contents
Advertisement
Quick Links
SP6906 RIDGID ESF.qxp_SP6636 12/10/14 9:19 AM Page 1
WARNING:
To reduce the risk of injury, the user must read and understand the owner's manual
before using this product.
Thank you for buying a RIDGID product.
Part No. SP6906
1.800.561.8187
SAVE THIS MANUAL FOR FUTURE REFERENCE
www.
OWNER'S MANUAL
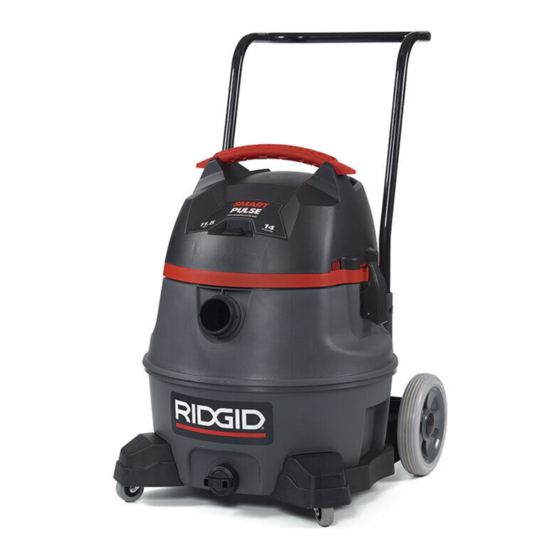
14 GALLON
SMART-PULSE VACUUM
RV34100
.com
• Español - página 21
• Français - page 41
Printed in Mexico
information@itm.com
Advertisement
Table of Contents

Related Manuals for RIDGID Smart Pulse RV3410


Summary of Contents for RIDGID Smart Pulse RV3410
- Page 1 SP6906 RIDGID ESF.qxp_SP6636 12/10/14 9:19 AM Page 1 OWNER’S MANUAL 14 GALLON SMART-PULSE VACUUM RV34100 WARNING: To reduce the risk of injury, the user must read and understand the owner’s manual before using this product. • Español - página 21 Thank you for buying a RIDGID product.
-
Page 2: Table Of Contents
SP6906 RIDGID ESF.qxp_SP6636 12/10/14 9:19 AM Page 2 Table of Contents Section Page Section Page Optional Dust Collection Bags ..11 Important Safety Instructions..2 Safety Signal Words....2 Vacuuming Liquids . - Page 3 SP6906 RIDGID ESF.qxp_SP6636 12/10/14 9:19 AM Page 3 • Do not pull or carry by cord, use cord • To reduce the risk of being struck by, or as handle, close a door on cord, or pull pulled down by, a rolling Vac, block the cord around sharp edges or corners.
-
Page 4: Grounding Instructions
SP6906 RIDGID ESF.qxp_SP6636 12/10/14 9:21 AM Page 4 Grounding Instructions This vac is for use on a nominal 120-volt This appliance must be grounded. circuit, and has a grounded plug that If it should malfunction or break down, looks like the plug shown. A temporary... -
Page 5: Introduction
SP6906 RIDGID ESF.qxp_SP6636 12/10/14 9:19 AM Page 5 Introduction This machine is equipped with an Note: It is normal to hear a clicking automatic filter cleaning system which is sound during the cleaning cycle. effective at minimizing filter face loading. -
Page 6: Unpacking And Checking Carton Contents
SP6906 RIDGID ESF.qxp_SP6636 12/10/14 9:25 AM Page 6 Unpacking and Checking Carton Contents Tools Required Phillips Screwdriver Hammer Mallet Refer to the assembly sketch for positioning of parts. Remove contents of carton. Check each item against the Carton Contents List. -
Page 7: Vac Assembly
SP6906 RIDGID ESF.qxp_SP6636 12/10/14 9:27 AM Page 7 Vac Assembly 1. Position the powerhead assembly on the drum as shown, Powerhead Assembly 2. Hook the latches over the tabs on the powerhead assembly. Tab (2) 3. Press the latches down until they snap closed against the sides of the tank. -
Page 8: Caddy Assembly
SP6906 RIDGID ESF.qxp_SP6636 12/10/14 9:27 AM Page 8 Caddy Assembly If any parts are missing or damaged contact Customer Service. Right Do not assemble until you have all the Caddy parts. 1. Insert left caddy and right caddy into the bottom of drum as shown. - Page 9 SP6906 RIDGID ESF.qxp_SP6636 12/10/14 9:27 AM Page 9 Caddy Assembly (Continued) 4. Slide open end of axle through left Left Caddy caddy making sure the leg slot lines up with the cradle hole. Slide all the way through the right caddy. Light taps with a mallet may be required to fully insert axle.
-
Page 10: Operation
SP6906 RIDGID ESF.qxp_SP6636 12/10/14 9:27 AM Page 10 Operation WARNING: To reduce the risk of fire, explosion, or damage to Vac: • Do not leave Vac running while unattended - you may fail to notice important signs indicating abnormal operation such as loss of suction, debris exiting the exhaust, or abnormal motor noises. -
Page 11: Vacuuming Dry Material
SP6906 RIDGID ESF.qxp_SP6636 12/10/14 9:28 AM Page 11 Operation (Continued) Vacuuming Dry Material Vacuuming Liquids 1. The filters must always be in correct 1. Before using your vacuum for wet position to reduce the risk of leaks pickup, ensure the drum is empty and and possible damage to Vac. -
Page 12: Emptying The Drum
SP6906 RIDGID ESF.qxp_SP6636 12/10/14 9:28 AM Page 12 Operation (Continued) Emptying the Drum Blowing Feature Your Vac features a blowing port. It can WARNING: To reduce the risk of blow sawdust and other debris. Follow injury from accidental starting, the steps below to use your Vac as a unplug power cord before emptying blower. -
Page 13: Diffuser
SP6906 RIDGID ESF.qxp_SP6636 12/10/14 9:28 AM Page 13 Operation (Continued) Diffuser Static-Dissipating Accessory Hose This Vac comes equipped with a diffuser that can be inserted into the exhaust port An optional accessory hose, VT2580, of the vacuum when it’s not being used can be used with this Vac to reduce the as a blower. - Page 14 SP6906 RIDGID ESF.qxp_SP6636 12/10/14 9:28 AM Page 14 Maintenance (Continued) Filter Installation: WARNING: Do not operate with 1. Carefully slide the Qwik Lock™ filter no filters or only one filter in place over the filter cage and press down unless picking up liquid. For liquid...
- Page 15 SP6906 RIDGID ESF.qxp_SP6636 12/10/14 9:28 AM Page 15 Maintenance (Continued) To disinfect the drum: 1. Pour 1 gallon of water and 1 teaspoon of chlorine bleach into the drum. 2. Let solution stand for 20 minutes, carefully swishing every few minutes, making sure to wet all inside surfaces of the drum.
-
Page 16: Repair Parts
SP6906 RIDGID ESF.qxp_SP6636 12/10/14 9:28 AM Page 16 Repair Parts 14 U.S. Gallon Smart-Pulse Vacuum Stock Number RV3410 (Model RV34100) Always order by Part Number - Not by Key Number WARNING: To reduce the risk of injury from electrical shock, unplug power cord before servicing the electrical parts of the Vac. - Page 17 SP6906 RIDGID ESF.qxp_SP6636 12/10/14 9:28 AM Page 17 Repair Parts (Continued) 14 U.S. Gallon Smart-Pulse Vacuum Stock Number RV3410 (Model RV34100) 1.800.561.8187 information@itm.com www. .com...
- Page 18 SP6906 RIDGID ESF.qxp_SP6636 12/10/14 9:28 AM Page 18 Repair Parts (Continued) 14 U.S. Gallon Smart-Pulse Vacuum Stock Number RV3410 (Model RV34100) Always order by Part Number - Not by Key Number WARNING: To reduce the risk of injury from electrical shock, unplug power cord before servicing the electrical parts of the Vac.
- Page 19 SP6906 RIDGID ESF.qxp_SP6636 12/10/14 9:28 AM Page 19 Repair Parts (Continued) 14 U.S. Gallon Smart-Pulse Vacuum Stock Number RV3410 (Model RV34100) 1.800.561.8187 information@itm.com www. .com...
-
Page 20: Warranty
• No other express warranty applies This FULL LIFETIME WARRANTY is the sole and exclusive warranty for RIDGID ® Wet/Dry Vacs. No employee, agent, dealer, or other person is authorized to alter this warranty or make any other warranty on behalf of Ridge Tool Company.