D-Link DWL-AG520 Manual
2.4/5ghz wireless pci adapter
Hide thumbs
Also See for DWL-AG520:
- Quick installation manual (12 pages) ,
- Manual (53 pages) ,
- Manual (44 pages)

Related Manuals for D-Link DWL-AG520


Summary of Contents for D-Link DWL-AG520
- Page 1 D-Link DWL-AG520 2.4/5GHz Wireless PCI Adapter Manual Rev. 0200402 Building Networks for People...
-
Page 2: Table Of Contents
Contents Package Contents ............ 3 Introduction............... 4 Wireless Basics ............6 Getting Started............8 Using the Configuration Utility ........ 13 Networking Basics ..........18 Technical Specifications.......... 31 Limited Warranty and Registration ......33... -
Page 3: Package Contents
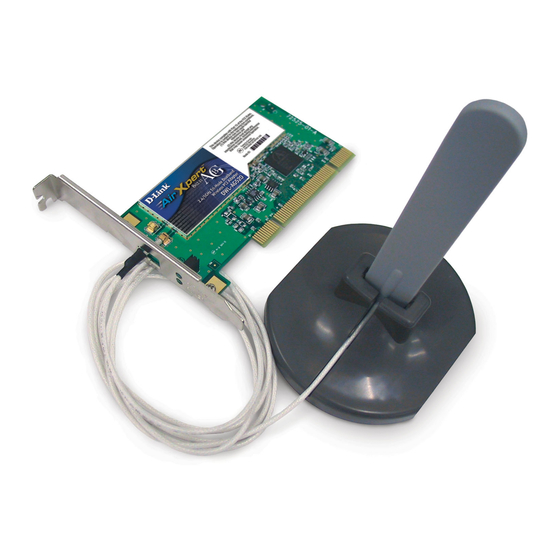
Package Contents Contents of Package: • D-Link DWL-AG520 2.4/5GHz Wireless PCI Adapter • Manual and Drivers on CD • Quick Installation Guide (printed) If any of the above items are missing, please contact your reseller. System Requirements: • A desktop computer with an available 32-bit PCI Card slot •... -
Page 4: Introduction
Getting Started section in this manual. You will see several options for setting up a network using the DWL-AG520. The DWL-AG520 comes with software drivers for the most popular Microsoft Windows operating systems and can be integrated into a larger network,... - Page 5 LED stands for light-emitting diode. The DWL-AG520 Wireless PCI Adapter has two LEDs, as shown below. When the computer is ON, the adapter is inserted properly, and there is activity on the network, both LEDs flash in unison. The BOTTOM LED (POWER) flashes to indicate that the adapter is inserted properly into a computer that is ON.
-
Page 6: Wireless Basics
Wireless Basics D-Link wireless products are based on industry standards to provide easy- to-use and compatible high-speed wireless connectivity within your home or business. Strictly adhering to IEEE 802.11a/b/g the D-Link wireless family of products will allow you to access the data you want, when and where you want it. - Page 7 Installation Considerations Designed to go up to 1650 feet (~500 meters), D-Link DWL-AG520 lets you access your network with your computer from virtually anywhere you want. Keep in mind, however, that the number and thickness of walls, ceilings or other objects that the wireless signals must pass thru may limit range.
-
Page 8: Getting Started
Getting Started To begin, select the type of wireless network you will be building. We will discuss the following types of networks in this section: 1. A Home Internet Network with A Residential Gateway/Router 2. A Home Internet Network with Multiple IP Addresses 3. - Page 9 Broadband connection, Connect the 802.11a/b/g Access Point to the router. 2. Install the D-Link DWL-AG520 Wireless PCI Adapter into a desktop computer on your wireless network. (You can also install the Wireless Cardbus Adapter into a laptop computer. Please refer to the Quick Install Guide included with each product.)
- Page 10 (Requirements: Wireless network adapters -for example) To complete this installation, please follow these steps: 1. Install the D-Link DWL-AG520 Wireless PCI Adapter into a desktop computer on your wireless network. (You can also install the Wireless Cardbus Adapter into a laptop computer. Please refer to the Quick Install Guide included with each product.)
- Page 11 If the Internet Sharing Software will be installed on the same computer into which you are installing this wireless network adapter, then follow these steps: 1. Install the D-Link DWL-AG520 Wireless PCI Adapter (please refer to the Quick Install Guide.) 2. Check the Device Manager to confirm that your adapter is installed...
- Page 12 Basics section in this manual entitled: Adding and Sharing Printers If the Internet Sharing Software will be installed on a computer other than the one in which you are installing the D-Link DWL-AG520 Wireless PCI Adapter, then follow these steps: 1.
-
Page 13: Using The Configuration Utility
Using the Configuration Utility The Configuration Utility program for the DWL-AG520 is called LinkMon. Please refer to the Quick Install Guide that came with the DWL-AG520 for instructions on how to install LinkMon on your computer. Once you have installed LinkMon (the configuration utility), you can read this section of the manual to find out how to monitor and configure your DWL-AG520 adapter using LinkMon. - Page 14 Frame Statistics Tab D-Link DWL-AG520 802.11a/b/g Wireless PCI Adapter Under the Transmit Retries Tab you will find detailed transmit retry statistical information for transmitted frames. Transmit Retries Tab D-Link DWL-AG520 802.11a/b/g Wireless PCI Adapter...
- Page 15 BSSID, association status, operating channel frequency, and information about scanned APs. Station Tab D-Link DWL-AG520 802.11a/b/g Wireless PCI Adapter Default BSS – (Basic Service Set) when one AP is connected to a wired network and a set of wireless stations, it is a BSS.
- Page 16 D-Link AirXport DWL-AG520 Wireless PCI Adapter The Action menu allows the unloading of the NDIS driver, and the resetting of the network interface card (NIC.) Note that unloading the driver and resetting the NIC are options that are available only in Windows XP and Windows 2000.
- Page 17 On the Options menu, choose Settings: DWL-AG520 802.11a/b/g Wireless PCI Adapter Under the Display Tab, you can select the data display modes of Cumulative, or Relative. Cumulative mode displays statistical data collected when LinkMon is started. Relative mode displays differences in the statistical data since the last update of collected data.
-
Page 18: Networking Basics
Networking Basics Using the Network Setup Wizard in Windows XP In this section you will learn how to establish a network at home or work, using Microsoft Windows XP. Note: Please refer to websites such as http://www.homenethelp.com http://www.microsoft.com/windows2000 for information about networking computers using Windows 2000, ME or 98. - Page 19 In the following window, select the best description of your computer. If your computer connects to the internet through a gateway/router, select the second option as shown. Click Next Enter a Computer description and a Computer name (optional.) Click Next Enter a Workgroup name.
- Page 20 Click Next Please wait while the wizard applies the changes. When the changes are complete, click Next. Please wait while the wizard configures the computer. This may take a few minutes.
- Page 21 In the window below, select the best option. In this example, Create a Network Setup Disk has been selected. You will run this disk on each of the computers on your network. Click Next. Insert a disk into the Floppy Disk Drive, in this case drive A:...
- Page 22 Format the disk if you wish, and click Next. Please wait while the wizard copies the files. Please read the information under Here’s how in the screen below. After you complete the Network Setup Wizard you will use the Network Setup Disk to run the Network Setup Wizard once on each of the computers on your network.
- Page 23 Please read the information on this screen, then click Finish to complete the Network Setup Wizard. The new settings will take effect when you restart the computer. Click Yes to restart the computer.
- Page 24 You have completed configuring this computer. Next, you will need to run the Network Setup Disk on all the other computers on your network. After running the Network Setup Disk on all your computers, your new wireless network will be ready to use. Naming your Computer Naming your computer is optional.
- Page 25 • In this window, enter the Computer name. • Select Workgroup and enter the name of the Workgroup. • All computers on your network must have the same Workgroup name. • Click OK Checking the Installation of the Drivers for the Wireless Adapter •...
- Page 26 • Select the Hardware Tab • Click Device Manager • Click on Network Adapters • Right-click on D-Link DWL-AG520 Wireless PCI Adapter • Select Properties to check that the drivers are installed properly. D-Link AirPro DWL-AG520 Wireless PCI Adapter...
- Page 27 Checking the Installation of the Drivers for the Wireless Adapter • Look under Device Status to check that the D-Link AorXProt DWL-AG520 Wireless PCI Adapter device is working properly. • Click OK Checking the Wireless Configuration • Double-click on the Networking Icon in the taskbar.
- Page 28 • Click Close Assigning a Static IP Address Note: Residential Gateways/Broadband Routers will automatically assign IP Addresses to the computers on the network, using DHCP (Dynamic Host Configuration Protocol) technology. If you are using a DHCP-capable Gateway/Router you will not need to assign Static IP Addresses. If you are not using a DHCP capable Gateway/Router, or you need to assign a Static IP Address, please follow these instructions: •...
- Page 29 • Double-click on Network Connections Assigning a Static IP Address • Right-click on Local Area Connections. • Double-click Properties...
- Page 30 • Highlight Internet Protocol (TCP/IP) D-Link AirPro DWL-AG520 Wireless PCI Adapter • Click Properties Assigning a Static IP Address • Select Use the following IP address in the Internet Protocol (TCP/IP) Properties window, • Input your IP address and subnet mask. (The IP Addresses on your network must be within the same range.
-
Page 31: Technical Specifications
Technical Specifications Standards • IEEE 802.11a/b/g Adapter Type • PCI 2.2 compliant • PCI 32-bit interface Supported OS • Windows XP • Windows 2000 • Windows ME • Windows 98SE Data Security • 64, 128, 154-bit WEP (Wired Equivalent Privacy) Encryption Media Access Control •... - Page 32 FCC part 15b • UL1950-3 • You can find the most recent software and user documentation on the D-Link website. D-Link provides free technical support for customers within the United States for the duration of the warranty period on this product.
-
Page 33: Limited Warranty And Registration
(90) days after any replacement Software is delivered. If a material non-conformance is incapable of correction, or if D-Link determines in its sole discretion that it is not practical to replace the non- conforming Software, the price paid by the original licensee for the non-conforming Software will be refunded by D-Link;... - Page 34 RETURNED TO D-LINK FOR WARRANTY SERVICE) RESULTING FROM THE USE OF THE PRODUCT, RELATING TO WARRANTY SERVICE, OR ARISING OUT OF ANY BREACH OF THIS LIMITED WARRANTY, EVEN IF D-LINK HAS BEEN ADVISED OF THE POSSIBILITY OF SUCH DAMAGES. THE SOLE REMEDY FOR A BREACH OF THE FOREGOING LIMITED WARRANTY IS REPAIR, REPLACEMENT OR REFUND OF THE DEFECTIVE OR NON-CONFORMING PRODUCT.
- Page 35 FCC RF Radiation Exposure Statement: This Transmitter must not be co-located or operating in conjunction with any other antenna or transmitter. This equipment complies with FCC RF radiation exposure limits set forth for an uncontrolled environment. This equipment should be installed and operated with a minimum distance of 20 centimeters between the radiator and your body.