D-Link DWL-AG530 Instruction Manual
Airpremiertm ag
Hide thumbs
Also See for DWL-AG530:
- Quick installation manual (77 pages) ,
- Manual (48 pages) ,
- Technical specifications (2 pages)
Table of Contents
Advertisement
Quick Links
Download this manual
See also:
Manual
Advertisement
Table of Contents

Related Manuals for D-Link DWL-AG530


Summary of Contents for D-Link DWL-AG530
- Page 1 D-Link AirPremier DWL-AG530 11a/11g Dualband (2.4GHz/5GHz) Wireless 108Mbps PCI Adapter Manual V.A2 Building Networks for People...
-
Page 2: Table Of Contents
Contents Package Contents ................3 Introduction....................4 Features ....................5 Wireless Basics ..................6 Getting Started ..................10 Using the Configuration Utility ..............13 Networking Basics ................22 Troubleshooting ...................35 Technical Specifications ..............40 Contacting Technical Support ..............42 Warranty and Registration ..............43 Appendix ....................46 EAP Types Definitions of Configuration Terms... -
Page 3: Package Contents
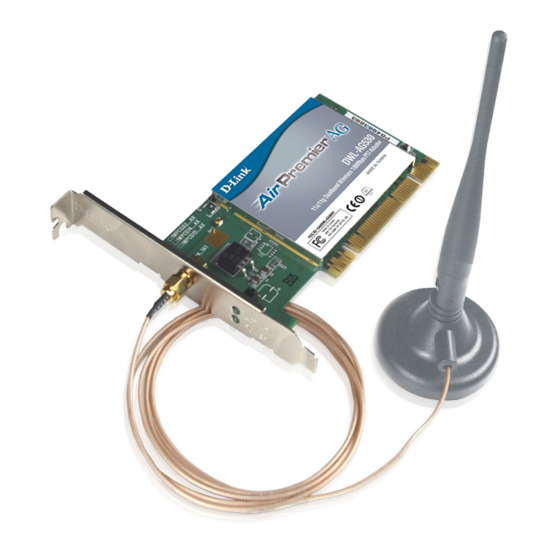
Package Contents Contents of Package: D-Link AirPremier DWL-AG530 11a/11g Dualband (2.4GHz/5GHz) Wireless 108Mbps PCI Adapter Manual, Warranty and Drivers on CD Printed Quick Installation Guide If any of the above items are missing, please contact your reseller. System Requirements for Configuration: A desktop computer with an available 32-bit PCI 2.2... -
Page 4: Introduction
802.11 products, will still be much stronger than ever before. Utilizing the Pre- Shared Key mode of WPA, the DWL-AG530 will obtain a new security key every time it connects to the 802.11 network. You only need to input your encryption information once in the configuration menu. -
Page 5: Features
Faster Wireless Networking with speeds up to 108Mbps in Turbo mode - Faster data transfers mean increased productivity. With the DWL-AG530 in your PC, you will have the flexibility of wireless net- working speeds that save you time and money. -
Page 6: Wireless Basics
Wireless Basics D-Link wireless products are based on industry standards to provide easy-to- use and compatible high-speed wireless connectivity within your home, business or public access wireless networks. D-Link wireless products will allow you access to the data you want, when and where you want it. You will be able to enjoy the freedom that wireless networking brings. - Page 7 Peer-to-Peer networks suitable for a small number of users to larger Infrastructure networks to accommodate hundreds or thousands of users, depending on the number of wireless devices deployed. The DWL-AG530 is compatible with the following wireless products: D-Link AirPremier DWL-AG660 Wireless Cardbus Adapters used with laptop computers...
- Page 8 Wireless Basics (continued) Standards-Based Technology The DWL-AG530 Wireless PCI Adapter utilizes the 802.11a, 802.11b and 802.11g standard. The IEEE 802.11g standard is an extension of the 802.11b standard. It increases the data rate up to 54 Mbps within the 2.4GHz band utilizing OFDM technology.
-
Page 9: Installation Considerations
(radio frequency) noise in your home or business. The key to maximizing wireless range is to follow these basic guidelines: Keep the number of walls and ceilings between the DWL-AG530 and other network devices to a minimum - each wall or ceiling can reduce your DWL-AG530’s range from 3-90 feet (1-30 meters.) Position your... -
Page 10: Getting Started
Ad-Hoc – directly connecting to another computer, for Peer- to-Peer communication, using wireless network adapters on each computer, such as two or more DWL-AG530 Wireless PCI Adapters. On the following pages we will show you an example of an Infrastructure Network and an Ad-Hoc Network. - Page 11 Connect the Cable or DSL modem to your broadband router. (See the Quick Installation Guide included with your router). Install the D-Link AirPremier AG DWL-AG530 Wireless PCI Adapter into an available PCI slot on your desktop computer. (See the Quick Installation Guide included with the network adapter).
- Page 12 Getting Started (continued) Setting up a Wireless Ad-Hoc Network DWL-AG530 DWL-AG660 Install the D-Link DWL-AG530 Wireless PCI Adapter into the desktop computer. (See the Quick Installation Guide included with the DWL-AG530). Install the DWL-AG660 into a laptop computer. (See the Quick Installation Guide included with the DWL-AG660).
-
Page 13: Using The Configuration Utility
The utility provides the user an easy interface to change any settings related to the wireless adapter. After you have completed the installation of the DWL-AG530 (refer to the Quick Installation Guide that came with your purchase) whenever you start the computer, the Configuration Utility starts automatically and the system tray icon is loaded in the toolbar (see illustration below*.) Clicking on the utility icon will start the Configuration Utility. - Page 14 52 and above are available for selection.) Signal Strength/Link Quality: Displays the Link Quality for the DWL-AG530 wireless connection to the ac- cess point. The signal strength represents the wireless signal between the access point and the DWL-AG530. The percentage coincides with the graphi- cal bar.
- Page 15 Data Encryption: Select Enabled or Disabled. Authentication: Choose one of the following modes: Open Authentication - The DWL-AG530 is visible to all devices on the network. Shared Authentication- Allows communication only with other devices with identical WEP settings. WPA* - Select to enable WPA. Click Athentication Config.
- Page 16 Using the Configuration Utility (continued) Configuration > IP Settings Obtain an IP Address Automatically: Choose this option to obtain an IP address automatically through a DHCP server. Assign the following IP Address: Choose this option to assign a static IP address. Obtain DNS Server Address Automatically: Choose this option to obtain a DNS server address automatically.
- Page 17 Using the Configuration Utility (continued) Authentication > WPA >802.1X Configuration>WPA Select WPA in the Authentication field. When you select WPA, 802.1X is Enabled. Enabled Click Authentication Config The Advanced Security Set- tings screen will appear, as shown below. Advanced Security Settings Select the EAP Type you want to use.
- Page 18 Using the Configuration Utility (continued) Authentication > WPA-PSK > 802.1X Configuration > WPA-PSK Select WPA-PSK in the Authentication field. WPA-PSK When you select WPA- PSK, 802.1X is Disabled. Disabled Click Authentication Config WPA-PSK does not require a RADIUS server in the network.
- Page 19 Using the Configuration Utility (continued) Frequency: Advanced Select the network fre- quency from these options: Auto; b 2.4GHz; b/g 2.4GHz; or a 5GHz. - - - - - Super A/G: Ad-Hoc Ad-Hoc Ad-Hoc Ad-Hoc Ad-Hoc Enable or Disable. Starting Ad-Hoc Network: If you are configuring an Ad-Hoc network, select 2.4GHz or...
- Page 20 Using the Configuration Utility (continued) Available Network: The top section of the window displays the Available Networks. Scroll up and down the list and highlight the network to which you wish to connect. Click on the Connect button. Profile: In the lower half of the screen, you can manage the profiles that you have cre- ated for the wireless network at home, at the office and in public places.
- Page 21 Properties you can configure, in this window, all the properties of a profile that already exists in the network. About The About screen displays informa- tion regarding your DWL-AG530, in- cluding the MAC address, Utility ver- sion, and Driver version.
-
Page 22: Networking Basics
Networking Basics Using the Network Setup Wizard in Windows XP In this section you will learn how to establish a network at home or work, using Microsoft Windows XP. Note: Please refer to websites such as http://www.homenethelp.com http://www.microsoft.com/windows2000 for information about networking computers using Windows 2000/Me/98SE. - Page 23 Networking Basics (continued) Please follow all the instructions in this window: Click Next. In the following window, select the best description of your computer. If your computer connects to the Internet through a gateway/router, select the second option as shown. Click Next.
- Page 24 Networking Basics (continued) Enter a Computer description and a Computer name (optional.) Click Next. Enter a Workgroup name. All computers on your network should have the same Workgroup name. Click Next.
- Page 25 Networking Basics (continued) Please wait while the Network Setup Wizard applies the changes. When the changes are complete, click Next. Please wait while the Network Setup Wizard configures the computer. This may take a few minutes.
- Page 26 Networking Basics (continued) In the window below, select the option that fits your needs. In this example, Create a Network Setup Disk has been selected. You will run this disk on each of the computers on your network. Click Next. Insert a disk into the Floppy Disk Drive, in this case drive A.
- Page 27 Networking Basics (continued) Please read the information under Here’s how in the screen below. After you complete the Network Setup Wizard you will use the Network Setup Disk to run the Network Setup Wizard once on each of the computers on your net- work.
- Page 28 Networking Basics (continued) Please read the information on this screen, then click Finish to complete the Network Setup Wizard. The new settings will take effect when you restart the computer. Click Yes to restart the computer. You have completed configuring this computer. Next, you will need to run the Network Setup Disk on all the other computers on your network.
- Page 29 Networking Basics (continued) Naming your Computer To name your computer in Windows XP, please follow these directions: Click Start (in the lower left corner of the screen). Right-click on My Computer. Select Properties and click. Select the Computer Name Tab in the Sys- tem Properties window.
- Page 30 Networking Basics (continued) Naming your Computer In this window, enter the Computer name. Select Workgroup and enter the name of the Workgroup. All computers on your network must have the same Workgroup name. Click OK. Checking the IP Address in Windows XP The wireless adapter-equipped computers in your network must be in the same IP address range (see Getting Started in this manual for a definition of IP ad- dress range).
- Page 31 Networking Basics (continued) Checking the IP Address in Windows XP This window will appear. Click the Support tab. Click Close. Assigning a Static IP Address in Windows XP/2000 Note: DHCP-capable routers will automatically assign IP addresses to the com- puters on the network, using DHCP (Dynamic Host Configuration Protocol) technology.
- Page 32 Networking Basics (continued) Assigning a Static IP Address in Windows XP/2000 Double-click on Network Connections. Right-click on Local Area Connections. Double-click on Properties.
- Page 33 192.168.0.2 Subnet Mask: 255.255.255.0 Default Gateway: Enter the LAN IP address of the wireless router. (D-Link wireless routers have a LAN IP address of 192.168.0.1). Select Use the following DNS server addresses. Enter the LAN IP address of the wireless router.
- Page 34 Networking Basics (continued) Checking the Wireless Connection by Pinging in Windows XP/2000 Go to Start > Run > type cmd. A window similar to this one will ap- pear. Type ping xxx.xxx.xxx.xxx, where xxx is the IP address of the wireless router or access point.
-
Page 35: Troubleshooting
(The examples below are illustrated in Windows XP. If you have a different operating system, the screenshots on your computer will look similar to the following examples). 1. How do I check that the drivers for the DWL-AG530 are installed properly? Go to Start > My Computer >... - Page 36 Troubleshooting (continued) Double-click on Network adapters. Right-click on D-Link DWL-AG530 Wireless PCI Adapter. D-Link AirPro DWL-AB650 Wireless Cardbus Adapter D-Link Air Premier DWL-AG530 Wireless PCI Adapter Select Proper- ties to check that the drivers are installed properly. D-Link Air Premier DWL-AG530...
- Page 37 AG530 does not support channels 36-48 in the 802.11a band. 3. The DWL-AG530 Power and Link lights are not on. Check to see if the DWL-AG530 PCI adapter is firmly inserted into the PCI slot of your laptop computer. 4. I forgot my Encryption key.
- Page 38 Windows 2000 will rename .inf files that have not received WHQL certification into oem.inf files (e.g., oem1.inf). 6. The computer with the DWL-AG530 installed is unable to connect to the wireless network and/or the Internet. Check that the LED indicators for the broadband modem are indicating normal activity.
- Page 39 If Security is enabled, make sure that the correct encryption keys are entered on both the DWL-AG530 and the access point. Double- click on the WLAN icon in the taskbar > click Encryption. Check to see that the key selected is set to the same key as other devices on the network.
-
Page 40: Technical Specifications
Technical Specifications Standards IEEE 802.11 IEEE 802.11a IEEE 802.11b IEEE 802.11g Bus Type PCI 2.2 PCI 32-bit interface Temperature Operating: 32ºF to 131ºF (0ºC to 55ºC) Humidity: 95% maximum, non-condensing Internal Antenna Type: Omni Directional Dipole Antenna with 2~4 dbi gain Security: 64, 128-bit WEP 802.1X... - Page 41 Technical Specifications (continued) Data Rates: With Automatic Fallback 108Mbps (Turbo Mode); 54Mbps; 48Mbps; 36Mbps; 24Mbps; 18Mbps; 12Mbps; 11Mbps; 9Mbps; 6Mbps; 5.5Mbps; 2Mbps; 1Mbps Media Access Control: CSMA/CA with ACK Frequency Range: 2.4GHz to 2.462GHz 5.250GHz to 5.350GHz, 5.725GHz to 5.85GHz Range: Indoors: Up to 328 feet (100 meters) Modulation Technology:...
-
Page 42: Contacting Technical Support
Support echni cal Support You can find software updates and user documentation on the D-Link website. D-Link provides free technical support for customers within the United States and within Canada for the duration of the warranty period on this product. -
Page 43: Warranty And Registration
D-Link’s sole obligation shall be to repair or replace the defective Hardware during the Warranty Period at no charge to the original owner or to refund at D-Link’s sole discretion. Such repair or replacement will be rendered by D-Link at an Authorized D-Link Service Office. The replacement Hardware need not be new or have an identical make, model or part. - Page 44 Canada) D-Link may reject or return any product that is not packaged and shipped in strict compliance with the foregoing requirements, or for which an RMA number is not visible from the outside of the package. The product owner agrees to pay D-Link’s reasonable handling and return shipping charges for any product...
- Page 45 LIABILITY OF D-LINK UNDER THIS WARRANTY IS LIMITED TO THE PURCHASE PRICE OF THE PRODUCT COVERED BY THE WARRANTY. THE FOREGOING EXPRESS WRITTEN WARRANTIES AND REMEDIES ARE EXCLUSIVE AND ARE IN LIEU OF ANY OTHER WARRANTIES OR REMEDIES, EXPRESS, IMPLIED OR STATUTORY.
-
Page 46: Appendix
Appendix EAP Types Configuration > Advanced Security Settings > EAP Types Inner Authentication Information needed EAP Type Protocol for Authenticating Certificate EAP-TLS User Name User Name LEAP Password TTLS Identity User Name Password TTLS Identity EAP-TTLS CHAP User Name TTLS Identity User Name MSCHAP Password... - Page 47 Appendix EAP Types (continued) Inner Authentication Information needed EAP Type Protocol for Authenticating TTLS Identity User Name EAP-MD5 Password TTLS Identity EAP- User Name Generic Token Card EAP-TTLS Password TTLS Identity User Name EAP-MSCHAPv2 Password Domain Name User Name EAP-MD5 Password User Name PEAP...
- Page 48 Appendix Definitions of Terms (continued) Domain Name: Each server has a domain name that uniquely identifies it. That domain name is normally contained in the Subject CN field of the server certificate. A server domain name ends with the name of a larger administrative domain, to which the server belongs.