Table of Contents
Advertisement
Quick Links
Advertisement
Table of Contents

Related Manuals for AEG BP7314021


Summary of Contents for AEG BP7314021
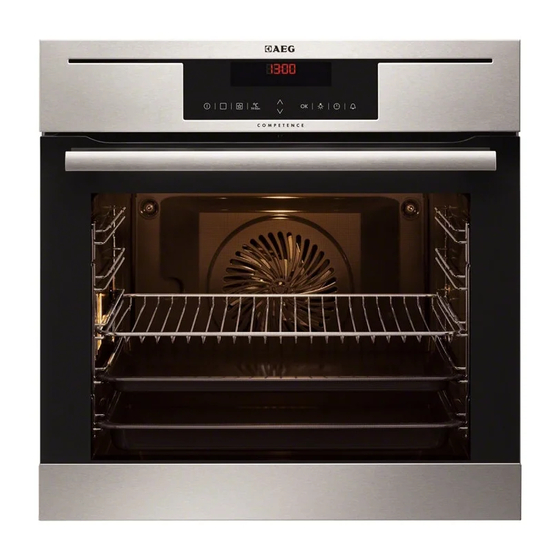
- Page 1 User Manual BP7314021 Oven BP731402E BP731402W BP731410E BP731410F BP731417I...
-
Page 2: Table Of Contents
15. ENERGY EFFICIENCY....................39 FOR PERFECT RESULTS Thank you for choosing this AEG product. We have created it to give you impeccable performance for many years, with innovative technologies that help make life simpler features you might not find on ordinary appliances. Please spend a few minutes reading to get the very best from it. -
Page 3: Safety Information
ENGLISH SAFETY INFORMATION Before the installation and use of the appliance, carefully read the supplied instructions. The manufacturer is not responsible for any injuries or damages that are the result of incorrect installation or usage. Always keep the instructions in a safe and accessible location for future reference. -
Page 4: Safety Instructions
Before maintenance cut the power supply. • Ensure that the appliance is switched off before • replacing the lamp to avoid the possibility of electric shock. Do not use a steam cleaner to clean the appliance. • Do not use harsh abrasive cleaners or sharp metal •... - Page 5 ENGLISH cable. Should the mains cable need • Do not apply pressure on the open to be replaced, this must be carried door. out by our Authorised Service Centre. • Do not use the appliance as a work • Do not let mains cables touch or surface or as a storage surface.
- Page 6 2.4 Care and cleaning The appliance becomes very hot and hot air is released from the front WARNING! cooling vents. Risk of injury, fire, or damage • Pyrolytic cleaning is a high to the appliance. temperature operation that can release fumes from cooking residues •...
-
Page 7: Product Description
ENGLISH 2.7 Disposal • Remove the door catch to prevent children or pets from becoming WARNING! trapped in the appliance. Risk of injury or suffocation. 2.8 Service • Disconnect the appliance from the • To repair the appliance contact an mains supply. -
Page 8: Control Panel
For shelves and trays. Telescopic runners 4. CONTROL PANEL 4.1 Electronic programmer Use the sensor fields to operate the appliance. Sensor Function Description Field DISPLAY Shows the current settings of the appliance. ON / OFF To activate and deactivate the appliance. - Page 9 ENGLISH Sensor Function Description Field To confirm a selection or setting. OVEN LIGHT To activate or deactivate the lamp. CLOCK To set the clock functions. MINUTE MINDER To set the Minute Minder. 4.2 Display A. Oven function symbol B. Temperature / time of day display C.
-
Page 10: Before First Use
Symbol Name Description Door lock The door lock function operates. Light You deactivated the light. Minute minder The minute minder function operates. 4.3 Heat up indicator When the appliance is at the set temperature, the bars go off the display. - Page 11 ENGLISH 6.2 Oven functions Oven function Application True Fan Cook- To bake on up to 3 shelf positions at the same time and to dry food. Set the temperature 20 - 40 °C lower than for Top / Bottom Heat. Pizza Setting To bake food on 1 shelf position for a more intensive browning and a crispy bottom.
-
Page 12: Clock Functions
Oven function Application Pyrolysis To activate the automatic pyrolytic cleaning of the oven. This function burns off residual dirt in the oven. 6.3 Setting the oven function 1. Touch The Temperature / Time display shows 1. Activate the appliance with the temperature in the appliance. - Page 13 ENGLISH Clock function Application To set when the appliance deactivates. You can use Du- ration and End at the same time (Time delay) if you want the appliance to activate and deactivate automatically later. SET+GO To start the appliance with necessary settings with only one touch of the sensor field any time later.
-
Page 14: Automatic Programmes
7.6 Setting the MINUTE 6. Touch a sensor field or open the oven door to stop the acoustic MINDER signal. Use the MINUTE MINDER to set a 7.7 Setting the Time delay countdown (maximum 23 h 59 min). This... - Page 15 ENGLISH Programme number Programme name QUICHE LORRAINE LEMON SPONGE CAKE CHEESE CAKE ROLLS FARMER BREAD DOUGH PROVING POTATO GRATIN LASAGNE CANNELLONI CONVENIENCE CAKE CONVENIENCE PIZZA CONVENIENCE POTATO TYPES 8.2 Recipes online 8.4 Automatic programmes with weight input You can find the recipes for the automatic programmes If you set the weight of the meat, the specified for this appliance...
-
Page 16: Using The Accessories
8.5 Automatic programmes 4. Touch to set the with the core temperature programme for the core temperature sensor. sensor (selected models) The display shows the cooking time, The core temperature of the food is default and fixed in programmes with the core temperature sensor. - Page 17 ENGLISH You can set the core WARNING! temperature only when Be careful when you remove the core temperature flashes. If is in the sensor. It is hot. There is a display but does not risk of burns. flash before you set the core temperature, touch 9.2 Inserting the accessories to set...
- Page 18 Baking tray or deep pan: All accessories have small Put the baking tray or deep pan on the indentations at the top of telescopic runners. the right and left side to increase safety. The indentations are also anti-tip devices.
-
Page 19: Additional Functions
ENGLISH 10. ADDITIONAL FUNCTIONS 10.1 Using My Favourite SAFE comes on in the display. The door is locked. Programme function To deactivate the Child Lock function repeat step 2. Use this function to save your favourite temperature and time settings for an 10.3 Using the Function Lock oven function or programme. - Page 20 Description Value to set CLICK / BEEP / OFF KEY TONE FAULTY TONE ON / OFF SERVICE MENU RESTORE SETTINGS YES / NO 1) It is not possible to deactivate the tone of the ON / OFF sensor field.
-
Page 21: Hints And Tips
ENGLISH 11. HINTS AND TIPS shelf positions to the values in the WARNING! tables. Refer to Safety chapters. • The manufacturer recommends that you use the lower temperature the The temperature and baking first time. times in the tables are •... - Page 22 Baking results Possible cause Remedy The cake browns unevenly. The oven temperature is too Set a lower oven tempera- high and the baking time is ture and a longer baking too short. time. The cake browns unevenly. The mixture is unevenly dis- Spread the mixture evenly tributed.
- Page 23 ENGLISH Cakes / pastries / breads on baking trays Food Function Temperature Time (min) Shelf position (°C) Plaited bread / Top / Bottom 170 - 190 30 - 40 Bread crown Heat Christmas stol- Top / Bottom 50 - 70 160 - 180 Heat Bread (rye...
- Page 24 Biscuits Food Function Temperature Time (min) Shelf position (°C) Short pastry bis- True Fan Cook- 150 - 160 10 - 20 cuits Short bread / True Fan Cook- 20 - 35 Short bread / Pastry stripes Short bread /...
- Page 25 ENGLISH Food Function Temperature Time (min) Shelf position (°C) Lasagne Top / Bottom 180 - 200 25 - 40 Heat Vegetables au Turbo Grilling 160 - 170 15 - 30 gratin Baguettes top- True Fan Cook- 160 - 170 15 - 30 ped with melted cheese Sweet bakes...
- Page 26 Cakes / pastries / breads on baking trays Food Temperature Time (min) Shelf position (°C) 2 positions 3 positions Cream puffs / 25 - 45 1 / 4 160 - 180 Eclairs Dry streusel 150 - 160 30 - 45...
- Page 27 ENGLISH 3. Put the core temperature sensor into Always cook without a lid the meat. when you use this function. 4. Select the function Slow Cooking and set the correct end core 1. Sear the meat in a pan on the hob on temperature.
- Page 28 11.10 Roasting • To prevent the meat juices or fat from burning onto the pan, put some liquid • Use heat-resistant ovenware to roast into the deep pan. (refer to the instructions of the • If necessary, turn the roast (after 1/2 - manufacturer).
- Page 29 ENGLISH Veal Food Quantity Function Temperature Time (min) Shelf posi- (kg) (°C) tion Roast veal Turbo Grill- 160 - 180 90 - 120 Knuckle of 1.5 - 2 Turbo Grill- 160 - 180 120 - 150 veal Lamb Food Quantity Function Temperature Time (min)
- Page 30 Food Quantity Function Temperature Time (min) Shelf posi- (kg) (°C) tion Turkey 4 - 6 Turbo Grill- 140 - 160 150 - 240 Fish (steamed) Food Quantity Function Temperature Time (min) Shelf posi- (kg) (°C) tion Whole fish 1 - 1.5...
- Page 31 ENGLISH 11.13 Frozen foods Food Temperature (°C) Time (min) Shelf position Pizza, frozen 200 - 220 15 - 25 Pizza American, fro- 190 - 210 20 - 25 Pizza, chilled 210 - 230 13 - 25 Pizza Snacks, frozen 180 - 200 15 - 30 French Fries, thin 200 - 220...
- Page 32 Food Quantity Defrosting Further de- Comments (kg) time (min) frosting time (min) Chicken 100 - 140 20 - 30 Put the chicken on an upturned saucer in a big plate. Turn halfway through. Meat 100 - 140 20 - 30 Turn halfway through.
- Page 33 ENGLISH Vegetables Food Temperature (°C) Cooking time until Continue to cook at simmering (min) 100 °C (min) 160 - 170 50 - 60 5 - 10 Carrots Cucumbers 160 - 170 50 - 60 Mixed pickles 160 - 170 50 - 60 5 - 10 Kohlrabi / Peas / As- 160 - 170...
-
Page 34: Care And Cleaning
Food Food core temperature (°C) Rib / Fillet steak: medium 60 - 65 Rib / Fillet steak: well done 70 - 75 Pork Food Food core temperature (°C) Shoulder / Ham / Neck joint of pork 80 - 82... - Page 35 ENGLISH 12.1 Notes on cleaning Install the shelf supports in the opposite sequence. • Clean the front of the appliance with a The retaining pins on the soft cloth with warm water and a telescopic runners must cleaning agent. point to the front. •...
- Page 36 2. Fully press the clamping levers (A) on 6. Touch to set the duration the two door hinges. of the cleaning procedure: Option Description 1:00 h for a low degree of dirt 1:30 h for a usual degree of dirt 3.
-
Page 37: Troubleshooting
ENGLISH 12.6 Replacing the lamp 4. Install the glass cover. Put a cloth on the bottom of the interior The side lamp of the appliance. It prevents damage to 1. Remove the left shelf support to get the lamp glass cover and the cavity. access to the lamp. - Page 38 Problem Possible cause Remedy The oven does not heat up. The Child Lock is on. Refer to "Using the Child Lock". The oven does not heat up. The fuse is blown. Make sure that the fuse is the cause of the malfunction.
-
Page 39: Technical Data
ENGLISH Problem Possible cause Remedy The display shows an error There is an electrical fault. • Deactivate the oven with code that is not in this table. the house fuse or the safety switch in the fuse box and activate it again. •... - Page 40 BP7314021M BP731402EM BP731402WM Model identification BP731410EM BP731410FM BP731417IM Energy Efficiency Index 81.2 Energy efficiency class Energy consumption with a standard load, conven- 0.99 kWh/cycle tional mode Energy consumption with a standard load, fan-forced 0.69 kWh/cycle mode Number of cavities...
- Page 41 ENGLISH automatically 10% earlier. The fan seconds. You may activate the lamp and lamp continue to operate. again but this action will reduce the • Cooking with the lamp off - expected energy savings. deactivate the lamp during the • Deactivating the display - If cooking and activate only when you necessary, you can fully deactivate the need it.
- Page 42 www.aeg.com...
- Page 43 ENGLISH...
- Page 44 www.aeg.com/shop...