
Related Manuals for Samsung AG010KSV Series


Summary of Contents for Samsung AG010KSV Series
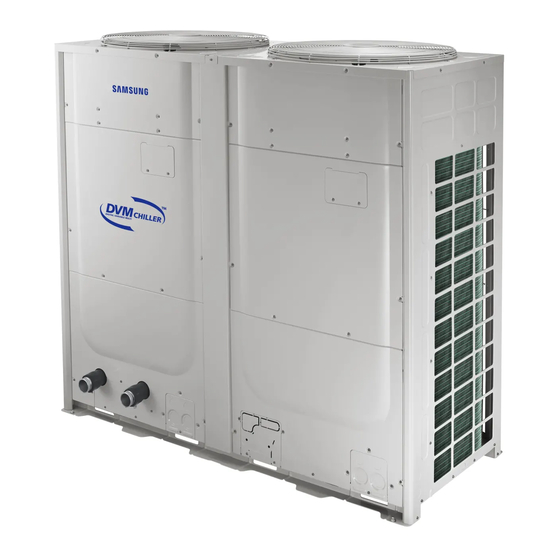
- Page 1 DVM CHILLER Installation manual AG010KSV✴✴✴ / AG015KSV✴✴✴ Series Thank you for purchasing this Samsung Product. Before operating this unit, please read this Installation manual carefully and retain it for future reference.
-
Page 2: Table Of Contents
Contents INSTALLATION Setting key function Setting hydro controller option Safety information How to set hydro controller option Preparing for installation Setting inverter controller option Specifications BEFORE OPERATION DVM CHILLER Classification Check points after installation Moving the product Center of Gravity Location Trial operation Accessories (Basic specification) Trial operation for each CHILLER unit... -
Page 3: Safety Information
But when it has to be relocated for There are potential risks of electric shock or fire. inevitable reasons, please contact Samsung's qualified Do not use the product where smokes consisted dealers for DVM Chiller. - Page 4 Safety information Do not operate the product with power switch or CAUTION circuit breaker. Do not use the product for preservation purposes. Potential risk of electric shock or fire. If automatic blackout restore is set, fan may spin If you use this product for unintended purposes, suddenly and it may cause injury.
- Page 5 When outdoor temperature drops below 32°F, take Do not install the field supply parts by users. appropriate countermeasures to prevent freezing Do not use any other product other than the of water. manufacturer recommended. It may result in Freeze protection such as using brine, heater, water leakage, electric shock, or fire if installation pump operation, etc.
- Page 6 Safety information Check the followings before installation and repair/ You must cut-off the power before you work maintenance service. on, or adjust any power supply part for product installation, maintenance, repair or any other Before brazing, remove dangerous and/or services. flammable things around workplace that may cause an explosion and fire.
- Page 7 Wiring must be connected with the designated A place with a machine that generates wires and it must be fixed securely so that it does electromagnetic waves not apply any external force to the connection part - Electromagnetic waves may cause problems in of the terminals.
-
Page 8: Preparing For Installation
Preparing for installation Specifications Model Name AG010KSVAFH AG015KSVAFH Power Supply , #, V, Hz 3, 3, 208~230, 60 3, 3, 208~230, 60 Ton (Nominal) usRT Capacity Cooling *1) kBtu/h 120.0 168.0 Heating *2) kBtu/h 120.0 171.0 Cooling *1) 10.71 16.63 Power Input Heating *2) 11.54... - Page 9 Model Name AG010KSVAJH AG015KSVAJH Power Supply , #, V, Hz 3, 3, 460, 60 3, 3, 460, 60 Ton (Nominal) usRT Capacity Cooling *1) kBtu/h 120.0 168.0 Heating *2) kBtu/h 120.0 171.0 Cooling *1) 10.71 16.63 Power Input Heating *2) 11.54 17.45 Cooling *1)
-
Page 10: Dvm Chiller Classification
Preparing for installation DVM CHILLER Classification Moving the product Select the moving path in advance. Classification DVM CHILLER Be sure that moving path can support weight of the product. Do not slant the product more than 30˚ when carrying it. (Do not lay the product down in sideways.) Appearance Surface of the heat exchanger is sharp. -
Page 11: Center Of Gravity Location
CAUTION Do not hang the rope on side of the water pipe. The rope may force the water pipe to deformed or damaged. 2 When moving with a forklift Carefully insert the forklift forks into the forklift holes at the palette. Be careful with the forklift from damaging the product. -
Page 12: Selecting Installation Location
- Check the installation site every 3 months and Place where it is not exposed to strong wind perform anti-corrosion treatment such as R-Pro supplied by SAMSUNG (Code : MOK-220SA) or Well ventilated place with sufficient service place commercial water repellent grease and wax, etc., for repairs and maintenance (Discharge duct can be based on the product condition. - Page 13 Protection wall should be constructed with a solid CAUTION material that can block the sea breeze and the height and width of the wall should be 1.5 times larger In regions with heavy snowfall, make sure to install than the size of the DVM CHILLER. (You must secure the DVM CHILLER where there are no concerns of more than 700 mm (27.6 inch) of space between direct snowfall on the DVM CHILLER.
-
Page 14: Required Space For Installation
Required space for installation 1 Single installation Space requirement is based on the following conditions; Cooling mode, outdoor temperature of Unit: mm (inch) 35°C (95°F). Larger space is required if the outdoor <Case 1> temperature is higher than 35°C (95°F) or if the place is heated easily by extreme solar radiation. - Page 15 2 Module installation Installing by <Case 1> or <Case 3> Unit: mm (inch) - Height of the wall on the front side should not be higher than 1500 mm (59 inch). <Case 1> - Height of the wall on the air inlet side should not be higher than 500 mm (20 inch).
-
Page 16: Base Construction And Installation
Base construction and installation 7 When installing multiple DVM CHILLERs at the same WARNING place, construct an H beam or a vibration-isolation frame on the base ground to install the product. Make sure to remove the wooden pallet before installing the DVM CHILLER. If you do not remove 8 After installing an H beam or a vibration-isolation the wooden pallet, there is risk of fire during frame, apply corrosion protection and other... -
Page 17: Product Installation
Product installation Examples of draining work Unit: mm (inch) Use concrete or steel bar for draining work to prevent any damage or cracks. For smooth draining of defrost water, make sure to apply 1/50 slant. Construct a drainage ditch/channel around the 50 (2) or 200 (8) or more... -
Page 18: Installation Precautions
Base construction and installation Installation precautions Connecting the pipe Connecting the anchor bolt Water inlet pipe CAUTION Water outlet pipe Tighten the rubber washer to prevent the bolt connection part of the DVM CHILLER from Plastic (rubber) If you install the DVM CHILLER on the rooftop, washer corroding. - Page 19 Installing vibration-isolation frame Installing discharge duct During installation, make sure there is no gap between the supporting base and the extra structures such as vibration-isolation frame or H beam. Supporting base must be constructed strongly to support the bottom part of the vibration-isolation mount.
-
Page 20: Installing The Wind/Snow Prevention Duct
Installing the wind/snow prevention duct Installing the discharge duct Installing the discharge duct in around obstacles cold regions Ex.) Balcony Upper floor Discharged air Ex.) Mechanical room Discharged In cold regions with lots of snowfall, install a snow prevention duct, as a sufficient countermeasure, to prevent snow from accumulating on the product. -
Page 21: Installing The Discharge Duct In Regions With Strong Wind
Installing the discharge duct in Unit: mm (inch) 871 (34 5/16) regions with strong wind In windy regions such as near sea shores, protection wall or wind protection duct must be installed for normal operation of the product. (Refer to the illustration of the snow prevention duct, for installing the wind protection duct.) When installing a wind prevention duct consider... -
Page 22: Water Pipe Installation
Water pipe installation Water pipe diagram Install the water system according to the diagram. Direction of water flow Expansion vessel Field scope DVM CHILLER Cleaning and flushing pipe (Install when Water cleaning) side heat exchanger Load unit AHU or Fan coil Name Remarks Name... -
Page 23: Water Pipe Installation
When insulation is not done thoroughly, you will WARNING waste energy caused by thermal loss and may get property damage during cold seasons when water The maximum operation water pressure of the product is 1.0 Mpa (145 psi). pipe freezes. If the product is stopped at night or not operated for long time during winter time, solution The water strainer is not included in the product. - Page 24 Water pipe installation Installing strainer Air venting Install strainer (Field scope: 50 Mesh) that is Vent air by opening two air vent valves on inlet and serviceable for cleaning at the inlet of DVM CHILLER middle of the pipe of water side heat exchanger. to prevent foreign substances such as bolts and If air venting is not done properly, it is difficult to stones from flowing into water side heat exchanger.
- Page 25 Maintaining contamination Freeze protection operation Small foreign substances in chilled/heating water may Forced pump operation may be operated periodically pass through the strainers and may become stuck to protect water side heat exchanger (plate type heat or stacked inside plate type heat exchanger. Foreign exchanger) from freezing in winter time or night time substance accumulation inside the plate type heat when the pump is stopped.
-
Page 26: Securing Water Storage
- In case of variable flow system, retain certain amount of water by bypass pipe system. Unit : L (gal) Model name Minimum water storage AG010KSV Series 272.5 (72) AG015KSV Series 381.6 (100.8) NOTE Total water storage in the system = water storage... -
Page 27: Electrical Wiring Work
Electrical wiring work Specification of the circuit breaker and power cable Electric Characteristics Units Comp Fan motor Norm. Ton Model Volts #2 FLA #1 FLA AG010KSVAFH 208/230 19.5 19.5 AG015KSVAFH 208/230 27.5 27.5 AG010KSVAJH AG015KSVAJH Rated Load Ampere Minimum Circuit Ampere (A) Full Load Ampere Maximum Overcurrent Protective Device (A) NOTE... -
Page 28: Power And Communication Cable Configuration
Electrical wiring work Power and communication cable configuration Main power and the ground cable must be withdrawn through the knock-out hole on the bottom-right corner of the front side. Withdraw the communication cable from the designated knock-out hole on the bottom-right corner of the front or side. -
Page 29: Connecting The Power Cable
Connecting the power cable UNIT 1 UNIT 2 UNIT 3 ELCB or ELCB or ELCB or MCCB+ELB MCCB+ELB MCCB+ELB Protection tube Power Power Communication cable ground cable ground cable cable cable cable Power cable Power cable Power cable Fix the cable with a cable tie. ELCB and ELB must be installed since there is risk of electric shock or fire when they are not installed. -
Page 30: Connecting The Communication Cable
Electrical wiring work Connecting the communication cable Module UNIT 1 UNIT2 UNIT 3 control F1 F2 V1 V2 F3 F4 Protection tube Communication cable Communication cable Single connection Module/Group connection Module Module Hydro controller control control communication part UNIT 1 UNIT 16 F1 F2 V1 V2 F3 F4 F1 F2 V1 V2 F3 F4... - Page 31 Name Signal Function Contact On (Short) Contact Off (Open) Display when operates in heating Cooling/Heating display Heat Cool mode Operation display Display when operates Operate Stop Warning display Display when error occurs Error occurred No error Zero Defrost operation display Display when defrosting Defrost ON Defrost OFF...
- Page 32 Electrical wiring work Input contact B-T/B Contact On Contact Off Signal Setting Name Signal Function (Short) (Open) recognition unit Disuse Disuse Disuse Signal about pump operation Pump interlock error (E918) Pump interlock Pump ON Pump OFF Usual input Each unit occurs if ON is not input when operating pump Main unit...
- Page 33 Usual input: Operate by current status of contact Instant input: Operate when contact signal changes from OFF to ON / from ON to OFF. For use of external contacts, be sure to set options for each function as shown in page 45-47. Note1) Operates when input method of Operation On/Off is set as external contact Note2)
- Page 34 Electrical wiring work Contact On Contact Off Signal Setting Name Signal Function (Short) (Open) recognition unit Recognize water outlet set Set temperature/ temperature by external input Main unit room Analog (4 ~ 20 mA) Note1) 17-18 Current input of group temperature current Recognize value of room temperature Note8) sensor sensor (4 ~ 20 mA) when standard for...
- Page 35 NOTE Room temperature sensor and external water outlet temperature sensor is not supplied. Purchase and install the appropriate sensor according to the usage. - Room temperature sensor: 4 mA: -50°C (-58°F), 20mA: 50°C (122°F)) - External water outlet temperature sensor: 4 ~ 20 mA (4 mA: -30°C (-22°F), 20mA: 70°C (158°F)) Example of input contact installation Input terminal block Input signal...
-
Page 36: Selecting Solderless Ring Terminal
Electrical wiring work Selecting solderless ring terminal Select the solderless ring terminal depending on the nominal dimension of the power cable. Cover and insulate the solderless ring terminal and connection part of the power cable. Soldering Unit: mm (inch) Nominal Nominal dimensions dimensions... -
Page 37: Connecting The Power Terminal
Connecting the power terminal Close the cover. Unit : N·m (lbf·in) Connect the cables to the terminal board with Screw Tightening torque solderless ring terminals. 5.5~7.3 3 phase (380-415 V) power Properly connect the cables by using certified and (48.7~64.6) cable rated cables and make sure to fix them properly so that external force is not applied to the terminal. - Page 38 Electrical wiring work 4 At this moment, cut out the outer sheath of the Examples of using the cable striper power cable by moving the tool toward the direction of the arrow as shown in the illustration. Cable striper 1 Adjust the blade position by coin. (Controller is at the bottom side of the tool.) Fix the blade position 5 Slightly bend the wire and pull out the cut part of the according to the outer sheath thickness of the power...
-
Page 39: Fixing The Power Cable
Fixing the power cable Connecting ring terminal of 3 phase cable CAUTION 1 Cut the power cable to an appropriate length and connect it with the solderless terminal. Do not let the power cable come into contact with 2 After connecting the power cable to the terminal as the pipes inside the DVM CHILLER. -
Page 40: Withdrawing The Power Cable
Electrical wiring work Withdrawing the power cable Grounding work Connect the power cable protection tube into the power The grounding must be done by a qualified installer for supply box. Be sure that the power supply cable is not safety. damaged by burr on the knock-out hole. - Page 41 Performing the grounding work Use a rated grounding cable by referring to the specification of the electric cable for the product. When using the exclusive grounding terminal (When the exclusive grounding terminal is already built in the house) Exclusive grounding terminal When using grounding terminal at the electrical panel Electrical panel...
-
Page 42: Setting Key Function
Setting key function Setting hydro controller option Basic segment display SEG1 SEG2 SEG3 SEG4 SEG5 SEG6 Remarks Water In Ex) -5°C View mode display Press and hold K3 and K4 for 3 seconds to enter the view mode. Press K3 to change view mode in order of the table. Press K4 to change view mode in reverse order of the table. - Page 43 Number of KEY operation SEG1 SEG2 SEG3 SEG4 SEG5 SEG6 Remarks press Discharge 1 8 times ex) 101.8°C 101 (Drop) temperature Discharge 2 9 times ex) 101.8°C 101 (Drop) temperature 10 times Top 1 temperature ex) 101.8°C 101 (Drop) 11 times Top 2 temperature ex) 101.8°C 101 (Drop)
- Page 44 Setting key function Number of KEY operation SEG1 SEG2 SEG3 SEG4 SEG5 SEG6 Remarks press ex) 1007 step 31 times Hydro EEV 1 (Drop "/10") ex) 1007 step 32 times Hydro EEV 2 (Drop "/10") ex) 1007 step 33 times Main EEV 1 (Drop "/10") ex) 1007 step 34 times...
-
Page 45: How To Set Hydro Controller Option
How to set hydro controller option Option No. Option value SEG1 SEG2 SEG3 SEG4 SEG5 SEG6 Operation On/Off input method Temperature setting input method 1 Turn on the product. 2 Press and hold the K2 to enter the option setting. In option setting, other key input (forced fan, temperature setting, etc.) is not received. - Page 46 Setting key function Module Option Factory control Option item Option Definition Setting unit value default setting option Note1) Module control/DMS Main unit Quiet function input method 0·1 of group External contact Note2) Module control/DMS Main unit Forced fan function input method 0·1 of group External contact...
- Page 47 Module Option Factory control Option item Option Definition Setting unit value default setting option Note1) Standard 1 outdoor temperature AirCool1 (For water law) 0 ~ 20 for cooling Standard 2 outdoor temperature AirCool2 (For water law) 30 ~ 40 for cooling Standard 1 room temperature for RoomCool1 (For water law) 15 ~ 24...
- Page 48 Setting key function Function description Description Select operation On/Off input method of module/group Select temperature setting input method of module/group Select operation mode (Cool/Heat, Hot water/Cool storage) input method of module/group Select demand control input method of module/group Select demand level Current will be limited below the set level when "Perform"...
- Page 49 Water law Room temperature standard If it is room temperature model, This function allows water outlet temperature to change water outlet set temperature regarding demand load changes depending on outdoor set by water law does not drop temperature and room temperature. It can be set to below 5°C (41°F).
- Page 50 Setting key function MICOM version display Press and hold K3 and K5 for 3 seconds to enter the view mode. Press K3 to change view mode in order of the table. Cancelling view mode display - Press and hold K3 for 3 seconds. SEG1 SEG2 SEG3...
-
Page 51: Setting Inverter Controller Option
Setting inverter controller option Basic segment display Display Step Display contents SEG1 SEG2 SEG3 SEG4 At initial power supply Checking segment display Setting communication (Addressing) After communication setting Hydro Hydro Transmit/Reception address (usual occasion) controller: A controller: 0 Setting inverter controller option switch K1 K2 K3 K4 K1 K2 K3 K4 English... - Page 52 Setting key function Installing and setting the option with tact switch and functions 1 Press and hold K2 for 3 seconds. (Only available when the operation is stopped) The display will show the following. If you have set the Emergency operation for compressor malfunction, 1 or 2 will be displayed on Seg 4. - Seg 1 and Seg 2 will display the number for selected option.
- Page 53 Option item Input unit SEG1 SEG2 SEG3 SEG4 Function of the option Remarks Factory default Outdoor unit fan Individual Increase the outdoor unit fan speed correction Increase fan speed speed to maximum value Unused option Main Unused option Unused option Main Unused option Unused option...
- Page 54 Setting key function Setting key operation and checking the view mode with tact switch K1 K2 K3 K4 K1 K2 K3 K4 K1 (Number of KEY operation Display on 7-Segment press) 1 time Refrigerant charging in Heating mode 2 times Trial operation in Heating mode 3 times Refrigerant discharging in Heating mode ...
- Page 55 K2 (Number of KEY operation Display on 7-Segment press) 10 times Inverter compressor 2 check 11 times Fan 1 check 12 times Fan 2 check 13 times End KEY operation To use key operating function for service and maintenance when installing module/group, set as main control (refer to the Dip S/W No.1 setting method on page 59.) or cancel in module/group.
- Page 56 Setting key function Display K4 (Number of Display contents press) SEG1 SEG2, 3, 4 19 times EVI outlet temperature -42°C -, 4, 2 20 times Main EEV 1 step 2000 steps 2, 0, 0 21 times Main EEV 2 step 2000 steps 2, 0, 0 22 times...
-
Page 57: Check Points After Installation
Check points after installation 1 Before supplying the power, measure the insulation 4 Check the following after the installation is resistance values between the ground terminals and completed. individual power terminals (R/S/T/N) on the product, Have you checked the external by using the DC 500V insulation resistance tester. -
Page 58: Trial Operation
Check points after installation Trial operation Is the grounding work properly done? Is the pump interlock circuit connected? Before the trial operation, check the following list to - Only applied to non-pump models protect the product. Is the strainer (50 Mesh) properly installed at water inlet? PRECAUTIONS BEFORE Is water flowing in water system? -
Page 59: Trial Operation For Each Chiller Unit
Is the strainer in water pipe contaminated after the The operation will finish automatically within 30 trial operation? seconds. - Clean the strainer if contaminated. The product and the pump cannot be operated while calibrating the pressure difference. Is minimum amount of circulating water (over 50 % 4 Forced fan function removes accumulated snow on of rated flow rate) acquired? the fan. - Page 60 Check points after installation 7 Change the set temperature if necessary in main CAUTION control. Make sure to close the top and bottom part of the Cooling Heating Default value product cabinet during operation. If you operate 7°C (45°F) 45°C (113°F) the unit with the front cabinet open, it may cause Temperature can be adjusted by K3 and K4.
-
Page 61: Maintenance
Maintenance Name of the parts Hydro controller Inverter controller control box control box Air side heat exchanger Water side heat exchanger Compressor Plate type heat exchanger Air vent valve Water inlet temperature sensor Water inlet pressure sensor Hydro Water middle coupler Water outlet Drain valve pressure sensor... -
Page 62: Water Pipe Installation
Maintenance Water pipe installation Expansion vessel Direction of water flow Field scope DVM CHILLER Water side heat Cleaning and flushing pipe exchanger (Install when cleaning) Name Name Drain pipe Valve Coupling Air vent valve Strainer Check valve Drain valve Pump Temperature gauge Flexible joint Pressure gauge... - Page 63 Maintain the water or brine storage as set standard. If the amount is too low, compressor will be stopped even operated for short time for light load, and repeat operation and stopping. Such operation may result in shortening life of the product and product malfunction due to repetition of compressor operation. Especially, be aware of amount at bypass system if water temperature and capacity control is done by bypass system.
-
Page 64: Water Maintenance Standard
Maintenance Caution regarding drainage during winter time When DVM CHILLER is not operated during winter time, drain all water by opening drain valves in CHILLER shown in figure and drain valves in the pipes. Drain valve Air venting Vent air by opening two air vent valves on inlet and middle of the pipe of water side heat exchanger. - Page 65 Heating water system Chilled water system Effect Low level medium temperature heating gauge Item Circulation water Circulation water Forming (Below 20°C Supply water (Over 20°C (68°F) Supply water Corrosion scale (68°F)) below 60°C (140°F)) Acid consumption Below 50 Below 50 Below 50 Below 50 (pH4.8, mgCaCO...
-
Page 66: Maintaining Plate Type Heat Exchanger
Maintenance Maintaining plate type heat The plate heat exchanger is not serviceable by disassembly. It must cleaned by following methods. exchanger - Check if there is any cleaning hole for chemical cleaning at the inlet water pipe. For water scale When the product was not operated for long period cleaning use diluted (down to 5 %) citric acid, of time, check the followings:... -
Page 67: Stopping During Winter Time
Stopping during winter time Stopping for a long time Do not cut-off the power supply. Drain water in water pipe and water side heat exchanger. - This may result in water leakage or pipe damage because pump will not operate to prevent - Open drain valves on water pipe system and freezing. -
Page 68: Inspection For Normal Operation
Maintenance Inspection for normal operation Number of Side effects when Item Standard inspection inadequate Have you set the electric conductivity value properly? Corrosion, water scale or Forced drainage Is electric conductivity sensor working Once a week slime may occur properly? Is auto valve working properly? Is chilled water corrupted or have floating particles? -
Page 69: Chilled Water Management
Chilled water management Water temperature range If the chilled water storage exceeds optimal range, stop Operate the product within the following range. For the operation until cause is taken care before re-start product protection, compressor operation may be the operation. limited. -
Page 70: Freeze Prevention
Maintenance Freeze prevention Cooling °C (°F) Outdoor temperature 48 (118) Necessity of freeze prevention 43 (109) When outdoor temperature is low or in winter time, Anti-freeze Water water in pump and water pipe may freeze and may condition condition cause damage to the product and the pipe. Insulate the pump and pipe to prevent freezing. - Page 71 Selecting brine Type and specification of brine When using brine, refer to the following list and select For low temperature CHILLER, use glycol type brine a product that will not damage the product. such as ethylene glycol and propylene glycol. If using Effective freeze prevention other types of brine (chloride type or alcohol type), Will not corrode metal...
- Page 72 Maintenance Standard data for status of Anti-freeze (Based on temperature of anti-freeze at 15°C (59°F)) Type of anti- freeze Concentration Freezing point Brine freezing point graph (Based on 15°C [% Wt.] (°C [°F]) [59°F]) -3.2 (26.2) 0 (32) -7.8 (18.0) -10 (14) Ethylene Propylene glycol solution...
-
Page 73: Error Display
Error display Display Description Segment will display error code (3 digits). Communication error between hydro controller and inverter controller (When there is no response from indoor units after tracking is completed) HYDRO-UNIT_MODULE_CHILLER 88-SEG DISPLAY Communication error of Main and sub MICOM of inverter controller Communication error of inverter Display... - Page 74 Maintenance Display Description Display Description Error on Top 2 temperature sensor (Short or INV2 input current error Open) Error due to over voltage/low voltage of Error on high pressure sensor (Short or Fan2 Open) Hall IC error of Fan2 Error on low pressure sensor (Short or Outdoor fan2 overload stop Open) Fan2 Date Flash error...
- Page 75 Display Description Display Description Instant blackout error Hydro outlet temperature sensor (Tw2) Short/Open Overheated motor of Fan1 Frozen damage error Error due to overheated IPM of Fan1 Error when freeze prevention Comp Off INV1 Comp starting error occurs 4 times Compressor stop due to full current control Error when freeze prevention Comp Off or error due to low current on CT2 occurs 3 times...
-
Page 76: Error History Display
Maintenance Error history display ❶ High pressure when cooling/Low pressure when heating Press and hold K3 and K6 for 3 seconds to enter the ❷ Low pressure when cooling/heating view mode. Apply nitrogen gas to the each charging port at Press K3 to change view mode in order of the table. - Page 77 Vacuuming the pipes Use tools for R-410A to prevent the inflow of foreign substances and resist against the internal pressure. Use vacuum pump that allows vacuuming under 5 Torr. Use the vacuum pump with the check valve to prevent pump oil from flowing backward while the vacuum pump is stopped.
-
Page 78: Troubleshooting
Maintenance Troubleshooting Following situations are not product breakdown. Problem Cause When only pump operates during Forced pump function to prevent water freezing is Supplying power winter time or outdoor available. (Refer to page 59.) temperature is low When compressor is heated while the Supplying power Compressor is heated for starting operation. - Page 79 Before you report the problem of the product, check the following table. Problem Monitor Cause Solution Check if there is power failure. Operate again when the power is on again. Open the circuit breaker if the switch is OFF. Check if circuit breaker is closed. When pump and Do not supply power if the switch is tripped.
-
Page 80: Periodic Maintenance
Maintenance Periodic maintenance For proper operation, check and record the following list periodically. Recommended values are normal operation range. Operation time is 3650 hours/year. Common items Periodic maintenance Preventive maintenance Name Check Preventive Preventive Checklist Check standard period description period Insulation Every Over 1 MΩ... - Page 81 Periodic maintenance Preventive maintenance Name Check Preventive Preventive Checklist Check standard period description period Resistance Every Should be rated resistance value value year Pressure sensor Exchange 5 years Visual check No deformation Every Structural parts Visual check No rust Refinishing 13 years year Refrigerant...
- Page 82 Maintenance Maintaining water system Check and clean water strainer. - If strainer is blocked, water side heat exchanger may freeze due to lack of water storage. Check if air is not mixed in inlet/outlet of chilled/heating water pipe system. - Air may be mixed in the system even if first air purging is done. Vent air constantly. Check the quality of water.
-
Page 83: Quick Smart Features
Quick Smart Features Hot water (Cool storage) mode CAUTION Hot water (Cool storage) temperature control To change functions of the product, electrical wiring and changing setting are also mandatory. Contact - This function is to control water temperature the merchandise or service center for electrical for Hot water mode differently from normal wiring work and changing settings. - Page 84 Quick Smart Features Forced fan function Remote control wiring This function operates fan of CHILLER to remove For the remote control circuit (including the module accumulated snow on the fan. control), use the cord or vinyl sheath cable (0.75-1.25 mm that meets the local power line requirements.
- Page 85 MEMO English...