
Related Manuals for Buffalo WMBR-HP-GNV2


Summary of Contents for Buffalo WMBR-HP-GNV2
- Page 1 User Manual Broadband ADSL2+ Modem Router WBMR-HP-GNV2 www.buffalotech.com 35011767 ver.01...
-
Page 2: Table Of Contents
Contents Chapter 1 - Product Overview ......... 5 Features .................. 5 Air Navigator CD Requirements ..........6 150 Mbps High Speed Mode ........... 6 Package Contents ..............6 Hardware Overview ..............7 Front Panel LEDs / Back Panel ............. 7 Top .................... - Page 3 DDNS (Router Mode only) ............. 29 Route ..................... 31 Wireless Config ............... 32 WPS ....................32 AOSS ..................... 33 Basic ....................35 Advanced ..................39 WMM ....................40 MAC Filter ..................42 Security (Router Mode only) ........... 43 Firewall (Router Mode only) ............43 IP Filter (Router Mode only) ............
- Page 4 Client Monitor ................. 65 Ping ....................66 DSL Connection ................67 Chapter 5 - Connect to a Wireless Network ....68 Automatic Secure Setup (AOSS/WPS) ........68 Windows 7/Vista (Client Manager V) ..........69 Windows XP (Client Manager 3) ............ 70 Other Devices (e.g.
- Page 5 Appendix C - TCP/IP Settings .......... 87 Windows 7 ................87 Windows Vista ................. 88 Windows XP ................89 Mac OS X ................90 Appendix D - Restoring the Default Configuration ..91 Appendix E - Regulatory Compliance Information ..92 Appendix F - Environmental Information .......
-
Page 6: Chapter 1 - Product Overview
Chapter 1 - Product Overview Features Supports IEEE802.11n and IEEE802.11b/g With support for current Wireless-N, Wireless-G, and Wireless-B standards, the AirStation can transfer data to and from all standard 2.4 GHz wireless clients. Dual speed mode Dual speed mode makes wireless transmission faster by using 2 channels, allowing 150 Mbps data transmission. -
Page 7: Air Navigator Cd Requirements
Chapter 1 Product Overview Air Navigator CD Requirements The AirStation wireless router and access point works with most wired and wireless devices. However, the automatic installation program on the CD requires a connected Windows 7, Vista or XP computer to run. If you use the AirStation with a different operating system, you will have to configure your network settings manually from a browser window. -
Page 8: Hardware Overview
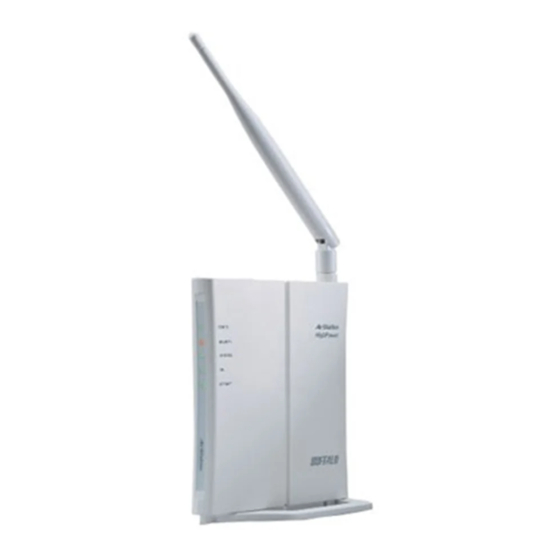
Chapter 1 Product Overview Hardware Overview Front Panel LEDs / Back Panel Power LED On (Green) : The AC adapter is connected. Off (Green) : The AC adapter is not connected. Shows AirStation status. 2 blinks (Red) Flash ROM error. 3 blinks (Red) Wired Ethernet LAN error. - Page 9 Chapter 1 Product Overview Turn off AirStation first, wait for a few seconds, then turn it back on. If the Power LED keeps blinking, do not turn off the AirStation nor unplug its power cable. Security LED (Amber) Indicates security status. Off : AOSS or Encryption is not set.
-
Page 10: Top
Chapter 1 Product Overview AOSS Button To initiate AOSS, hold down this button until the Security LED flashes (about 1 second). Then, push or click the AOSS button on your wireless client device to complete the connection. Both devices must be powered on for this to work. -
Page 11: Bottom
Chapter 1 Product Overview Bottom Reset Button To reset all settings, hold down this button until the Power LED comes on (about 3 seconds). Power must be on. Right Side Factory Default Settings This sticker shows the AirStation’s SSID, default encryption key, and WPS PIN code. -
Page 12: Chapter 2 - Placing Your Airstation
Chapter 2 - Placing Your AirStation Antenna Placement The antenna is included in the package. Screw the antenna clockwise to install. Vertical Placement To place unit vertically, attach the stand as shown below. WBMR-HP-GNV2 User Manual... -
Page 13: Horizontal Placement
Chapter 2 Placing Your AirStation Horizontal Placement For horizontal placement, the stand is not used. WBMR-HP-GNV2 User Manual... -
Page 14: Wall-Mounting
Chapter 2 Placing Your AirStation Wall-Mounting To wall-mount the AirStation, attach the stand to the wall with the two screws (included). 8.5 cm (~3.3 inches) Snap the center of the AirStation to the stand as shown. WBMR-HP-GNV2 User Manual... -
Page 15: Chapter 3 - Installation
Chapter 3 - Installation Automatic Setup The AirNavigator CD can step you through installing your AirStation. To step through the setup program, insert the CD into your Windows 7/Vista/XP PC and follow the instructions on the screen. If your computer uses a different operating system, use manual setup instead. Note: ·... - Page 16 Chapter 3 Installation Connection for the AirStation to the ADSL line varies by country and region. Typically it involves a microfilter or a microfilter with built-in splitter to allow simultaneous use of ADSL service and telephone service on the same telephone line. Please read the following steps carefully and select the appropriate method.
- Page 17 Chapter 3 Installation Turn on the AirStation, wait one minute, and then turn on your computer. AirStation 1) Connect the power supply power outlet computer Once your computer has booted, the AirStation’s LEDs should be lit as described below: POWER Green light on.
-
Page 18: Gathering Information
Chapter 3 Installation Gathering Information Most DSL providers require PPPoE or PPPoA details to log in to your connection. You must call your ISP’s Technical Support number to obtain the following information: Username : This is the Username that is used to log onto your ADSL service provider’s network. It is commonly in the form −... - Page 19 Chapter 3 Installation Country Encapsulation VPI / VCI Multi plexing ISPs Holland RFC1483 Bridged 0/35 BBNed, XS4all Versatel, DHCP 0/32 Baby XL, Tiscali. (start/Surf/ 0/34 Family/Live) RFC2364 PPPoA 8/48 KPN, Hetnet, HCCNet, Tiscali (lite/ Basis/Plus), Wanadoo RFC2364 PPPoA 0/32 Versatel PPP, Zonnet RFC2516 PPPoE 8/35 Various...
-
Page 20: Chapter 4 - Configuration
Chapter 4 - Configuration The web-based configuration tool lets you change advanced settings for the AirStation. Don’t change these settings unless you know what you’re doing. How to Access the Web-Based Configuration Utility To configure the AirStation’s advanced settings manually, log in to the web-based configuration utility as shown below. - Page 21 Chapter 4 Configuration This is the configuration utility, where most AirStation settings can be configured. Help is always displayed on the right side of each screen. Refer to the Help screens for more information on using the configuration utility. WBMR-HP-GNV2 User Manual...
-
Page 22: Configuration Utility Menus
Chapter 4 Configuration Configuration Utility Menus The menu structure for the AirStation is as follows. Please refer to the pages listed at right for explanations of each item. Main screen Descriptions Page Internet/LAN Internet Configure Internet settings. Page 25 DDNS DNS settings. - Page 23 Chapter 4 Configuration Access Configure access restrictions to the AirStation’s configuration screens. Page 56 Configure a syslog server to manage the AirStation’s logs. Page 57 Save/Restore Save or restore the AirStation’s configuration from a configuration file. Page 58 Initialize/Restart Initialize the AirStation or reboot it. Page 59 Update Update the AirStation’s firmware.
-
Page 24: Setup
Chapter 4 Configuration Setup Setup is the home page of the configuration utility. You can verify settings and the status of the AirStation here. Parameter Meaning Internet/LAN (LAN Config) Displays the configuration screen for the Internet port and LAN ports. Wireless Config Click this button to display the configuration screen for wireless settings. - Page 25 Chapter 4 Configuration Parameter Meaning WIRELESS Displays the current wireless settings. AOSS Setup Click this button to display the AOSS configuration screen. WPS Setup Click this button to display the WPS configuration screen. Language Enables you to select the language you use. Logout Log out from the configuration screen of the AirStation.
-
Page 26: Internet/Lan
Chapter 4 Configuration Internet/LAN Internet The Internet settings are made here. For details on the settings, refer to the documentation provided by your ADSL provider. WBMR-HP-GNV2 User Manual... - Page 27 Chapter 4 Configuration Parameter Meaning Internet Setup Encapsulation Set the ADSL communication method. Modulation Set the modulation system used in ADSL communication. Multiplexing Set the encapsulation system for VC multiplexing. Select from LLC (Logical Link Control Encapsulation) which can handle multiple protocols or VC (Virtual Circuit) for a single protocol.
- Page 28 Chapter 4 Configuration Parameter Meaning User Name Set the user name (PPP login name) specified by the provider in 64 or less single-byte alphanumeric characters and symbols. If the name specified by the provider contains an @ mark, the characters after the @ mark cannot be omitted when entering the User Name.
- Page 29 Chapter 4 Configuration Parameter Meaning DHCP Relay Server When Local DHCP Server is set to DHCP Relay, you must enter the IP address of the remote DHCP server here. (Note that “DHCP relay server” is a widely used but incorrect term for a remote DHCP server.) Starting IP Address This is the lowest address in the range that the gateway will assign...
-
Page 30: Ddns (Router Mode Only)
Chapter 4 Configuration DDNS (Router Mode only) Configure Dynamic DNS settings. Many settings are only available when the appropriate Dynamic DNS service is enabled. Parameter Meaning DDNS Service Select a provider (DynDNS or TZO) for Dynamic DNS. User Name Enter the Dynamic DNS user name. You may enter up to 64 alphanumerical characters and symbols. - Page 31 Chapter 4 Configuration Parameter Meaning IP Address Update Period Specifies the period to notify the dynamic DNS service provider of the current IP address. For DynDNS, set it between 0 and 35 days. For TZO, set it between 0 and 99 days. If 0 (zero) days is set, no periodic update is performed.
-
Page 32: Route
Chapter 4 Configuration Route Configure the AirStation’s IP communication route. Parameter Meaning Destination Address Adds a destination IP address and subnet mask to a routing table. Gateway Adds a gateway address to a routing table. Metric The metric is the maximum number of router hops a packet may take on the way to its destination address. -
Page 33: Wireless Config
Chapter 4 Configuration Wireless Config WPS Status and Settings. Parameter Meaning Enable to use WPS automatic configuration. External Registrar Enable to accept the external configure requests from other WPS devices. Note: External configure requests will not be accepted if AOSS is in use. AirStation PIN Displays the PIN code of the AirStation. -
Page 34: Aoss
Chapter 4 Configuration AOSS AOSS Status and Settings. WBMR-HP-GNV2 User Manual... - Page 35 Chapter 4 Configuration Parameter Meaning Initiates AOSS automatic wireless configuration. Click this, then press or click the AOSS button on your AOSS-compatible wireless client. Repeat for additional AOSS clients. Click this button to disconnect AOSS connections. Note: If AOSS connections are disconnected, the SSID and encryption keys will be restored to their most recent settings before using AOSS.
-
Page 36: Basic
Chapter 4 Configuration Basic The screen to configure a basic wireless settings. WBMR-HP-GNV2 User Manual... - Page 37 Chapter 4 Configuration Parameter Meaning Wireless Radio Determines whether to allow wireless communication. If this is unchecked, then no wireless connections will be allowed. Wireless Channel Sets a channel (a range of frequencies) used for wireless connections. With Auto Channel selected, the AirStation will automatically use the best available channel.
- Page 38 Chapter 4 Configuration Parameter Meaning Wireless encryption You may use any of the following types of encryption: No encryption Data is transmitted without encryption. Avoid this option since any communication may be intercepted. [No encryption] can be selected only when [No authentication] is selected for Wireless authentication.
- Page 39 Chapter 4 Configuration Parameter Meaning WPA-PSK (Pre-Shared Key) A pre-shared key or passphrase is the [password] for your wireless connections. There are two different formats for a pre-shared key. Use 8 to 63 alphanumeric characters (case-sensitive) for a [character] (ASCII) passphrase, or use 64 digits using 0 to 9 and a to f (not case- sensitive) for a [hexadecimal] passphrase..
-
Page 40: Advanced
Chapter 4 Configuration Advanced Configure advanced wireless settings. Parameter Meaning BSS Basic Rate Set Set the communication speeds of administrative and communication control frames of the AirStation and wireless devices. Multicast Rate Set the communication speed of multi-cast packets. Reverse Direction Grant For faster wireless communication, you may enable receiving packets while sending packets. -
Page 41: Wmm
Chapter 4 Configuration Set priorities for specific communications. WBMR-HP-GNV2 User Manual... - Page 42 Chapter 4 Configuration Parameter Meaning WMM-EDCA Parameters You don't usually need to change these settings. Using the default settings is recommended. Priority The following priorities may be applied to individual transmission packets: (Highest) 8, (High) 4, (Normal) 2, and (Low) 1. From the queue, these packets are processed in order of priority.
-
Page 43: Mac Filter
Chapter 4 Configuration MAC Filter Restrict access to specific wireless devices. Parameter Meaning Enforce MAC Filtering Enable to restrict wireless connections to devices with registered MAC addresses. Registration List Displays the MAC addresses of registered devices which are permitted to connect wirelessly. [Edit Registration List] Click to add a wireless device to the list of permitted devices. -
Page 44: Security (Router Mode Only)
Chapter 4 Configuration Security (Router Mode only) Firewall (Router Mode only) Configure the AirStation’s firewall. Parameter Meaning Log Output Enable to output a log of firewall activity. Basic Rules Enable to use any of the quick filters. Preconfigured quick filters include: Prohibit NBT and Microsoft-DS Routing When this is enabled, you cannot use the Microsoft network... -
Page 45: Ip Filter (Router Mode Only)
Chapter 4 Configuration IP Filter (Router Mode only) Edit IP filters. Parameter Meaning Log Output If enabled, IP filter activity is saved to a log. Operation Specify how to process target packets. Direction Specify the transmission direction of target packets. IP Address Specify the sender's IP address and receiver's IP address of the target packets. -
Page 46: Vpn Pass Through (Router Mode Only)
Chapter 4 Configuration VPN Pass Through (Router Mode only) Configure IPv6 pass through, PPPoE pass through, and PPTP pass through. Parameter Meaning PPPoE Pass Through Enable to use PPPoE bridge. Using PPPoE bridge lets you automatically obtain an IP address from your provider using the PPPoE protocol from your computer connected to the LAN side because all PPPoE packets can pass through between the Internet and LAN. -
Page 47: Lan Config
Chapter 4 Configuration LAN Config Port Forwarding (Router Mode only) Configure port translation. Parameter Meaning Group Specify a group name for a new rule to belong to. Select [New Group] and enter the new group name in the Group Name field to create a new group. - Page 48 Chapter 4 Configuration Parameter Meaning LAN Side IP Address Enter the LAN side IP address (after translation) for the port translation table entry. LAN Side Port Select the LAN side (after translation) port number (1 - 65535) for the port translation table entry. Port Forwarding Registration Shows current entries in the port translation table.
-
Page 49: Dmz (Router Mode Only)
Chapter 4 Configuration DMZ (Router Mode only) Configure a destination to transfer communication packets without a LAN side destination to. Parameter Meaning IP Address of DMZ Enter the IP address of the destination to which packets which are not routed by a port translation table are forwarded. Note: RIP protocol packets (UDP port number 520) will not be forwarded. -
Page 50: Qos (Router Mode Only)
Chapter 4 Configuration QoS (Router Mode only) Configure the priority of packets sent to the Internet. Parameter Meaning QoS for transmission to the Internet Determine whether or not to prioritize packets sent to the Internet. Check this box to enable QoS. Upload bandwidth Specify the upstream bandwidth in kbps from the AirStation to the internet side. -
Page 51: Admin Config
Chapter 4 Configuration Parameter Meaning destination port Specify a destination port with the value of 1 - 65535. If this field is empty, a random port is selected. priority Select high, medium or low. If packets do not qualify for classification as a type on the list, then their priority is treated as a level between medium and low. -
Page 52: Password
Chapter 4 Configuration Password Configure the password to log in to the AirStation’s configuration screen. Parameter Meaning Administrator Name The Administrator name is used to log in to the AirStation’s configuration utility. This name is fixed as [root]. Administrator Password The password is required to log in. -
Page 53: Time/Date
Chapter 4 Configuration Time/Date Configure the AirStation’s internal clock. Parameter Meaning Local Date You may manually set the date of the AirStation’s internal clock. Local Time You may manually set the time of the AirStation’s internal clock. Time Zone Specify the time zone (offset of Greenwich Mean Time) of the AirStation’s internal clock. -
Page 54: Ntp
Chapter 4 Configuration Configure an NTP server to automatically synchronise the AirStation’s internal clock. Parameter Meaning NTP Functionality Enable to use an NTP server. The default is disabled. NTP Server Enter the name of the NTP server as a host name, host name with domain name, or IP address. -
Page 55: Eco
Chapter 4 Configuration Configure Eco mode from this screen. WBMR-HP-GNV2 User Manual... - Page 56 Chapter 4 Configuration Parameter Meaning Schedule feature Enable to schedule Eco mode. Note: If Schedule is enabled, AOSS will only function while the AirStation is in Normal Operating Mode. Weekly schedule Graphically displays the configured schedule. Register schedule Configure operational mode for time periods in the weekly schedule.
-
Page 57: Access
Chapter 4 Configuration Access Restrict access to the AirStation’s settings screens. Parameter Meaning Log Output Enabling outputs a log of changes to access settings. Prohibit configuration from wireless If enabled, prevents access to settings screens from wirelessly connected devices (only wired devices may configure). Prohibit configuration from wired If enabled, prevents access to settings screens from wired devices (only wirelessly connected devices may configure). -
Page 58: Log
Chapter 4 Configuration Transfer the AirStation’s logs to a syslog server. Parameter Meaning Log Transfer Enable to send logs to a syslog server. Syslog Server Identify the syslog server by host name, host name with domain name, or IP address. You may enter up to 255 alphanumeric characters, hyphens (-), and underscores (_). -
Page 59: Save/Restore
Chapter 4 Configuration Save/Restore Save AirStation settings as a file, and restore from them later. Parameter Meaning Save current settings Clicking [Save] will save the current configuration of the AirStation to a file. If the [Encrypt the configuration file with a password] option is checked, then the configuration file will be password protected with the current Administrator Password. -
Page 60: Initialize/Restart
Chapter 4 Configuration Initialize/Restart Initialize or restart the AirStation. Parameter Meaning Restart Click [Restart Now] to restart the AirStation. Initialize Click [Initialize Now] to initialize and restart the AirStation. WBMR-HP-GNV2 User Manual... -
Page 61: Update
Chapter 4 Configuration Update Update the AirStation’s firmware. Parameter Meaning Firmware Version Displays the current firmware version of the AirStation. Specify Local File Update Method Updates from a firmware file stored on your computer. Automatic Update (On Line Version Up) Automatically updates to the latest firmware available. -
Page 62: Diagnostic
Chapter 4 Configuration Diagnostic System Info View system information for the AirStation. WBMR-HP-GNV2 User Manual... - Page 63 Chapter 4 Configuration Parameter Meaning Model Displays the product name of the AirStation and the firmware version. AirStation Name Displays the AirStation Name. Operational Mode Displays the current operational mode of the AirStation. Internet Displays the information about the Internet port. Displays the information about the LAN port.
-
Page 64: Logs
Chapter 4 Configuration Logs The AirStation’s logs are recorded here. Parameter Meaning Display log info Choose the types of logs to display. Logs Displays the log information recorded in the AirStation. WBMR-HP-GNV2 User Manual... -
Page 65: Packet Info
Chapter 4 Configuration Packet Info View packet transfer information. Parameter Meaning Sent Displays the number of packets sent to the Internet side of Ethernet, the LAN side of the Ethernet, and the LAN side of the wireless connection. Received Displays the number of packets received from the Internet side of Ethernet, the LAN side of the Ethernet, and the LAN side of the wireless connection. -
Page 66: Client Monitor
Chapter 4 Configuration Client Monitor This screen shows devices that are connected to the AirStation. Parameter Meaning Client Monitor Displays information ( MAC address, lease IP address, host name, communication method, wireless authentication and 802.11n) for devices that are connected to the AirStation. WBMR-HP-GNV2 User Manual... -
Page 67: Ping
Chapter 4 Configuration Ping A Ping test checks whether the AirStation can communicate with a specific network device. Parameter Meaning Destination Address Enter an IP address or a host name of the device for which you try to verify the connection, and click [Execute]. The result will be displayed in the [Result] field. -
Page 68: Dsl Connection
Chapter 4 Configuration DSL Connection View DSL Connection for the AirStation. Parameter Meaning DSL Status If a DSL link has been established, technical information about it is shown here. PCV Connection This section reflects settings in the Internet Connection Type and VC settings sections of the Internet/LAN setup panel. -
Page 69: Chapter 5 - Connect To A Wireless Network
PC or Game console (AOSS Devices) • Before using AOSS or WPS to connect to a Buffalo wireless client, install Client Manager software from the included AirNavigator CD. Consult your wireless client’s documentation for more information. • Buffalo’s Client Manager software can be used with the wireless LAN devices built into your computer. -
Page 70: Windows 7/Vista (Client Manager V)
Chapter 5 Connect to a Wireless Network Windows 7/Vista (Client Manager V) If you are using Windows 7/Vista, use the included Client Manager V software to connect wirelessly with AOSS/WPS. Click the icon in the system tray. When the screen at left is displayed, click [Create Profi le]. -
Page 71: Windows Xp (Client Manager 3)
Chapter 5 Connect to a Wireless Network Windows XP (Client Manager 3) If you are using Windows XP, use Client Manager 3 to connect wirelessly with AOSS/WPS. Right click on the icon in the system tray, and select [Profi le]. Click the [WPS AOSS] button. -
Page 72: Manual Setup
Chapter 5 Connect to a Wireless Network Manual Setup You can also connect to the AirStation without installing Client Manager V or Client Manager 3 by using the utility built-in to Windows. The procedure varies depending on which version of Windows you are using. -
Page 73: Windows Vista (Wlan Autoconfig)
Chapter 5 Connect to a Wireless Network Enter the encryption key and click [OK]. Windows Vista (WLAN AutoConfig) With Vista, use WLAN AutoConfig to connect to the AirStation. Right click on the wireless network icon in the system tray. Click [Connect to a network]. When the screen at left is displayed, select the network to connect to and click [Connect]. - Page 74 Chapter 5 Connect to a Wireless Network If the screen below is displayed, click [I want to enter the network key or passphrase instead]. Otherwise, go to step 4. WBMR-HP-GNV2 User Manual...
- Page 75 Chapter 5 Connect to a Wireless Network Enter the encryption key and click [Connect]. Step through the wizard to finish configuration. If the Set Network Location screen is displayed, select [Home], [Work], or [Public location] depending where you’re using the AirStation. WBMR-HP-GNV2 User Manual...
-
Page 76: Windows Xp (Wireless Zero Configuration)
Chapter 5 Connect to a Wireless Network Windows XP (Wireless Zero Configuration) Windows XP includes a built-in utility to connect to your AirStation. Note: If Client Manager 3 is installed on your computer, Wireless Zero Configuration is disabled. Uninstall Client Manager 3 to use Wireless Zero Configuration, or just use Client Manager 3 to connect to the AirStation. -
Page 77: Mac Os X (Airport)
Chapter 5 Connect to a Wireless Network Mac OS X (AirPort) Use AirPort in the Mac OS X to connect to the AirStation. Refer to the label on the side of the AirStation, and make a note of the SSID and KEY printed on the label. -
Page 78: Chapter 6 - Trouble Shooting
Chapter 6 - Trouble Shooting Cannot connect to the Internet over wired connection. • Make sure that your AirStation is plugged in! • Check that the status LEDs of your AirStation are lit as below: Power Green light is ON Green light is ON or OFF (depending on your environment) Internet Green light is ON or flashing... -
Page 79: Cannot Connect To The Network Wirelessly
• Configure your wireless client with the same SSID, encryption type, and encryption key as set on the AirStation. The factory defaults are: SSID - BUFFALO-XXXXXX (the last 6 digits of the AirStation’s MAC address) Encryption Type - WPA/WPA2 mixed mode - PSK (Connect with either WPA-PSK TKIP or WPA2-PSK AES). -
Page 80: Other Tips
How do I enable or modify security encryption settings on the wireless router? Answer: Log in to the configuration utility with your browser. Go to the Wireless Config tab and then select the Security tab. Buffalo recommends WPA for wireless encryption. The passphrase/key should be at least 8 characters in length. Issue:... - Page 81 1 - 11 may be selected. Try the Auto-Channel option if available. Otherwise, manually select an alternate channel and click [Apply]. Issue: Where can I download the latest drivers, firmware and instructions for my Buffalo wireless products? Answer: The latest drivers and firmware are available online at www.buffalotech.com...
-
Page 82: Appendix A - Specifications
Appendix A - Specifications Wireless LAN Interface Standard Compliance IEEE802.11b / IEEE802.11g / IEEE802.11n Transmission Method Direct Sequence Spread Spectrum (DSSS), OFDM, SISO Frequency Range 2,412 - 2,462 MHz (Channels 1 - 11) Transmission Rate 802.11b/g: 54, 48, 36, 24, 18, 12, 9, 6, 11, 5.5, 2, 1 Mbps 802.11n 20 MHz BW (LongGI) 65, 58.5, 52, 39, 26, 19.5, 13, 6.5 Mbps... -
Page 83: Appendix B - Default Configuration Settings
Appendix B - Default Configuration Settings Feature Parameter Default Setting Internet Encapsulation RFC 1483 Bridged Modulation MultiMode Multiplexing QoS Type PCR Rate 0 cps SCR Rate 0 cps Auto Detect Disabled Virtual Circuit 0 VPI 35 VCI IP Settings Obtain an IP Address Automatically Host Name none Domain Name... - Page 84 (Printed on the label of the AirStation) WPS Security Information WPS status: configured or unconfigured SSID: BUFFALO-XXXXXX (the last 6 digits of the AirStation’s MAC address) Security: WPA/WPA2 mixedmode - PSK TKIP/AES mixedmode or none Encryption key: A 13-digit random value or disabled.
- Page 85 Appendix B Default Configuration Settings Feature Parameter Default Setting Advanced BSS Basic Rate Set 1, 2, 5.5, 11 Mbps Multicast Rate 1 Mbps Reverse Direction Grant Enabled DTIM Period Privacy Separator Disabled Output Power 100 % Tx Burst Enabled WMM-EDCA Parameters For AP For STA (Priority AC_BK (Low) )
- Page 86 Appendix B Default Configuration Settings Feature Parameter Default Setting VPN Pass PPPoE Pass Through Disabled Through PPTP Pass Through Disabled (Router Mode only) Port Forwarding Port Forwarding Registration none (Router Mode only) Information IP Address of DMZ none (Router Mode only) UPnP UPnP Enabled...
- Page 87 Appendix B Default Configuration Settings Feature Parameter Default Setting Log Transfer Disabled Syslog Server none Transfer Logs Address Translation, IP Filter, Firewall, PPPoE Client, Dynamic DNS, DHCP Client, DHCP Server, AOSS, Wireless Client, Authentication, Setting Changes, System Boot, NTP Client, and Wired Link WBMR-HP-GNV2 User Manual...
-
Page 88: Appendix C - Tcp/Ip Settings
Appendix C - TCP/IP Settings Windows 7 To configure TCP/IP in Windows 7, follow the procedure below. Click [Start] > [Control Panel] > [Network and Internet]. Click [Network and Sharing Center]. Click [Change Adapter Settings] on the left side menu. Right-click on [Local Area Connection], then click [Properties]. -
Page 89: Windows Vista
Appendix C TCP/IP Settings Windows Vista To configure TCP/IP in Windows Vista, follow the procedure below. Click [Start] > [Settings] > [Control Panel]. Click [Network and Sharing Center]. Click [Manage network connections] on the left side menu. Right-click on [Local Area Connection], then click [Properties]. If the User Account Control screen opens, click [Yes] or [Continue]. -
Page 90: Windows Xp
Appendix C TCP/IP Settings Windows XP To configure TCP/IP in Windows XP, follow the procedure below. Click [Start] > [Settings] > [Control Panel]. Double-click [Network]. Right click on [Local Area Connection], then click [Properties]. Select [Internet Protocol (TCP/IP)], then click [Properties]. To have DHCP set your IP address settings automatically, check [Obtain an IP address automatically] and [Obtain DNS server address automatically]. -
Page 91: Mac Os X
Appendix C TCP/IP Settings Mac OS X To configure TCP/IP in Mac OS X, follow the procedure below. Click [Apple menu] > [System Preferences…]. Click [Network]. Click [Ethernet]. To have DHCP set your IP address settings automatically, select [Using DHCP] in the Configure IPv4 field. -
Page 92: Appendix D - Restoring The Default Configuration
Appendix D - Restoring the Default Configuration With the AirStation powered on, hold down this button for 3 seconds to return it to factory default settings. WBMR-HP-GNV2 User Manual... -
Page 93: Appendix E - Regulatory Compliance Information
Appendix E - Regulatory Compliance Information Federal Communication Commission Interference Statement This equipment has been tested and found to comply with the limits for a Class B digital device, pursuant to Part 15 of the FCC Rules. These limits are designed to provide reasonable protection against harmful interference in a residential installation. - Page 94 Appendix E Regulatory Compliance Information Europe – EU Declaration of Conformity This device complies with the essential requirements of the R&TTE Directive 1999/5/EC. The following test methods have been applied in order to prove presumption of conformity with the essential requirements of the R&TTE Directive 1999/5/EC: EN60950-1: 2006 +A11: 2009 Safety of Information Technology Equipment EN 50385: 2002...
- Page 95 Directive 1999/5/EC. Español [Spanish] Por medio de la presente Buffalo Technology Inc. declara que el AirStation WBMR-HP-GNV2 cumple con los requisitos esenciales y cualesquiera otras disposiciones aplicables o exigibles de la Directiva 1999/5/CE.
- Page 96 Buffalo Technology Inc. declara que este AirStation WBMR-HP-GNV2 está conforme com os requisitos essenciais e outras disposições da Directiva 1999/5/CE. Slovensko [Slovenian] Buffalo Technology Inc. izjavlja, da je ta AirStation WBMR-HP-GNV2 v skladu z bistvenimi zahtevami in ostalimi relevantnimi določili direktive 1999/5/ES. Slovensky [Slovak] Buffalo Technology Inc.
-
Page 97: Appendix F - Environmental Information
Appendix F - Environmental Information • The equipment that you have purchased has required the extraction and use of natural resources for its production. • The equipment may contain hazardous substances that could impact health and the environment. • In order to avoid the dissemination of those substances in our environment and to diminish the pressure on the natural resources, we encourage you to use the appropriate take-back systems. -
Page 98: Appendix G - Gpl Information
Appendix G - GPL Information The source code for Buffalo products that use GPL code is available at http://opensource.buffalo.jp/ . WBMR-HP-GNV2 User Manual... -
Page 99: Appendix H - Warranty Information
Appendix H - Warranty Information Buffalo Technology (Buffalo Inc.) products come with a two-year limited warranty from the date of purchase. Buffalo Technology (Buffalo Inc.) warrants to the original purchaser the product; good operating condition for the warranty period. This warranty does not include non-Buffalo Technology (Buffalo Inc.) installed components.