Honeywell NOTIFIER NFS2-3030 Operation Manual
Fire alarm control panel
Hide thumbs
Also See for NOTIFIER NFS2-3030:
- Programming manual (164 pages) ,
- Manual (77 pages) ,
- Programming and operations manual (46 pages)

Related Manuals for Honeywell NOTIFIER NFS2-3030


Summary of Contents for Honeywell NOTIFIER NFS2-3030
- Page 1 Fire Alarm Control Panel NFS2-3030 Operations Manual Document 52546 11/29/2005 Rev: P/N 52546:A ECN 05-210...
- Page 2 Fire Alarm System Limitations While a fire alarm system may lower insurance rates, it is not a substitute for fire insurance! An automatic fire alarm system—typically made up of Heat detectors do not sense particles of combustion and smoke detectors, heat detectors, manual pull stations, audible alarm only when heat on their sensors increases at a predeter- warning devices, and a fire alarm control panel with remote mined rate or reaches a predetermined level.
- Page 3 Acclimate Plus™, HARSH™, NIS™, Notifier Integrated Systems™, NOTI•FIRE•NET™, and ONYXWorks™ are all trademarks; and FlashScan®, NION®, NOTIFIER®, ONYX®, UniNet®, VeriFire®, and VIEW® are all registered trademarks of Honeywell International Inc. Echelon® is a registered trademark and LonWorks™ is a trademark of Echelon Corporation. ARCNET® is a registered trademark of Datapoint Corporation. Microsoft® and Windows® are registered trademarks of the Microsoft Corporation.
- Page 4 • Your suggestion for how to correct/improve documentation Send email messages to: FireSystems.TechPubs@honeywell.com Please note this email address is for documentation feedback only. If you have any technical issues, please contact Technical Services. NFS2-3030 Operations Manual — P/N 52546:A 11/29/2005...
-
Page 5: Table Of Contents
Table of Contents Section 1: General Information....................7 1.1: UL 864 Compliance............................7 1.1.1: Products Subject to AHJ Approval......................7 1.2: Related Documents ............................7 1.3: About This Manual ............................8 1.4: Introduction to the Control Panel ........................9 1.5: Operating Features............................9 1.5.1: The Display/Keypad ..........................10 The Liquid Crystal Display ........................10 The Keypad ............................10 1.6: Message Formats ............................12... - Page 6 Table of Contents 2.8.1: How the Control Panel Indicates an Active Fire Control Point............36 2.8.2: How the Control Panel Indicates an Active Non-fire Point ..............36 2.9: Operation of Special System Timers, Presignal, and PAS................37 2.9.1: System (Panel) Timers........................37 Alarm Verification Timer (VERIFY TIME) ..................37 AC Fail Delay Timer ...........................37 Silence Inhibit Timer ..........................37 Auto Silence Timer ..........................37...
-
Page 7: Section 1: General Information
Section 1: General Information 1.1 UL 864 Compliance 1.1.1 Products Subject to AHJ Approval This product has been certified to comply with the requirements in the Standard for Control Units and Accessories for Fire Alarm Systems, UL 864 9th Edition. Products that have not received UL 864 9th Edition certification may only be used in retrofit applications. -
Page 8: About This Manual
General Information About This Manual NCM-W/F Installation Document 51533 NCS ONYX™ Network Control Station, Network Version 4.0 & Higher Manual 51658 NCA-2 Network Control Annunciator Manual 52482 NCA Network Control Annunciator Manual 51482 System Components Document Number Annunciator Control System Manual 15842 Annunciator Fixed Module Manual 15048... -
Page 9: Introduction To The Control Panel
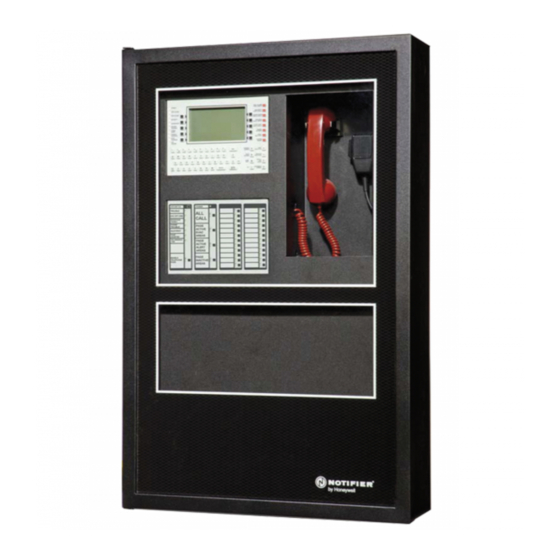
Introduction to the Control Panel General Information NOTE: Information that highlights an important part of the preceding or subsequent text or illustration. 1.4 Introduction to the Control Panel The NFS2-3030 is an intelligent Fire Alarm Control Panel (FACP) with features suitable for most applications. -
Page 10: 1: The Display/Keypad
General Information Operating Features 1.5.1 The Display/Keypad The display/keypad provides an easy-to-use keypad and large LCD (liquid crystal display) that simplifies the programming process. Fixed Status Function LEDs Keys Soft Keys Special Function Keys Figure 1.1 The Display/Keypad The Liquid Crystal Display The display is 40 characters wide by 16 lines. - Page 11 Operating Features General Information the Local Control option is disabled, the panel does not have local control of the Signal Silence, System Reset, and Drill Fixed Function keys, or the SIGNAL SILENCE, SYSTEM RESET, and ACKNOWLEDGE soft keys. These functions must be performed by a remote device preprogrammed for this purpose.
-
Page 12: Message Formats
General Information Message Formats PRINT SCREEN - Press this key to print what is displayed on the display screen. LAMP TEST - Press this key to test the LED indicators on the left of the keypad and the piezo. Pressing the key longer than 5 seconds will display firmware version numbers on the display screen. -
Page 13: 1: System Normal Screen
Message Formats General Information 1.6.1 System Normal Screen The System Normal message appears at the top of the display when no off-normal events exist. It consists of two lines, each 40 characters long. Line one is a custom network message. Line 2 is a standard message giving the System Normal message, the time, day of the week, and date. - Page 14 General Information Message Formats The format of the first line will vary slightly as follows, depending on the type of event.: Event Line 1 F I R E A L A R M Format Displays the type of E L E V A T O R L O B B Y E A S T W I N G (not trouble event, and whether it...
-
Page 15: System Events Format
Navigating Menu and Programming Screens General Information System Events Format When a system trouble occurs, a message is generated to the panel that displays on the top of the LCD screen, and soft keys display available functions that may be used to handle the event. The top four lines contain event information, and are formatted as follows: Line 1 - Displays TROUBLE and whether it... -
Page 16: The Main Menu
General Information The Main Menu Pressing an ACCEPT soft key will save information entered on the screen. It may also return to the previous screen and/or perform other functions as described in the soft key section for each screen. When the panel can not read a specified point (that is, if the point entered on the screen for processing does not exist in the panel’s programming) it will display an error screen for several seconds, then return to the screen where the address was entered. -
Page 17: 2: More Information
The Main Menu General Information Lines six and seven display current counts of off-normal events in six categories. The counts include both acknowledged and unacknowledged events. F I R E A L A R M E L E V A T O R L O B B Y E A S T W I N G F I F T H F L O O R... - Page 18 General Information The Main Menu Display Lines 1 through 4 - Event information Line 5 - Screen title Lines 6 through 9 - The Custom Action Message programmed for the point in alarm Line 10 - blank Line 11 and 14 - These lines exist only for smoke/heat detectors. They do not display for wireless smoke detectors.
-
Page 19: 3: Multiple Event List
The Main Menu General Information Line 14 This value represents the highest percent per foot obscuration reading taken P E A K S : 5 6 % - by this detector. It can be a historical figure, and does not necessarily represent the highest reading for this particular alarm. - Page 20 General Information The Main Menu sequence below it. Press the key again to begin scrolling. If there are no events of the type denoted by the Scroll Display key, pressing the key will have no effect. A C K N O W L E D G E D F I R E A L A R M E L E V A T O R L O B B Y E A S T W I N G F I F T H F L O O R...
-
Page 21: 4: History Display (History Select Screen)
The Main Menu General Information 1.8.4 History Display (History Select Screen) The History Select screen allows the user to select a type of history file to view, and to set time/date or point range viewing parameters. The particular menu items will not appear on the History Display screen if no associated events are in the queue. - Page 22 General Information The Main Menu NFS2-3030 Operations Manual — P/N 52546:A 11/29/2005...
-
Page 23: Section 2: Operation Of The Control Panel
Section 2: Operation of the Control Panel 2.1 Overview The control panel periodically checks for events. An event can be any change in the status of a device, a transfer of information between a device and the FACP, or a transfer of information between two devices. -
Page 24: 2: Acknowledging An Event
Operation of the Control Panel Fire Alarm Event 2.1.2 Acknowledging an Event When the panel detects an off-normal event and the information is displayed on-screen, one of the soft keys displayed on the screen is ACKNOWLEDGE. Use this key to respond to new alarm or trouble signals. -
Page 25: 2: How To Respond To A Fire Alarm
Fire Alarm Event Operation of the Control Panel F I R E A L A R M E L E V A T O R L O B B Y E A S T W I N G F I F T H F L O O R Z 0 0 5 S M O K E ( P H O T O ) 1 1 : 5 8 : 4 5 A W E D A U G 2 4 , 2 0 0 5... -
Page 26: System Or Point Trouble Event
Operation of the Control Panel System or Point Trouble Event 2.3 System or Point Trouble Event 2.3.1 How the Control Panel Indicates a System or Point Trouble A system or point trouble occurs when the control panel detects an electrical or mechanical fault. The panel will react differently depending on whether or not there are higher priority unacknowledged events. -
Page 27: 2: How To Respond To A System Or Point Trouble
System or Point Trouble Event Operation of the Control Panel T R O U B L E D E T E C T O R F A I L E D T E S T E L E V A T O R L O B B Y E A S T W I N G F I F T H F L O O R S M O K E ( P H O T O ) - Page 28 Operation of the Control Panel System or Point Trouble Event POINT TROUBLES TROUBLE TYPE TROUBLE DESCRIPTION ACTION AC FAILURE The main or auxiliary power supply has lost AC power. Determine whether there is an AC power loss or whether the power supply and wiring is correct.
-
Page 29: System Troubles
System or Point Trouble Event Operation of the Control Panel System Troubles A message from the “Trouble Type” column in Table 2.2 will appear in the second line on the left of the panel display when a device trouble occurs. Use this table to help determine the cause of the trouble. -
Page 30: 4: Interpreting Type Id Codes
Operation of the Control Panel Pre-alarm Event SYSTEM TROUBLES TROUBLE MESSAGE TYPE TROUBLE DESCRIPTION NVRAM BATT TROUBLE Battery backup and/or clock backup is low. Replace battery. NO DEV. INST ON L1 No devices are installed on the system. NO POWER SUPPLY INST The AMPS-24 (main power supply) AC fail address (base plus one) has not been correctly entered or the loop is not installed. -
Page 31: 1: How The Control Panel Indicates A Pre-Alarm
Pre-alarm Event Operation of the Control Panel Alert and Action settings are set individually with detector point programming. Individual detector sensitivity threshold settings can have a value of one through nine, and are set by the programmer. A sensitivity threshold setting of zero indicates the detector does not participate in prealarm. For more detailed information on Pre-alarm, refer to this panel’s programming manual. -
Page 32: 3: Interpreting Type Id Codes
Operation of the Control Panel Security Alarm Event Press the SYSTEM RESET soft key if the Pre-alarm message does not clear when the condition causing it is cleared. A subsequent alarm condition for this detector clears the Action indication from the panel display. The soft key PROGRAM/ALTER STATUS is also displayed on this screen. -
Page 33: 2: How To Respond To A Security Alarm
Security Alarm Event Operation of the Control Panel A Typical security message that appears on the panel display: S E C U R I T Y A L A R M E L E V A T O R L O B B Y E A S T W I N G F I F T H F L O O R A R E A M O N I T O R... -
Page 34: Supervisory Signal Event
Operation of the Control Panel Supervisory Signal Event 2.6 Supervisory Signal Event 2.6.1 How the Control Panel Indicates an Active Supervisory The system indicates a Supervisory alarm when a monitor module point programmed with a supervisory Type Code activates. The panel will react differently depending on whether or not there are higher priority unacknowledged events. -
Page 35: 3: How To Interpret Type Codes
Disabled Points Event Operation of the Control Panel Investigate and correct the condition causing the Supervisory. NOTE: A supervisory condition caused by a device with a “tracking” type code automatically clears and restores the panel to normal when the condition causing its activation disappears. Press the SYSTEM RESET soft key to clear any supervisory condition caused by a device with a latching type code: the supervisory will not automatically clear when the condition causing it is cleared. -
Page 36: Active Event
Operation of the Control Panel Active Event • Displays a message for each disabled point, with DISABLED in the upper left corner of the LCD as well as other information about the point D I S A B L E D E L E V A T O R L O B B Y E A S T W I N G F I R S T F L O O R D O O R... -
Page 37: Operation Of Special System Timers, Presignal, And Pas
Operation of Special System Timers, Presignal, and PAS Operation of the Control Panel 2.9 Operation of Special System Timers, Presignal, and PAS 2.9.1 System (Panel) Timers There are user-programmable time delays for four specific functions: Alarm Verification, AC Fail, Silence Inhibit, and Auto Silence. Refer to this panel’s programming manual for instructions on viewing or modifying these values. -
Page 38: How The Panel Indicates A Presignal Alarm
Operation of the Control Panel Operation of Special System Timers, Presignal, and PAS How the Panel Indicates a Presignal Alarm When an initiating device participating in Presignal goes into alarm, the panel LCD displays a fire alarm message. (Refer to Section 2.2, “Fire Alarm Event”, on page 24.) If a second alarm occurs while the Presignal timer is counting down, the control panel aborts the Presignal timer countdown and activates all programmed outputs. -
Page 39: Section 3: Read Status
Section 3: Read Status This section contains instructions and screen illustrations for Read Status functions and menus using the NFS2-3030 display. Read Status allows viewing of detailed device status information without entering a password or halting full fire protection. Information can be viewed while a fire alarm or trouble condition exists. Read Status screens are refreshed periodically with up-to-date information. -
Page 40: Smoke Detector
Read Status Smoke Detector Type Address Format* Special Function Zone NxxxZFxx ZF=Special Function Zone, x=Special Function Zone number (00, 01, 02, 03, 04, 05, 09) Trouble Zone NxxxZTyyy ZT=Trouble Zone, yyy=Trouble Zone number (1-100) DAA Speaker CKT NxxxAyySn N indicates Node number, xxx=DVC/DVC-EM Node number, A indicates DAA-5025 or DAA-5070 Audio Amplifier, yy=DAA address (01 through 32), S indicates Speaker circuit, n = Speaker circuit number (1-4).. - Page 41 Smoke Detector Read Status Line 6 - Line 6 displays two statistics that display for inputs (detectors and modules) and zones; in the above example they are: AUTOMATIC INACTIVE The first field displays the point control. There are three designations that could appear in this field Point Control Description...
-
Page 42: Heat Detector
Read Status Heat Detector 3.3 Heat Detector When a detector address is entered into the Point Select Screen and the ACCEPT soft key is pressed, the following screen will display if the detector is a heat detector. L A K E V I E W G E N E R A L H O S P I T A L S Y S T E M N O R M A L 1 0 : 2 2 : 3 4 A F R I S E P 2 3 , 2 0 0 5... -
Page 43: Control Module
Control Module Read Status Lines 13 and 14 - When a module is monitoring an AMPS-24 or an ACPS-2406, information will appear in these lines in the following format. BATTERY VOLTAGE: 27.9 VOLTS CHARGER CURRENT: 0.0 AMPS Line 15 - The current time and date are displayed in this line. Line 16 - Press to return to the previous screen. -
Page 44: General Zone
Read Status General Zone The device is a control module (an output device) so by referring to the descriptions below, it can be determined that the point is in a normal state. Outputs: (Control Modules) If the point is not in trouble or disabled and the status is Automatic, the display will read: AUTOMATIC AUTOMATIC AUTOMATIC... -
Page 45: Logic Zone
Logic Zone Read Status L A K E V I E W G E N E R A L H O S P I T A L S Y S T E M N O R M A L 1 0 : 2 2 : 3 4 A F R I S E P 2 3 , 2 0 0 5 R E A D A D D R E S S : N 1 2 4 Z 0 6 6 A U T O M A T I C... -
Page 46: Releasing Zone
Read Status Releasing Zone 3.8 Releasing Zone When a releasing zone address is entered into the Point Select Screen and the ACCEPT soft key is pressed, the following screen will display: L A K E V I E W G E N E R A L H O S P I T A L S Y S T E M N O R M A L 1 0 : 2 2 : 3 4 A F R I S E P 2 3 , 2 0 0 5... -
Page 47: Special Function Zone
Special Function Zone Read Status 3.9 Special Function Zone When a special function zone address is entered into the Point Select Screen and the ACCEPT soft key is pressed, the following screen will display: L A K E V I E W G E N E R A L H O S P I T A L S Y S T E M N O R M A L 1 0 : 2 2 : 3 4 A F R I S E P 2 3 , 2 0 0 5... -
Page 48: Annunciator
Read Status Annunciator 3.11 Annunciator When an annunciator address is entered into the Point Select Screen and the ACCEPT soft key is pressed, the following screen will display if the point is a monitor module. L A K E V I E W G E N E R A L H O S P I T A L S Y S T E M N O R M A L 1 0 : 2 2 : 3 4 A F R I A P R 2 2 , 2 0 0 5... -
Page 49: Daa Speaker Circuit
DAA Speaker Circuit Read Status 3.12 DAA Speaker Circuit When a DAA Speaker circuit address is entered into the Point Select Screen and the ACCEPT soft key is pressed, the following screen will display. L A K E V I E W G E N E R A L H O S P I T A L S Y S T E M N O R M A L 1 0 : 2 2 : 3 4 A F R I A P R 2 2 , 2 0 0 5... - Page 50 Read Status PAM Points MAPPED LOGIC EQUATION: - The logic equation associated with this PAM point is displayed here, or NONE if there is no associated equation. WALK TEST: - The screen will display the PAM point’s programmed setting for Walk Test participation (Yes or No).
-
Page 51: Section 4: Viewing And Printing History Information
Section 4: Viewing and Printing History Information The control panel maintains a history file of alarm, trouble, supervisory, and security events, each with a time/date stamp. An alarm history is maintained in a buffer that can include up to 1000 events. -
Page 52: Time And Date Range Selection For All Events
Viewing and Printing History Information Time and Date Range Selection for All Events Lines 8 through 11 give more information about the event. Refer to Section 1.6.2, “Event Reporting Format”, on page 13 for an explanation of these fields. Soft Keys NEXT EVENT - Press to view next event (In the above example, event 005 of 017). -
Page 53: Point Range Select For All Events In Range
Point Range Select for All Events in Range Viewing and Printing History Information ACCEPT: - When entries are made, press this soft key to proceed to the All Events in Interval Screen. All Events in Interval Screen This screen is the same as the Event History screen, except for its title. Refer to Figure 4.1 on page 51. 4.3 Point Range Select for All Events in Range Pressing the Point Range soft key on the Local History Select screen displays the Point Range Select screen. - Page 54 Viewing and Printing History Information Point Range Select for All Events in Range EVENT TYPE: - Press this soft key to scroll through the following: ALL EVENTS, ALARMS ONLY, TROUBLES ONLY, SUPERVISORY ONLY, SECURITY ONLY, OTHER ONLY. Stop scrolling at the desired event type. ACCEPT: - When entries are made, press this soft key to proceed to the All Events in Range Screen.
-
Page 55: Section 5: Printing Reports
Section 5: Printing Reports A variety of reports can be generated and printed from the NFS2-3030. Reports listing all event, alarm, trouble, supervisory, or security history can be generated from the history screens in Section 4, “Viewing and Printing History Information”, on page 51. The following section describes how to print programming, Walk Test, and active point information. -
Page 56: Print Programming Menu Screen
Printing Reports Print Programming Menu Screen DETECT MAINTENANCE REPORT: Press this soft key to print a list from the printer connected to the control panel that contains the detector maintenance status for each installed addressable detector. The report looks like this: ******DETECTOR MAINTENANCE****************************************************** NORMAL SMOKE(LASER) Detector L01D001 000330us 000340us... - Page 57 Print Programming Menu Screen Printing Reports P R I N T P R O G R A M M I N G M E N U N E T W O R K P A R A M E T E R S L C D D I S P L A Y P A N E L S E T T I N G P A N E L T I M E R S...
-
Page 58: Print Programming Menu Screen (2)
Printing Reports Print Programming Menu Screen (2) 5.3 Print Programming Menu Screen (2) The second PRINT PROGRAMMING MENU screen displays when MORE is pressed at the first PRINT PROGRAMMING MENU screen: P R I N T P R O G R A M M I N G M E N U S U P E R V I S I O N E V E N T L O G G I N G L O G I C E Q U A T I O N S... -
Page 59: Active Points Report Screen
Active Points Report Screen Printing Reports 5.4 Active Points Report Screen This screen displays when the ACTIVE POINTS soft key is pressed on the PRINTER FUNCTIONS screen (refer to Figure 5.1 on page 55). L A K E V I E W G E N E R A L H O S P I T A L S Y S T E M N O R M A L 1 0 : 2 2 : 3 4 A F R I S E P 2 3 , 2 0 0 5 4... - Page 60 Printing Reports Installed Points Report Screen Soft Keys SLC POINTS:Press to print information on installed SLC points. When the soft key is pressed, a field appears to allow choice of a single SLC or ALL. Toggle until the desired choice appears in the field, then press ACCEPT.
- Page 61 Installed Points Report Screen Printing Reports ACS: Press to print information on the device types for addresses 1-32. The report looks like this: Point function Mapped point ACS point column column address column ******INSTALLED POINTS********************************************************** BOARD 01: 64PT POINT 01: ACKNOWLEDGE A01.01 POINT 02: SILENCE...
- Page 62 Printing Reports Installed Points Report Screen RANGE: Press to bring up the following screen, which allows the programmer to choose a range of installed points to print. I N S T A L L E D P O I N T S M E N U S T A R T P O I N T : L O 1 D 0 0 1 ( D E T E C T O R )
-
Page 63: Appendix A: Software Type Id Codes
Appendix A: Software Type ID Codes A.1 Alphabetical List The following chart lists NFS2-3030 Type ID codes in alphabetical order. These codes are assigned during programming based on the types and functions of the devices they are assigned. The codes appear in point message formats. - Page 64 Software Type ID Codes Alphabetical List Software Type ID Code Device NONRESET CTL Output unaffected by “System Reset” command PAS INHIBIT Monitor used to inhibit Positive Alarm Sequence (PAS) POWER MONITR Monitor for main and auxiliary power supplies PULL STATION Manual fire-alarm activating device REL AUDIBLE Activates audio or visual devices steady when releasing starts...
- Page 65 Alphabetical List Software Type ID Codes NFS2-3030 Operations Manual — P/N 52546:A 11/29/2005...
- Page 66 Software Type ID Codes Alphabetical List NFS2-3030 Operations Manual — P/N 52546:A 11/29/2005...
-
Page 67: Appendix B: Releasing Zones
Appendix B: Releasing Zones B.1 Introduction The control panel provides ten Releasing Zones (ZR00-ZR09). These are special zones that can be used for up to ten independent releasing operations. This section contains descriptions of each releasing function option and an example of how Releasing Zone options work. For instructions on programming Releasing Functions, refer to this panel’s programming manual. -
Page 68: B.2: How Releasing Zones Operate
Releasing Zones How Releasing Zones Operate B.2 How Releasing Zones Operate The figure below contains an illustrated example of how Releasing Zones work, using cross zone selections with four detectors and an NAC mapped to Releasing Zone 1 (listed as ZR01 in the zone map). - Page 69 How Releasing Zones Operate Releasing Zones Cross Zone Selection Condition(s) Required to Activate the Releasing zone (Cross=) Cross=ZONE An alarm from two detectors mapped to different Software Zones, but mapped to the same Releasing Zone. • An alarm from L02D101 and L02D103 – detectors mapped to different zones, but both list ZR01 in their zone map.
- Page 70 Releasing Zones How Releasing Zones Operate NFS2-3030 Operations Manual — P/N 52546:A 11/29/2005...
-
Page 71: Index
Index DCC, see Display and Control Center Delay Timer 67 Abort 67 Detector AC Fail Delay Timer 37 Action/Status display 18 Setting report 57 Address format 39 ACCEPT soft key 16 Co-operative Multi-alarm Sensing 19 Acknowledge Heat Detector Read Status 42 An Event 24 Peaks display 19 Block and point 24... - Page 72 G–P Index tion key 11 See also Monitor Module 42 Firmware version numbers, to view 12 Monitor Module Fixed Function Keys, functions of 11 Read Status 42 Multiple Event List 19 General Zone Address format 39 Navigating menu and programming screens 15 Read Status 44 Network parameters report 57 General Zones Installed Points Report 60...
- Page 73 Index R–S Pre-alarm Settings 57 Action 30 Supervision 58 Alert 30 Timers 57 How to respond 31 Reports 55 latching 30 Resound, see Panel Resound non-latching 30 Panel indications 31 Presignal 37 Security Alarm How to respond 38 How to respond 33 Panel Indication 38 Panel indications 32 Primary Zone...
- Page 74 T–Z Index Panel indication 26 System Troubles 29 Time & Date Range selection, all events 52 Timers - See System (Panel) Timers 57 Trouble - See System or Point trouble 27 TROUBLE SCROLL/DISPLAY fixed function key 11 Trouble Zone Address format 40 Read Status 47 Trouble Zones Installed Points Report 61 Type ID codes, see Software Type ID codes 63...
- Page 75 Limited Warranty NOTIFIER® warrants products manufactured by it to be free from defects in materials and workmanship for eighteen (18) months from the date of manufacture, under normal use and service. Products are date stamped at time of manufacture. The sole and exclusive obligation of NOTIFIER®...
- Page 76 World Headquarters NOTIFIER is a Honeywell company. 12 Clintonville Road Northford, CT 06472-1653 USA 203-484-7161 fax 203-484-7118 www.notifier.com...