Table of Contents
Advertisement
Quick Links
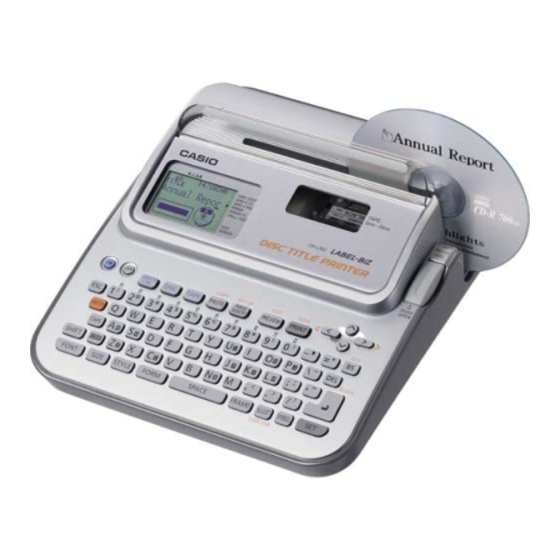
CW-L300
Startup Guide
We recommend that you print on a disc* before you record anything
on it. Printing on a disc that already has data recorded on it can
cause the data to become corrupted.
Note that CASIO COMPUTER CO., LTD. shall not be held liable for
any loss or corruption of data on discs arising through the use of this
printer.
* CD-R, CD-RW, DVD-R, etc.
Be sure to read the Safety Precautions contained in the User's Guide before
trying to use the printer for the first time, and always keep this manual on hand
for future reference.
RJA514733-9
E
Advertisement
Table of Contents

Related Manuals for Casio RJA514733-9


Summary of Contents for Casio RJA514733-9
- Page 1 Printing on a disc that already has data recorded on it can cause the data to become corrupted. Note that CASIO COMPUTER CO., LTD. shall not be held liable for any loss or corruption of data on discs arising through the use of this printer.
- Page 2 Connect the equipment into an outlet on a circuit different from that to which the receiver is connected. Consult the dealer or an experienced radio/TV technician for help. Caution: Changes or modification to the product not expressly approved by CASIO could void the user’s authority to operate the product. FCC WARNING Changes or modifications not expressly approved by the party responsible for compliance could void the user’s authority to operate the equipment.
-
Page 3: Table Of Contents
Read This First! CASIO COMPUTER CO., LTD. shall not be held liable for any loss or claims by you or any other person or entity that may arise through the use of this printer. Reproduction of this manual in any form, either in part or its entirety, is forbidden without the express permission of CASIO COMPUTER CO.,... -
Page 4: Cw-L300 Printer Features
CW-L300 Printer Features The CW-L300 makes it possible to print on both discs and on tape without connecting to a computer or installing any special software. DISC Mode A selection of illustrations and fonts makes labels stylish and informative. You can even create labels for your disc cases. - Page 5 TAPE Mode Powerful features and functions simplify printing of cassette tape labels, name tags, and just about any other type of label imaginable.
-
Page 6: General Guide
Print Head Release Button Hole Perform the following steps to release the print head when you cannot remove a disc from the printer due to printer malfunction. Normally, you should not use the following procedure to release the print head. Use this... - Page 7 Press down on the cassette cover until you hear it click securely closed. Important! Take care when opening and closing the cassette cover, and never try to force it past its normal range of movement. Excessive force creates the risk of malfunction of and damage to the printer.
- Page 8 Should the cassette cover or positioning guide become detached from the printer, replace it as shown in the illustrations below. Take care to avoid apply- ing excessive force to the hinges on the cassette cover and tabs on the guide.
-
Page 9: Power Requirements
Power Requirements You can run the printer by using its bundled AC adaptor to plug it into a power outlet. It can also run on commercially available alkaline batteries. For information about loading alkaline batteries, see page 57 of the User’s Guide. -
Page 10: Initializing Printer Memory
Be sure to take the printer to your retailer or your nearest CASIO service center to have the memory backup battery replaced before the replacement date is reached. -
Page 11: Powering Up And Selecting A Printing Mode
Powering Up and Selecting a Printing Mode Turning the printer on and off is as simple as pressing a button. After the printer powers up, you will need to select the type of operation you want to perform. Select the DISC mode to print on a disc. Select the TAPE mode when you want to print tape labels. -
Page 12: Mode Selection Basics
The illustration below shows operation for the DISC mode only. Operation in the TAPE mode is identical. To display text that was on the display when you last turned off the printer (LAST DATA) Data that was displayed when printer was turned off To input new label text •... -
Page 13: Loading And Removing An Ink Ribbon Cassette
An ink ribbon cassette is required when printing disc labels. You should use only the special ink ribbon cassettes that are specified for this printer. If you plan to print a tape label for a disc case, you need to load a tape cartridge. -
Page 14: To Remove The Ink Ribbon Cassette
To remove the ink ribbon cassette Press to turn off the printer. Press the cassette cover release and open the cover. Grasping both sides of the adaptor, lift it straight up. Remove the ink ribbon cassette from the adaptor. -
Page 15: Loading And Removing A Tape Cartridge
Check to make sure there is no slack in the ink ribbon. Ink ribbon Important! Loading the tape cartridge into the printer while the ink ribbon is slack can cause the ink ribbon to break, creating the risk of malfunction. Removing Slack from an Ink Ribbon... -
Page 16: To Remove The Tape Cartridge From The Printer
Press down on the cassette cover until you hear it click securely into place. After loading the tape cartridge in the printer, never pull on the tape or try to push the tape back into the cartridge. To remove the tape cartridge from the printer Press Press the cassette cover release and open the cover. -
Page 17: Using The Printer's Keys
Using the Printer’s Keys 5 6 7 Press to print data created on a computer. Press to enter the DISC mode. Press to enter the TAPE mode. COPY Press to store and recall often-used words and phrases. Press to preview the label you are currently creating. -
Page 18: Display Symbols And Indicators
Display Symbols and Indicators Before actually using the printer, you should first take some time to become acquainted with the symbols and indicators used on the label printer display. Note that display contents are different in the DISC mode and in the TAPE mode, but some indicators are common to both modes. - Page 19 DISC Mode Symbols and Indicators cursor 1 Label format Shows the format of the label being created. 2 Auto format indicator This indicator appears when Auto Format is enabled. 3 Text area This is where text appears during input and editing. 4 Character count These values indicate the character count as shown below 13/24 CHR...
-
Page 20: Label Printing Basics
Disc Label Printing General Procedure Connect the AC adaptor (Page 7). Or load batteries into the printer. (Page 57 of the User’s Guide) Load an ink ribbon cassette (Page 11). If you plan to also print a disc case label, load a tape cartridge (Page 13). - Page 21 A LAST DATA icon will also appear on the Main Menu if there is input data left over from the last time you used the printer. See page 10 for more information. to select DISC, and then press SET.
- Page 22 Note It is recommended that you print on a disc before you record anything on it. Note that CASIO COMPUTER CO., LTD. will not be held responsible for any data that is lost during printing. Before printing, be sure to check the “Printing Precautions” and make sure the disc you are about to print on is acceptable.
- Page 23 Adjust the position of the disc so its logo or marking is parallel with the positioning guide and slit. Note that the printer cannot print in an area of the disc that already has a logo or other markings. You can skip this step if the disc you are using does not have a logo or other markings on it.
- Page 24 Note It is recommended that you print on a disc before you record anything on it. Note that CASIO COMPUTER CO., LTD. will not be held responsible for any data that is lost during printing. Before printing, be sure to check the “Printing Precautions” and make sure the disc you are about to print on is acceptable.
-
Page 25: Tape Mode
Mode to print on label tape. Tape Label Printing General Procedure Connect the AC adaptor (Page 7). Or load batteries into the printer (Page 57 of the User’s Guide). Load a tape cartridge (Page 13). Select the TAPE Mode (Page 23). - Page 26 This causes the contents of the label to scroll on the display. Note that the above step cannot be performed if you do not have a tape cartridge loaded in the printer. To pause scrolling of the label contents at any point, press SET.
- Page 27 Never open the cassette cover while the printer is performing a print operation. Do not touch the tape coming out of the printer until it is cut automatically or until printing is complete. Before printing, make sure that the tape cartridge has enough tape left to finish the print operation.
- Page 28 After printing is complete, press FUNCTION CUT. Important! Make sure that the printer is level when performing a tape cut operation. Also, do not pull on the tape or open the cassette cover. To exit the printing operation When the screen shown above is on the display, use EXIT, and then press SET twice.
- Page 29 CASIO Europe GmbH Bornbarch 10, 22848 Norderstedt, Germany...
- Page 30 CASIO COMPUTER CO., LTD. 6-2, Hon-machi 1-chome Shibuya-ku, Tokyo 151-8543, Japan MO0503-B Printed in China/Imprimé en Chine...