Table of Contents
Advertisement
Quick Links
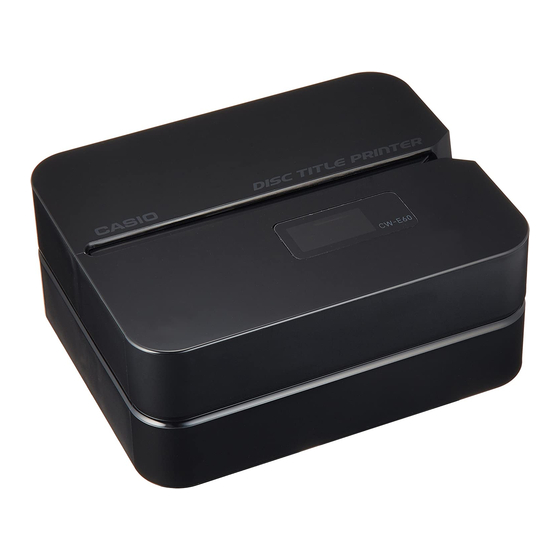
CW-E60
In addition to CW-E60 operating precautions, these instructions
also include information about installing the software that comes
bundled with the CW-E60 and how to connect it to your computer.
For information about using the bundled software, see the
documentation on the CD-ROM that comes with the CW-E60.
Be sure to read the Safety Precautions contained in this manual
before trying to use the printer for the first time, and always
keep this manual on hand for future reference.
• CASIO COMPUTER CO., LTD. shall not be held liable for any loss or
claims by you or any other person or entity that may arise through the
use of this product.
• Reproduction of this manual in any form, either in part or its entirety, is
forbidden without the express permission of CASIO COMPUTER CO.,
LTD. You are granted permission to use this software for your own personal
use. Any and all other use of this software without the express permission
of CASIO COMPUTER CO., LTD. is forbidden under international
copyright laws.
• The contents of the manual are subject to change without notice.
• We recommend that you print on a disc* before you record anything on
it. Printing on a disc that already has data recorded on it can cause the
data to become corrupted.
• Note that CASIO COMPUTER CO., LTD. shall not be held liable for any
loss or corruption of data on discs arising through the use of this printer.
* CD-R, CD-RW, DVD-R, etc.
RCA502822-001V01
User's Guide
– 1 –
E
MO0603-B
Advertisement
Table of Contents

Related Manuals for Casio CW-E60


Summary of Contents for Casio CW-E60
- Page 1 • CASIO COMPUTER CO., LTD. shall not be held liable for any loss or claims by you or any other person or entity that may arise through the use of this product.
- Page 2 • Adobe and Adobe Acrobat are trademarks of Adobe Systems Incorporated. • Other company and product names used herein may also be company and product names of others. © Copyright 2006 CASIO COMPUTER CO., LTD. All rights reserved – 2 –...
- Page 3 • Consult the dealer or an experienced radio/TV technician for help. Caution: Changes or modification to the product not expressly approved by CASIO could void the user’s authority to operate the product. Changes or modifications not expressly approved by the party responsible for compliance could void the user’s authority to operate the equipment.
-
Page 4: Safety Precautions
Safety Precautions Thank you for purchasing this quality CASIO product. Before using it, be sure to read the following Safety Precautions. Keep the manual in a convenient location for future reference when necessary. - Page 5 Smoke, abnormal odor, overheating, and other abnormalities Continued use of the product while it is emitting smoke or strange odor, or overheating creates the risk of fire and electric shock. Immediately perform the following steps whenever any of the above symptoms are present.
- Page 6 Dropping and rough treatment Continued use of the product after it has been damaged due to dropping or other rough treatment creates the risk of fire and electric shock. Immediately perform the following steps if the product should ever become damaged.
- Page 7 • Plug in the power cord into the wall outlet as far as it will go. • Plug in the USB cable into the computer and the printer as far as it will • Before leaving the product unattended for long periods (such as when you go on a trip), unplug the power cord and USB cable.
-
Page 8: Operating Precautions
"Caring for the Printer" explanation on page 24. • Using the printer in a location where it is exposed to direct sunlight or other strong light can cause malfunction of its photo sensor. Use the printer in a location where it is not exposed to strong light. -
Page 9: User Documentation
CW-E60 Printer AC adaptor (AD-2105S) Positioning guide User Documentation The CW-E60 comes with the two types of user documentation described below. Printed Documentation 1 CW-E60 User’s Guide (this manual) PDF File Documentation (CD-ROM) 2 DISC TITLE PRINTER Application User’s Guide... -
Page 10: About The Bundled Cd-Rom
About the Bundled CD-ROM Handling Precautions • When handling the disc, avoid getting finger smudges, dirt, scratches, etc. on either of its surfaces. • Should the disc become dirty, use an eyeglass cleaning cloth or some other soft cloth to wipe it lightly from the center of the disc outwards towards its edge. Never use phonograph record cleaner or any other cleaning agent. -
Page 11: Minimum System Requirements
Minimum System Requirements OS: Microsoft® Windows® XP, 2000 Professional, Me, 98SE, or 98 (English/French/German/Italian/Spanish Version) Computer: IBM PC/AT with the following specifications. • Windows XP, 2000 Professional, Me, 98SE, or 98 pre-installed • Pentium®II 266MHz or higher CPU or CPU recommended for running the OS you are using. -
Page 12: Installing The Software
To Install Software Important! • Be sure to install the software before you connect the printer to your computer. Connecting before you install the software can result in improper operation. • Make sure you quit all other anti-virus and other applications running on your computer before starting installation. - Page 13 To install the printing software The examples in this manual show installation from a CD-ROM drive named drive D:. Start up Windows, and place the DISC TITLE PRINTER SOFTWARE CD-ROM into your computer’s CD-ROM drive. The installer should start up automatically, and display the screen shown below.
- Page 14 Click Finish. Check to make sure that everything was installed correctly. • DISC TITLE PRINTER Application: If you installed this application following the above steps, there should be a DISC TITLE PRINTER shortcut icon on your Windows desktop. – 14 –...
-
Page 15: Installing Adobe Reader
Your computer must have Adobe Reader or Acrobat Reader 4.0 or higher installed in order to view the PDF file user documentation for the DISC TITLE PRINTER. If your computer does not have one of these readers installed, perform the following proce- dure to install Adobe Reader 6.0 from the CD-ROM. - Page 16 To Read the Contents of a Manual in a PDF file Place the CD-ROM that comes with the printer into the CD drive of your computer. When the installer screen for the printing software appears, click Cancel to cancel it.
-
Page 17: General Guide
Slide the disc to be printed into the slit. Print Head Release Lever Hole – 17 – Indicator lamp • Lights when the printer is connected correctly to a PC. • Flashes when printing is in progress. USB port Connect the bundled USB cable here when connecting to your PC. - Page 18 1. Insert a thin object* into the hole and slide in the direction indicated by the arrow. • This will cause the print head to release the disc so you can remove it from the printer. 2. The release lever will return to its original position automatically.
-
Page 19: Connecting To Your Computer
• Perform the following procedures only after you have installed the software on your computer. • Use only the USB cable that comes bundled with the printer. To Connect to Your Computer Connect the power cord to the AC adaptor. -
Page 20: Installing The Usb Driver
Installing the USB Driver A USB driver installation Wizard starts up automatically the first time you con- nect the printer to your computer after installing the DISC TITLE PRINTER ap- plication. Follow the instructions that appear on the display to install the USB driver. -
Page 21: Disconnecting From A Computer
Unplug the power cord from the wall outlet (1), and then unplug the AC adaptor from the printer (2). Important! • Never disconnect the AC adaptor, power cord, or USB cable while a print operation is in progress. Doing so creates the risk of printer malfunction. – 21 –... -
Page 22: Loading And Removing An Ink Ribbon Cassette
Loading and Removing an Ink Ribbon Cassette An ink ribbon cassette is required when printing disc labels. You should use only the special ink ribbon cassettes that are specified for this printer. To load the ink ribbon cassette Open the cassette cover. -
Page 23: To Remove The Ink Ribbon Cassette
Load the ink ribbon cassette into the printer. • Make sure that the ink ribbon passes between the print head the rubber roller as shown in the illustration below. Press down on the ink ribbon cassette until you hear them click securely into place. -
Page 24: Caring For The Printer
Inserting a Disc into the Printer See the DISC TITLE PRINTER Application User's Guide for information about how to insert a disc into the printer for printing and how to use the positioning guide. Caring for the Printer A dirty print head can make it impossible to obtain good printing results. Perform the following steps to clean the print head when it becomes dirty. -
Page 25: Troubleshooting
Consult this troubleshooting guide whenever you start to have problems with the printer. If you cannot find the solution to your problem below, contact your original retailer. Symptom I can't get a The bundled USB cable connection or the AC adaptor is not between the connected properly. - Page 26 17. Remove the disc and then re- insert it straight into the left side of the slit along the top of the printer. (See the DISC TITLE PRINTER Application User's Guide) Refer to the "General Guide" explanation on page 17.
-
Page 27: Specifications
Model: CW-E60 Printing Resolution: 200dpi Approximate Speed: 8mm per second Print System : Thermal transfer Print Width : Approximately 16mm Print Length : Approximately 74mm Actual printing speed depends on printing environment, conditions, etc. Power Supply Power Requirements : AC adaptor (AD-2105S) - Page 28 CASIO Europe GmbH Bornbarch 10, 22848 Norderstedt, Germany This mark applies in EU countries only. CASIO COMPUTER CO., LTD. 6-2, Hon-machi 1-chome Shibuya-ku, Tokyo 151-8543, Japan – 28 –...