AEG COOKER HOOD CHDF 6260 Operating And Installation Instructions
Aeg ventilation hood user manual
Hide thumbs
Also See for COOKER HOOD CHDF 6260:
- Operating and installation manual (22 pages) ,
- Operating and installation instructions (21 pages) ,
- Operating and installation manual (21 pages)
Table of Contents
Advertisement
Available languages
Available languages
Advertisement
Chapters
Table of Contents

Related Manuals for AEG COOKER HOOD CHDF 6260


Summary of Contents for AEG COOKER HOOD CHDF 6260
- Page 1 CHDF 6260 DF 6260 DF6260-ml/1 DF 6160 Dunstabzugshaube Afzuigkap Hotte Cooker Hood Montage- und Gebrauchsanweisung Installatie- en gebruiksaanwijzing Notice d’utilisation et d’installation Operating and Installation Instructions...
- Page 2 Seiten. Bewahren Sie bitte diese Benutzerinformation zum späteren Nachschlagen auf. Geben Sie sie an eventuelle Nachbesitzer des Gerätes weiter. AEG DIRECT • INFO SERVICES 0180 - 555 45 Hier erhalten Sie Antwort auf jede Frage, die die Ausstattung und den Einsatz Ihres Gerätes betrifft.
-
Page 3: Table Of Contents
Inhalt Sicherheitshinweise für den Benutzer für den Küchenmöbel-Monteur Allgemeines Abluftbetrieb Umluftbetrieb Gerätebeschreibung Bedienung der Dunsthaube Wartung und Pflege Metallfettfilter Öffnen der Metallfettfilter Aktivkohlefilter Austausch der Glühlampe(n) Reinigung Sonderzubehör Kundendienst Technische Daten Zubehör/Montagematerial Elektroanschluß Installation... -
Page 4: Sicherheitshinweise
Sicherheitshinweise für den Benutzer • Es muß darauf geachtet werden, daß Kochstellen bei Betrieb stets abgedeckt sind, damit nicht durch zu starke Hitzeentwicklung das Gerät beschädigt wird. Unbedingt zu vermeiden sind offene Feuerstellen bei Öl-, Gas- und Kohleherden. • Außerdem ist beim Fritieren über einem Herd/Mulde das zum Fritieren verwendete Gerät während des Betriebes zu beaufsichtigen. - Page 5 • Bei gleichzeitigem Betrieb von Dunstabzugshaube im Abluftbetrieb und Feuerstätten darf im Aufstellraum der Feuerstätte der Unterdruck nicht größer als 4PA (4x10 • Die Abluft darf nicht in einen Rauch- oder Abgasschornstein eingeleitet werden. Das Einleiten der Abluft in einen Schacht, der der Entlüftung von Aufstellungsräumen von Feuerstätten dient, ist nicht zulässig.
-
Page 6: Allgemeines
Einsatz eines Aktivkohlefilters (Sonderzubehör) als Umluftgerät verwendet werden. • Für den Umluftbetrieb wird der Original Aktivkohlefilter KLF 60/80 aus dem AEG Sonderzubehör benötigt. Abluftbetrieb • Die Luft wird mit Hilfe eines Rohres ins Freie geleitet. • Das Abluftrohr muß bei Abluftbetrieb denselben Durchmesser wie der Gebläseaustrittsstutzen haben, um die spezifizierten... -
Page 7: Bedienung Der Dunsthaube
Bedienung der Dunstabzugshaube • Die Schiebeschalter sind auf der rechten Oberseite des Auszugsteiles angeordnet (Bild 1 - E). Die einzelnen Zahlen und Symbole haben folgende Bedeutung (von links nach rechts): DF 6260 - CHDF 6260 = stufenlose Gebläseregelung = Intensivstufe = Beleuchtung = Beleuchtung Aus = Beleuchtung Ein... -
Page 8: Wartung Und Pflege
Wartung und Pflege • Bevor irgendwelche Wartungsarbeiten ausgeführt werden, muß die Dunstabzugshaube vom Stromnetz getrennt werden. Metallfettfilter • Die Metallfettfilter haben die Aufgabe, die Fettpartikel, die beim Kochen entstehen, aufzusaugen und werden in jedem Fall, d.h. sowohl bei Abluft- als auch bei Umluftbetrieb, verwendet. Die Metallfettfilter sollten alle 4 Wochen im Geschirrspüler bzw. -
Page 9: Aktivkohlefilter
Reinigungsmittel, Bürste oder Scheuersand verwenden). • Bei Bestellung eines Ersatzfilters die Modellbezeichnung und die E- Nr. angeben. Diese Daten sind auf dem Typenschild an der Innenseite des Gerätes zu finden. • Der Aktivkohlefilter kann beim AEG- Kundendienst bestellt werden. Bild 3... -
Page 10: Austausch Der Glühlampe(N)
Achtung • Nichtbeachtung dieser Anweisungen zur Reinigung des Gerätes und zum Wechsel bzw. zur Reinigung der Filter kann zum Brand führen. Diese Anweisungen sind unbedingt zu beachten! • Der Hersteller übernimmt keine Haftung für irgendwelche Schäden am Motor oder aus Feuergründen, die auf eine unsachgemäße Wartung oder Nichteinhaltung der oben angeführten Sicherheitsvorschriften zurückzuführen sind. -
Page 11: Reinigung
Frontblende AL BF6060-al Mauerkasten Abluftrohr Wandabschlußleiste * Clipse* zur Befestigung der Wandanschlußleiste (3xbestellen) * ET-NR. nur über den AEG-Kundendienst beziehbar E-Nr. 942 118 648 942 120 646 942 120 647 Beim Kundendienst erfragen Beim Kundendienst erfragen ET-NR.: 502 426 420 02... -
Page 12: Kundendienst
Kundendienst Bei eventuellen Rückfragen und Störungen Kundendienst anrufen (siehe Kundendienst-Stellenverzeichnis). Folgende Daten beim Anruf angeben: 1. Modellbezeichnung 2. E-Nr. 3. F-Nr. Diese Daten befinden sich auf dem Typenschild auf der Innenseite des Gerätes hinter den Fettfiltern. Konstruktions- und Farbänderungen im Rahmen der technischen Entwicklung bleiben vorbehalten. -
Page 13: Technische Daten
Technische Daten Modell Maße: Höhe x Breite x Tiefe (in cm) Gesamtanschlußwerte: Lüftermotor: Beleuchtung: Länge des Netzkabels: Elektroanschluß: Zubehör/Montagematerial 1 Abluftstutzen: Ø 150 mm (DF 6260 - DF 6260-ml/1 und CHDF 6260), Ø 120 mm (DF 6160) 1 Reduzierstutzen: Ø 125-120 mm (DF 6260 - DF 6260-ml/1), Ø 125-110-100 mm (DF 6160) 1 Luftumlenkgitter 2 Holzschrauben 2,9 x 22 mm 4 Holzschrauben 4,5 x 16 mm... -
Page 14: Installation
Installation Vorbereitung Oberschrank- Abluft/Umluft • Die Dunstabzugshaube wird werksseitig für die Inbetriebnahme Abluft nach oben angeliefert. Vor der Montage der Haube, ein Loch oben in den Oberschrank schneiden (siehe Bild 5). Das Loch dient zur Durchführung des Stutzens, des Kabels und für Kundendienst Zwecke. - Page 15 Abluftöffnung für DF 6260 - DF 6260-ml/1 und CHDF 6260 (Abluft-Umluft) • Das Abluftrohr muss einen Durchmesser von 150 mm haben. Nur bei Modell DF 6260 - DF 6260-ml/1: Falls ein Abluftrohr in Wand oder Dach mit einem Durchmesser von 125 mm schon besteht, kann der mitgelieferte Reduzierstutzen, 150/125 mm, verwendet werden.
- Page 16 Gewürzbord (Abluft-Umluft) • Wird vor der Einbauhaube ein Gewürzbord vorgebaut, muß ein Mindestabstand von 5 mm zwischen Einbauhaube-Vorderkante und zwischen Wand Gewürzbord vorgesehen werden (dieser Luftspalt wird für die Luftzirkulation unbedingt benötigt). • Der obere Teil der Gewürzbord-Rückwand sollte herausnehmbar sein (Zugang für Abluftschlauch bzw.
- Page 17 • Bei Oberschränken mit mehr als 300 mm Korpustiefe muß der Spalt zur Wand mit der Wandabschlußleiste (Sonderzubehör) abgedeckt werden. Zur Montage gehen Sie wie folgt vor: Messen Sie den Wandabstand und bringen Sie die Abdeckleiste auf die notwendige Breite (Wandabstand plus 5 bis 8 mm), indem Sie die Abdeckleiste an der entsprechenden Kerbe knicken und das überflüssige Material abreißen (Schutzfolie abziehen).
- Page 18 Herausnahme Dunstabzugshaube aus dem Oberschrank Muß aus technischen Gründen (Umstellung Abluft - Umluft) die Dunstabzugshaube aus dem Oberschrank entfernt werden, gehen Sie wie folgt vor: • Auszugsteil ganz ausziehen und die Metallfettfilter entfernen. • Die 4 bzw. 6 Befestigungsschrauben der Dunstabzugshaube (Oberschrank-Befestigung) lösen.
- Page 19 Montage Lichtblende (Sh. auch Sonderzubehör) • Griffe der Metallfettfilter öffnen, entriegeln und zuerst den hinteren und dann den vorderen Metallfettfilter entfernen. • Innere Abdeckung der vorhandenen Geräteblende durch Drücken der beiden Entriegelungen (Drücken und Ziehen) abnehmen. Bild 16. Bild 16 •...
- Page 20 Geef het door aan een eventuele volgende eigenaar van het apparaat. • Bij technische problemen kunt u altijd contact opnemen met de AEG service-afdeling, zie hoofdstuk “Klantenservice”. Afvalverwerking Verpakkingsmateriaal verwijderen •...
- Page 21 Inhoudsopgave Veiligheidsaanwijzingen voor de gebruiker voor de keukenmeubel-monteur Algemeen Gebruik als afzuigkap Gebruik als recirculatiekap Beschrijving van de kap Bediening van de afzuigkap Onderhoud Metalen vetfilters Demonteren van de metalen vetfilters Koolfilter Vervangen van de gloeilamp Reiniging Extra leverbare accessoires Klantenservice Technische gegevens Toebehoren/Montagemateriaal...
-
Page 22: Veiligheidsaanwijzingen
Veiligheidsaanwijzingen voor de gebruiker • U dient erop te letten dat op ingeschakelde kookzones en gasbranders altijd een pan staat, opdat het apparaat niet door te sterke hitte-ontwikkeling wordt beschadigd. Bij olie-, gas- en kolenfornuizen dient open vuur beslist te worden vermeden. •... - Page 23 • Bij gelijktijdig gebruik van het apparaat als afzuigkap en stookplaatsen mag in de ruimte waar de stookplaats zich bevindt de onderdruk niet groter dan 4PA (4x10 • De afgewerkte lucht mag niet in een kanaal dat bestemd is voor de afvoer van rook-/verbrandingsgassen of een schacht die dient voor de ontluchting van ruimten met stookplaatsen geleid worden.
-
Page 24: Algemeen
Het apparaat wordt als afzuigkap geleverd en kan in combinatie met een koolfilter (extra leverbaar accessoire) als recirculatiekap worden gebruikt. • Daarvoor is een origineel AEG koolfilter KLF60/80 nodig (zie “Extra leverbare accessoires”). Gebruik als afzuigkap • De lucht wordt met behulp van een op de afvoeropening aan te brengen buis naar buiten geleid. -
Page 25: Bediening Van De Afzuigkap
Bediening van de afzuigkap • De schuifschakelaars zijn aan de rechter bovenkant van het dampscherm geplaatst (afb. 1 - E). De verschillende getallen en symbolen hebben de volgende betekenis (van links naar rechts): DF 6260 - CHDF 6260 = Traploze vermogensregeling = Intensief stand = Verlichting... -
Page 26: Onderhoud
Onderhoud • Voordat u werkzaamheden aan het apparaat gaat uitvoeren, eerst de stekker uit het stopcontact trekken. Metalen vetfilters • De metalen vetfilters hebben de taak om de vetdeeltjes die bij het koken ontstaan, op te zuigen en worden altijd, d.w.z. zowel bij gebruik als afzuigkap als bij gebruik als recirculatiekap, gebruikt. -
Page 27: Koolfilter
• Het koolfilter moet worden gebruikt, als het apparaat als recirculatiekap wordt gebruikt. • Daarvoor is een origineel AEG koolfilter nodig (zie “Extra leverbare accessoires”). • Reinigen/vervangen van het koolfilter In tegenstelling tot andere koolfilters kan het LONG LIFE koolfilter gereinigd en gereactiveerd worden. -
Page 28: Vervangen Van De Gloeilamp
Attentie • Als u deze aanwijzingen m.b.t. reiniging van het apparaat en vervanging resp. reiniging van de filters niet opvolgt, kan dat tot brand leiden. Deze aanwijzingen beslist opvolgen! • De fabrikant is niet aansprakelijk voor schade aan de motor of schade t.g.v. -
Page 29: Reiniging
Reiniging • Attentie: eerst de stekker uit het stopcontact trekken. Geen spitse voorwerpen in het beschermrooster van de motor steken. • De buitenkant van het apparaat met een mild sopje reinigen. Gebruik geen scherpe reinigingsmiddelen, borstels of schuurmiddel. • Het bedieningspaneel en het vetfilterrooster alleen met een vochtige doek en mild afwasmiddel reinigen. -
Page 30: Klantenservice
Klantenservice Geef in geval van storing onze service-afdeling onderstaande gegevens door: 1. modelaanduiding 2. E-nummer 3. F-nummer Deze gegevens vindt u op het typeplaatje op de binnenzijde van de afzuigkap, achter de vetfilters. Constructie- en kleurwijzigingen in het kader van de technische ontwikkeling voorbehouden. - Page 31 Reparatievoorwaarden Onze reparatievoorwaarden zijn conform de afspraak tussen de Consumentenbond en Vlehan*. Art. 1 Aan de consument zal na een melding van een storing zo mogelijk direct, doch uiterlijk binnen één werkdag worden medegedeeld op welke dag het bezoek van de technicus zal plaatsvinden. De reparatie zal als regel binnen zeven werkdagen na de melding zijn uitgevoerd.
- Page 32 diagnose, toegepaste tarieven, gebruikte onderdelen en materialen en een korte omschrijving van de verrichte werkzaamheden. De betaling van de rekening dient tegen afgifte van een reparatienota direct contant of door middel van een gegarandeerd betaalmiddel plaats te vinden. Art. 6 Op elke uitgevoerde en betaalde reparatie zal bij normaal huishoudelijk gebruik een volledige garantie van minimaal 3 maanden worden gegeven.
-
Page 33: Technische Gegevens
Technische gegevens Afmetingen (in cm): Hoogte x Breedte x Diepte Totale aansluitwaarde: Ventilatormotor: Verlichting: Lengte van het aansluitsnoer: Elektrische aansluiting: Toebehoren/Montagemateriaal 1 afvoerbuis: Ø 150 mm (DF 6260 - DF 6260-ml/1 - CHDF 6260), Ø 120 mm (DF 6160) 1 verloopstuk: Ø 125-120 mm (DF 6260), Ø 125-110-100 mm (DF 6160) 1 luchtgeleider 2 houtschroeven 2,9 x 22 mm 4 houtschroeven 4,5 x 16 mm... -
Page 34: Installatie
Installatie Voorbereiding bovenkast - afzuigkap/recirculatiekap • De kap wordt door de fabriek voor het ingebruik nemen met de afvoer naar boven geleverd. Alvorens de kap te installeren, een gat boren in de bovenkant van de bovenkast (zie afb. 5). Door dit gat worden de afvoerbuis en het aansluitsnoer gevoerd en het dient ook om eventuele reparaties te vergemakkelijken. - Page 35 Afvoeropening voor DF 6260 - CHDF 6260 (afzuigkap/recirculatiekap) • De afvoerbuis moet een diameter van 150mm hebben. Alleen voor model DF 6260: Als een afvoerbuis in wand of dak met een diameter van 125 mm al aanwezig is, kan het meegeleverde verloopstuk, 150/125 mm, worden gebruikt.
- Page 36 Kruidenrekje • Als vóór de kap een kruidenrekje wordt aangebracht, moet er een min. afstand van 5 mm tussen de voorkant van de kap en de wand van het kruidenrekje aangehouden worden (deze luchtspleet is voor de luchtcirculatie absoluut nodig). •...
- Page 37 • Bij bovenkasten met meer dan 300 mm rompdiepte moet de spleet naar de muur met een wandafsluitlijst (extra leverbaar accessoire) afgedekt worden. Bij de montage handelt u als volgt: Meet de wandafstand en zorg bij de afsluitlijst voor de nodige breedte (wandafstand +5 à...
- Page 38 Kap uit de bovenkast halen Als om technische redenen (omschakeling afzuigkap-recirculatiekap) de kap uit de bovenkast moet worden verwijderd handelt u als volgt: • Dampscherm helemaal uittrekken en de metalen vetfilters verwijderen. • De 4 respectievelijk 6 bevestigingsschroeven van de kap (bevestiging aan de bovenkast) losmaken.
- Page 39 Montage wisselfront (extra leverbaar accessoire) • De vetfilters verwijderen, eerst het achterste, daarna het voorste. • Binnenste afdekking van het aanwezige front door indrukken van de beide ontgrendelingen (drukken en trekken) losnemen eraf halen. Afb. 16. afb. 16 • Het wisselfront volgens het sjabloon voorboren en met 3 schroeven aan het bevestigen.
- Page 40 Chère cliente, cher client, Veuillez lire attentivement cette notice d’utilisation et notamment le chapitre « Sécurité » que vous trouverez dans les premières pages. Conservez cette notice d’utilisation pour pouvoir la consulter ultérieurement. Transmettez-la à l'éventuel prochain propriétaire de l’appareil. Mise au rebut Mettre au rebut les matériaux d'emballage •...
- Page 41 Sommaire Consignes de sécurité pour l’utilisateur pour l’installateur Généralités Version évacuation extérieure Version recyclage Description de l’appareil Utilisation de la hotte Entretien Filtre à graisse métallique Ouverture du filtre à graisse métallique Filtre à charbon Remplacement de l´ampoule d’éclairage Nettoyage Accessoires (en option) Service Après-vente Caractéristiques techniques...
-
Page 42: Consignes De Sécurité
Cet appareil doit être installé par une personne qualifiée et selon les normes en vigueur. Consignes de sécurité pour l’utilisateur • Il est recommandé de ne jamais laisser les foyers de cuisson sans récipient dessus. En cas de cuisinières à gaz, à mazout ou à charbon il faut absolument éviter toute flamme libre. -
Page 43: Pour L'installateur
pour l’installateur • Uniquement pour le modèle DF6160: le tuyau d’évacuation doit présenter un diamètre de 150 mm en version évacuation. • Uniquement pour les modèles DF 6260, DF 6260-ml/1 et CHDF 6260:Le tuyau d’évacuation doit présenter un diamètre de 150 mm en version évacuation. Uniquement pour le modèle DF 6260 - DF 6260-ml/1: Dans le cas où... - Page 44 • Selon les prescriptions de construction locales, des restrictions sont imposées à l’utilisation simultanée dans une même pièce de hottes aspirantes et de systèmes de chauffage reliés à une cheminée tels que des poêles à charbon, à mazout ou à gaz. •...
-
Page 45: Généralités
L’air est filtré par un filtre à charbon et renvoyé dans la cuisine. • En version recyclage utilisez le filtre à charbon actif KF8 d’origine AEG (voir Accessoires) que vous pourrez vous procurer en option auprès de votre magasin vendeur.. Description de l’appareil Fig. -
Page 46: Utilisation De La Hotte
Utilisation de la hotte • Les interrupteurs à coulisse sont disposés sur la face supérieure droite du tiroir (Fig. 1 - E). Les différents chiffres et symboles ont la signification suivante (de gauche à droite): DF 6260 - CHDF 6260 = réglage continu de la vitesse = position intensive... -
Page 47: Entretien
Entretien • Débranchez la hotte avant tout entretien. Filtre à graisse métallique • Le filtre à graisse métallique a pour but de piéger les particules de graisse produites durant la cuisson des aliments et sont utilisés aussi bien durant le fonctionnement en version évacuation qu’en version recyclage. -
Page 48: Filtre À Charbon
• Le filtre à charbon doit être mis en place lorsque la hotte est utilisée en version recyclage. • Pour cela, il faudra utiliser le filtre à charbon actif d’origine AEG (voir Accessoires). • Nettoyage/remplacement du filtre à charbon A la différence d’autres filtres de même type, le filtre à charbon LONG LIFE peut être nettoyé... -
Page 49: Remplacement De L´ampoule D'éclairage
Attention • Il y a risque d’incendie si vous ne respectez pas les instructions concernant le nettoyage de l’appareil et le remplacement ou le nettoyage du filtre. • La responsabilité du constructeur ne peut en aucun cas être engagée dans le cas d’un endommagement du moteur ou d’incendie liés à... -
Page 50: Accessoires (En Option)
Accessoires (en option) Filtre à charbon KF8 Bandeau M BF6060-m Bandeau AL BF6060-al Baguette de bordure* Clipse* pour fixer la baguette de bordure (3x) * ET-NR. seulement par le service après-vente Service Après-vente Dans le cas de demandes de renseignement ou de pannes, veuillez appeler notre service après-vente (voir la liste de nos différents points de service après-vente). -
Page 51: Caractéristiques Techniques
Caractéristiques techniques Modèle: Dimensions (en cm): Hauteur Largeur Profondeur Puissance nominale totale: Puissance moteur : Eclairage: Longueur du câble d’alimentation: Branchement électrique: Accessoires pour l’installation 1 bride de raccord: Ø 150 mm (DF 6260 - DF 6260-ml/1-CHDF 6260), Ø 120 mm (DF 6160), 1 manchon de réduction: Ø... -
Page 52: Branchement Électrique
Branchement électrique Consignes de sécurité pour l’électricien Avant de brancher l’appareil, vérifier que la tension indiquée sur la plaque signalétique correspond à celle du secteur. Si l’appareil est muni d’une fiche de courant, il pourra être branché sur n’importe quelle prise de courant installée conformément aux normes et facile d’accès. -
Page 53: Fixation
Fixation Préparation élément haut - évacuation de l´air • La hotte est livrée en version évacuation vers le haut. Avant d’installer la hotte, réalisez un trou dans le plafond du meuble (voir fig. 5). Ce trou servira pour le passage du tuyau d’évacuation, du câble d’alimentation. - Page 54 Orifice de sortie pour les modèle DF 6260 - DF 6260-ml/1 et CHDF6260 (évacuation-recyclage) • Le tuyau d’évacuation doit présenter un diamètre de 150 mm en version évacuation. Uniquement pour le modèle DF 6260 - DF 6260-ml/1: Dans le cas où il existe déjà un tuyau d’évacuation de l’air d’un diamètre de 125 mm dans le mur ou sur le toit, on pourra...
- Page 55 Etagère à épices • Si une étagère à épices est placée devant la hotte, il faut prévoir un espacement minimum de 5 mm entre la hotte et l’arête avant et entre le mur et l’étagère à épices (cette fente d’aération est absolument nécessaire pour la circulation de l’air).
- Page 56 • Quand les éléments hauts ont une profondeur de corps supérieure à 300 mm, il faut recouvrir la fente jusqu’au mur avec la baguette de bordure murale (accessoire spécial) Pour la mettre en place, vous procédez de la manière suivante: Mesurez l’écartement du mur et réduisez la baguette à...
- Page 57 Pour retirer la hotte de l’élément haut S’il vous faut, pour des raisons techniques (transformation évacuation extérieure - recyclage), retirer la hotte de l’élément haut, procédez de la manière suivante: • Sortez entièrement le tiroir et retirez les filtres graisse métallique. •...
- Page 58 Fixation du bandeau d’éclairage (voir aussi Accessoires) • Sortez les filtres à graisse métallique. Retirez en premier le filtre à graisse métallique arrière, puis le filtre avant. • Retirez le recouvrement intérieur en enfonçant les deux éléments de déverrouillage (appuyez et tirez). Fig. 16. Fig.
- Page 59 Charcoal filter Changing the light bulb(s) Special accessories What to do if Special accessories Technical assistance service Technical Specifications Mounting accessories included Electrical connection Safety warnings for the electrician Installation Printed on recycled paper AEG - putting words into action...
-
Page 60: Safety Warnings
Safety warnings For the user • The cooker hood is designed to extract unpleasant odours from the kitchen, it will not extract steam. • Always cover lighted elements, to prevent excess heat from damaging the appliance. In the case of oil, gas and coal fired cookers it is essential to avoid open flames. - Page 61 • The national Standard on fuel-burning systems specifies a maximum depression of 0.04 bar in such rooms. • The air outlet must not be connected to chimney flues or combustion gas ducts. The air outlet must under no circumstances be connected to ventilation ducts for rooms in which fuel-burning appliances are installed.
-
Page 62: Description Of The Appliance
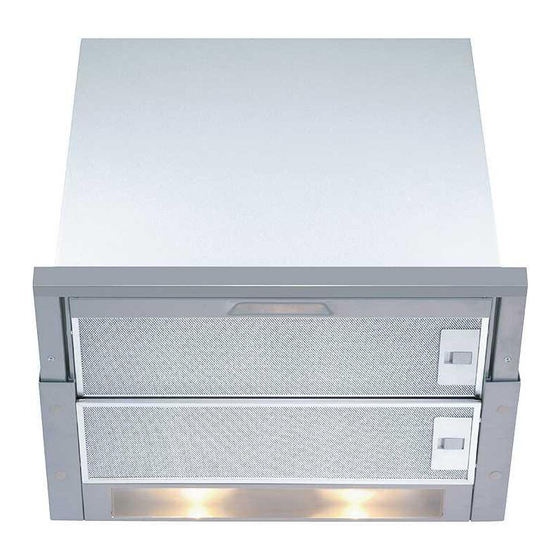
Recirculation Version • The air is filtered through a charcoal filter and returned to the kitchen. • You will need an original AEG charcoal filter for the recirculation function. (Available from your local Service Force Centre). Fig. 1... -
Page 63: Control Panel
Control Panel • The switches are mounted on the upper right side of the visor (Fig. 1 - E). The numbers and symbols have the following meanings (from left to right): DF 6260 - CHDF 6260 = Continuously variable fan control = Intensive setting = Light = Light OFF... -
Page 64: Maintenance And Care
Maintenance and care • The hood must always be disconnected from the electricity supply before beginning any maintenance work. • Never insert pointed objects in the motor’s protective grid. • Wash the outside surfaces using a delicate detergent solution. Never use caustic detergents or abrasive brushes or powders. -
Page 65: Charcoal Filter
• The charcoal filter should only be used if you want to use the hood in the recirculation function. • To do this you will need an original AEG charcoal filter (available from your local Service Force Centre). • Cleaning/replacing the carbon filter Unlike other carbon filters, the LONGLIFE carbon filter can be cleaned and reactivated. -
Page 66: Changing The Light Bulb(S)
Warning • Failure to observe the instructions on cleaning the unit and changing the filters will cause a fire hazard. You are therefore strongly recommended to follow these instructions. • The manufacturer declines all responsibility for any damage to the motor or any fire damage linked to inappropriate maintenance or failure to observe the above safety recommendations. -
Page 67: What To Do If
What to do if If your appliance fails to work properly please carry out the following checks. Symptom The cooker hood will not start... The cooker hood is not working effectively.. The cooker hood has switched off during operation... If after all these checks, the problem persists, contact your local Service Force Centre, quoting the model and serial number. -
Page 68: Special Accessories
Service and spare parts for UK In the event of your appliance requiring service, or if you wish to purchase spare parts, contact your local AEG Service Force Centre by telephoning: 08705 929 929 Your call will be automatically routed to the Service Centre covering your post code area. -
Page 69: Technical Specifications
Technical Specifications Dimensions (in cm): Height Width Depth Maximum absorbed power: Motor absorption: Lighting: Length of the cable: Electrical connection: Mounting accessories included 1 Flange: Ø 150 mm (DF 6260 - DF 6260-ml/1-CHDF 6260), Ø 120 mm (DF 6160) 1 reduction flange: Ø... -
Page 70: Electrical Connection
Electrical connection (not for UK) Safety warnings for the electrician Before connecting the appliance to the power supply, check that the voltage indicated on the rating plate corresponds to the mains power supply available. Appliances fitted with a plug can be connected to any standard power socket within easy access. -
Page 71: Installation
Installation Preparing the wall unit - Extractor version • The hood is supplied as an extractor unit. Before installing the hood, drill a hole in the roof of the wall unit (see item. 5). This hole is to allow passage of the outlet pipe and the power cable, and to facilitate servicing. - Page 72 Outlet hole - Only for models DF 6260, DF 6260-ml/1 and CHDF 6260 (extractor-filter version) • When used as an extractor unit, the hood must be fitted with a 150mm diameter hose. Only for model DF 6260 - DF 6260-ml/1: Should there already be a pipe of diameter 125 mm that ducts to the outside through the walls or roof, it is...
- Page 73 Spice rack • If a spice rack is to be incorporated in front of the hood, a minimum distance of 5 mm must be provided between the front edge of the fume extractor hood and the spice rack wall (this air gap being necessary for air circulation).
- Page 74 • If the cupboard is deeper than 300 mm, cover the gap between the hood and the wall with a finishing strip (special accessory). To install it, proceed as follows: Measure the wall distance and apply the covenng strip over the necessary width (wall distance plus 5 to 8 mm), kinking the covering strip at the appropriate notches and tearing off the surplus material (removing the protective foil).
- Page 75 Removing the hood from the wall unit If, for technical reasons (extraction version/recirculation version conversion) the extractor hood has to be removed from the wall unit, proceed as follows: • Fully withdraw the visor and remove the grease filter. • Loosen the 4 or 6 mounting screws of the hood (wall unit mounting). •...
- Page 76 Installing the front panel (see also “Special accessories”) • Remove first the rear then the front grease filters. • Remove the internal cover pressing both unlocking devices (press and pull). Fig. 16. Fig. 16 • Predrill the front panel as per template and fix it to the visor with 3 screws.
- Page 80 AEG Hausgeräte GmbH Postfach 1036 D-90327 Nürnberg http://www.aeg.hausgeraete.de http://www.aeg.co.uk © Copyright by AEG LI1SGD Ed. 02/03...