
Related Manuals for Honeywell HWAC-1217S


Summary of Contents for Honeywell HWAC-1217S
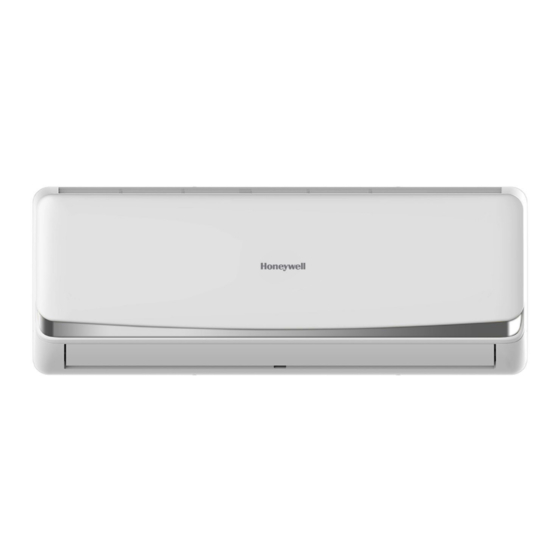
- Page 1 Mini-Split Air Conditioner Single Zone Installation and Operations Manual HWAC-1217S HWAC-1817S HWAC-2417S Professional Installation Required! Please read and retain these instructions.
- Page 2 CONTENTS Thank you for purchasing the HWAC-1217S, HWAC-1817S, or HWAC-2417S Mini-Split Air Conditioner. This manual will provide you with safety information, installation steps, instructions for optimal use, and proper care and maintenance for your product. Please read this manual carefully before operating.
-
Page 3: Specifications
SPECIFICATIONS MODEL HWAC-1217S HWAC-1817S HWAC-2417S Cooling Capacity 12,000 BTU Cooling 18,000 BTU Cooling 23,000 BTU Cooling Heating Capacity 12,500 BTU Heating 18,000 BTU Heating 24,000 BTU Heating SEER Rating Room Size (Sq. ft.) 300-500 600-800 900-1,200 Voltage / Frequency 115V / 60 Hz... - Page 4 SAFETY INSTRUCTIONS - INSTALLATION Always be careful when using the machine. To reduce the risk of fire, electrical shock, or other injuries, keep these safety considerations in mind when installing, using, and maintaining your machine. WARNING The air conditioner must be properly grounded on a level surface. Do not connect the grounding wire to the gas pipeline, water pipeline, lightning rod, or telephone grounding wire.
- Page 5 SAFETY INSTRUCTIONS - INSTALLATION Always be careful when using the machine. To reduce the risk of fire, electrical shock, or other injuries, keep these safety considerations in mind when installing, using, and maintaining your machine. CAUTION Do not open windows and doors for a long time when the air conditioner is running. This will cause the cooling or heating capacity to be weakened.
-
Page 6: Product View
PRODUCT VIEW Indoor Unit, Open view Air Inlet Grille Panel Air Filter Air Louvre Air Vent Force Switch Pipe Protector Ring Outdoor Unit Air Outlet Grille Power Cable Connecting Pipe Drain Hose Outlet/Pipe 12k and 24k BTU Version 18k BTU Version... -
Page 7: Notice For Installation
NOTICE FOR INSTALLATION Important Notices • Before installing, please contact a local HVAC professional. If the unit is not installed by a registered HVAC contractor, the warranty will be voided. Please request a copy of the HVAC contractor’s invoice at the end of installation and keep for your records. - Page 8 NOTICE FOR INSTALLATION Electrical Safety Requirements • Be sure to use the rated voltage and air conditioners dedicated circuit for the power supply, and the power cord diameter must meet the national requirements. • When the maximum current of air conditioner is ≥ 16A, it must use the air switch or leakage protection switch equipped with protection devices.
- Page 9 NOTICE FOR INSTALLATION Requirements for Operations at Raised Height • When carrying out installation at 6.6 ft. or higher above the base level, safety belts must be worn and ropes of sufficient strength be securely fastened to the outdoor unit, to prevent falling that could cause personal injury or death as well as property loss.
-
Page 10: Installation: Indoor Unit
INSTALLATION: INDOOR UNIT Clearance Requirements for Indoor Installation 5.9 in 7.9 in 7.9 in 78.7 in NOTE: All measurements should be no less than posted from obstructions. Mounting Plate 1. The wall for installation of the indoor unit shall be hard and firm to prevent vibration. 2. - Page 11 INSTALLATION: INDOOR UNIT Route of Pipeline 1. Depending on the position of the unit, the piping may be routed sideways from the left or the right (Fig 1), or vertically from the back (Fig 2) (depending on the pipe length of the indoor unit). In the case of sideway routing, cut off the outlet cutting stock of the opposite side.
- Page 12 INSTALLATION: INDOOR UNIT Wrap the Piping 1. Use the insulation sleeve to wrap the joint part of the indoor unit and the connection pipe. Then use the insulating material to pack and seal insulation pipe, to prevent generation of condensate water on the joint part. 2.
- Page 13 INSTALLATION: INDOOR UNIT Wiring Diagram • If the air conditioner is provided with an interconnection cord, the wiring of the indoor unit is connected in the factory, there is no need of connection. • If the interconnection cord is not provided, connection is needed in accordance with the wiring diagram.
-
Page 14: Installation: Outdoor Unit
INSTALLATION: OUTDOOR UNIT Clearance Drawing for Outside Installation 7.9 in 11.8 in 11.8 in NOTE: All measurements should be no less than posted from obstructions. Unit Mounting Dimensions Installation Outdoor Unit Bolt Unit Outdoor Unit Size A (in. ") B (in. ") W1(W2)*H*D (in. - Page 15 INSTALLATION: OUTDOOR UNIT Wiring Connection 1. Loosen the screws and remove the E-parts cover from the unit. 2. Connect the cables to the corresponding terminals of the terminal board of the outdoor unit (see the wiring diagram), and if there are signals connected to the plug, just create a butt joint.
- Page 16 INSTALLATION: OUTDOOR UNIT Expelling the Air Outdoor Unit Refrigerant Discharging Method: • After the pipe side connection is complete, proceed as follows. Gas Part Wait for 8 seconds. Quickly tighten and connect the nut. Loosen the temporarily fastened nut by half a The installing torque turn.
- Page 17 INSTALLATION: OUTDOOR UNIT Outdoor Condensation Drainage • When the unit is heating, the condensing water and defrosting water can go through the drain elbow. Installation: Install the outdoor drain elbow in one of the ⌀ • There are three drain holes to choose from. 25 mm hole on the base plate and join the drain hose to the elbow.
-
Page 18: Notices For Use
NOTICES FOR USE Temperature Range Conditions • Outside the temperature range provided in following table, the air conditioner may shut down. > 109.4˚F Outdoor Cooling > 125.6˚F Indoor < 64.4˚F > 75.2˚F Outdoor Heating > 19.4˚F Indoor > 80.6˚F • When the temperature is too high, the air conditioner may activate the automatic protection device and shut the unit down. -
Page 19: Test Operation
NOTICES FOR USE Emergency Operation • If the remote controller is lost or broken, use the force switch button to operate the air conditioner. • If this button is pushed with the unit OFF, the air conditioner will operate in AUTO mode. - Page 20 SAFETY INSTRUCTIONS – UNIT OPERATION Always be careful when using the machine. To reduce the risk of fire, electrical shock, or other injuries, keep these safety considerations in mind when installing, using, and maintaining your machine. CAUTION Do not let the remote controller drop or fall. Do not let the remote controller get wet.
-
Page 21: Remote Control Functions
REMOTE CONTROL FUNCTIONS NOTE: The remote controller displays all symbols during power-on and only those corresponding to operation the rest of the time. 1. ON / OFF • Press this button to turn on/off the unit. SET TEMPERATURE • This will clear the existing timer and sleep AUTO settings. - Page 22 REMOTE CONTROL FUNCTIONS 6. TIMER • With the unit ON, press this button to set OFF timer, with it OFF, press to set ON timer. ˄ ˅ • Press this button once, an “ON (OFF)” will flash. Press “ ” or “ ”...
- Page 23 REMOTE CONTROL FUNCTIONS 11. SLEEP • Press this button to enter SLEEP mode, which the unit will exit after 10 hours of continuous operation and restore to the previous status. NOTE: The SLEEP function cannot be activated in FAN mode. 12.
- Page 24 AIR CONDITONER OPERATION Install Batteries 1. Install the batteries included with the unit. (Triple A) and position the batteries to the right electric poles (+ and -). 2. Put back on the cover. Automatic Operation Mode 1. Press the “MODE” button, select the automatic operation mode. 2.
-
Page 25: Air Conditioner Operation
AIR CONDITIONER OPERATION Fan Operation Mode 1. Press the “MODE” button, select the fan operation mode. 2. By pressing the “SPEED” button, you can select the fan speed from LOW, MID, HIGH. 3. Press the “ON/OFF” button, the air conditioner starts to operate. 4. -
Page 26: Machine Maintenance
MACHINE MAINTENANCE WARNING: • Before cleaning the air conditioner, it must be shut down and the electricity must be cut off for more than 5 minutes, otherwise there is a risk of electric shock. Do not wet the air conditioner, which can cause an electric shock. Make sure not to rinse the air conditioner with water under any circumstances. - Page 27 MACHINE MAINTENANCE Check Before Use 1. Check whether all the air inlets and outlets of the units are unblocked. 2. Check whether there is blocking in the water outlet of the drainpipe, and immediately clean it up if any. 3. Check the ground wire is reliably grounded. 4.
-
Page 28: Troubleshooting
TROUBLESHOOTING In case of problems, first turn off the air conditioner and disconnect from the source of electricity. Symptom Solutions • Has the power been shut down? • Is the wiring loose? Air conditioner can not • Is voltage too high or too low? (measured by professionals) operate at all •... -
Page 29: Two Years Limited Warranty
TWO YEARS LIMITED WARRANTY Royal Sovereign International, Inc. warranties this product to be free from defects in material and workmanship for a period of two (2) years. This warranty is extended to the original purchaser only as outlined below: Parts: Replacement of defective parts for 2 years from the date of customer purchase. Compressor: 3-year warranty from the date of customer purchase. - Page 30 ROYAL SOVEREIGN INTERNATIONAL, INC. 2 Volvo Dr., Rockleigh, NJ 07647 USA TEL: +1 855-687-2223 Email: supportusa@honeywelldispensers.com The Honeywell Trademark is used under license from Honeywell International Inc. Honeywell International Inc. makes no representations or warranties with respect to this product.