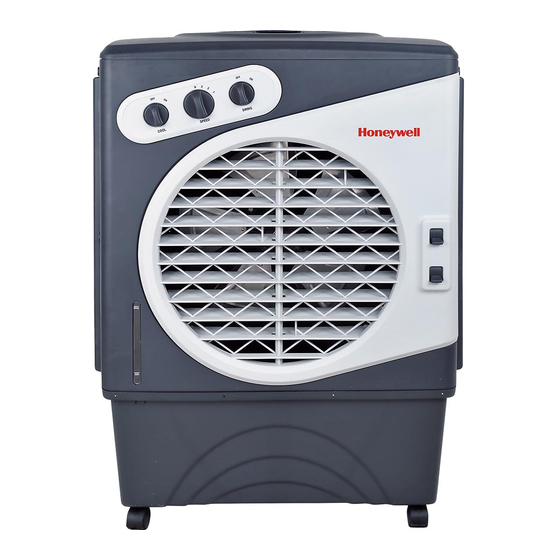
Honeywell CO60PM Service Manual
Evaporative air cooler
Hide thumbs
Also See for CO60PM:
- Owner's manual (40 pages) ,
- User manual (16 pages) ,
- Maintenance manual (10 pages)

Related Manuals for Honeywell CO60PM


Summary of Contents for Honeywell CO60PM
-
Page 1: Service Manual
EVAPORATIVE AIR COOLER SERVICE MANUAL CAUTION: Before servicing the unit, read the “Safety Precautions” in this manual. Only for authorized service. MODEL NO.: CO60PM (FOR INDOOR & OUTDOOR USE) -
Page 2: Table Of Contents
CONFIDENTIAL Website: http://www.honeywellaircoolers.com CONTENT 1. Preface 1.1. Safety Precautions 1.2. Insulation Resistance Test 1.3. Specifications 1.4. Features 1.5. Warning & Safety Rules 1.6. Parts Description 1.7. Operations 1.8. Cleaning & Maintenance 2. Disassembly Instructions 2.1. How To Change Honeycomb Cooling Media 2.1.1. -
Page 3: Preface
Measure the resistance value with an ohm meter between the jumper lead and each exposed metallic part on the equipment at all MODES (except POWER OFF). The value should be over 1 MΩ. 1.3 Specifications MODELS CO60PM ITEMS Power Supply 120V, 50Hz Input (W) -
Page 4: Features
CONFIDENTIAL Website: http://www.honeywellaircoolers.com Features Three functions in one: air cooler, humidifier & fan. Very powerful airflow: up to 2610 m /hr or 1540 CFM Cooling area: up to 80 m or 850 ft Air throw distance: 11 m or 36 ft. ... -
Page 5: Parts Description
CONFIDENTIAL Website: http://www.honeywellaircoolers.com DO NOT let children play with any appliance packaging or plastic bags. Injury may result from such practice. Children should be supervised to ensure that they do not play with the appliance. If the unit is damaged or it malfunctions, do not continue to operate it. ... -
Page 6: Operations
CONFIDENTIAL Website: http://www.honeywellaircoolers.com 1.6 Operations Control Panel: NOTE: Speed control may be marked as High/Med/Low in certain units. Operation Instructions: Cooler Location: Place the cooler in front of an open door or window. Ensure that there is adequate cross – ventilation in the room by leaving a door or window open opposite the cooler. - Page 7 CONFIDENTIAL Website: http://www.honeywellaircoolers.com FILL WATER: Water can be filled into the air cooler by: Water Inlet (Manually) Water / Ice can be put into the tank through the top opening. There is a hole for water to flow into the tank. Continuous water supply (Auto Refill) Connect a garden hose to the continuous water supply inlet.
-
Page 8: Cleaning & Maintenance
CONFIDENTIAL Website: http://www.honeywellaircoolers.com Cool To begin cooling the desired area turn the "COOL" switch ON. The water pump will operate. You can feel the cooler air after the Honeycomb media is completely wet. Swing Vertical Louvers Turn the "SWING" switch ON. The louvers will begin to move from right to left automatically. Manually adjust the horizontal louvers to change vertical airflow. - Page 9 CONFIDENTIAL Website: http://www.honeywellaircoolers.com...
-
Page 10: Disassembly Instructions
CONFIDENTIAL Website: http://www.honeywellaircoolers.com 2. DISASSEMBLY INSTRUCTIONS WARNING – Before the following disassembly, POWER is set to OFF and disconnected the power cord. 2.1 How To Change Honeycomb Cooling Media(3 sides) 2.1.1 Back Panel. Use screw driver to remove 5 Remove the back panel. galvanized screw with plate head (ST4*12) on the back panel. -
Page 11: Right Side Honeycomb Cooling Media
CONFIDENTIAL Website: http://www.honeywellaircoolers.com 2.1.4 Right Side Honeycomb Cooling Media. Use screw driver to remove 4 Remove the honeycomb Remove the honeycomb galvanized screw with plate holder. cooling media from the right head(ST4*12) on the side panel. honeycomb holder. 2.1.5 Left Side Panel. Use screw driver to remove 4 Remove the left side panel. -
Page 12: How To Change Switch
CONFIDENTIAL Website: http://www.honeywellaircoolers.com 2.2 How To Change Switch Remove the back panel follow the procedure 2.1.1 Remove the right side panel follow the procedure 2.1.3 2.2.1. Switch Box Use screw driver to remove 4 Remove switch box. galvanized screws with plate head(ST3*12) on the switch box. -
Page 13: How To Change Water Pump
CONFIDENTIAL Website: http://www.honeywellaircoolers.com 2.3 How To Change Water Pump Remove the back panel follow the procedure 2.1.1 Remove the right side panel follow the procedure 2.1.3 Remove the switch box follow the procedure 2.2.1 2.3.1 Water pump pipe and water pump clip. Remove the water pump pipe. -
Page 14: How To Change Main Motor
CONFIDENTIAL Website: http://www.honeywellaircoolers.com 2.4 How To Change Fan Motor Remove the back panel follow the procedure 2.1.1 Remove the right side panel follow the procedure 2.1.3 Remove the switch box follow the procedure 2.2.1 2.4.1 Speed Switch And Wiring Connector. Use screw driver to remove 2 Remove the white/yellow/ Remove the wiring cap (below... -
Page 15: How To Change Swing Motor
CONFIDENTIAL Website: http://www.honeywellaircoolers.com 2.5 How To Change Swing Motor Remove the back panel follow the procedure 2.1.1 Remove the right side panel follow the procedure 2.1.3 Remove the switch box follow the procedure 2.2.1 2.5.1 Swing Switch And Wiring Connector. Use screw driver to remove 2 Remove the pink wire on the Remove the wiring cap (below... -
Page 16: Troubleshooting Guide
Height: 1017 mm (40.0’’) 3.2 Cooling System Honeywell Evaporative Air Coolers are built to maximize energy efficiency and keep costs low. Warm air is drawn into the cooler through a dust and odor-reducing carbon filter and enters the Honeycomb Cooling Media. Water pumped from the tank pours over the honeycomb media. As the warm air passes through the media, the water absorbs the heat, naturally cooling and humidifying the air. -
Page 17: Troubleshooting Guide
CONFIDENTIAL Website: http://www.honeywellaircoolers.com 3.3 Troubleshooting Guide The following troubleshooting guide is intended to address the most common symptoms and is by no means exhaustive. If symptoms persist, call a qualified service provider. Only a certified electrician should complete any electrical work. Unplug and disconnect the appliance from the power source before attempting to troubleshoot any of the following symptoms. -
Page 18: Schematic Diagram
CONFIDENTIAL Website: http://www.honeywellaircoolers.com 4. SCHEMATIC DIAGRAM 4.1 Wiring Diagram 4.2 Wiring Color Description Power Cord: (1) Brown Live to speed switch(4) (2) Blue Neutral motor COM(black) (3) Green + Yellow Earth (Ground) to motor earth Main Motor: (1) White High speed to speed switch(1) (2) Yellow Medium speed... -
Page 19: Exploded View
CONFIDENTIAL Website: http://www.honeywellaircoolers.com 5. EXPLODED VIEW... -
Page 20: Replacement Parts List
CONFIDENTIAL Website: http://www.honeywellaircoolers.com 6. REPLACEMENT PARTS LIST PART NAME QUANTITY Up/Down swing knob Swing knob press board Horizontal louver 1 Horizontal louver 2 Horizontal louver 3 Horizontal louver 4 Horizontal louver 5 Horizontal louver middle link Horizontal louver press board A Horizontal louver link A Horizontal louver press board B Horizontal louver link B... - Page 21 CONFIDENTIAL Website: http://www.honeywellaircoolers.com Side water distributor cover Side water distributor Side honeycomb pad holder Swing motor Swing motor wheel Vertical louver drive Base of fan motor frame Fan motor frame Fan blade assembly Fan motor Top cover Water fill door Four directions pipe Back water distributor tube Left/Right water distributor tube...
- Page 22 CONFIDENTIAL Website: http://www.honeywellaircoolers.com Float tube Water level board Vertical louver link Water tank Water pump Water pump clip Continuous water supply connection Castor Castor with brake Water drainage plug Silica gel ring...