Table of Contents
Advertisement
Available languages
Available languages
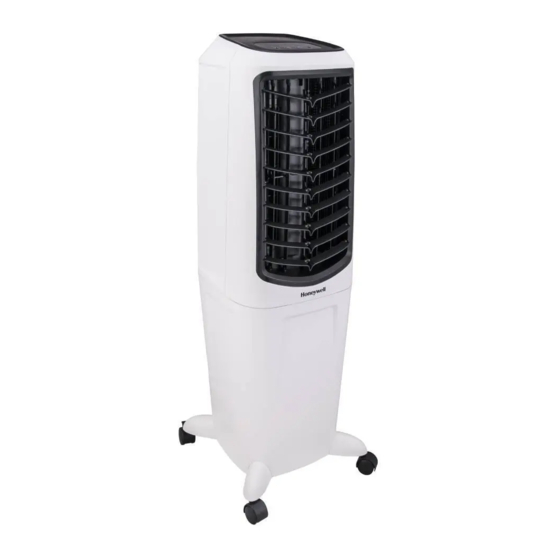
Portable Evaporative Air Cooler
EN
User Manual
Read and save these instructions before use
Refroidisseur d'air par évaporation portatif
FR
Mode d'emploi
Lire ces instructions avant l'utilisation et les conserver
Enfriador de Aire Evaporativo Portátil
ES
Manual de Instrucciones
Lea y guarde estas instrucciones antes de usar la unidad
Customer Support:
Assistance Au Client:
Servicio de atencion a clientes:
USA/ EE.UU: 1-800-474-2147
CANADA/ CANADÁ^ : 1-888-209-0999
^ Canada Customer Support service available for models sold in Canada only.
^ Le Service Client Canadien est disponible uniquement pour les modèles vendus sur le territoire Canadien.
^ Servicio de Atención A Clientes en Canadá disponible solo para modelos vendidos en Canadá.
www.jmatek.com
Email: usinfo@jmatek.com
Model / Modèle / Modelo:
TC30/50PE Series / Série / Serie
Advertisement
Table of Contents

Related Manuals for Honeywell TC30PE Series


Summary of Contents for Honeywell TC30PE Series
- Page 1 Portable Evaporative Air Cooler User Manual Read and save these instructions before use Refroidisseur d'air par évaporation portatif Mode d'emploi Lire ces instructions avant l'utilisation et les conserver Enfriador de Aire Evaporativo Portátil Manual de Instrucciones Lea y guarde estas instrucciones antes de usar la unidad Model / Modèle / Modelo: TC30/50PE Series / Série / Serie Customer Support:...
-
Page 2: Parts Description
PARTS DESCRIPTION Control Panel Rear Grill & Mesh Filter Louvers Honeycomb Cooling Media Water Level Indicator Water Fill Door Casters Power Cord & Plug Handle & Remote Control Drain Plug Storage Remote Control Water Inlet Valve* WARNING -- READ AND SAVE THE AIR COOLER SAFETY & MAINTENANCE GUIDE AND USER MANUAL BEFORE USING THIS PRODUCT. -
Page 3: Use And Operation
USE & OPERATION CONTROL PANEL Icons on Display Screen Power Speed Swing = Low Cool = Medium = High... -
Page 4: Function Buttons
USE & OPERATION (CONTINUED) FUNCTION BUTTONS POWER Press the button to turn the unit on. The cooler will start automatically at medium speed. After a few seconds the speed will switch to low. To turn the unit off, press the button again. SPEED Press the SPEED button repeatedly to change the speed between | - || - |||. -
Page 5: Remote Control
USE & OPERATION (CONTINUED) REMOTE CONTROL POWER : ON / OFF SPEED Low / Medium / High COOL Evaporative Cooling ON / OFF SWING Controls the motion of the louvers NOTE: • The remote control requires a CR2025 (1 x 3V) coin type or equivalent battery for replacement. Open the battery compartment at the back of the remote control and insert the battery inside. -
Page 6: Cooler Location
USE & OPERATION (CONTINUED) COOLER LOCATION Make sure to position the air cooler correctly before you set up and start using the product. Please refer to the COOLER LOCATION section of the separate Safety & Maintenance Guide. FILLING WITH WATER It is ideal to use the Continuous Water Supply* Connection to run the unit for long periods of time without refilling the tank. - Page 7 USE & OPERATION (CONTINUED) FILLING WITH WATER (CONTINUED) The Water Level Indicator is located at the back of the unit. Refill the water tank when water level is low. Do not fill water above the "Max." water level mark to avoid water droplets collecting on the louvers.
- Page 8 USE & OPERATION (CONTINUED) LOW WATER ALARM* The unit is equipped with a low water sensor. In Cooling Mode, when water in the tank is below the minimum level, you will hear a beeping sound and the indicator light will flash continuously. The unit will automatically pause evaporative cooling.
- Page 9 USE & OPERATION (CONTINUED) CLEANING THE MESH FILTER AND HONEYCOMB COOLING MEDIA WARNING: Before cleaning the unit, switch the unit OFF and disconnect the power adapter from the unit and electrical socket. • The appliance is supplied with a Mesh Filter and Honeycomb Cooling Media. •...
-
Page 10: Description Des Pieces
DESCRIPTION DES PIECES Panneau de contrôle Grille arrière & filter Grilles d'aération Système de refroidissement en nid d’abeilles Indicateur de niveau d'eau Porte de remplissage d'eau Roulettes Cordon electrique & prise Poignée & Télécommande Bouchon de vidange stockage Télécommande Vanne de l’entrée d’eau* AVERTISSEMENT -- LIRE ET SAUVEGARDER LE GUIDE DE SECURITE ET D'ENTRETIEN ET LE MANUEL D'UTILISATION DU REFROIDISSEUR D'AIR AVANT D'UTILISER LE PRODUIT. -
Page 11: Utilisation Et Fonctionnement
UTILISATION ET FONCTIONNEMENT PANNEAU DE COMMANDE Icônes sur l’écran d’affichage Interrupteur Vitesse Oscillation = Faible Refroidissement = Moyenne = Élevée... - Page 12 UTILISATION ET FONCTIONNEMENT (SUITE) BOUTONS DE FONCTION INTERRUPTEUR Appuyer sur pour allumer l'unité. Le refroidisseur s'allumera automatiquement à une vitesse moyenne. Après quelques seconds, la vitesse basculera bas faible. Pour éteindre l'unité, appuyer sur le bouton à nouveau. VITESSE Appuyer sur le bouton de la à...
- Page 13 UTILISATION ET FONCTIONNEMENT (SUITE) TÉLÉCOMMANDE INTERRUPTEUR : En Marche / Éteindre VITESSE : Faible / Moyenne / Élevée REFROIDISSEMENT : Enfriamiento evaporativo Enc / Apag OSCILLATION : Commande le mouvement des grilles d’aération REMARQUE: • La pile est déjà installée dans la télécommande de votre refroidisseur d’air. Pour la remplacer, il convient de se procurer une pile plate CR2025 (1 x 3V) ou l’équivalent.
- Page 14 UTILISATION ET FONCTIONNEMENT (SUITE) POSITION DU REFROIDISSEUR D’AIR Veiller à placer le refroidisseur d’air comme il se doit avant de l’installer et de l’utiliser. Il convient de se reporter à la section POSITION DU REFROIDISSEUR D’AIR (IMPORTANT à LIRE) du Guide de sécurité et d’entretien. REMPLIR AVEC DE L'EAU Pour utiliser l’appareil pendant de longues périodes sans en remplir le réservoir, l’utilisation du raccord d’alimentation continue* est idéale.
- Page 15 UTILISATION ET FONCTIONNEMENT (SUITE) REMPLIR AVEC DE L'EAU (SUITE) L’indicateur du niveau d’eau se trouve à l’arrière de l’unité. Remplir le réservoir d’eau lorsque le niveau d’eau est faible. Ne pas dépasser la marque de niveau pour éviter les gouttelettes d'eau sur les grilles d'aération.
- Page 16 UTILISATION ET FONCTIONNEMENT (SUITE) AVERTISSEUR DE BAS NIVEAU D’EAU* L’appareil est muni d’un capteur de bas niveau d’eau. En mode Refroidissement, lorsque l’eau du réservoir n’atteint plus le niveau minimal, un bip se fait entendre et le symbole Voyant indicateur de RÉSERVOIR VIDE clignote automatiquement.
- Page 17 UTILISATION ET FONCTIONNEMENT (SUITE) NETTOYAGE DU FILTRE ET DU SYSTÈME DE REFROIDISSEMENT EN NID D’ABEILLES AVERTISSEMEN: Avant de nettoyer l’appareil, il convient de l’éteindre, puis de le débrancher de la prise électrique. • L’appareil est vendu avec un filtre et un système de refroidissement en nid d’abeilles. •...
-
Page 18: Descripción De Partes
DESCRIPCIÓN DE PARTES Panel de Control Rejilla Trasera y Filtro de Malla Deflectores Filtro de Enfriamiento Honeycomb Indicador de Nivel de Puerta de Llenado Agua de Agua Ruedas Cable de Alimentación y Enchufe Manija & Almacenamiento a Tapón de Agua Control Remoto Control Remoto Válvula de Entrada de Agua*... -
Page 19: Uso Y Funcionamiento
USO Y FUNCIONAMIENTO PANEL DE CONTROL Iconos en la Pantalla Display Encendido/ Apagado Velocidad Oscilación = Bajo Frío = Media = Alta... - Page 20 USO Y FUNCIONAMIENTO (CONTINUACIÓN) BOTONES DE FUNCIONES ENCENDIDO / APAGADO Presione el botón para encender la unidad. El enfriador comenzará automáticamente a funcionar a velocidad media. Después de unos segundos la velocidad cambiará a baja. Para apagar la unidad, presione el botón nuevamente. VELOCIDAD Presione el botón repetídamente para cambiar la velocidad entre | - || - |||.
-
Page 21: Control Remoto
USO Y FUNCIONAMIENTO (CONTINUACIÓN) CONTROL REMOTO ENCENDIDO : Encendido / Apagado VELOCIDAD Bajo / Media / Alta FRÍO : Encendido / Apagado del modo enfriamiento evaporativo OSCILACIÓN : Controla el movimiento de los deflectores NOTA: • El control remoto requiere una CR2025 (1 x 3V) tipo moneda o pila equivalente para su reemplazo.Abra el compartimento para pilas en la parte de atrás del control remoto e inserte una pila. - Page 22 USO Y FUNCIONAMIENTO (CONTINUACIÓN) UBICACIÓN DEL ENFRIADOR Asegúrese de colocar el enfriador de aire correctamente antes de configurar y empezar a usar el producto. Por favor, consulte la sección UBICACION DEL ENFRIADOR de la Guía de seguridad y de mantenimiento separada.
- Page 23 USO Y FUNCIONAMIENTO (CONTINUACIÓN) LLENADO CON AGUA (CONTINUED) El indicador de nivel de agua está ubicado al atrás de la unidad. Recargue el tanque de agua cuando el nivel de agua está bajo. No colocar agua por encima de la marca de “Max” del indicador de nivel de agua.
- Page 24 USO Y FUNCIONAMIENTO (CONTINUACIÓN) ALARMA DE BAJO NIVEL DE AGUA* La unidad está equipada con un sensor de bajo nivel de agua. En modo Frío, cuando el tanque de agua está por debajo del nivel mínimo, usted escuchará la alarma y un indicador parpadeará continuamente.
- Page 25 USO Y FUNCIONAMIENTO (CONTINUACIÓN) LIMPIEZA DEL FILTRO DE MALLA Y FILTRO DE ENFRIAMIENTO HONEYCOMB ADVERTENCIA: Antes de limpiar la unidad, apague la unidad y desconecte de la toma de corriente. • El aparato tiene un Filtro de Malla y un Medio de Enfriamiento Honeycomb. •...
- Page 26 Hecho en China © 2018 JMATEK Limited. Todos los derechos reservados. La marca Honeywell es usada bajo licencia de Honeywell International Inc. Honeywell International Inc. no representa ni garantiza este producto. Este producto es fabricado por Airtek Int'l Corp. Ltd.