
Related Manuals for AEG FSB32610Z


Summary of Contents for AEG FSB32610Z
- Page 1 FSB32610Z Gebruiksaanwijzing Afwasautomaat User Manual Dishwasher USER MANUAL...
-
Page 2: Table Of Contents
13. MILIEUBESCHERMING................... 26 VOOR PERFECTE RESULTATEN Bedankt dat je voor dit AEG-product hebt gekozen. We hebben het gecreëerd om jarenlang onberispelijke prestaties te leveren, met innovatieve technologieën die het leven eenvoudiger maken – functies die je wellicht niet op gewone apparaten aantreft. - Page 3 NEDERLANDS niet verantwoordelijk voor verwondingen of schade die voortvloeit uit de onjuiste installatie of het onjuiste gebruik. Bewaar de instructies altijd op een veilige, toegankelijke plek voor toekomstig gebruik. 1.1 Veiligheid van kinderen en kwetsbare mensen Dit apparaat kan worden gebruikt door kinderen van 8 •...
-
Page 4: Veiligheidsvoorschriften
De waterdruk (minimaal en maximaal) moet liggen • tussen 0.5 (0.05) / 10 (1.0) bar (MPa) Volg het maximale aantal 13 plaatsen. • Indien het netsnoer beschadigd is, moet het worden • vervangen door de fabrikant, een erkende serviceverlener of vergelijkbaar gekwalificeerde personen om gevaar te voorkomen. - Page 5 NEDERLANDS • Zorg ervoor dat er geen zichtbare waterlekken zijn tijdens en na het www.youtube.com/electrolux www.youtube.com/aeg eerste gebruik van het apparaat. • De watertoevoerslang heeft een How to install your 60 cm veiligheidsventiel en een omhulsel Dishwasher Sliding Hinge met een hoofdkabel aan de binnenkant.
- Page 6 • Houd er rekening mee dat afvoerfilters, binnenrekken en plastic zelfreparatie of niet-professionele randapparatuur zoals manden en reparatie gevolgen kan hebben voor deksels. de veiligheid en de garantie kan doen • Met betrekking tot de lamp(en) in dit vervallen.
-
Page 7: Productbeschrijving
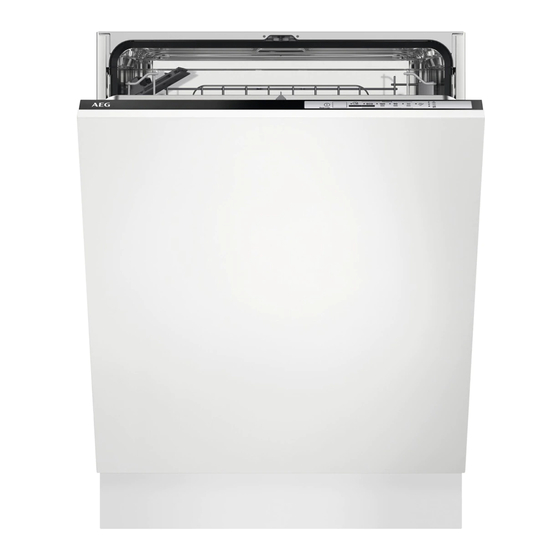
NEDERLANDS 3. PRODUCTBESCHRIJVING Bovenste sproeiarm Bestekmand Onderste sproeiarm Onderste korf Filters Bovenste korf Typeplaatje De afbeelding is een algemeen overzicht. Zoutreservoir Raadpleeg voor meer details Luchtventilatie andere hoofdstukken en/of Glansmiddeldoseerbakje documenten die bij het Afwasmiddeldoseerbakje apparaat zijn meegeleverd. 4. BEDIENINGSPANEEL Aan-/uittoets/Resettoets Programmatoets Programma-controlelampjes... -
Page 8: Programma's
4.1 Indicatielampjes Indicatie‐ Beschrijving lampje Indicatielampje droogfase. Dit is aan wanneer u een programma selec‐ teert met de droogfase. Het gaat knipperen wanneer de droogfase loopt. Indicatielampje zout. Dit is aan als het zoutreservoir bijgevuld dient te wor‐ den. Het is altijd uit als het programma in werking is. -
Page 9: Instellingen
NEDERLANDS Programma Lading vaatwas‐ Mate van bevui‐ Programmafasen ling Alles Alles • Voorspoelen 1) Dit programma heeft het meest efficiënte water- en energieverbruik voor normaal vervuild serviesgoed en bestek. Dit is het standaardprogramma voor testinstituten. Dit programma wordt gebruikt voor de be‐ oordeling van de naleving van Verordening (EU) 2019/2022 van de Commissie inzake ecologisch ont‐... - Page 10 Het apparaat slaat de instellingen op, Houd om naar de gebruikersmodus te dus u hoeft deze niet voor iedere gaan de programmaknop ingedrukt tot cyclus te configureren. het indicatielampje knippert en de indicatielampjes aan zijn. De programmakeuzemodus instellen 6.2 De waterontharder...
- Page 11 NEDERLANDS Regeneratieproces een programma met 2 Wh. Het spoelen Voor de juiste werking van de van de waterontharder eindigt met een waterontharder moet de hars van de volledige afvoer. ontharder regelmatig worden Elke uitgevoerde waterontharderspoeling geregenereerd. Dit proces is automatisch (mogelijk meer dan één in dezelfde en maakt deel uit van de normale cyclus) kan de programmaduur met nog...
- Page 12 Het wordt automatisch uitgeschakeld, maar kan worden vrijgegeven tijdens de hete spoelfase. geactiveerd. Als het glansmiddelreservoir leeg is, gaat Het geluidssignaal voor het de glansmiddelindicator branden om aan einde van het programma te geven dat je glansmiddel moet inschakelen bijvullen.
-
Page 13: Voor Het Eerste Gebruik
NEDERLANDS AirDry wordt automatisch bij alle 1. Druk drie keer op de programma's geactiveerd, behalve bij programmatoets. (indien van toepassing). Het controlelampje begint te knipperen. De duur van de droogfase en de 2. Wacht tot het indicatielampje blijft openingstijd van de deur variëren knipperen en de overige programma- afhankelijk van het geselecteerde indicatielampjes uit zijn. -
Page 14: Dagelijks Gebruik
LET OP! Het compartiment (A) is alleen voor glansmiddel. Vul het niet met vaatwasmiddel. LET OP! Gebruik alleen glansspoelmiddel dat 6. Draai de dop van het zoutreservoir speciaal is ontworpen voor rechtsom om het zoutreservoir te vaatwassers. sluiten. 1. Druk op de ontgrendelingsknop (D) LET OP! om het deksel te openen (C). - Page 15 NEDERLANDS 8.1 Gebruik van het 8.2 Een programma instellen vaatwasmiddel en starten Een programma starten 1. Laat de deur op een kier staan. 2. Druk op de aan/uit-knop om het apparaat te activeren. Zorg dat het apparaat in de keuzemodus Programma staat.
-
Page 16: Aanwijzingen En Tips
Controleer of er vaatwasmiddel in het Probeer de deur van het afwasmiddeldoseerbakje aanwezig is apparaat niet binnen 2 voordat je een nieuw programma start. minuten nadat AirDry hem automatisch opent te De Auto Off-functie openen, want dit kan schade... - Page 17 NEDERLANDS 9.3 Wat moet u doen als u – Controleer of het ingestelde stand van de waterontharder juist is wilt stoppen met het gebruik voor de waterhardheid in uw van multitabletten omgeving. – Volg de instructies in het Volg de volgende stappen voordat u hoofdstuk "Onderhoud en begint met het gebruiken van apart reiniging".
-
Page 18: Onderhoud En Reinigen
9.5 Voordat u een programma • De juiste hoeveelheid afwasmiddel wordt gebruikt. start 9.6 De rekken uitruimen Zorg vóór het starten van het gekozen programma dat: 1. Laat de borden afkoelen voordat u • De filters schoon zijn en correct zijn deze uit het apparaat neemt. - Page 19 NEDERLANDS 10.4 De filters reinigen Het filtersysteem bestaat uit 3 delen. 5. Zorg ervoor dat er geen etensresten of vuil in of rond de rand van de opvangbak zitten. 6. Plaats de platte filter (A) terug op zijn plaats. Zorg ervoor dat het goed 1.
- Page 20 3. Duw de sproeiarm naar beneden om LET OP! deze weer terug te plaatsen. Een onjuiste plaatsing van de filters kan leiden tot slechte wasresultaten en het apparaat beschadigen. 10.5 De onderste sproeiarm reinigen We raden u aan om de onderste...
-
Page 21: Probleemoplossing
NEDERLANDS 11. PROBLEEMOPLOSSING contact op te nemen met een erkende WAARSCHUWING! servicedienst. Onjuiste reparatie van het Zie de onderstaande tabel voor apparaat kan een gevaar informatie over mogelijke problemen. voor de veiligheid van de gebruiker vormen. Bij enkele problemen knippert het Reparaties moeten worden toegewezen indicatielampje af en toe om uitgevoerd door... - Page 22 Probleem en alarmcode Mogelijke oorzaak en oplossing De overstromingsbeveiliging is inge‐ • Draai de waterkraan dicht. schakeld. • Controleer of het apparaat correct geïnstal‐ leerd is. • Het indicatielampje knippert • Controleer of de korven zijn geladen volgens herhaaldelijk drie keer.
- Page 23 NEDERLANDS Probleem en alarmcode Mogelijke oorzaak en oplossing Het programma duurt te lang. • Als de optie uitgestelde start is ingesteld, an‐ nuleert u deze functie of wacht u tot het aftel‐ len is voltooid. • Raadpleeg de tabel verbruikswaarden in het hoofdstuk Programma’s.
- Page 24 11.1 De was- en droogresultaten zijn niet naar tevredenheid Probleem Mogelijke oorzaak en oplossing Slechte wasresultaten. • Gebruik intensievere wasprogramma´s. • Maak de openingen in de sproeiarm en het filter schoon. Raadpleeg Onderhoud en reiniging. • Raadpleeg Dagelijks gebruik, Tips en advies en de folder voor het laden van de korf.
-
Page 25: Technische Informatie
NEDERLANDS Probleem Mogelijke oorzaak en oplossing Roestresten op het bestek. • Er zit te veel zout in het water dat voor het wassen wordt gebruikt. Zie De waterontharder instellen. • Zilver en roestvrijstalen bestek zijn samen geplaatst. Zet zilveren en roestvrijstalen voorwerpen niet dicht bij elkaar. -
Page 26: Milieubescherming
Watertoevoer max. 60°C Koud water of warm water Capaciteit Plaatsinstellingen 1) Zie het typeplaatje voor andere waarden. 2) Als het hete water door een alternatieve energiebron wordt geproduceerd (bijv. zonnepanelen), ge‐ bruik dan de heetwatervoorziening om het energieverbruik te verminderen. -
Page 27: Safety Information
13. ENVIRONMENTAL CONCERNS..............49 FOR PERFECT RESULTS Thank you for choosing this AEG product. We have created it to give you impeccable performance for many years, with innovative technologies that help make life simpler – features you might not find on ordinary appliances. Please spend a few minutes reading to get the very best from it. - Page 28 Always keep the instructions in a safe and accessible location for future reference. 1.1 Children and vulnerable people safety This appliance can be used by children aged from 8 • years and above and persons with reduced physical,...
-
Page 29: Safety Instructions
• using the new supplied hose-sets. Old hose sets must not be reused. 2. SAFETY INSTRUCTIONS 2.1 Installation www.youtube.com/electrolux www.youtube.com/aeg WARNING! Only a qualified person must How to install your 60 cm install this appliance. Dishwasher Sliding Hinge • Remove all the packaging. - Page 30 2.4 Use cable. Should the mains cable need to be replaced, this must be carried out • Do not put flammable products or by our Authorised Service Centre. items that are wet with flammable • Connect the mains plug to the mains products in, near or on the appliance.
-
Page 31: Product Description
ENGLISH 2.6 Disposal separately: These lamps are intended to withstand extreme physical conditions in household appliances, WARNING! such as temperature, vibration, Risk of injury or suffocation. humidity, or are intended to signal • Disconnect the appliance from the information about the operational mains supply. -
Page 32: Control Panel
4. CONTROL PANEL On/off button / Reset button Programme button Programme indicators Delay button Indicators 4.1 Indicators Indicator Description Drying phase indicator. It is on when you select a programme with the dry‐ ing phase. It flashes when the drying phase operates. - Page 33 ENGLISH Programme Dishwasher load Degree of soil Programme phases Crockery, cutlery, Normal, lightly • Dishwashing 60 °C pots, pans dried-on • Intermediate rinse • Final rinse 55 °C • Drying • AirDry Crockery, cutlery Fresh • Dishwashing 50 °C • Intermediate rinse •...
-
Page 34: Settings
6. SETTINGS 6.1 Programme selection Press and hold the on/off button until the appliance is in programme selection mode and user mode mode. When the appliance is in programme How to enter user mode selection mode it is possible to set a programme and to enter user mode. - Page 35 ENGLISH German de‐ French de‐ mmol/l Clarke de‐ Water softener lev‐ grees (°dH) grees (°fH) grees <4 <7 <0.7 < 5 1) Factory setting. 2) Do not use salt at this level. Regardless of the type of detergent initiation has no impact on the cycle used, set the proper water hardness duration, unless it occurs in the middle of level to keep the salt refill indicator...
- Page 36 4. Press the on/off button to confirm the are off. setting. The intermittent flashing of the indicator 6.4 Acoustic signals shows the current setting: e.g. 5 flashes + pause + 5 flashes = level 5.
-
Page 37: Before First Use
ENGLISH CAUTION! If children have access to the appliance, it is advised to deactivate AirDry as opening the door may pose a danger. How to deactivate the AirDry Make sure the appliance is in user mode. 1. Press the programme button three times. -
Page 38: Daily Use
CAUTION! The compartment (A) is for rinse aid only. Do not fill it with detergent. CAUTION! Only use rinse aid designed specifically for dishwashers. 1. Press the release button (D) to open the lid (C). 4. Carefully shake the funnel by its 2. - Page 39 ENGLISH 8.2 Setting and starting a Make sure that the appliance is in programme selection mode. programme • If the salt indicator is on, fill the salt container. Starting a programme • If the rinse aid indicator is on, fill the rinse aid dispenser.
-
Page 40: Hints And Tips
Make sure that there is detergent in the Do not try to close the detergent dispenser before you start a appliance door within 2 new programme. minutes after AirDry automatically opens it as this The Auto Off function may cause damage to the appliance. - Page 41 ENGLISH 9.4 Loading the baskets products can cause damage to the appliance. • Always use the whole space of the • In areas with hard and very hard baskets. water, we recommend to use basic • Use the appliance to wash dishwasher detergent (powder, gel, dishwasher-safe items only.
-
Page 42: Care And Cleaning
After the programme is completed, water can still remain on the inside surfaces of the appliance. 10. CARE AND CLEANING WARNING! CAUTION! Before maintenance, If unable to remove the deactivate the appliance and foreign objects, contact an disconnect the mains plug Authorised Service Centre. - Page 43 ENGLISH 7. Reassemble the filters (B) and (C). 8. Put back the filter (B) in the flat filter (A). Turn it clockwise until it locks. 2. Remove the filter (C) out of filter (B). 3. Remove the flat filter (A). 4.
-
Page 44: Troubleshooting
3. To install the spray arm back, press it downwards. 2. Wash the spray arm under running water. Use a thin pointed tool, e.g. a toothpick, to remove particles of soil 10.6 Cleaning the upper from the holes. spray arm Do not remove the upper spray arm. - Page 45 ENGLISH Problem and alarm code Possible cause and solution The programme does not start. • Make sure that the appliance door is closed. • If the delay start is set, cancel the setting or wait for the end of the countdown. •...
- Page 46 Problem and alarm code Possible cause and solution The temperature of the water inside • Make sure that the temperature of the inlet wa‐ the appliance is too high or malfunc‐ ter does not exceed 60°C. tion of the temperature sensor occur‐...
- Page 47 ENGLISH Problem and alarm code Possible cause and solution The appliance trips the circuit-beaker. • The amperage is insufficient to supply simulta‐ neously all the appliances in use. Check the socket amperage and the capacity of the me‐ ter or turn off one of the appliances in use. •...
- Page 48 Problem Possible cause and solution The dishes are wet. • For the best drying performance activate the function AirDry. • The programme does not have a drying phase or has a drying phase with low temperature. • The rinse aid dispenser is empty.
-
Page 49: Technical Information
ENGLISH Refer to "Before first use", "Daily use" or "Hints and tips" for other possible causes. 12. TECHNICAL INFORMATION Dimensions Width / height / depth (mm) 596 / 818 - 898 / 550 Voltage (V) 220 - 240 Electrical connection Frequency (Hz) Water supply pressure Min. - Page 52 www.aeg.com/shop...