
Related Manuals for Makita XAG12


Summary of Contents for Makita XAG12
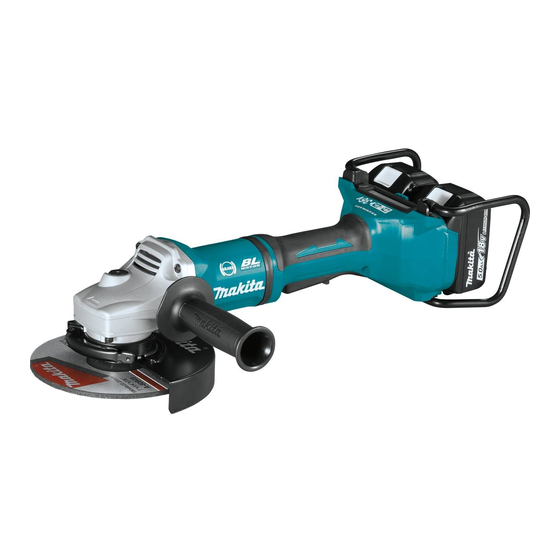
- Page 1 INSTRUCTION MANUAL MANUAL DE INSTRUCCIONES Cordless Angle Grinder Esmeriladora Angular Inalámbrica XAG12 XAG13 IMPORTANT: Read Before Using. IMPORTANTE: Lea antes de usar.
-
Page 2: Specifications
ENGLISH (Original instructions) SPECIFICATIONS Model: XAG12 XAG13 Wheel diameter 180mm (7″) 230mm (9″) Max. wheel thickness 6.5mm (1/4″) Spindle thread 5/8″ Rated speed (n) 7,800/min 6,000/min Overall length 499mm (19-5/8″) Rated voltage D.C.36 V Standard battery cartridge BL1815N, BL1820B, BL1830, BL1830B, BL1840B, BL1850B, BL1860B Net weight 5.0 - 6.0 kg (11.02 - 13.23 lbs) - Page 3 Dress properly. Do not wear loose clothing or Do not expose a battery pack or tool to fire or jewellery. Keep your hair, clothing, and gloves excessive temperature. Exposure to fire or tem- away from moving parts. Loose clothes, jewel- perature above 130 °C may cause explosion.
- Page 4 Wear personal protective equipment. Never place your hand near the rotating acces- Depending on application, use face shield, sory. Accessory may kickback over your hand. safety goggles or safety glasses. As appro- Do not position your body in the area where priate, wear dust mask, hearing protectors, power tool will move if kickback occurs.
- Page 5 When wheel is binding or when interrupting Observe the instructions of the manufacturer a cut for any reason, switch off the power for correct mounting and use of wheels. tool and hold the power tool motionless until Handle and store wheels with care. the wheel comes to a complete stop.
-
Page 6: Functional Description
If you can see the red indicator on the causing fires, personal injury and damage. It will upper side of the button, it is not locked completely. also void the Makita warranty for the Makita tool and charger. CAUTION: Always install the battery cartridge fully until the red indicator cannot be seen. -
Page 7: Overload Protection
Indicating the remaining battery Tool / battery protection system capacity The tool is equipped with a tool/battery protection sys- tem. This system automatically cuts off power to the Only for battery cartridges with the indicator motor to extend tool and battery life. The tool will auto- matically stop during operation if the tool or battery is placed under one of the following conditions: ►... - Page 8 Shaft lock Automatic speed change function Press the shaft lock to prevent spindle rotation when installing or removing accessories. ► 1. Mode indicator ► 1. Shaft lock Mode indicator status Operation mode NOTICE: Never actuate the shaft lock when the High speed mode spindle is moving.
- Page 9 ASSEMBLY CAUTION: Always be sure that the tool is switched off and the battery cartridge is removed before adjusting or checking function on the tool. Installing side grip (handle) CAUTION: Always be sure that the side grip is installed securely before operation. Screw the side grip securely on the position of the tool as shown in the figure.
- Page 10 ► 1. Wheel guard ► 1. Lock nut 2. Depressed center wheel 3. Inner flange Close the lever in direction of the arrow. Then tighten the wheel guard with fastening the nut. Be sure to To tighten the lock nut, press the shaft lock firmly so tighten the nut securely.
-
Page 11: Operation
Follow instructions for depressed center wheel but also CAUTION: Never switch on the tool when it use back up pad over wheel. See order of assembly on is in contact with the workpiece, it may cause an accessories page in this manual. injury to operator. - Page 12 For United States and Canada Operation with abrasive cut-off / diamond wheel ø45 Optional accessory ø78 WARNING: When using an abrasive cut-off / diamond wheel, be sure to use only the special wheel guard designed for use with cut-off wheels. WARNING: NEVER use cut-off wheel for side grinding.
-
Page 13: Maintenance
If the battery guard is deformed be performed by Makita Authorized or Factory Service or damaged, contact your authorized service center Centers, always using Makita replacement parts. -
Page 14: Optional Accessories
The use of any other accessories or attachments might present a risk of injury to persons. Only use accessory or attachment for its stated purpose. If you need any assistance for more details regarding these accessories, ask your local Makita Service Center. •... -
Page 15: Warranty Policy
COMPLETE tool, freight prepaid, to one of Makita’s Factory or Authorized Service Centers. If inspection shows the trouble is caused by defective workmanship or material, Makita will repair (or at our option, replace) without charge. This Warranty does not apply where: •... -
Page 16: Especificaciones
ESPAÑOL (Instrucciones originales) ESPECIFICACIONES Modelo: XAG12 XAG13 Diámetro de la rueda o disco abrasivo 180 mm (7″) 230 mm (9″) Grosor máx. de la rueda o disco abrasivo 6,5 mm (1/4″) Rosca del eje 5/8″ (15,88 mm) Velocidad especificada (n) - Page 17 Seguridad personal Realice el mantenimiento a las herramientas eléctricas. Compruebe que no haya partes móviles Manténgase alerta, preste atención a lo que desalineadas o estancadas, piezas rotas y cualquier está haciendo y utilice su sentido común otra condición que pueda afectar al funcionamiento cuando opere una herramienta eléctrica.
- Page 18 Utilice equipo de protección personal. Dependiendo Advertencias de seguridad para la de la aplicación, use careta y gafas protectoras o de esmeriladora inalámbrica seguridad. Según resulte apropiado, use máscara contra polvo, protectores para oídos, guantes y Advertencias de seguridad comunes para las ope- mandil de trabajo que puedan detener pequeños raciones de esmerilado, lijado, cepillado con alam- fragmentos abrasivos o de la pieza de trabajo.
- Page 19 Mantenga sujetada firmemente la herramienta No utilice ruedas que estén desgastadas de eléctrica y posicione su cuerpo y brazo de herramientas eléctricas más grandes. Una rueda manera que pueda resistir las fuerzas del retro- diseñada para una herramienta eléctrica más ceso brusco.
- Page 20 18. Los discos cortadores no se deben someter a Si se recomienda utilizar un protector durante el cepillado con alambre, impida cualquier ninguna presión lateral. interferencia de la rueda o cepillo de alambre 19. No utilice guantes de trabajo de tela durante con el protector.
-
Page 21: Descripción Del Funcionamiento
Makita, o de baterías alteradas, puede ocasio- nar que las baterías exploten causando un incendio, lesiones personales y daños. Asimismo, esto inva- lidará la garantía de Makita para la herramienta y el cargador Makita. Consejos para alargar al máximo ►... -
Page 22: Protección Contra Sobrecarga
Indicación de la capacidad restante de la batería Únicamente para cartuchos de batería con el indicador ► 1. Indicador de batería Protección contra sobrecarga Cuando la herramienta se está utilizando de manera que causa que consuma una cantidad de corriente inusualmente alta, la herramienta se detiene auto- ►... - Page 23 Bloqueo del eje Presione el bloqueo del eje para impedir que éste gire al instalar o extraer accesorios. ► 1. Palanca de desbloqueo 2. Palanca interruptora Función de cambio de velocidad ► 1. Bloqueo del eje automática AVISO: Nunca accione el bloqueo del eje cuando éste se esté...
-
Page 24: Montaje
Función de control de torsión Instalación y extracción del electrónica protector de la rueda o disco abrasivo (para rueda de centro La herramienta detecta electrónicamente las situa- hundido, multidisco, rueda flexible, ciones en las que hay riesgo de que la rueda o el rueda de cepillo de alambre / rueda accesorio puedan saltar. - Page 25 Para herramienta con protector de la rueda o disco abrasivo de tipo palanca de abrazadera Afloje la tuerca y luego jale la palanca en la dirección de la flecha. ► 1. Palanca 2. Tuerca Para extraer el protector de la rueda, siga el procedi- miento de instalación en orden inverso.
-
Page 26: Operación
Instalación o extracción de un disco abrasivo Accesorio opcional ► 1. Llave de contratuerca 2. Bloqueo del eje Para extraer la rueda, siga el procedimiento de instala- ción en orden inverso. NOTA: En países distintos de Estados Unidos de América y Canadá, también se puede utilizar una ►... - Page 27 Operación con una rueda o disco de PRECAUCIÓN: Nunca encienda la herra- corte abrasivo / rueda de diamante mienta cuando ésta esté en contacto con la pieza de trabajo, esto podría ocasionar lesiones al operador. Accesorio opcional PRECAUCIÓN: Use siempre gafas de seguri- ADVERTENCIA: Cuando use una rueda cor- dad o careta durante la operación.
- Page 28 Para Estados Unidos de América y Canadá AVISO: Cuando utilice el cepillo, evite aplicar mucha presión que haga que los alambres se ø45 doblen demasiado. Esto podría provocar una rotura prematura. Operación con rueda de cepillo de ø78 alambre Accesorio opcional PRECAUCIÓN: Verifique la operación de la rueda de cepillo de alambre haciendo funcionar...
-
Page 29: Mantenimiento
Para mantener la SEGURIDAD y FIABILIDAD del pro- ducto, las reparaciones, y cualquier otra tarea de man- tenimiento o ajuste deberán ser realizadas en centros de servicio autorizados o de fábrica Makita, empleando siempre repuestos Makita. 29 ESPAÑOL... -
Page 30: Accesorios Opcionales
Estos accesorios o aditamentos están recomendados para utilizarse con su herra- mienta Makita especificada en este manual. El empleo de cualquier otro accesorio o aditamento puede conlle- var el riesgo de lesiones personales. Utilice los accesorios o aditamentos solamente para su fin establecido. - Page 31 Makita. Si la inspección muestra que el problema ha sido a causa de un defecto de mano de obra o material, Makita hará la reparación (o a su discreción, el reemplazo) sin ningún cargo. Esta garantía no aplica cuando: •...
- Page 32 Para reducir la exposición a estos productos químicos: trabaje en un área bien ventilada y póngase el equipo de seguridad indicado, tal como las máscaras contra polvo que están especialmente diseñadas para filtrar partículas microscópicas. Makita Corporation 3-11-8, Sumiyoshi-cho, Anjo, Aichi 446-8502 Japan 885578-949...
- Page 33 DC18RD Two Port Multi Fast Charger Chargeur Rapide 2 Batteries Multi-Cargador Rápido de Dos Puertos IMPORTANT: Read Before Using. IMPORTANT : Lire ce qui suit avant d’utiliser cet outil. IMPORTANTE: Leer antes de usar. Symbols The followings show the symbols used for the charger and battery. Be sure that you understand their meaning before use.
- Page 34 • Cooling abnormality • Problème de refroidissement • Anormalidad en la carga • Do not short batteries. • Ne jamais court-circuiter les bornes d’une batterie. • No provoque un cortocircuito en las baterías.
-
Page 35: Important Safety Instructions
10. Make sure cord is located so that it will not be stepped on, tripped over, or otherwise subjected to damage or stress. 11. Do not operate charger with damaged cord or plug. If the cord or plug is damaged, ask Makita authorized service center to replace it in order to avoid a hazard. -
Page 36: Cooling System
Preset melody sound remains stored even when the charger is unplugged. NOTE: • The battery charger is for charging Makita-battery cartridge. Never use it for other purposes or for other manufacturer’s batteries. • When you charge a battery cartridge which is new or has not been used for a long period of time, it may not accept a full charge until after discharging it completely and recharging a couple of times. - Page 37 Using with USB device This charger works as an external power supply for USB device. Open the cover of the USB power supply port. Connect the USB cable to the USB power supply port and USB device. Plug the charger into a power source. After charging, unplug the charger.
- Page 38 (1) le chargeur de batterie, sur (2) la batterie et sur (3) le produit utilisant la batterie. ATTENTION — Pour réduire le risque de blessure, ne chargez que les batteries rechargeables MAKITA qui figurent sur l’étiquette du chargeur. Les autres types de batteries peuvent causer des blessures et entraîner des dommages en explosant.
-
Page 39: Système De Refroidissement
La mélodie préréglée demeure en mémoire même lorsque vous débranchez le chargeur. NOTE : • Le chargeur de batterie est conçu pour les batteries Makita. Ne jamais l’utiliser à d’autres fins ou avec les batteries d’autres fabricants. • Lorsque vous chargez une cartouche de batterie neuve ou restée inutilisée pendant une période prolongée, il se peut que vous deviez la recharger et la décharger à... - Page 40 Charge de remise en condition La charge de remise en condition peut faire augmenter la durée de vie de la batterie en effectuant automatiquement une recherche du niveau de charge optimale des batteries dans toute situation. Une batterie utilisée à plusieurs reprises dans les conditions suivantes nécessitera une “charge de remise en condi- tion”...
-
Page 41: Instrucciones De Seguridad Importantes
(1) el cargador de baterías, (2) la batería, y (3) el producto con el que se utilice la batería. PRECAUCION — Para reducir el riesgo de sufrir heridas, cargue solamente las baterías recargables MAKITA marcadas en la etiqueta de cargador. Otros tipos de baterías podrán explotar y ocasionar heridas personales y daños. - Page 42 El sonido de melodía permanecerá almacenado aunque desenchufe el cargador. NOTAS: • El cargador de baterías es sólo para cargar cartuchos de batería Makita. No lo utilice nunca con otros fines ni para baterías de otros fabricantes. • Cuando cargue un cartucho de batería que sea nuevo o que no haya sido utilizado durante un largo periodo de tiempo, es posible que no acepte una carga completa hasta después de haberlo descargado completamente y...
- Page 43 Carga de acondicionamiento La carga de acondicionamiento puede alargar la vida útil de la batería buscando automáticamente la condición óptima para la carga de la batería en cualquier situación. La batería empleada en las siguientes condiciones repetidamente requerirá una “carga de acondicionamiento” para evitar que su vida de servicio no se acorte rápidamente.
- Page 44 Makita Corporation 3-11-8, Sumiyoshi-cho, Anjo, Aichi 446-8502 Japan 885372-949 www.makita.com...