Makita GA037G Instruction Manual
Cordless angle grinder
Hide thumbs
Also See for GA037G:
- Instruction manual (172 pages) ,
- Instruction manual (172 pages) ,
- Instruction manual (172 pages)
Table of Contents
Advertisement
Quick Links
Advertisement
Table of Contents

Related Manuals for Makita GA037G


Summary of Contents for Makita GA037G
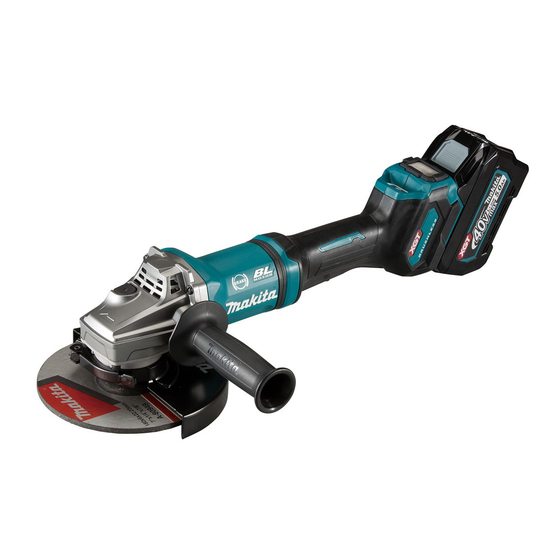
- Page 1 INSTRUCTION MANUAL Cordless Angle Grinder GA037G GA038G Read before use.
-
Page 2: Specifications
The followings show the symbols which may be used The typical A-weighted noise level determined accord- for the equipment. Be sure that you understand their ing to EN60745-2-3: meaning before use. Model GA037G Sound pressure level (L ) : 88 dB(A) Read instruction manual. Sound power level (L... -
Page 3: Safety Warnings
Vibration SAFETY WARNINGS The vibration total value (tri-axial vector sum) deter- General power tool safety warnings mined according to EN60745-2-3: Model GA037G Work mode: surface grinding with normal side grip WARNING: Read all safety warnings, instruc- Vibration emission (a ) : 5.5 m/s... - Page 4 Personal safety Power tool use and care Stay alert, watch what you are doing and use Do not force the power tool. Use the correct common sense when operating a power tool. power tool for your application. The correct Do not use a power tool while you are tired or power tool will do the job better and safer at the under the influence of drugs, alcohol or med- rate for which it was designed.
- Page 5 Do not use a battery pack or tool that is dam- Do not use a damaged accessory. Before each aged or modified. Damaged or modified batteries use inspect the accessory such as abrasive wheels for chips and cracks, backing pad for may exhibit unpredictable behaviour resulting in cracks, tear or excess wear, wire brush for loose fire, explosion or risk of injury.
- Page 6 Kickback is the result of power tool misuse and/or Additional Safety Warnings Specific for Abrasive incorrect operating procedures or conditions and can be Cutting-Off Operations: avoided by taking proper precautions as given below. Do not “jam“ the cut-off wheel or apply exces- Maintain a firm grip on the power tool and sive pressure.
- Page 7 12. Use the batteries only with the products serious personal injury. specified by Makita. Installing the batteries to non-compliant products may result in a fire, exces- sive heat, explosion, or leak of electrolyte.
- Page 8 It will button with an object with a sharp edge. also void the Makita warranty for the Makita tool and 16. Always close the lid of the slot when charger.
-
Page 9: Functional Description
Indicating the remaining battery FUNCTIONAL capacity DESCRIPTION Press the check button on the battery cartridge to indi- cate the remaining battery capacity. The indicator lamps CAUTION: Always be sure that the tool is light up for a few seconds. switched off and the battery cartridge is removed before adjusting or checking function on the tool. - Page 10 Tool / battery protection system Switch action The tool is equipped with a tool/battery protection sys- CAUTION: Before installing the battery car- tem. This system automatically cuts off power to the tridge into the tool, always check to see that the motor to extend tool and battery life.
- Page 11 Mount the wheel guard with the protrusions on the ASSEMBLY wheel guard band aligned with the notches on the bear- ing box. Then rotate the wheel guard to such an angle that it can protect the operator according to work. CAUTION: Always be sure that the tool is switched off and the battery cartridge is removed...
- Page 12 When using an abrasive cut-off / diamond wheel Optional accessory WARNING: Be sure to use only the special wheel guard designed for use with cut-off wheels. (In some European countries, when using a diamond wheel, the ordinary guard can be used. Follow the regulations in your country.) Mount the wheel guard with the protrusions on the wheel guard band aligned with the notches on the bear-...
- Page 13 No. Those flanges are so thick that the entire thread cannot be retained by the spindle. Mount inner flange, abrasive wheel and Ezynut onto the spindle so that Makita Logo on Ezynut faces outside. ► 1. Ezynut 2. Abrasive wheel 3. Inner flange 4. Spindle...
- Page 14 Installing abrasive cut-off / diamond Installing wire cup brush wheel Optional accessory Optional accessory CAUTION: Do not use brush that is damaged, or which is out of balance. Use of damaged brush WARNING: When using an abrasive cut-off could increase potential for injury from contact with / diamond wheel, be sure to use only the special broken brush wires.
-
Page 15: Operation
Installing offset diamond wheel Connecting a vacuum cleaner Optional accessory Optional accessory With optional accessories, you can use this tool for WARNING: Never vacuum metal particles cre- planing concrete surface. ated by grinding/cutting/sanding operation. Metal particles created by such operation are so hot that they WARNING: For offset diamond wheels that ignite dust and the filter inside the vacuum cleaner. - Page 16 Usage example: operation with abrasive cut-off Grinding and sanding operation wheel Usage example: operation with diamond wheel Turn the tool on and then apply the wheel or disc to the workpiece. In general, keep the edge of the wheel or disc at an angle of about 15°...
- Page 17 The overview of the wireless activation function Operation with wire wheel brush setting is as follows. Refer to each section for detail procedures. Optional accessory Installing the wireless unit CAUTION: Check operation of wire wheel Tool registration for the vacuum cleaner brush by running tool with no load, insuring that Starting the wireless activation function no one is in front of or in line with the wire wheel...
- Page 18 Tool registration for the vacuum cleaner NOTE: A Makita vacuum cleaner supporting the wireless activation function is required for the tool registration. NOTE: Finish installing the wireless unit to the tool before starting the tool registration.
- Page 19 Push the wireless activation button on the tool Starting the wireless activation briefly. The wireless activation lamp will blink in blue. function NOTE: Finish the tool registration for the vacuum cleaner prior to the wireless activation. NOTE: Refer to the instruction manual of the vacuum cleaner, too.
- Page 20 Description of the wireless activation lamp status ► 1. Wireless activation lamp The wireless activation lamp shows the status of the wireless activation function. Refer to the table below for the meaning of the lamp status. Status Wireless activation lamp Description Color Duration...
- Page 21 If the cancellation is performed successfully, the wire- Cancelling tool registration for the less activation lamps will light up in red for 2 seconds vacuum cleaner and start blinking in blue. NOTE: The wireless activation lamps finish blinking in Perform the following procedure when cancelling the red after 20 seconds elapsed.
- Page 22 Before asking for repairs, conduct your own inspection first. If you find a problem that is not explained in the manual, do not attempt to dismantle the tool. Instead, ask Makita Authorized Service Centers, always using Makita replace- ment parts for repairs.
-
Page 23: Maintenance
To maintain product SAFETY and RELIABILITY, repairs, any other maintenance or adjustment should be performed by Makita Authorized or Factory Service Centers, always using Makita replacement parts. Air vent cleaning The tool and its air vents have to be kept clean. -
Page 24: Optional Accessories
The use of any other accessories or attachments might present a risk of injury to persons. Only use accessory or attachment for its stated purpose. If you need any assistance for more details regarding these accessories, ask your local Makita Service Center. •... - Page 25 Offset diamond wheel Lock nut wrench NOTE: *1 Only for tools with M14 spindle thread. NOTE: *2 In some European countries, when using a diamond wheel, the ordinary guard can be used instead of the special guard covering the both side of the wheel. Follow the regulations in your country. NOTE: *3 Use Inner flange 78 and Outer flange 78 together.
- Page 28 Makita Europe N.V. Jan-Baptist Vinkstraat 2, 3070 Kortenberg, Belgium Makita Corporation 3-11-8, Sumiyoshi-cho, Anjo, Aichi 446-8502 Japan 885839A226 www.makita.com 20200905...