Table of Contents
Advertisement
Quick Links
DEHUMIDIFIER
SERVICE MANUAL
Model
CONTENTS
1. PRODUCT SPECIFICATIONS........................................................................................ 2
2. OUTER DIMENSIONS .................................................................................................... 3
3. EXTERNAL VIEW, PARTS AND DISPLAY SECTION................................................ 3 ~ 8
4. TECHNICAL POINTS.................................................................................................. 8 ~ 10
5. DAILY CHECKS AND MAINTENANCE ........................................................................ 11
6.1 Wiring Diagram....................................................................................................... 12
6.2 Function List ....................................................................................................... 13 ~ 15
6.3 Timing Charts ..................................................................................................... 16 ~ 20
6.4 Board Diagrams (Component Side) ....................................................................... 21
6.5 General Block Diagram ...................................................................................... 22 ~ 25
7.1 Troubleshooting flowchart ..................................................................................... 26
7.2 One-Point Service .............................................................................................. 26 ~ 27
7.3 Key Component Check Procedures ....................................................................... 27
7.4 Error Indications and Corrective Actions ............................................................... 28
7.5 Self-Test Program and Execution Procedure .................................................... 28~ 30
8. DISASSEMBLY AND REASSEMBLY HINTS ........................................................... 31~ 34
9. CONTINUOUS WATER DRAINAGE ............................................................................. 35
PARTS CATALOG .......................................................................................................... 36~ 43
10. TROUBLESHOOTING................................................................................................ 44~ 45
PRECAUTIONS ............................................................................................................... 46~ 47
MJ-E16S/E16SX-S1
ADVANCED AND EVER ADVANCING
MITSUBISHI ELECTRIC
Sold from 2003
2003
No.MJW-21
Advertisement
Table of Contents
Troubleshooting

Related Manuals for Mitsubishi MJ-E16S-S1


Summary of Contents for Mitsubishi MJ-E16S-S1
-
Page 1: Table Of Contents
ADVANCED AND EVER ADVANCING MITSUBISHI ELECTRIC 2003 DEHUMIDIFIER No.MJW-21 SERVICE MANUAL MJ-E16S/E16SX-S1 Model Sold from 2003 CONTENTS 1. PRODUCT SPECIFICATIONS..................2 2. OUTER DIMENSIONS ....................3 3. EXTERNAL VIEW, PARTS AND DISPLAY SECTION..........3 ~ 8 4. TECHNICAL POINTS....................8 ~ 10 5. -
Page 2: Product Specifications
1. Product specifications Model MJ-E16S-S1 MJ-E16SX-S1 Item Dehumidifying capacity 16.0 (30°C room temperature, 80% relative humidity) (liters/day) Laundry Continuous dehumidi- fying single phase, 220-240V, 50Hz Power supply (phases,V,Hz) Power consumption (W) Operating current (A) Starting current (A) Metallic Blue (A) Color tone 570 ×... -
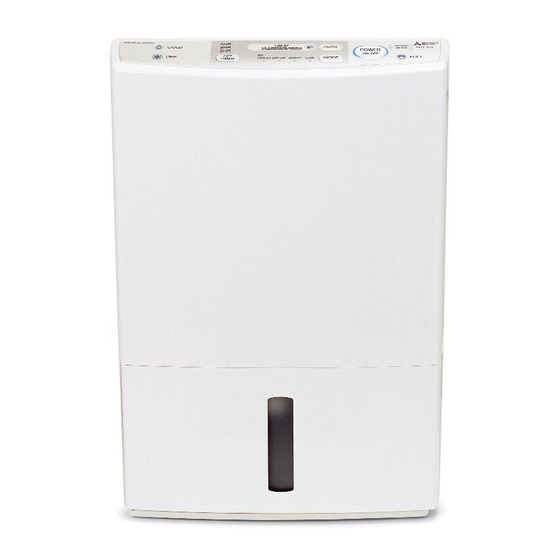
Page 3: Outer Dimensions
2. Outer Dimensions 3. External View, Parts and Display Section E16SX Control Panel Front Air purifying filter Already installed at time of purchase Air filter Back Handle Raise handle to transport Louvre Side air intakes (left/right) Front Do not block panel Sensor Water Tank... - Page 4 Control Panel MJ-E16S ¡ COLD Lamp ¡ OFF Timer Lamp ¡ Lamp ¡ Power button Current mode lights Lights when the room Set time lights Use this to switch the ¡ Auto button ¡ OFF Timer button temperature drops unit OFF and ON. For swiching mode the below 15°C For setting the Timer...
- Page 5 <Modes> ¡ Easy Dehumidifying The unit automatically controls airflow to counter excessive E16S E16SX room temperature/humidity. It activates the blower at high temperatures. ¡ Room temperature is below 27°C - the unit automatically sets the humidity level according to the temperature. ¡...
- Page 6 <Indications> E16S E16SX Low indicator High humidity warning Cold lamp When the room temperature falls below 15°C while the unit is operating, the lamp turns on or the indicator flashes when the humidity in indicator appears. the room exceeds 75%. Activating the dehumidifier is recommended when the indicator is flashing.
- Page 7 E16SX <<ON timer operation>> <<OFF timer operation>> The ON timer can be set for 1 to 9 hours. The OFF timer can be set for 1 to 9 hours. Set the timer when the power is switched off. Set the timer when the power is switched on. To set To set Switch the power off.
-
Page 8: Technical Points
<Using the Child Lock> E16SX To Lock Releasing the child lock Press for 3 or more seconds. Press for 3 or more seconds. ¡ The child lock indicator ¡ The child lock lamp goes out. The child lock is switched off when the power cord is unplugged. When the child lock is activated the unit cannot be switched off or on. - Page 9 4.2 Operation and Performance Working temperature Defrosting Dehumidification is possible with a room temperature of 1 The unit may display during operation and stop air – 35°C. If the room temperature exceeds 35°C, however, flow, followed by a change in the operating noise. The the temperature inside the unit will increase;...
- Page 10 4.3 Coolant Circuit φ5 Compressor Coolant flow Dehumidifying φ5 Defrosting φ5 φ6.35 Tube temperature φ6.35 sensing thermistor Solenoid Intake Blow valve (closed when dehumidifying and open when defrosting) Capillary tube Humidity sensor φ5.0 × φ4.0 Room temperature sensing thermistor φ6.35 φ6.35 Capillary tube φ2.0 ×...
-
Page 12: Wiring Diagram And Block Diagram
6. Wiring Diagram and Block Diagram 6.1 Wiring Diagram E16S Sensors Control board (Humidity and room P200 temperature sensing) P100 Gray Run capacitor 1°C (defrost)/12°C (end) Gray Thermistor (Tube White Blue temperature sensing) White Power supply board Brown Power plug Gray Tank full switch Gray... -
Page 13: Function List
6.2 Function List E16S Operation mode Dehumidifying operation Compressor Blower OFF OFF OFF OFF OFF OFF Solenoid value Easy dehumidifying Laundry Low temp Air purifier Off timer Tank full Defrost Low temperture ※ = Lit. = Can light. = Not lit. E16SX Operation mode Dehumidifying operation... - Page 14 <Operation Control> 1 Humidity set operation E16SX (a) Compressor and blower fan operation will switch by current humidity and set temperature. Blower fan rank Decline in Rise in current Compressor current 29°C 36°C humidity humidity 27°C 34°C Rank 1 Rank 2 Rank 5 Current humidity Rank 2...
- Page 15 5 Easy Dehumidifier E16S E16SX (a) Modifies humidity setting or operates CIRCULATE mode (blower only mode) according to the room temperature. (b) Switches temperature table every 60 seconds to prevent the blower from turning on and off at the 3-minute restart for the coloured section in the chart below.
-
Page 21: Board Diagrams (Component Side)
6.4 Board Diagrams (Componet Side) [Power supply board diagram] [Control board] E16S E16SX... -
Page 22: General Block Diagram
6.5 General Block Diagram E16S... - Page 24 E16SX...
-
Page 26: Troubleshooting Procedure
7. Troubleshooting Procedure 7.1 Troubleshooting flowchart The compressor does not operate in Air purifier The unit does not operate mode. Start Abnormal Restore AC power supply Check AC power supply Normal Blown Has the fuse blown out? Replace fuse Not blown Is the float switch turned on? Mechanical check •... -
Page 27: Key Component Check Procedures
If the customer complains that the unit won’t dehumidify, make the following checks before starting to repair the coolant circuit: 1 Clogged filter, or dust: ➞ Action: Clean. 2 Low-temperature, low-humidity operating environment: ➞ Action: See the explanation of the graph on page 9, or move the unit to a kitchen or bathroom and request verification of its performance. -
Page 28: Error Indications And Corrective Actions
7.4 Error Indications and Corrective Actions Indication Error (failure) Corrective action (Timer display) Frequency determination error Check power plug and 100V power supply All Mode (Try replacing main and power supply boards) lamps lit Watchdog error Replace main board (Try replacing main and power supply boards) RAM error Replace main board Compressor... - Page 29 (2) Deactivating 3-minute restart prevent lock ●Start: Press the MODE and HUMIDITY SELECTION buttons (Auto buttons for the E16S) together 3 times when the power is off. Press the POWER button within 2 seconds. ●Functions: 1 Deactivates 3-minute restart prevention lock 2 Activates compressor 3 Operating mode: Low Temp 4 Operates blower on HIGH...
- Page 30 E16S (5) LED sensor test Start ...... Press the MODE and AUTO buttons together 4 times when the power is off. Press the POWER button within 2 seconds. Mode selection ..Use the AUTO button to change through the self test modes.
-
Page 31: Disassembly And Reassembly Hints
8. Disassembly and Reassembly Hints * The pictures show an E16SX 8.1 Disassembly Procedures Picture 1 Remove the water tank (See Picture 1.) 2. Remove the front panel and air filter assembly Click fittings Steps 1) Hold down the bottom of the front panel and pull it forward (releasing the bottom side click clamp fittings). - Page 32 <<Remove the main board >> Picture 7 Steps 1) Pull the front case switch operation part to the outside, detach the main board cover side switch button (convex part) fittings, and remove the main board cover assembly. (See Picture 7) 2) Release the main board click fittings (4 points on the bottom), and remove the main board.
- Page 33 5. Remove the blower fan assembly Steps 1) Following the sequence in Procedures 1-4 above, remove the water tank, Picture 14 front panel, front case assembly and rear panel. 2) Remove the connectors (8) in the Power supply power supply board. board box 3) Remove the power supply board box assembly...
- Page 34 6. Removing the drain pan assembly Steps 1) Following the sequence in Procedures Picture 20 1-3 above, remove the water tank, front panel, front case assembly, rear panel and blower fan assembly. 2) Release the drain pan and base fittings, lift up the right side of the heat exchanger while removing the base.
-
Page 35: Continuous Water Drainage
9. Continuous Water Drainage If a drain is available, the unit can continuously drain excess water by attaching a commercially available hose (internal diameter 15mm). The unit can be operated for extensive periods without the need to empty the water tank. CAUTION Do not drain water continuously When draining water continuously or... -
Page 36: Parts Catalog
Parts Catalog Model MJ-E16S/SX-S1 Exploded View <Casing and Structure> MJ-E16S... - Page 37 Parts Catalog Model MJ-E16S/SX-S1 Parts List <Casing and Structure> Notes: 1.New parts and the parts that are used only with these models lack compatibility. 2.Those parts that are marked by are of critical importance for sustaining safety and performance. Use specified parts at replacement.
- Page 38 Parts Catalog Model MJ-E16S/SX-S1 Exploded View <Casing and Structure>...
- Page 39 Parts Catalog Model MJ-E16S/SX-S1 Parts List <Casing and Structure> Notes: 1.New parts and the parts that are used only with these models lack compatibility. 2.Those parts that are marked by are of critical importance for sustaining safety and performance. Use specified replacement.
- Page 40 Parts Catalog Model MJ-E16S/SX-S1 Exploded View <Electrical Parts>...
- Page 41 Parts Catalog Model MJ-E16S/SX-S1 Parts List <Electrical Parts> Notes: 1.New parts and the parts that are used only with these models lack compatibility. 2.Those parts that are marked by are of critical importance for sustaining safety and performance. Use specified replacement.
- Page 42 Parts Catalog Model MJ-E16S/SX-S1 Exploded View <Compressor Parts> 12 18 Rear View...
- Page 43 Parts Catalog Model MJ-E16S/SX-S1 Parts List <Compressor Parts> Notes: 1.New parts and the parts that are used only with these models lack compatibility. 2.Those parts that are marked by are of critical importance for sustaining safety and performance. Use specified replacement.
-
Page 44: Troubleshooting
9. Troubleshooting The unit does not operate. ¡Power plug is unplugged. ¡The Tank full light is lit. ¡The water tank is not installed properly. ¡The unit is in the EASY HUMIDIFYING or HUMIDITY SET modes. ¡The unit is defrosting. (The unit will restart when the defrosting session completes.) Dehumidifying does not function. - Page 45 Operation noise reverberates. ¡Sometimes occurs when using the unit in a room with flooring or in a narrow room. Rumbling or other strange sounds are made by the unit when starting, stopping operation, or changing modes. ¡The refrigerant may be producing strange noises before its circulation stabilizes. A “buzz”...
-
Page 46: Precautions
Benzine... - Page 48 Issued in 2003.06 Printed in Japan...