Table of Contents
Advertisement
Quick Links
Advertisement
Table of Contents

Related Manuals for Philips HD2178/72


Summary of Contents for Philips HD2178/72
- Page 1 HD2178 User manual...
-
Page 3: Table Of Contents
Contents 7 Notices 1 Important Electromagnetic fields (EMF) 2 Your All-in-One cooker Recycling What’s in the box Product overview 8 Guarantee and service Controls overview 9 Troubleshooting 3 Getting started Before first use 4 Using the All-in-One cooker Preparations before cooking Cooking time regulating range... -
Page 4: Important
Important and knowledge, unless they have been given supervision or instruction Read this safety leaflet carefully before concerning use of the you use the All-in-One cooker and save appliance by a person it for future reference. responsible for their safety. Warning Children should be •... - Page 5 Cleaning and user table or worktop on which • maintenance should not the appliance stands. be performed by children. Make sure the heating • Keep the appliance and element, the temperature • its cord out of reach of sensor, and the outside of children.
- Page 6 Do not use the inner pot if • manufacturers or it is deformed. that Philips does not Make sure that the sealing • specifically recommend. If ring is clean and in good you use such accessories condition.
- Page 7 Only use the cooking this safety leaflet, the • utensils provided. Avoid guarantee becomes invalid using sharp utensils. and Philips refuses liability To avoid scratches, it is for any damage caused. • not recommended to Visit www.philips.com/ • cook ingredients with...
-
Page 8: Your All-In-One Cooker
2 Your All-in-One cooker Congratulations on your purchase, and welcome to Philips! To fully benefit from the support that Philips offers, register your product at www.Philips.com/welcome. What’s in the box All-in-One cooker main unit Inner pot x 2 Rice & soup ladle... -
Page 9: Product Overview
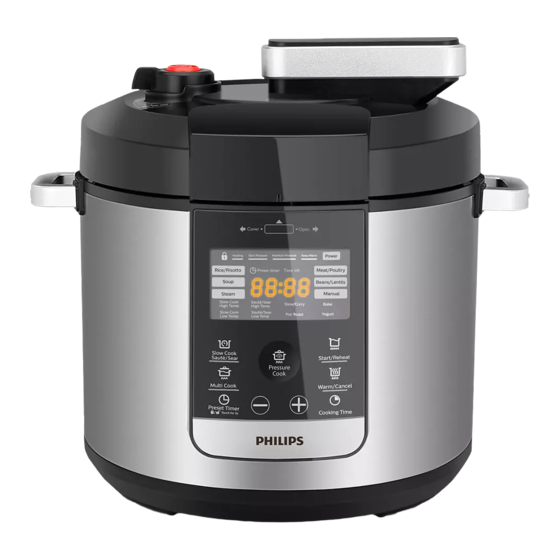
Product overview Inner pot Safety valve Water level indication Sealing ring Control panel Inner lid Heating element Main unit handle Pressure regulator Floating valve Top lid Lid handle... -
Page 10: Controls Overview
Controls overview Display screen Pressure Cook button Slow cook Start/Reheat button Sauté / Sear button Multi Cook button Warm/Cancel button Preset Timer and Screen Lock Cooking Time button button Decrease button Increase button... -
Page 11: Getting Started
3 Getting started 4 Using the All- in-One cooker Before first use Preparations before Remove all packaging materials from the appliance. cooking Take out all the accessories from the inner pot. Before using the All-in-One cooker to Clean the parts of the All-in-One cook food, you need to follow below cooker thoroughly before using preparations:... - Page 12 Wipe the outside of the inner pot dry and put it back into the All-in- One cooker. Place the top lid onto the All-in- One cooker and turn it clockwise. You will hear a “click” sound when the top lid is properly locked. Note •...
-
Page 13: Cooking Time Regulating Range
Cooking time regulating range Non-pressure cooking programs Cooking function Cooking Default cooking Adjustable temperature time cooking time Slow cook High Temp 90°C±10°C 6 hrs 2-12 hrs Slow cook Low Temp 70°C±10°C 6 hrs 2-12 hrs Sauté/Sear High Temp* 150°C±10°C 2 mins 2 mins-2 hrs Sauté/Sear Low Temp** 130°C±10°C... -
Page 14: Non-Pressure Cooking
If you want to set a different cooking Non-pressure cooking time, press the Cooking Time button Follow the steps in “Preparations before cooking”. Turn the pressure regulator to the Bake or Vent position. When choosing Slow cook, • Stew/Curry, Pot Roast, Yogurt and Reheat turn the pressure regulator to the Vent position. -
Page 15: Pressure Cooking
Press and hold the Start/Reheat Pressure cooking button ( ) for 3 seconds and the All-in-One cooker starts working in the selected mode. Note • Make sure the floating valve drops down before closing the lid. Follow the steps in “Preparations before cooking”. - Page 16 When the cooking time has If you want to set a different cooking elapsed, you will hear two beeps time, press the Cooking Time and the All-in-One cooker switches button ( to keep-warm mode automatically. » The keep warm indicator lights Caution: Turn the pressure regulator to the vent position.
-
Page 17: Preset Time For Delayed Cooking
Choose the desired cooking mode, Note then press the preset timer button • When cooking soup or viscous liquid, do not release pressure by turning the pressure regulator to the steam vent position, otherwise liquid might spurt from the pressure regulator valve. Wait until the pressure is naturally released and the floating valve has dropped to open the top lid. -
Page 18: Setting Up Child Lock
To disassemble the pressure regulator: Setting up child lock Turn the lower screw anti-clockwise until it becomes loose. To protect your child from using the product, you can set up the child lock function. • Press and hold the preset timer button ( ) for 3 seconds to enter the child lock mode. -
Page 19: Specifications
5 Specifications Make sure the regulator points at the sealed position and put it back to the steam valve. Model Number HD2178 Rated power output 1000W Rated capacity Note • Always unplug the appliance if not used Turn the screw clockwise until it is for a longer period. -
Page 20: Cleaning And Maintenance
6 Cleaning and Exterior Maintenance Surface of the outer lid and outside of the main body: • Wipe with a cloth damped with soap water. Note • Only use soft and dry cloth to wipe the control panel. • Unplug the All-in-One cooker before •... -
Page 21: Notices
One of Philips’ leading Business If you need service or information, or Principles is to take all necessary health if you have a problem, visit the Philips and safety measures for our products, website at www.philips.com or contact to comply with all applicable legal... -
Page 22: Troubleshooting
If your All-in-One cooker does not function properly or if the cooking quality is insufficient, consult the table below. If you are unable to solve the problem, contact a Philips service center or the Consumer Care Center in your country. Problem Solution The sealing ring is not well assembled. - Page 23 The top lid or the pressure regulator has malfunction. • the appliance starts Take the appliance to your Philips dealer or a service pressurizing. center authorized by Philips. E3 displays on the The temperature inside the inner pot is too high. Wait •...
- Page 24 © 2018 Koninklijke Philips N.V. All rights reserved. HD2178_UM_AUS_v4.0...