Advertisement
Quick Links
Register your product and get support at
What's in the box
Apa saja isi kemasannya
Apa dalam kotak ini
Trong h p có gì
www.philips.com/welcome
包装盒内物品
HD2136
HD2139
a
b
c
d
e
f
g
EN
User manual
MS
Manual pengguna
VI
Hướng dẫn sử dụng
ID
Buku Petunjuk
Pengguna
ZH-S
用户手册
Cooking food
Memasak makanan
Memasak makanan
N u th c ăn
烹饪食物
Specifications are subject to change without notice
© 2016 Koninklijke Philips N.V.
All rights reserved.
HD2136_2139_UM_AS_v4.0
3
Using the electric pressure
English
cooker
1
Your electric pressure cooker
Before using the electric pressure cooker to cook food,
Congratulations on your purchase, and welcome to
you need to follow below preparations:
Philips!
1
Hold the lid handle and turn it anti-clockwise until
To fully benefit from the support that Philips offers,
the top lid cannot move any more, then lift up the
register your product at www.Philips.com/welcome.
top lid.
2
Take out the inner pot from the electric pressure
2
What's in the box
cooker and put the pre-washed food in the inner
pot.
Electric pressure cooker main unit
Rice spoon
3
Soup ladle
Measuring cup
Wipe the outside of the inner pot dry and put it
User manual
Safety leaflet
back into the electric pressure cooker.
Warranty card
Power cord
4
Place the top lid onto the electric pressure cooker
and turn it clockwise. You will hear a "click" sound
when the top lid is properly locked.
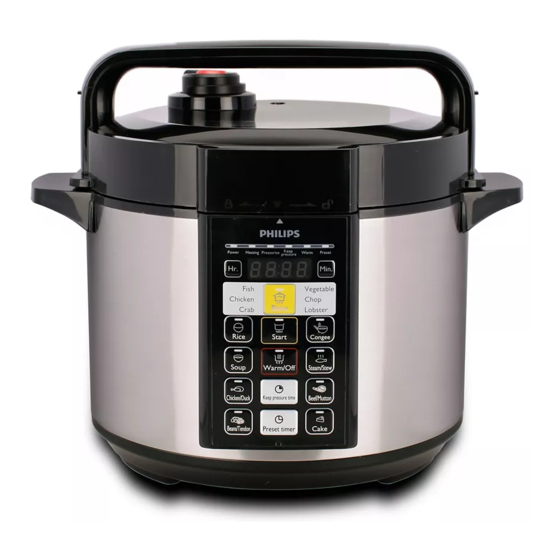
Overview
5
Turn the pressure control valve to the sealed
Lid handle
Power socket
position (
).
a
h
b
Top lid
i
Locking pin
Note
c
Sealing ring
j
Floater
Inner pot
Floating valve
d
k
•
Make sure the sealing ring is properly assembled
e
Water level indication
l
Pressure regulator
around the inside of the top lid.
valve
•
Make sure the pressure regulator valve and floating
valve are clean and not blocked.
f
Control Panel
m
Safety valve
•
Make sure the outside of the inner pot is dry and
g
Heating element
clean, and that there is no foreign residue on the
heating element or the magnetic switch.
•
Make sure the inner pot is in proper contact with
Controls Overview
the heating element.
Pressurize indicator
Preset timer button
n
v
o
Heating indicator
w
Warm/Off button
Cooking food
p
Power indicator
x
Bake button
Hour button
Minute button
q
y
Note
r
Baking functions
z
Preset indicator
s
Start button
{
Warm indicator
•
Do not fill the inner pot with less than 1/3 or more
than 2/3 full of food and liquid.
t
Keep pressure time
|
Keep pressure
•
For food that expands during cooking, do not fill
button
indicator
the inner pot with more than 1/2 full of food and
Pressure cooking
u
liquid.
functions
•
For rice cooking, follow the water level indications
on the inside of the inner pot. You can adjust the
water level for different types of rice and your own
Before first use
preference. Do not exceed the quantities indicated
on the inside of the inner pot.
1
Remove all packaging materials from the appliance.
•
Make sure the floater falls down before cooking.
2
Take out all the accessories from the inner pot.
3
Clean the parts of the electric pressure cooker
1
Follow the preparation steps in "Using the electric
thoroughly before using it for the first time (see
pressure cooker".
chapter 'Cleaning').
2
Put the plug in the power socket.
3
Press the desired cooking function button or the
Note
baking button (
) to choose a cooking mode.
»
The selected cooking mode indicator flashes.
•
Make sure all parts are completely dry before you
»
The default pressure keeping time is displayed
start using the electric pressure cooker.
on the screen.
4
If you want to set a different pressure keeping time,
press the keep pressure time button ( ).
»
The pressure keeping time flashes on the
screen.
5
Press the hour button (
) to set the hour unit
and the minute button (
) to set the minute
unit.
Using the electric pressure cooker
Menggunakan penanak bertekanan listrik
Menggunakan periuk tekanan elektrik
S d ng n i đi n áp su t
使用电压力煲
n
|
o
{
m
p
z
q
y
r
l
x
s
w
k
j
i
t
v
h
u
www.philips.com/welcome
www.philips.com/welcome
www.philips.com/welcome
HD2136
HD2139
HD2139
HD2136
HD2139
HD2136
User manual
Safety leaflet
Warranty
Preset time for delayed cooking
Waktu preset untuk memasak yang ditunda
Masa dipraset bagi masakan tertangguh
Đ t s n th i gian n u ch m
延迟烹饪
6
6
Press the start button (
) and the electric pressure
When the cooking is finished, the rice cooker
cooker starts working in the selected mode.
switches to keep warm mode automatically, and
7
When the electric pressure cooker reaches the
the keep warm function light will be on.
working pressure, the keep pressure (
)
indicator lights up.
Note
»
The electric pressure cooker enters pressure
keeping mode.
•
Do not exceed the volume indicated nor exceed
8
When the pressure keeping time has elapsed, the
the maximum water level indicated in the inner pot,
electric pressure cooker automatically switches to
as this may cause the electric pressure cooker to
keep warm mode.
overflow.
9
Turn the pressure regulator valve to the vent (
)
position.
»
The electric pressure cooker starts releasing
Adjustable pressure keeping time
pressure.
»
The floater drops when the pressure is
range
released sufficiently.
10
Hold the top lid handle and turn the lid anti-
Cooking function
Default
Adjustable
clockwise until it cannot move any more, then lift
pressure
pressure
it up.
keeping time
keeping time
(minute)
(minute)
Note
15
15-59
Fish (
)
Chicken (
)
18
18-59
•
When cooking soup or viscous liquid, do not
release pressure by turning the pressure regulator
20
20-59
Crab (
)
valve to the steam vent position, otherwise liquid
Vegetable
3
1-59
might spurt from the pressure control valve. Wait
(
)
until the pressure is naturally released and the
floater has dropped to open the top lid.
23
20-59
Chop (
)
•
The pressure keeping timer will start counting when
20
20-59
the working pressure is reached.
Lobster (
)
•
After the cooking is finished and the pressure is
14
N/A
released, unplug the electric pressure cooker to
Rice (
)
turn off the keep warm function or when not in use.
Soup (
)
20
20-59
Chicken/Duck
15
12-59
(
)
Tip
Beans/Tendon
30
25-59
•
You can adjust the pressure keeping time
(
)
for different types of food according to your
Congee (
)
13
1-59
preference. Pressure keeping time is not adjustable
Steam/Stew
20
5-59
for rice cooking function (
).
•
(
)
If the cooking mode is selected by the baking
button (
), you can cook food without adding
Beef/Mutton
30
30-59
water in the inner pot. Make sure to turn the
(
)
pressure control valve to the bake (
) position.
45
45-59
Cake (
)
Preset time for delayed cooking
Assembling and disassembling the
You can preset the delayed cooking time for different
pressure regulator valve
cooking functions. The preset timer is available up
to 24 hours, but is not applicable to the cake baking
function (
).
Caution
1
Follow the preparation steps in "Using the electric
•
pressure cooker".
Do not disassemble the pressure regulator valve
2
Choose the desired cooking mode, then press the
during cooking. Always unplug the electric pressure
cooker and wait until the pressure has been
preset timer button (
).
3
released sufficiently.
Press the hour button (
) and minute button
(
) to choose the preset time.
4
Once the preset time is set, press the start button
(
) to enter preset mode.
5
When the preset time has elapsed, the electric
pressure cooker starts working automatically.
To disassemble the pressure regulator valve
Untuk melepaskan katup regulator tekanan
To assemble the pressure regulator valve
Untuk memasang katup regulator tekanan
Untuk menanggalkan injap pengatur tekanan Đ tháo van đi u ch nh áp su t
Untuk memasang injap pengatur tekanan
Đ l p van đi u ch nh áp su t
拆卸调压器阀
安装调压器阀
Accessories
Rice spoon, soup ladle, and inner pot:
•
Soak in hot water and clean with sponge.
6 Environment
Do not throw away the appliance with normal
household waste at the end of its life, but hand
it in at an official collection point for recycling.
By doing this, you can help to preserve the
environment.
7
Guarantee and service
If you need service or information, or if you have a
problem, visit the Philips website at www.philips.com
or contact the Philips Customer Care Center in your
country. You can find its phone number in the worldwide
guarantee leaflet. If there is no Customer Care Center in
your country, go to your local Philips dealer.
8 Troubleshooting
If your electric pressure cooker does not function
properly or if the cooking quality is insufficient, consult
the table below. If you are unable to solve the problem,
contact a Philips service center or the Consumer Care
Center in your country.
Problem
Solution
I have
The sealing ring is not well assembled.
difficulties
Make sure the sealing ring is well
closing the
assembled around the inside of the
top lid.
top lid.
The floater blocks the locking pin. Push
To disassemble the pressure regulator:
down the floater so that it does not
1
Turn the lower screw anticlockwise until it becomes
block the locking pin.
loose.
I have
The floater has not dropped. Push the
2
Pull it up and take out the pressure regulator.
difficulties
floater down.
To assemble the pressure regulator:
opening the
1
Assemble the lower screw back to the regulator.
top lid after
2
Make sure the regulator points at the sealed
the pressure is
position and put it back to the steam valve.
released.
3
Turn the screw clockwise until it is fastened.
The food is
Make sure that there is no foreign
not cooked.
residue on the heating element and
4 Specifications
the outside of the inner pot before
switching the electric pressure cooker
on.
Model Number
HD2136
HD2139
The heating element is damaged, or
Rated power output
900W
1000W
the inner pot is deformed. Take the
Rated capacity
5.0L
6.0L
cooker to your Philips dealer or a
service center authorized by Philips.
Diameter
22cm
22cm
Air or steam
The sealing ring is not well assembled.
Warm keeping temperature
60-80°C
60-80°C
leaks from
Make sure the sealing ring is well
under the lid.
assembled around the inside of the
Note
top lid.
There is food residue in the sealing
•
Always unplug the appliance if not used for a
ring. Make sure the sealing ring is
longer period.
clean.
The top lid is not properly closed.
Make sure the top lid is properly
5
Cleaning and Maintenance
closed.
The pressure level inside of the
appliance is abnormal. In this case the
Note
safety valve will be releasing steam.
Take the appliance to your Philips
•
Unplug the electric pressure cooker before starting
dealer or a service center authorized
to clean it.
by Philips.
•
Wait until the electric pressure cooker has cooled
Air or steam
There is food residue in the rubber ring
down sufficiently before cleaning it.
leaks from the
of the floating valve. Clean the rubber
floating valve.
ring of the floating valve.
The rubber ring of the floating valve is
Interior
broken. Replace the rubber ring.
Inside of the outer lid and the main body:
The floater
Make sure there is enough food and
•
Wipe with wrung out and damp cloth.
does not
water in the inner pot.
•
Make sure to remove all the food residues
rise after the
The top lid or the pressure regulator
stuck to the electric pressure cooker.
appliance
valve has malfunction. Take the
Heating element:
starts
appliance to your Philips dealer or a
•
Wipe with wrung out and damp cloth.
pressurizing.
•
service center authorized by Philips.
Remove food residues with wrung out and
damp cloth or toothpicks.
E3 displays on
The temperature inside the inner pot
Sealing ring:
the screen.
is too high. Wait until it falls down to
•
Soak in warm water and clean with sponge.
room temperature.
E1, E2, or E4
The electric pressure cooker has
Exterior
displays on
malfunction. Take the appliance to
the screen.
a Philips dealer or a service center
Surface of the outer lid and outside of the main body:
•
authorised by Philips.
Wipe with a cloth damped with soap water.
•
Only use soft and dry cloth to wipe the control
panel.
•
Make sure to remove all the food residues
around the pressure regulator valve and
floating valve.
Pressure control valve and floating valve:
•
Disassemble the pressure control valve, soak it
in warm water, and clean with sponge.
•
Remove food residues in the pressure control
valve and floating valve with toothpicks.
5
Indonesia
Tekan tombol jam (
) untuk menyetel satuan
jam dan tombol menit (
) untuk menyetel
satuan menit.
1
Penanak bertekanan listrik
6
Tekan tombol mulai (
) dan penanak bertekanan
Anda
listrik akan mulai beroperasi dalam mode yang
dipilih.
Selamat atas pembelian Anda dan selamat datang di
7
Bila penanak bertekanan listrik mencapai tekanan
Philips!
pengoperasian, indikator (
) jaga
Untuk memanfaatkan sepenuhnya dukungan yang
tekanan akan menyala.
ditawarkan Philips, daftarkan produk Anda di
»
Penanak bertekanan listrik memasuki mode
www.Philips.com/welcome.
tetap tekan.
8
2
Apa saja isi kemasannya
Bila waktu tetap tekan selesai, penanak bertekanan
listrik otomatis beralih ke mode tetap hangat.
Unit utama penanak bertekanan listrik
Sendok nasi
9
Putar katup regulator tekanan ke posisi (
Sendok sup
Gelas takar
lubang.
Petunjuk Pengguna
Pamflet keselamatan
»
Penanak bertekanan listrik mulai melepaskan
Kartu garansi
Kabel listrik
tekanan.
»
Floater jatuh saat tekanan sudah cukup keluar.
Ikhtisar
10
Pegang gagang tutup atas dan putar tutupnya
berlawanan arah jarum jam hingga tidak dapat
a
Pegangan tutup
h
Soket Daya
bergerak lagi, kemudian angkat.
b
Tutup atas
i
Pin pengunci
Gelang penyegel
Floater
c
j
Catatan
d
Panci bagian dalam
k
Katup mengambang
•
Saat memasak sup atau cairan kental, jangan
e
Indikator ukuran air
l
Katup regulator
mengeluarkan tekanan dengan memutar katup
tekanan
regulator tekanan ke posisi lubang uap karena
f
Panel Kontrol
m
Katup pengaman
cairan bisa menyembur dari katup kontrol tekanan.
Tunggu hingga tekanan keluar dengan sendirinya
Elemen pemanas
g
dan floater turun sebelum membuka tutupnya.
•
Waktu tetap tekan akan memulai bila tekanan yang
tepat sudah dicapai.
Ikhtisar Kontrol
•
Setelah memasak selesai dan tekanan dikeluarkan,
cabut steker dari penanak bertekanan listrik untuk
n
Indikator tekanan
v
Tombol timer preset
mematikan fungsi tetap hangat atau jika tidak
digunakan.
o
Indikator pemanas
w
Tombol Warm/Off
p
Indikator daya
x
Tombol panggang
Tombol jam
Tombol menit
q
y
Tip
r
Fungsi pemanggang
z
Indikator Preset
•
Anda juga dapat menyesuaikan waktu menjaga
s
Tombol mulai
{
Indikator hangat
tekanan untuk jenis makanan berbeda sesuai
Tombol waktu jaga
Indikator jaga tekanan
t
|
preferensi Anda. Waktu menjaga tekanan tidak
tekanan
dapat disetel untuk fungsi memasak nasi (
•
Fungsi memasak
Jika mode memasak dipilih melalui tombol
u
dengan tekanan
pemanggang (
), Anda dapat memasak makanan
tanpa menambahkan air dalam panci bagian
dalam. Pastikan memutar katup kontrol tekanan ke
Sebelum menggunakan alat pertama
posisi (
) panggang.
kali
1
Lepaskan semua kemasan dari alat.
Waktu preset untuk memasak yang
2
Lepaskan semua aksesori dari panci bagian dalam.
ditunda
3
Bersihkan bagian-bagian penanak bertekanan
listrik dengan saksama sebelum menggunakannya
Anda dapat mengatur waktu preset untuk memasak
untuk pertama kali (lihat bab 'Membersihkan').
yang ditunda untuk fungsi memasak yang berbeda.
Timer preset tersedia hingga 24 jam, tapi tidak dapat
digunakan untuk fungsi memanggang kue (
Catatan
1
Ikuti langkah persiapan dalam "Menggunakan
penanak bertekanan listrik".
•
Pastikan semua bagian benar-benar kering
2
Pilih mode memasak yang diinginkan, kemudian
sebelum Anda mulai menggunakan penanak
tekan tombol timer preset (
).
bertekanan listrik.
3
Tekan tombol jam (
) dan tombol menit (
untuk memilih waktu preset.
4
Setelah waktu preset disetel, tekan tombol mulai
3
Menggunakan penanak
(
) untuk masuk ke mode preset.
bertekanan listrik
5
Bila waktu preset telah terlewati, penanak
bertekanan listrik mulai beroperasi secara otomatis.
Sebelum menggunakan penanak bertekanan listrik untuk
6
Bila selesai memasak, penanak nasi akan beralih
memasak, Anda perlu melakukan persiapan berikut:
ke mode tetap hangat secara otomatis, dan fungsi
1
Pegang gagang tutup dan putar berlawanan arah
lampu fungsi tetap hangat akan menyala.
jarum jam hingga tutup atas tidak dapat bergerak
lagi, kemudian angkat tutup atasnya.
2
Catatan
Keluarkan panci bagian dalam dari penanak
bertekanan listrik dan masukkan makanan yang
telah dicuci ke dalam panci bagian dalam.
•
Jangan melebihi volume yang ditunjukkan atau
3
melebihi batas air maksimum yang ditunjukkan di
Lap bagian luar panci bagian dalam, keringkan dan
masukkan kembali ke dalam penanak bertekanan
panci bagian dalam, karena dapat menyebabkan
listrik.
penanak bertekanan listrik meluap.
4
Pasang tutup atas ke penanak bertekanan listrik
dan putar searah jarum jam. Anda akan mendengar
suara "klik" bila tutup telah terkunci dengan benar.
Kisaran waktu menjaga tekanan yang
5
Putar katup kontrol tekanan ke posisi tersegel (
).
dapat disesuaikan
Catatan
Fungsi memasak
Waktu
Waktu
menjaga
menjaga
•
Pastikan gelang penyegel terpasang dengan benar
tekanan
tekanan
di sekeliling bagian dalam tutup atas.
default
yang dapat
•
Pastikan katup regulator tekanan dan katup
(menit)
disesuaikan
mengambang bersih dan tidak tersumbat.
(menit)
•
Pastikan bagian luar panci bagian dalam sudah
kering dan bersih, dan tidak ada benda apa pun
15
15-59
Ikan (
)
pada elemen pemanas atau sakelar magnetik.
•
18
18-59
Pastikan panci bagian dalam telah bersentuhan
Ayam (
)
dengan elemen pemanas secara tepat.
20
20-59
Kepiting (
)
3
1-59
Sayuran (
)
Cacahan (
)
23
20-59
Memasak makanan
20
20-59
Lobster (
)
14
N/A
Catatan
Beras (
)
Sup (
)
20
20-59
•
Jangan isi panci bagian dalam dengan makanan
atau cairan kurang dari 1/3 atau lebih dari 2/3
Ayam/Bebek
15
12-59
bagian.
(
)
•
Untuk makanan yang mengambang saat memasak,
Kacang-
30
25-59
jangan isi panci bagian dalam dengan makanan
kacangan/Tendon
atau cairan lebih dari 1/2 bagian.
(
)
•
Untuk memasak nasi, ikuti indikator tingkat
air di dalam panci bagian dalam. Anda dapat
13
1-59
Bubur (
)
menyesuaikan ketinggian air untuk jenis beras yang
Kukus/Tanak
20
5-59
berbeda dan preferensi Anda. Jangan melebihi
(
)
jumlah yang ditunjukkan pada panci bagian dalam.
•
Pastikan floater jatuh sebelum memasak.
Daging Sapi/
30
30-59
Daging Domba
1
(
)
Ikuti langkah persiapan dalam "Menggunakan
penanak bertekanan listrik".
45
45-59
Kue (
)
2
Pasang steker ke soket daya.
3
Tekan tombol fungsi menanak yang diinginkan atau
tombol pemanggang (
) untuk memilih mode
Memasang dan melepaskan katup
memasak.
regulator tekanan
»
Indikator mode memasak yang dipilih akan
berkedip.
»
Waktu menjaga tekanan default akan
Perhatian
ditampilkan pada layar.
4
Jika Anda ingin menyetel waktu menjaga tekanan
•
Jangan melepaskan katup regulator tekanan saat
yang berbeda, tekan tombol waktu jaga tekanan
memasak. Selalu cabut steker penanak bertekanan
(
).
listrik dan tunggu hingga tekanan sudah cukup
»
Waktu menjaga tekanan akan berkedip pada
keluar.
layar.
Untuk membongkar regulator tekanan:
1
Putar sekrup bawah berlawanan arah jarum jam
hingga lepas.
2
Tarik ke atas dan lepaskan regulator tekanan.
Untuk memasang regulator tekanan:
1
Pasang sekrup bawah kembali ke regulator.
2
Pastikan titik-titik regulator di posisi yang bersegel
dan pasang kembali ke katup uap.
3
Putar sekrup searah jarum jam hingga kencang.
4 Spesifikasi
Nomor Model
HD2136
HD2139
Keluaran daya terukur
900 W
1.000 W
)
Kapasitas terukur
5,0 L
6,0 L
Diameter
22 cm
22 cm
Suhu tetap hangat
60-80 °C
60-80 °C
Catatan
•
Selalu cabut steker alat jika tidak digunakan dalam
waktu lama.
5
Membersihkan dan
Pemeliharaan
Catatan
•
Cabut steker penanak bertekanan listrik sebelum
membersihkannya.
•
Tunggu sampai penanak bertekanan listrik sudah
cukup dingin sebelum membersihkannya.
Bagian dalam
Bagian dalam tutup luar dan badan utama:
•
Seka menggunakan kain yang sudah diperas
dan lembap.
).
•
Pastikan untuk membersihkan semua sisa
makanan yang menempel pada penanak
bertekanan listrik.
Elemen pemanas:
•
Seka menggunakan kain yang sudah diperas
dan lembap.
•
Bersihkan sisa makanan dengan kain yang
sudah diperas dan lembab atau tusuk gigi.
Gelang penyegel:
•
Rendam di dalam air hangat dan bersihkan
dengan spons.
Bagian luar
Permukaan tutup luar dan bagian luar badan utama:
).
•
Seka dengan kain yang dibasahi air sabun.
•
Gunakan hanya kain lembut dan kering untuk
menyeka panel kontrol.
•
Pastikan untuk membersihkan semua sisa
makanan yang menempel pada katup
)
regulator tekanan dan katup mengambang.
Katup kontrol tekanan dan katup mengambang:
•
Lepaskan katup kontrol tekanan, rendam
dalam air hangat dan bersihkan dengan spons.
•
Bersihkan sisa makanan yang menempel pada
katup kontrol tekanan dan katup mengambang
dengan tusuk gigi.
Aksesori
Sendok nasi, sendok sup dan panci bagian dalam:
•
Rendam di dalam air panas dan bersihkan
dengan spons.
6 Lingkungan
Jangan membuang alat bersama limbah rumah
tangga biasa jika alat sudah tidak bisa dipakai
lagi, tetapi serahkan ke tempat pengumpulan
barang bekas yang resmi untuk didaur ulang.
Dengan melakukan hal ini, Anda ikut membantu
melestarikan lingkungan.
7
Garansi dan layanan
Jika Anda memerlukan layanan atau informasi, kunjungi
situs web Philips di www.philips.com atau hubungi Pusat
Layanan Pelanggan Philips di negara Anda. Anda bisa
menemukan nomor telepon Philips di kartu garansi
internasional. Jika di negara Anda tidak terdapat Pusat
Layanan Pelanggan, kunjungi dealer Philips setempat.
8 Mengatasi masalah
Jika penanak bertekanan listrik Anda tidak berfungsi
dengan benar atau jika kualitas memasak tidak
memadai, perhatikan tabel di bawah ini. Jika Anda
tidak dapat mengatasi masalah tersebut, hubungi pusat
layanan Philips atau Pusat Layanan Konsumen di
negara Anda.
Masalah
Solusi
Saya kesulitan
Gelang penyegel tidak terpasang
menutup
dengan benar. Pastikan gelang
tutup atas.
penyegel terpasang dengan benar di
sekeliling bagian dalam tutup atas.
Floater memblokir pin pengunci.
Tekan floater sehingga tidak
memblokir pin pengunci.
Saya kesulitan
Floater belum jatuh. Tekan floater ke
membuka
bawah.
tutup atas
setelah
tekanan
dikeluarkan.
Makanan
Pastikan tidak ada endapan asing
tidak matang.
pada elemen pemanas dan di
luar panci bagian dalam sebelum
menghidupkan penanak bertekanan
listrik.
Elemen pemanas rusak, atau panci
bagian dalam sudah berubah bentuk.
Bawalah penanak ke dealer Philips
Anda atau ke pusat layanan resmi
Philips.
Advertisement

Related Manuals for Philips HD2136


Summary of Contents for Philips HD2136
- Page 1 • kali Bersihkan sisa makanan dengan kain yang or contact the Philips Customer Care Center in your sudah diperas dan lembab atau tusuk gigi. country. You can find its phone number in the worldwide Lepaskan semua kemasan dari alat.
- Page 2 đến khi áp suất được xả một cách tự nhiên và phao đã rớt 烘焙功能 预约指示灯 Bên ngoài (lihat bab ‘Pembersihan’). Để được hưởng lợi ích đầy đủ từ hỗ trợ do Philips cung cấp, hãy xuống để mở nắp trên. 洁净。 20-59 Anda boleh praset masa memasak tertangguh bagi 开始按钮...