Advertisement
Available languages
Available languages
Quick Links
Always there to help you
1
Register your product and get support at
www.philips.com/welcome
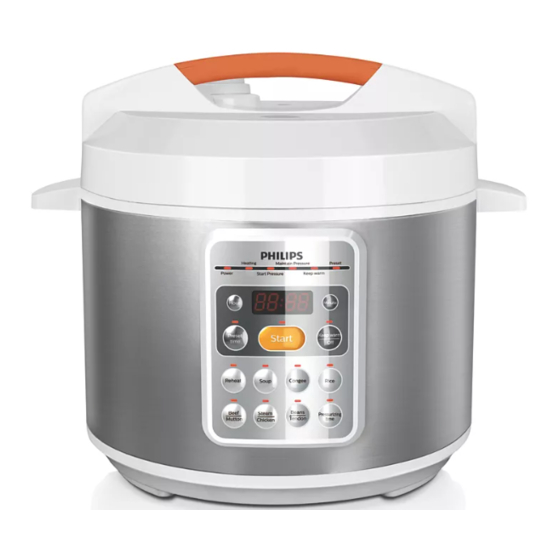
HD2132
Question?
Contact
Philips
http://www.philips.com/welcome
http://www.philips.com/welcome
User manual
用户手册
Manual pengguna
User manual
Specifications are subject to change without notice
© 2016 Koninklijke Philips N.V.
All rights reserved.
HD2132_UM_Malay_v2.0
English
1 Your electric pressure
cooker
Congratulations on your purchase, and welcome
to Philips!
Functions overview
To fully benefit from the support that Philips
offers, register your product at www.philips.com/
Cooking
Default
welcome.
function
pressure
keeping
2 What's in the box (fig. 1)
time
(minute)
Rice
14
Main unit
Inner pot
Power cord
Soup ladle
Congee
13
Rice spoon
Measuring cup
Soup
20
User manual
Important information leaflet
Reheat
25
Warranty card
Beef/
30
Mutton
Steam/
3 Overview
20
Chicken
Beans/
30
Tendon
Product overview (fig. 2)
a Lid handle
f Control Panel
4 Using the electric
b Pressure regulator
g Heating element
pressure cooker
c Top lid
h Power socket
d Inner pot
i Safety valve
Note
e Main body
•
Always unplug the appliance if not used for a
longer period.
Controls overview (fig. 3)
Pressurizing time
Before first use
a Hour button
h
button
b Preset button
i Congee button
1
Remove all packaging materials from the
appliance.
c Reheat button
j Rice button
2
Take out all the accessories from the inner pot.
d Soup button
k Start button
3
Clean the parts of the electric pressure cooker
Keep warm/Off
thoroughly before using it for the first time (see
e Beef/Mutton button l
button
chapter 'Cleaning and Maintenance').
Steam/Chicken
f
m Display screen
button
Note
Beans/Tendon
g
n Minute button
•
Make sure all parts are completely dry before
button
using the electric pressure cooker.
http://www.philips.com/welcome
Warranty
Important information lea et
Preparations before cooking
Pressure
Preset
Before using the electric pressure cooker to cook
keeping time
time
food, follow below preparation steps.
regulating
(hour)
1
Hold the lid handle and turn it
range
counterclockwise to take the lid off the main
(minute)
unit, and then take the inner pot out (fig. 4).
Not adjustable
24
2
Put the pre-washed food in the inner pot,
1-59
24
wipe the outside of the inner pot dry (fig. 5),
20-59
24
and then put it back into the electric pressure
cooker (fig. 6).
20-50
24
30-59
24
Note
20-59
24
•
Do not fill the inner pot with less than 1/3 or
more than 2/3 full of food.
25-59
24
•
For food that expands during cooking, do
not fill the inner pot with more than 1/2 full of
food.
•
For rice cooking, follow the water level
indications on the inside of the inner pot. You
can adjust the water level for different types of
rice and according to your own preference. Do
not exceed the maximum quantities indicated
on the inside of the inner pot.
3
Place the top lid onto the electric pressure
cooker and turn it clockwise to lock the top lid
properly (fig. 7).
Warning
•
Make sure the pressure regulator valve and
floating valve are clean and not blocked.
Note
•
Make sure the sealing ring is properly
assembled around the inner side of the top lid.
•
Make sure the outside of the inner pot is dry
and clean, and that there is no foreign residue
on the heating element.
•
Make sure the inner pot is in proper contact
with the heating element.
3
Tip
•
To release pressure quickly, turn the pressure
regulator to the vent position after the electric
pressure cooker turns into keep warm mode.
Beware of hot steam coming out of the steam
vent to avoid scald burns.
•
You can adjust the pressure keeping time for
different types of food. The pressure keeping
time is fixed when you use the rice cooking
function.
•
To cancel the ongoing cooking process, press
the keep warm/off button.
Note
•
When cooking soup or viscous liquid, do
not release pressure by turning the pressure
regulator to vent, otherwise liquid might spurt
from the pressure regulator. Wait until the
pressure is naturally released and the floater
has dropped down to open the top lid.
•
After the cooking is finished, unplug the
electric pressure cooker if you are not using it
continously.
Reheating
1
Loosen the food and evenly distribute it in the
inner pot.
2
Pour some water onto the food to prevent it
from becoming too dry. The quantity of the
water depends on the amount of food.
3
Place the top lid onto the electric pressure
cooker and turn it clockwise to lock the top lid
properly (fig. 7).
4
Turn the pressure regulator to the sealing
position (fig. 8).
5
Put the plug in the power socket (fig. 9).
6
Press the reheating button (fig. 20)
»
The default reheating time displays on
the screen.
7
To set a different reheating time, press the
pressurizing time button (fig. 16).
8
Press the minute button to set the reheating
time (fig. 17).
9
Press the start button to start the reheating
process (fig. 18).
»
The remaining reheating time starts
counting down.
10
When the reheating time has elapsed,
the electric pressure cooker automatically
switches to keep warm mode.
11
After the pressure has been released
sufficiently, turn the pressure regulator to the
vent position (fig. 19), and then turn the top lid
counterclockwise to take it off the main unit
(fig. 4).
»
The floater drops down when the
pressure is released sufficiently.
Preset time for delayed cooking
You can preset the delayed cooking time for
different cooking functions. The preset timer is
available up to 24 hours.
1
Cooking food
Choose one of the cooking functions, and
then press the preset button (fig. 21).
1
2
Press the hour button to set the hours, and
Follow the steps in "Preparations before
press the minute button to set the minutes
cooking".
(fig. 22).
2
Turn the pressure regulator to the sealing
position (fig. 8).
Tip
3
Put the plug in the power socket (fig. 9).
4
Press one of the cooking buttons (fig. 10 to
•
Press the hour button once to set the hour
fig. 15)
unit by the increment of one hour; press the
minute button once to set the minute unit by
»
The default pressure keeping time
the increment of ten minutes. Press and hold
displays on the screen.
the minute or hour button to fast forward in
5
To set a different pressure keeping time, press
setting the minute or hour unit.
the pressurizing time button (fig. 16).
6
Press the minute button to set the pressure
3
Press the start button to confirm the preset
keeping time (fig. 17).
time (fig. 18).
4
When the preset time has elapsed, the electric
Tip
pressure cooker starts the cooking process
•
Press the minute button once to set the
automatically.
minute unit by the increment of one minutes.
Press and hold the minute button to fast
5 Cleaning and
forward in setting the minute unit.
Maintenance
7
Press the start button to start the cooking
process (fig. 18).
Note
8
When the electric pressure cooker reaches
the working pressure, the remaining pressure
•
Unplug the electric pressure cooker before
keeping time starts counting down.
cleaning.
9
When the pressure keeping time has elapsed,
•
Wait until the electric pressure cooker has
the electric pressure cooker automatically
cooled down sufficiently before cleaning.
switches to keep warm mode.
10
After the pressure has been released
sufficiently, turn the pressure regulator to the
vent position (fig. 19), and then turn the top lid
counterclockwise to take it off the main unit
(fig. 4).
»
The floater drops down when the
pressure is released sufficiently.
Interior
Problem
Solution
The top lid is not properly closed.
Inside of the top lid and the main body:
Make sure the top lid is properly
•
Wipe with wrung out and damp cloth.
closed.
•
Make sure to remove all the food residues
The pressure level inside of
stuck to the electric pressure cooker.
the appliance is abnormal, in
Heating element:
this case the safety valve will
•
Wipe with wrung out and damp cloth.
be releasing steam. Take the
•
Remove food residues with wrung out and
appliance to your Philips dealer
damp cloth.
or a service center authorized by
Sealing ring:
Philips.
•
Soak in warm water and clean with sponge.
Air or steam
There is food residue in the
leaks from
rubber ring of the floating valve.
Exterior
the floating
Clean the rubber ring of the
valve.
floating valve.
Surface of the top lid and outside of the main
The rubber ring of the floating
body:
valve is broken. Replace the
•
Wipe with a cloth damped with soap water.
rubber ring.
•
Only use soft and dry cloth to wipe the control
The floater
Make sure there is enough food
panel.
does not
and water in the inner pot.
•
Make sure to remove all the food residues
rise after the
around the pressure regulator and floating
appliance
valve.
starts
Pressure regulator:
pressurizing.
•
Disassemble the pressure regulator, soak it in
The top lid or the pressure
warm water, and clean with sponge (fig. 23 to
regulator valve has malfunction.
fig. 26).
Take the appliance to your
•
Remove food residues in the pressure
Philips dealer or a service center
regulator and floating valve.
authorized by Philips.
E3 displays
The temperature inside the inner
Tip
on the
pot is too high. Wait until it falls
•
screen.
down to room temperature.
To remove the pressure regulator, turn it
counterclockwise and then pull it up (fig. 23).
E1, E2, or E4
The electric pressure cooker has
displays on
malfunction. Take the appliance
the screen.
to a Philips dealer or a service
center authorised by Philips.
Accessories
Detachable top lid, measuring cup, rice spoon,
soup ladle, and inner pot:
Bahasa Melayu
•
Soak in hot water and clean with sponge.
6 Specifications
1 Periuk tekanan elektrik
Model Number
HD2132
anda
Rated voltage
220-240V~
50-60 Hz
Tahniah atas pembelian anda dan selamat
Rated power output
830-980W
menggunakan Philips!
Rated capacity
5.0L
Untuk mendapat manfaat sepenuhnya daripada
sokongan yang ditawarkan oleh Philips, daftarkan
Warm keeping temperature
60-80°C
produk anda di www.philips.com/welcome.
2 Isi kandungan kotak
7 Recycling
(rajah 1)
Do not throw away the appliance with normal
household waste at the end of its life, but hand it in
Unit utama
at an official collection point for recycling. By doing
Kord kuasa
this, you can help to preserve the environment.
Sudu nasi
Manual pengguna
8 Guarantee and service
Kad waranti
If you need service or information, or if you have a
3 Gambaran keseluruhan
problem, visit the Philips website at www.philips.
com or contact the Philips Customer Care Center
in your country. You can find its phone number
in the worldwide guarantee leaflet. If there is no
Gambaran keseluruhan produk
Customer Care Center in your country, go to your
(rajah 2)
local Philips dealer.
9 Troubleshooting
a Pemegang penutup f Panel Kawalan
b Pengatur tekanan
If your electric pressure cooker does not function
c Penutup atas
properly or if the cooking quality is insufficient,
consult the table below. If you are unable to solve
d Periuk dalam
the problem, contact a Philips service center or the
e Jasad utama
Consumer Care Center in your country.
Problem
Solution
Gambaran keseluruhan kawalan
I have
The sealing ring is not well
(rajah 3)
difficulties
assembled. Make sure the
closing the
sealing ring is well assembled
top lid.
around the inside of the top lid.
a Butang jam
The floater blocks the locking pin.
Push down the floater so that it
b Butang praset
does not block the locking pin.
Butang pemanasan
c
I have
The floater has not dropped.
semula
difficulties
Push the floater down.
d Butang sup
opening the
top lid after
Butang daging
e
the pressure
lembu/kambing
is released.
f Butang stim/ayam
The food
Make sure that there is no foreign
Butang kacang/
is not well
residue on the heating element
g
tendon
cooked.
and the outside of the inner pot
before switching the electric
pressure cooker on.
The heating element is damaged,
or the inner pot is deformed. Take
the cooker to your Philips dealer
or a service center authorized by
Philips.
Air or steam
The sealing ring is not well
leaks from
assembled. Make sure the
under the lid.
sealing ring is well assembled
around the inside of the top lid.
There is food residue in the
sealing ring. Make sure the
sealing ring is clean.
Periuk dalam
Senduk sup
Cawan penyukat
Risalah maklumat penting
g Elemen pemanasan
h Soket kuasa
i Injap keselamatan
Butang masa
h
penekanan
i Butang bubur
j Butang nasi
k Butang mula
Butang simpan
l
panas/mati
m Skrin paparan
n Butang minit
Advertisement

Related Manuals for Philips HD2132


Summary of Contents for Philips HD2132
- Page 1 Rice Not adjustable Main unit Inner pot the problem, contact a Philips service center or the Put the pre-washed food in the inner pot, Press one of the cooking buttons (fig. 10 to • Press the hour button once to set the hour...
- Page 2 杂物黏附在加热元件上。 • tekanan menyimpan (jam) 确保清理掉黏在电压力煲上的所有食物残渣。 Putarkan pengatur tekanan kepada fungsi memasak yang berlainan. Pemasa boleh Layanan Pelanggan Philips di negara anda. Anda • 确保内锅已正确接触加热元件。 lalai (minit) tekanan 加热元件: kedudukan kedap (rajah 8). dipraset sehingga 24 jam. boleh mendapatkan nombor telefonnya dalam (minit) 感谢您的惠顾,欢迎光临飞利浦!...