Table of Contents
Advertisement
Quick Links
Advertisement
Table of Contents

Related Manuals for AEG BSK99733PT


Summary of Contents for AEG BSK99733PT
- Page 1 BSK99733PT User Manual Steam oven USER MANUAL...
- Page 2 Products must be used, installed and operated in accordance with this manual. You may not be able to claim on the AEG manufacturer’s warranty in the event that your product fault is due to failure to adhere to this manual.
-
Page 3: Table Of Contents
CONTENTS 1. SAFETY INFORMATION................5 1.1 Children and vulnerable people safety............. 5 1.2 General Safety....................5 2. CONDITIONS OF USE................... 7 3. SAFETY INSTRUCTIONS................8 3.1 Installation......................8 3.2 Electrical connection..................9 3.3 Use........................9 3.4 Care and cleaning...................10 3.5 Steam Cooking....................10 3.6 Internal lighting....................11 3.7 Service......................11 3.8 Disposal...................... - Page 4 CONTENTS 10.3 Cooling fan....................35 11. HINTS AND TIPS..................36 11.1 Cooking recommendations................36 11.2 Moist Fan Baking..................36 11.3 Moist Fan Baking - recommended accessories..........37 11.4 Cooking tables for test institutes..............37 12. CARE AND CLEANING................41 12.1 Notes on cleaning..................41 12.2 How to remove: Shelf supports ..............41 12.3 How to use: Steam Cleaning................
-
Page 5: Safety Information
SAFETY INFORMATION Before the installation and use of the appliance, carefully read the supplied instructions. The manufacturer is not responsible for any injuries or damage that are the result of incorrect installation or usage. Always keep the instructions in a safe and accessible location for future reference. - Page 6 SAFETY INFORMATION Before carrying out any maintenance, disconnect the • appliance from the power supply. WARNING: Ensure that the appliance is switched off before • replacing the lamp to avoid the possibility of electric shock. Do not use the appliance before installing it in the built-in •...
-
Page 7: Conditions Of Use
2. CONDITIONS OF USE This appliance is intended to be used in household and similar applications such as: • Farm houses • By clients in serviced apartments, holiday apartments and other residential type environments. 7/64... -
Page 8: Safety Instructions
3. SAFETY INSTRUCTIONS 3.1 Installation WARNING! Only a qualified person must install this appliance. • Remove all the packaging. • Do not install or use a damaged appliance. • Follow the installation instructions supplied with the appliance. • Always take care when moving the appliance as it is heavy. Always use safety gloves and enclosed footwear. -
Page 9: Electrical Connection
SAFETY INSTRUCTIONS 3.2 Electrical connection WARNING! Risk of fire and electric shock. • All electrical connections should be made by a qualified electrician. • The appliance must be earthed. • Make sure that the parameters on the rating plate are compatible with the electrical ratings of the mains power supply. -
Page 10: Care And Cleaning
SAFETY INSTRUCTIONS WARNING! Risk of damage to the appliance. • To prevent damage or discoloration to the enamel: – do not put ovenware or other objects in the appliance directly on the bottom. – do not put aluminium foil directly on the bottom of cavity of the appliance. –... -
Page 11: Internal Lighting
SAFETY INSTRUCTIONS 3.6 Internal lighting WARNING! Risk of electric shock. • Concerning the lamp(s) inside this product and spare part lamps sold separately: These lamps are intended to withstand extreme physical conditions in household appliances, such as temperature, vibration, humidity, or are intended to signal information about the operational status of the appliance. -
Page 12: Product Description
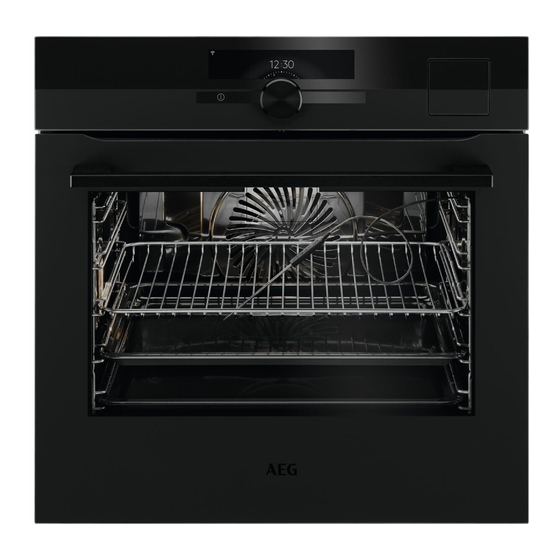
4. PRODUCT DESCRIPTION 4.1 General overview Control panel Display Water drawer Socket for the food sensor Heating element Lamp Descaling pipe outlet Shelf support, removable Shelf positions 4.2 Accessories Wire shelf For cookware, cake tins, roasts. Baking tray For cakes and biscuits. Grill- / Roasting pan To bake and roast or as a pan to collect fat. - Page 13 PRODUCT DESCRIPTION Trivet For roasting and grilling. Use the trivet only with the Grill- / Roasting pan. Patisserie tray For rolls, pretzels and small pastries. Suitable for steam functions. The discolouration of the surface has no effect on the functions. ≤...
-
Page 14: How To Turn Oven On And Off
5. HOW TO TURN OVEN ON AND OFF 5.1 Control panel On / Off Press and hold to turn the oven on and off. Lamp switch To turn the lamp on and off. Display Shows the current settings of the oven. Rotary knob To operate the oven. - Page 15 HOW TO TURN OVEN ON AND OFF If you do not use the oven for 2 minutes, the display goes to standby. 09:37 When you cook, the display shows the set 12:30 functions and other available options. 60°C 200°C The display with the maximum number of func‐ tions set.
-
Page 16: Before First Use
6. BEFORE FIRST USE WARNING! Refer to Safety chapters. 6.1 Initial Cleaning Step 1 Step 2 Step 3 Clean the oven and the ac‐ Remove all accessories and Place the accessories and the cessories with a soft cloth, removable shelf supports from removable shelf supports in warm water and a mild deter‐... - Page 17 BEFORE FIRST USE Step 1 Step 2 Step 3 Step 4 Put the test paper Shake the test paper After 1 min, check Set the water hardness into water for about to remove the excess water hardness with level: Menu / Settings / 1 sec.
-
Page 18: Daily Use
7. DAILY USE WARNING! Refer to Safety chapters. 7.1 How to set: Heating functions Step 1 Turn on the oven. Step 2 Hold the knob. The display shows the default heating functions. Step 3 Select the symbol of the heating function and press the knob to enter the submenu. Step 4 Select the heating function and press the knob. -
Page 19: Water Drawer
DAILY USE 7.2 Water drawer A. Lid B. Wave-breaker C. Drawer D. Water-filling opening E. Scale F. Front cover 7.3 How to use: Water drawer Step 1 Push the front cover of the water draw‐ Step 2 Fill the water drawer up to the maximum level. You can do it in two ways: A: Leave the water drawer inside the B: Remove the water drawer from the oven and pour the water from a contain‐... -
Page 20: How To Set: Steamify - Steam Heating Function
DAILY USE CAUTION! Keep the water drawer away from hot surfaces. 7.4 How to set: Steamify - Steam heating function Step 1 Turn on the oven. Step 2 Select: . Press the knob to set the steam heating function. Step 3 Select: . -
Page 21: How To Set: Sousvide Cooking
DAILY USE Step 6 Fill the water drawer with cold water to the maximum level (around 950 ml). The water supply is sufficient for approximately 50 minutes. Use the scale on the water drawer. WARNING! Use only cold tap water. Do not use filtered (demineralised) or distilled wa‐ ter. -
Page 22: How To Set: Assisted Cooking
DAILY USE Step 6 Select: . Press the knob. Step 7 Turn and press the knob to set the temperature. Step 8 Press: Step 9 Residual water can accumulate on the vacuum bags and in the cavity. After cooking, open the oven door carefully. Use a plate and a towel to take out the vacuum bags. When the oven is cold, remove the water from the bottom of the cavity with a sponge. -
Page 23: Heating Functions
DAILY USE 7.7 Heating functions Standard heating functions Heating function Application To grill thin pieces of food and to toast bread. Grill To roast large meat joints or poultry with bones on one shelf position. To make gratins and to brown. Turbo Grilling To bake on up to three shelf positions at the same time and to dry food. - Page 24 DAILY USE Special heating functions Heating function Application To preserve vegetables (e.g., pickles). Preserving To dry sliced fruit, vegetables and mushrooms. Dehydrating To prepare yogurt. The lamp in this function is off. Yogurt Function To preheat plates for serving. Plate Warming To defrost food (vegetables and fruit).
-
Page 25: Notes On: Moist Fan Baking
DAILY USE Steam heating functions Heating function Application The function name refers to a method of cooking in vacuum sealed plastic pouches at low temperatures. Refer to the section SousVide Cooking be‐ low and the chapter "Hints and Tips" with the cooking tables to find more SousVide Cooking information. - Page 26 DAILY USE For the cooking instructions refer to "Hints and tips" chapter, Moist Fan Baking. For general energy saving recommendations refer to "Energy Efficiency" chapter, Energy Saving. 26/64...
-
Page 27: Clock Functions
8. CLOCK FUNCTIONS 8.1 Clock functions description Clock function Application Cooking time To set the length of cooking. Maximum is 23 h 59 min. Start criteria To set when the timer starts counting. End action To set what happens when the timer ends counting. Delayed start To postpone the start and / or end of cooking. - Page 28 CLOCK FUNCTIONS How to set cooking time Step 2 Select: Timer. Step 3 Turn the knob to set the time. Press the knob. Step 4 Select: End action. Press the knob. Timer starts counting down immediately. Take a shortcut! How to choose cooking start / end option Step 1 Choose a heating function and set the temperature.
- Page 29 CLOCK FUNCTIONS How to delay start without setting the end of cooking Step 2 Select: Start criteria / At a later time. Step 3 Turn the knob to set the start time. Press the knob twice to confirm. How to extend cooking time When 10% of cooking time is left and the food seems not to be ready, you can extend cooking time.
-
Page 30: How To Use: Accessories
9. HOW TO USE: ACCESSORIES 9.1 Inserting accessories A small indentation at the top increases safety. The indentations are also anti-tip devices. The high rim around the shelf prevents cookware from slipping of the shelf. Wire shelf: Push the shelf between the guide bars of the shelf support. -
Page 31: Using Trivet And Grill- / Roasting Pan
HOW TO USE: ACCESSORIES Wire shelf: Put the wire shelf on the telescopic runners. Deep pan: Put the deep pan on the telescopic runners. Wire shelf and deep pan together: Place the wire shelf and the deep pan to‐ gether on the telescopic runner. 9.3 Using Trivet and Grill- / Roasting pan WARNING! Be careful when you remove the accessories from a hot oven. -
Page 32: Food Sensor
HOW TO USE: ACCESSORIES Step 1 Put the trivet into the deep pan so that the supports of the wire shelf point up. Step 2 Put the deep pan into the oven on the necessary shelf position. You can use the trivet to grill flat dishes in large quantities and to toast. Step 1 Put the trivet into the deep pan so that the supports of the wire shelf... - Page 33 HOW TO USE: ACCESSORIES How to use: Food Sensor Step 1 Turn on the oven. Step 2 Set a heating function and, if necessary, the oven temperature. Step 3 Insert: Food Sensor. Meat, poultry and fish Casserole Insert the tip of Food Sensor into the centre Insert the tip of Food Sensor exactly in the centre of meat, fish, in the thickest part if possible.
- Page 34 HOW TO USE: ACCESSORIES Step 6 Press the knob to set the preferred sensor option: • Sound alarm - when food reaches the core temperature, the signal sounds. • Sound alarm and stop cooking - when food reaches the core temperature, the sig‐ nal sounds and the oven stops.
-
Page 35: Additional Functions
10. ADDITIONAL FUNCTIONS 10.1 How to save: Favourites You can save your favourite settings, such as the heating function, the cooking time, the temperature or the cleaning function. You can save 3 favourite settings. Saved settings are available in the menu: Favourites. Step 1 Turn on the oven. -
Page 36: Hints And Tips
11. HINTS AND TIPS WARNING! Refer to Safety chapters. 11.1 Cooking recommendations The temperature and cooking times in the tables are guidelines only. They depend on the recipes and the quality and quantity of the ingredients used. Your oven may bake or roast differently to the oven you had before. The tables below show rec‐ ommended settings for temperature, cooking time and shelf position for specific types of the food. -
Page 37: Moist Fan Baking - Recommended Accessories
HINTS AND TIPS (°C) (min) Short crust bis‐ baking tray or dripping 15 - 25 cuits, 20 pieces Tartlets, 8 baking tray or dripping 15 - 25 pieces 11.3 Moist Fan Baking - recommended accessories Use the dark and non-reflective tins and containers. They have better heat absorption than the light colour and reflective dishes. - Page 38 HINTS AND TIPS BAKING ON ONE LEVEL. Baking in tins (°C) (min) Apple pie, 2 tins Ø20 cm Conventional Cook‐ 70 - 90 BAKING ON ONE LEVEL. Biscuits Use the third shelf position. (°C) (min) Short bread / Pastry strips True Fan Cooking 25 - 40 Short bread / Pastry strips,...
- Page 39 HINTS AND TIPS MULTILEVEL BAKING. Biscuits (°C) (min) Fatless sponge cake True Fan Cooking 35 - 50 1 / 4 GRILL Preheat the empty oven for 5 minutes. Grill with the maximum temperature setting. (min) Toast Grill 1 - 3 Beef steak, turn halfway Grill 24 - 30...
- Page 40 HINTS AND TIPS Set the temperature to 100 °C. Container (kg) (min) (Gastro‐ norm) Broccoli, pre‐ 1 x 2/3 perfo‐ 8 - 9 Put the baking heat the emp‐ rated tray on the first ty oven shelf position. Broccoli, pre‐ 1 x 2/3 perfo‐...
-
Page 41: Care And Cleaning
12. CARE AND CLEANING WARNING! Refer to Safety chapters. 12.1 Notes on cleaning Clean the front of the oven with a soft cloth with warm water and a mild deter‐ gent. Clean the bottom of the cavity with a few drops of vinegar to remove limestone residue. -
Page 42: How To Use: Steam Cleaning
CARE AND CLEANING 12.3 How to use: Steam Cleaning Before you start: Turn off the oven and wait Remove all accessories and re‐ Clean the bottom of the cavity until it is cold. movable shelf supports. and the inner door glass with a soft cloth with warm water and a mild detergent. -
Page 43: How To Clean: Water Drawer
CARE AND CLEANING 12.5 How to clean: Water drawer Step 1 Remove the water drawer from the oven. Step 2 Remove the lid of the water drawer. Lift the cover in correspondence with the protrusion in the rear. Step 3 Remove the wave-breaker. -
Page 44: Descaling Reminder
CARE AND CLEANING Step 4 Select: Menu / Cleaning. Step 5 Turn on the function and follow the instruction on the display. The first part of descaling starts. Step 6 After the first part is over, empty the deep pan and put it back on the first shelf posi‐ tion. -
Page 45: How To Use: Rinsing
CARE AND CLEANING 12.8 How to use: Rinsing Before you start: Turn off the oven and wait until it is cold. Remove all accessories. Step 1 Place the deep pan on the first shelf position. Step 2 Fill the water drawer with water. Step 3 Select: Menu / Cleaning / Rinsing. -
Page 46: How To Replace: Lamp
CARE AND CLEANING Step 1 Fully open the door. Step 2 Lift and press the clamping levers (A) on the two door hinges. Step 3 Close the oven door to the first opening position (approximately 70° angle). Hold the door at both sides and pull it away from the oven at an upwards angle. Put the door with the outer side down on a soft cloth on a stable surface. - Page 47 CARE AND CLEANING Before you replace the lamp: Step 1 Step 2 Step 3 Turn off the oven. Wait until Disconnect the oven from the Put a cloth on the bottom of the oven is cold. mains. the cavity. Top lamp Step 1 Turn the glass cover to remove it.
-
Page 48: Troubleshooting
13. TROUBLESHOOTING WARNING! Refer to Safety chapters. 13.1 What to do if... The oven does not turn on or does not heat up Possible cause Remedy The oven is not connected to an electrical sup‐ Check if the oven is correctly connected to the ply or it is connected incorrectly. - Page 49 TROUBLESHOOTING Water drawer does not work properly Description Possible cause Remedy The oven does not retain the You did not fully press the wa‐ Fully insert the water drawer water drawer after you insert ter drawer body. into the oven. Water comes out of the water You did not assemble the lid Reassemble the lid of the wa‐...
-
Page 50: How To Manage: Error Codes
TROUBLESHOOTING 13.2 How to manage: Error codes When the software error occurs, the display shows error message. In this section, you will find the list of the problems that you can handle on your own. Code and description Remedy F111 - Food sensor is not correctly inserted in‐ Fully plug Food sensor into the socket. -
Page 51: Energy Efficiency
14. ENERGY EFFICIENCY 14.1 Product Information and Product Information Sheet* Supplier's name Model identification BSK99733PT 944188471 Energy Efficiency Index 61.9 Energy efficiency class Energy consumption with a standard load, conventional 0.99 kWh/cycle mode Energy consumption with a standard load, fan-forced 0.52 kWh/cycle... - Page 52 ENERGY EFFICIENCY Cooking with fan When possible, use the cooking functions with fan to save energy. Residual heat If a programme with the Duration or End Time selection is activated and the cooking time is longer than 30 min, the heating elements automatically turn off earlier in some oven functions. The fan and lamp continue to operate.
-
Page 53: Menu Structure
15. MENU STRUCTURE 15.1 Menu Select: Menu and press the knob. Menu item Application Favourites Lists the favourite settings. Assisted cooking Lists automatic programmes. Cleaning Lists cleaning programmes. Options To set the oven configuration. Settings Setup To set the oven configuration. Service Shows the software version and con‐... -
Page 54: Submenu For: Setup
MENU STRUCTURE Submenu Application Lamp icon visible Lamp icon appears on the screen. Child lock Prevents accidental activation of the oven. When the option is on, the text "Child Lock" appears on the display when you turn on the oven. To enable the oven use, choose the code letters in the alphabetical order. -
Page 55: Submenu For: Service
MENU STRUCTURE 15.5 Submenu for: Service Submenu Description Demo mode Activation / deactivation code: 2468 Licence Information about licenses. Software version Information about software version. Reset all settings Restores factory settings. Reset all popups Restores all pop-ups to the original settings. 55/64... -
Page 56: S Easy
16. IT'S EASY! Before the first use you have to set: Display bright‐ Language Buzzer volume Water hardness Time of day ness Familiarize yourself with the basic icons on the control panel and the display: On / Off Information Timer options Food sensor Start using the oven Quick start... - Page 57 IT'S EASY! Get to know how to cook quickly Use the automatic programmes to prepare a dish quickly with the default settings: Step 1 Step 2 Step 3 Step 4 Step 5 Select: Menu. Select: Assisted Choose the Choose the dish Press: Press the knob.
-
Page 58: Take A Shortcut
17. TAKE A SHORTCUT! Here you can see all the useful shortcuts. You can also find them in the dedicated chapters in the user manual. How to set: Heating functions How to set: Steamify - Cooking with a steam heating function How to set: SousVide Cooking How to set: Assisted cooking MENU... -
Page 59: Warranty
‘ASC’ means Electrolux’s authorised serviced centres; d) ‘AEG’ is the brand controlled by Electrolux Home Products Pty Ltd of 163 O’Riordan Street, Mascot NSW 2020, ABN 51 004 762 341 in respect of Appliances purchased in Australia and Electrolux (NZ) Limited (collectively “Electrolux”) of 3-5 Niall Burgess Road, Mount Wellington, in respect of Appliances purchased in New Zealand;... - Page 60 Important Notice Before calling for service, please ensure that the steps listed in clause 8 above have been fol‐ lowed. SERVICE AUSTRALIA aeg.com/au FOR SERVICE FOR SPARE PARTS or to find the address of your nearest author‐ or to find the address of your nearest spare...
- Page 61 FOR SERVICE FOR SPARE PARTS or to find the address of your nearest author‐ or to find the address of your nearest spare ised service centre in New Zealand parts centre in New Zealand PLEASE CALL 0800 234 234 PLEASE CALL 0800 10 66 20 OR EMAIL OR EMAIL customercare@electrolux.co.nz...
- Page 62 19. ENVIRONMENTAL CONCERNS Recycle materials with the symbol . Put the packaging in relevant containers to recycle it. Help protect the environment and human health by recycling waste of electrical and electronic appliances. Do not dispose of appliances marked with the symbol with the household waste.
- Page 63 63/64...
- Page 64 www.aeg.com/au...