Table of Contents
Advertisement
Quick Links
Advertisement
Table of Contents

Related Manuals for AEG FFE72800PM


Summary of Contents for AEG FFE72800PM
- Page 1 FFE72800PM User Manual Dishwasher USER MANUAL...
-
Page 2: Table Of Contents
16. WARRANTY ......................24 FOR PERFECT RESULTS Thank you for choosing this AEG product. We have created it to give you impeccable performance for many years, with innovative technologies that help make life simpler features you might not find on ordinary appliances. Please spend a few minutes reading to get the very best from it. - Page 3 ENGLISH manufacturer is not responsible for any injuries or damages that are the result of incorrect installation or usage. Always keep the instructions in a safe and accessible location for future reference. 1.1 Children and vulnerable people safety This appliance can be used by children aged from 8 •...
-
Page 4: Safety Instructions
Before any maintenance operation, deactivate the • appliance and disconnect the mains plug from the socket. Do not use high pressure water sprays and/or steam • to clean the appliance. The appliance is to be connected to the water mains •... - Page 5 ENGLISH new devices fitted (water meters, instructions on the detergent etc.), let the water flow until it is clean packaging. and clear. • Do not drink and play with the water • Ensure that there are no visible water in the appliance. leaks during and after the first use of •...
-
Page 6: Product Description
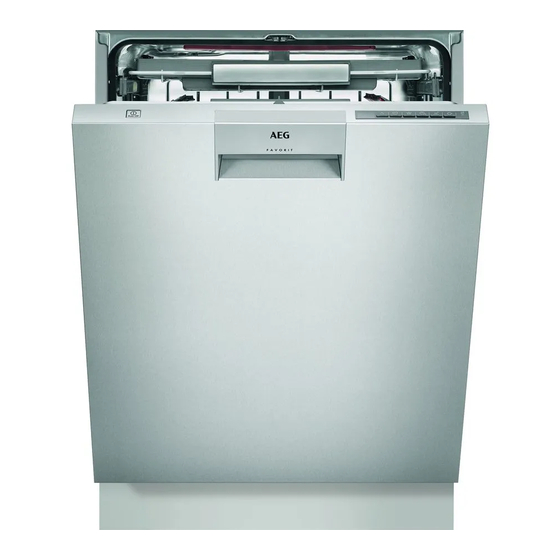
3. PRODUCT DESCRIPTION Top spray arm Detergent dispenser Upper spray arm Comfort Lift basket Lower spray arm Release handle Filters Upper basket Rating plate Cutlery drawer Air vent Rinse aid dispenser 3.1 Beam-on-Floor The Beam-on-Floor is off when the appliance is The Beam-on-Floor is a light that is deactivated. -
Page 7: Control Panel
ENGLISH 4. CONTROL PANEL On/off button TimeSaver button Display XtraDry button Program button ExtraHygiene button Delay button Indicators MyFavourite button 4.1 Indicators Indicator Description Rinse aid indicator. It is always off while the programme operates. 5. PROGRAMMES Programme Degree of soil Programme phases Options Type of load... -
Page 8: Consumption Values
Programme Degree of soil Programme phases Options Type of load • Normal or light • Wash 45 °C • XtraDry soil • Rinse • Delicate crock- • Dry ery and glass- ware • Fresh soil • Wash 60 °C •... -
Page 9: Settings
ENGLISH Water Energy Duration Programme (kWh) (min) 12 - 14 0.7 - 0.9 82 - 92 10.5 0.01 9.0 - 10.0 1.1 - 1.3 230 - 250 1) The pressure and the temperature of the water, the variations of the mains supply, the options and the quantity of dishes can change the values. - Page 10 3. Press the on/off button to confirm indicator active. the setting. 7.4 Acoustic signals How to deactivate the rinse aid empty notification Acoustic signals sound when a malfunction of the appliance occurs. It is Make sure the appliance is in user mode.
-
Page 11: Options
ENGLISH • The display shows the current During the drying phase, the setting. door opens automatically – = AirDry is deactivated. and remains ajar. – = AirDry is activated. CAUTION! 2. Press to change the setting. Do not try to close the 3. -
Page 12: Before First Use
In other programmes, the By default, TimeSaver is off, but it is setting of XtraDry is permanent and it is possible to activate it manually. This automatically used in next cycles. This option cannot be combined with configuration can be changed at any XtraDry. -
Page 13: Daily Use
ENGLISH CAUTION! If you use multi-tablets and Only use rinse aid the drying performance is specifically designed for satisfactory, the rinse aid dishwashers. refill indication can be disabled. 1. Open the lid (C). We recommend to always 2. Fill the dispenser (B) until the rinse use rinse aid for better aid reaches the marking ''MAX''. - Page 14 10.3 Setting and starting a programme The Auto Off function This function decreases energy consumption by deactivating automatically the appliance when it is not operating. The function comes into operation: Once the basket is unlocked, push • 5 minutes after the completion of the the rack down.
-
Page 15: Hints And Tips
ENGLISH Opening the door while the Press and hold simultaneously appliance operates until the appliance is in programme selection mode. Opening the door while a programme is running stops the appliance. It may affect Cancelling the programme the energy consumption and the programme duration. -
Page 16: Care And Cleaning
• Remove remaining food from the • The position of the items in the items. baskets is correct. • Make soft the remaining burned food • The programme is applicable for the on the items. type of load and for the degree of •... - Page 17 ENGLISH 7. Reassemble the filters (B) and (C). 8. Put back the filter (B) in the flat filter (A). Turn it clockwise until it locks. 2. Remove the filter (C) out of filter (B). 3. Remove the flat filter (A). 4.
-
Page 18: Troubleshooting
12.3 External cleaning • Clean the appliance with a moist soft cloth. • Only use neutral detergents. • Do not use abrasive products, abrasive cleaning pads or solvents. 12.4 Internal cleaning • Carefully clean the appliance, including the rubber gasket of the door, with a soft damp cloth. - Page 19 ENGLISH With some problems, the display WARNING! shows an alarm code. Repairs not properly done The majority of problems that can may result in serious risk to occur can be solved without the need the safety of the user. Any to contact an Authorised Service repairs must be performed Centre.
- Page 20 Problem and alarm code Possible solution Small leak from the appli- • The appliance is not levelled. Loosen or tighten the ad- ance door. justable feet (if applicable). • The appliance door is not centred on the tub. Adjust the rear foot (if applicable).
- Page 21 ENGLISH Problem Possible cause and solution There are stains and dry water • The released quantity of rinse aid is not sufficient. Ad- drops on glasses and dishes. just the rinse aid level to a higher level. • The quality of the rinse aid can be the cause. The dishes are wet.
-
Page 22: Technical Information
14. TECHNICAL INFORMATION Dimensions Width / height / depth (mm) 596/ 818 - 878 / 570 Voltage (V) 200 - 240 Electrical connection Frequency (Hz) 50 / 60 Wattage (W) 1550-2200 Water supply pressure bar (minimum and maximum) 0.5 - 8... - Page 23 ENGLISH 15.1 Adjusting the height of 15.3 Water inlet hose the appliance Connect the inlet hose to a water tap with an external BSP thread spout of 1. Remove the adjustable plinth. 3/4''. For best washing performance it is recommended to connect the appliance to a cold water supply.
- Page 24 Remove the sink plug when the appliance drains the water to prevent that the water goes back into the appliance. The appliance has a security feature to prevent dirty water going back into the appliance. If the spigot of the sink has a non-return valve, this valve can cause the appliance to drain incorrectly.
-
Page 25: Warranty
(c) cosmetic damage which does not affect the operation of the Appliance; This document sets out the terms and conditions of the product warranties for AEG Appliances. It is an important document. Please keep it with your proof (d) damage to the Appliance caused by: of purchase documents in a safe place for future reference should there be a (i) negligence or accident;... - Page 26 www.aeg.com/au...