Table of Contents
Advertisement
Quick Links
Advertisement
Table of Contents

Related Manuals for AEG FFE83800PM


Summary of Contents for AEG FFE83800PM
- Page 1 FFE83800PM User Manual Dishwasher USER MANUAL...
-
Page 2: Table Of Contents
15. WARRANTY ......................24 FOR PERFECT RESULTS Thank you for choosing this AEG product. We have created it to give you impeccable performance for many years, with innovative technologies that help make life simpler features you might not find on ordinary appliances. Please spend a few minutes reading to get the very best from it. - Page 3 ENGLISH damages that are the result of incorrect installation or usage. Always keep the instructions in a safe and accessible location for future reference. 1.1 Children and vulnerable people safety This appliance can be used by children aged from 8 •...
-
Page 4: Safety Instructions
Before any maintenance operation, deactivate the • appliance and disconnect the mains plug from the socket. Do not use high pressure water sprays and/or steam • to clean the appliance. The appliance is to be connected to the water mains •... - Page 5 ENGLISH new devices fitted (water meters, • Do not put flammable products or etc.), let the water flow until it is clean items that are wet with flammable and clear. products in, near or on the appliance. • Ensure that there are no visible water 2.5 Internal light leaks during and after the first use of the appliance.
-
Page 6: Product Description
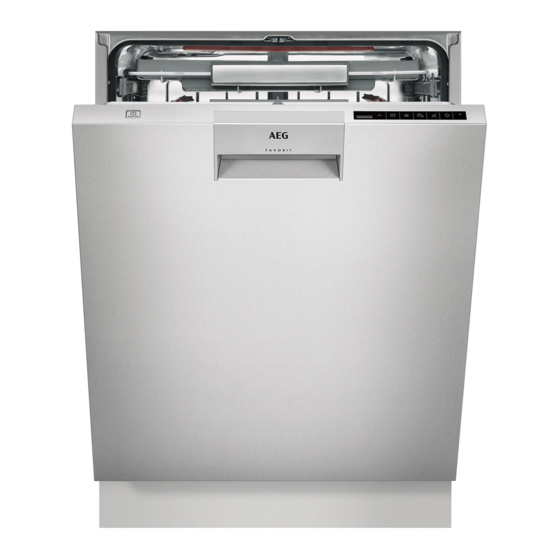
3. PRODUCT DESCRIPTION Top spray arm Detergent dispenser Upper spray arm Comfort Lift basket Lower spray arm Release handle Filters Upper basket Rating plate Cutlery drawer Air vent Rinse aid dispenser 3.1 TimeBeam The TimeBeam is a display that is shown on the floor below the appliance door. -
Page 7: Control Panel
ENGLISH When AirDry is activated during the drying phase, the projection on the floor may not be completely visible. To check the remaining time of the running programme, look at the control panel display. 4. CONTROL PANEL On/off button TimeSaver touchpad Display XtraDry touchpad Program touchpad... - Page 8 Programme Degree of soil Programme phases Options Type of load • Heavy soil • Prewash • ExtraHygiene • Crockery, cut- • Wash 70 °C • XtraDry lery, pots and • Rinse • TimeSaver pans • Dry • Normal or light •...
-
Page 9: Settings
ENGLISH Water Energy Duration Programme (kWh) (min) 14 - 16 1.2 - 1.5 160 - 180 12.5 - 14.5 1.4 - 1.7 170 - 190 12 - 14 0.7 - 0.9 82 - 92 10.5 0.01 9.0 - 10.0 1.1 - 1.3 230 - 250 1) The pressure and the temperature of the water, the variations of the mains supply, the options and the quantity of dishes can change the values. - Page 10 To enter user mode, press and hold It is possible to set the released quantity of rinse aid between level 1 (minimum simultaneously until the quantity) and level 6 (maximum quantity). indicators flash Level 0 deactivates the rinse aid and the display is blank.
- Page 11 ENGLISH 3. Press the on/off button to confirm CAUTION! the setting. Do not try to close the appliance door within 2 6.5 How to set the colour of minutes after automatic the TimeBeam open. This can cause damage to the appliance. The appliance must be in programme selection mode.
-
Page 12: Options
How to set the MyFavourite • If options are saved together with the programme, the indicators programme related to the options are on. Press • The MyFavourite indicator is on. • The display shows the number and the duration of the programme. -
Page 13: Before First Use
ENGLISH °C for at least 10 minutes during the last If the option is not applicable to the rinsing phase. programme, the related indicator does not come on or it flashes quickly for a How to activate ExtraHygiene few seconds and then goes out. The display shows the updated programme duration. - Page 14 9.1 Comfort Lift CAUTION! Do not sit on the rack. Do not put excessive pressure on the locked basket. CAUTION! Do not exceed the max load capacity of 18 kg. Once the release handle is lifted, CAUTION! push the rack down. The mechanism...
- Page 15 ENGLISH 9.3 Setting and starting a When the countdown is completed, the programme starts. programme Opening the door while the The Auto Off function appliance operates This function decreases energy If you open the door while a programme consumption by deactivating is running, the appliance stops.
-
Page 16: Hints And Tips
End of programme Close the water tap. When the programme is completed and you open the door, the appliance is automatically deactivated. 10. HINTS AND TIPS 10.1 General 10.3 Loading the baskets The following hints will ensure optimal • Only use the appliance to wash items cleaning and drying results in daily use that are dishwasher-safe. -
Page 17: Care And Cleaning
ENGLISH 10.5 Unloading the baskets 4. First remove items from the lower basket then the upper basket. 1. For improved drying results with the At the end of the program most efficient use of energy select water can still remain on the the AirDry option, otherwise open sides and on the door of the the door by approximately 10cm at... - Page 18 11.2 Cleaning the upper spray We recommend to clean regularly the upper spray arm to avoid soil to clog the holes. Clogged holes can cause unsatisfactory washing results. 1. Pull out the upper basket. 2. To disengage the spray arm from the...
-
Page 19: Troubleshooting
ENGLISH • Do not use abrasive products, abrasive cleaning pads, sharp tools, strong chemicals, scourer or solvents. • If you use short duration programmes regularly, these can leave deposits of grease and limescale inside the appliance. To prevent this, we recommend running long duration programmes at least twice a month. - Page 20 Problem and alarm code Possible solution The appliance does not fill • Make sure that the water tap is open. with water. • Make sure that the pressure of the water supply is not too low. For this information, contact your local water The display shows authority.
- Page 21 ENGLISH the problem occurs again, contact an Refer to "Before first use", Authorised Service Centre. "Daily use", or "Hints and For alarm codes not described in the tips" for other possible table, contact an Authorised Service causes. Centre. Once you have checked the appliance, deactivate and activate the appliance.
-
Page 22: Technical Information
Problem Possible cause and solution Traces of rust on cutlery. • Silver and stainless steel cutlery were placed together. Avoid to put silver and stainless steel items close to- gether. There are residues of deter- • The detergent tablet got stuck in the dispenser and gent in the dispenser at the therefore was not completely washed away by water. -
Page 23: Installation
ENGLISH 14. INSTALLATION Remove entire plastic There should be a minimum The hose should not be membrane from sink trap 2mm gap between the top of extended by more than spigot & fit drain hose to spigot the dishwasher and 2 metres or water pump- with clamp underside of bench top... -
Page 24: Warranty
This document sets out the terms and product purchased by you and conditions of the product warranties accompanied by this document; for AEG Appliances. It is an important d) ‘ASC’ means AEG authorised document. Please keep it with your service centres;... - Page 25 In all instances, unless the Appliance when an Appliance cannot be is transported by Electrolux or an repaired or it is uneconomic for AEG authorised representative, the Electrolux, at its discretion, to Appliance is transported at the repair an Appliance during the owner’s cost and risk while in transit...
- Page 26 Guarantees Act, the Sale of Goods use or non use of the Appliance. Act and the Fair Trading Act. 10. For AEG Appliances and services in 13. To enquire about claiming under this Australia, the Appliances come with a warranty, please follow these steps:...
- Page 27 ENGLISH FOR SERVICE or to find the address of your nearest authorised service centre in New Zealand FREE CALL 0800 10 66 10 OR EMAIL customercare@electrolux.co.nz (New Zealand only) FOR SPARE PARTS or to find the address of your nearest state spare parts centre in New Zealand FREE CALL 0800 10 66 20 OR EMAIL customercare@electrolux.co.nz (New Zealand only)
- Page 28 (c) cosmetic damage which does not affect the operation of the Appliance; This document sets out the terms and conditions of the product warranties for AEG Appliances. It is an important document. Please keep it with your proof (d) damage to the Appliance caused by: of purchase documents in a safe place for future reference should there be a (i) negligence or accident;...
- Page 29 www.aeg.com/au...