
Related Manuals for Makita CML01


Summary of Contents for Makita CML01
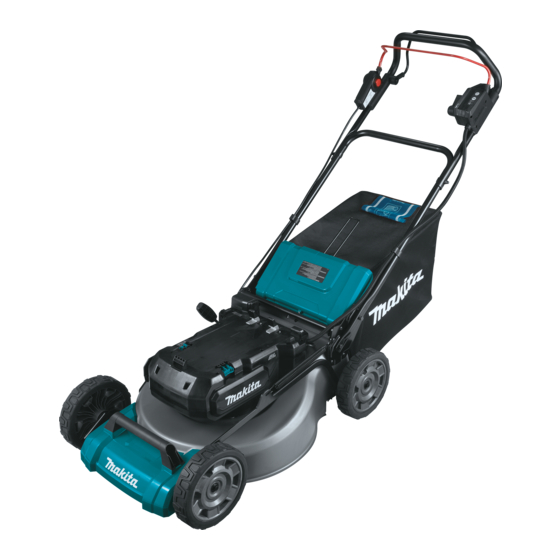
- Page 1 INSTRUCTION MANUAL MANUAL DE INSTRUCCIONES Battery Powered Lawn Mower Cortadora de Césped a Batería CML01 IMPORTANT: Read Before Using. IMPORTANTE: Lea antes de usar.
-
Page 2: Specifications
ENGLISH (Original instructions) SPECIFICATIONS Model: CML01 Mowing width (blade diameter) 534 mm (21″) No load speed Normal mode 2,800 /min Soft no-load mode 2,300 - 2,800 /min Noise reduction mode 2,300 /min Part number of replacement mower blade 191D52-7 Dimensions L: 1,630 mm to 1,715 mm (64″... - Page 3 Do not insert or remove the lock key in the 14. Stop the motor and remove the lock key when- rain. ever you leave the equipment, before cleaning the mower or unclogging the chute and mak- 10. Before operation, inspect the mower or blades ing any repairs or inspections.
- Page 4 Keep machine free of grass, leaves, or other Recharge only with the charger specified by debris build up. Keep guards in place and in the manufacturer. A charger that is suitable for working order. one type of battery pack may create a risk of fire when used with another battery pack.
- Page 5 Follow your local regulations relating to disposal of battery. direct current 12. Use the batteries only with the products specified by Makita. Installing the batteries to non-compliant products may result in a fire, exces- no load speed sive heat, explosion, or leak of electrolyte.
-
Page 6: Installing The Handle
Use of non-genuine Makita batteries, or batteries that have been altered, may result in the battery bursting causing fires, personal injury and damage. It will also void the Makita warranty for the Makita tool and charger. Tips for maintaining maximum... -
Page 7: Removing The Mulching Plug
Assembling the grass basket CAUTION: Hold the upper handle firmly so that it does not drop off your hand. Otherwise, the Insert the frame into the grass basket as far as it handle may fall and cause an injury. will go. Attach the holders to the handle. - Page 8 Attach the mulching plug while holding down the Installing or removing the grass lever, and then release the lever to lock the mulching basket plug. To install the grass basket, follow the steps below. Open the rear cover. ► 1. Lever 2. Mulching plug Attaching the discharge attachment ►...
-
Page 9: Functional Description
For PDC1200 Open the right side cover, and then attach the discharge attachment. Place the cord of the portable power pack as Insert the hooks of the discharge attachment under the shown in the figure. rod of the right side cover. ►... - Page 10 For PDC01 Attach the cord to the cord holders as shown in the figure. Open the plug cover, then align the arrow NOTE: Before installing the portable power pack to mark on the socket with that on the machine, and then the machine, install at least one battery to battery port insert the socket into the plug all the way.
-
Page 11: Overload Protection
Attach the cord to the cord holders as shown in Machine / battery protection system the figure. Open the plug cover, then align the arrow mark on the socket with that on the machine, and then The machine is equipped with a machine/battery insert the socket into the plug all the way. -
Page 12: Main Power Switch
If you notice anything unusual with either of the capacity lock key or switch, stop the operation immediately and have them checked by your nearest Makita Authorized Service Center. When the remaining battery capacity becomes low, the indicator lamp blinks or lights up. -
Page 13: Adjusting The Mowing Height
For PDC01 Adjusting the mowing height WARNING: Never put your hand or leg under the mower body when adjusting the mowing height. WARNING: Always make sure that the lever fits in the groove properly before operation. The mowing height can be adjusted in the range of between 32 mm (1-1/4″) and 100 mm (3-15/16″). -
Page 14: Adjusting The Handle Height
Adjusting the handle height NOTE: The mowing height figures should be used just as a guideline. Depending on the conditions of the lawn or the ground, the actual lawn height may CAUTION: Before removing the bolts, hold become slightly different from the set height. the upper handle firmly. -
Page 15: Operation
• Electric brake This machine is equipped with an electric brake. If the machine consistently fails to quickly stop the mower blades after releasing the switch lever, have the machine serviced at Makita Authorized Service Center. 15 ENGLISH... -
Page 16: Emptying The Grass Basket
Never use gasoline, benzine, thinner, alcohol or the like. Discoloration, deformation or cracks may result. To maintain product SAFETY and RELIABILITY, repairs, any other maintenance or adjustment should be performed by Makita Authorized or Factory Service Centers, always using Makita replacement parts. 16 ENGLISH... -
Page 17: Carrying The Mower
Maintenance Carrying the mower Remove the lock key and battery cartridges, and When carrying the mower, hold the front grip and rear then close the battery cover. grip with two people as shown in the figure. Put the mower on its side so that the mowing height adjusting lever comes to the upper side. - Page 18 Turn the bolt counterclockwise with box wrench ► 1. Mower blade 2. Pin 3. Box wrench Remove the bolt, and then mower blade. ► 1. Blade support 2. Mower blade 3. Bolt 4. Protrusion NOTICE: When installing the mower blade, make sure that the protrusions on the blade support fit in the holes in the mower blade.
-
Page 19: Troubleshooting
Before asking for repairs, conduct your own inspection first. If you find a problem that is not explained in the manual, do not attempt to disassemble the machine. Instead, ask Makita Authorized Service Centers, always using Makita replacement parts for repairs. -
Page 20: Especificaciones
ESPAÑOL (Instrucciones originales) ESPECIFICACIONES Modelo: CML01 Amplitud de corte del césped (diámetro de la cuchilla) 534 mm (21″) Velocidad sin carga Modo normal 2 800 r/min Modo suave y sin carga 2 300 r/min - 2 800 r/min Modo de reducción de ruido 2 300 r/min Número de pieza de la cuchilla de repuesto de la cortadora de... - Page 21 Preparación Manténgase alerta - Preste atención a lo que está haciendo. Use el sentido común. No utilice Mantenga a los niños alejados - Todos los visi- la cortadora de césped cuando esté cansado. No tantes deberán ser mantenidos a una distancia opere la máquina cuando esté...
- Page 22 - reemplace o repare cualquier pieza dañada, Mantenga la máquina libre de la acumulación - revise y apriete cualquier pieza suelta. de césped, hojas y otros residuos. Mantenga los protectores en su sitio y en buen estado de 18. No sujete las cuchillas ni los bordes de corte funcionamiento.
- Page 23 Uso y cuidado de la herramienta a batería Seguridad eléctrica y de la batería Evite una puesta en marcha accidental. No arroje la(s) batería(s) al fuego. La celda Asegúrese de que el interruptor esté en podría explotar. Consulte los códigos locales para la posición apagada antes de conectar el ver si hay instrucciones especiales relativas al paquete de baterías, levantar la herramienta o...
- Page 24 12. Utilice las baterías únicamente con los pro- Instrucciones importantes de ductos especificados por Makita. Instalar las baterías en productos que no cumplan con los seguridad para el cartucho de batería requisitos podría ocasionar un incendio, un calen- tamiento excesivo, una explosión o una fuga de...
-
Page 25: Montaje
Makita, o de baterías alteradas, puede ocasio- nar que las baterías exploten causando un incendio, lesiones personales y daños. Asimismo, esto inva- lidará la garantía de Makita para la herramienta y el cargador Makita. Consejos para alargar al máximo la vida útil de la batería... - Page 26 Montaje del canasto para césped PRECAUCIÓN: Sujete firmemente el mango superior de tal forma que no se desprenda de Inserte el marco en el canasto para césped lo su mano. De lo contrario, el mango podría caerse y máximo que se inserte. causar una lesión.
- Page 27 Acople el tapón para mantillo mientras presiona Instalación o remoción del canasto la palanca hacia abajo, y luego suelte la palanca para para césped bloquear el tapón para mantillo. Para instalar el canasto para césped, siga los pasos a continuación. Abra la cubierta posterior.
-
Page 28: Descripción Del Funcionamiento
Para el PDC1200 Abra la cubierta del lado derecho y luego acople el aditamento de descarga. Coloque el cable de la unidad portátil de alimenta- Inserte los ganchos del aditamento de descarga bajo la ción eléctrica, como se muestra en la figura. barra de la cubierta del lado derecho. - Page 29 Para el PDC01 Coloque el cable en los sujetadores de cable como se muestra en la figura. Abra la tapa para la NOTA: Antes de instalar la unidad portátil de alimen- clavija, luego alinee la marca de flecha del enchufe tación eléctrica a la máquina, instale al menos una hembra con la de la máquina, y luego inserte el enchufe batería en el puerto para batería 1 o 2, y al menos...
-
Page 30: Protección Contra Sobrecarga
Coloque el cable en los sujetadores de cable Sistema de protección de la como se muestra en la figura. Abra la tapa para la máquina/batería clavija, luego alinee la marca de flecha del enchufe hembra con la de la máquina, y luego inserte el enchufe Esta máquina está... - Page 31 Indicación de capacidad restante de autorizado de Makita más cercano para su inspección. la batería Instale la unidad portátil de alimentación eléctrica, luego inserte la llave de cierre.
- Page 32 Para el modelo PDC01 Suelte la palanca de accionamiento y la palanca interruptora para detener la máquina. Ajuste de la altura de corte del césped ADVERTENCIA: Nunca coloque su mano o pierna debajo del cuerpo de la cortadora de cés- ped cuando esté...
- Page 33 Sujete la empuñadura delantera o el mango inferior con Cuando el canasto para césped está casi lleno, el una mano, y luego mueva la palanca de ajuste de la indicador deja de oscilar mientras las cuchillas están en altura de corte del césped con la otra mano. funcionamiento.
-
Page 34: Operación
Makita. Uso del tapón para mantillo OPERACIÓN El tapón para mantillo permite echar el pasto cortado al suelo sin recolectarlo en el canasto para césped. - Page 35 Sujete el mango firmemente con ambas manos al cortar AVISO: El uso de la cortadora de césped con el el césped. La referencia de velocidad del corte es de canasto para césped lleno impide una rotación aproximadamente 7 metros a 14 metros (23 ft. - 46 ft.) uniforme de la cuchilla e implica una sobrecarga cada 10 segundos.
-
Page 36: Mantenimiento
Makita, empleando siempre repuestos Makita. Mantenimiento Retire la llave de cierre y los cartuchos de batería, y luego cierre la cubierta de la batería. - Page 37 Retire el perno y luego la cuchilla de la cortadora Extracción o instalación de la de césped. cuchilla de la cortadora de césped ADVERTENCIA: La cuchilla continuará moviéndose por inercia durante algunos segun- dos tras haber soltado el interruptor. No realice ninguna operación hasta que la cuchilla se haya detenido por completo.
-
Page 38: Resolución De Problemas
Antes de solicitar alguna reparación, primero realice una inspección por su cuenta. Si detecta algún problema que no esté explicado en el manual, no intente desarmar la máquina. En vez de esto, solicite la reparación a un centro de servicio autorizado de Makita, usando siempre piezas de repuesto Makita. Estado de la anomalía Causa probable (avería) - Page 40 Makita Corporation 3-11-8, Sumiyoshi-cho, 885868-940 Anjo, Aichi 446-8502 Japan CML01-1 EN, ESMX 20201218 www.makita.com...