Linksys BEFCMU10 User Manual
Hide thumbs
Also See for BEFCMU10:
- User manual (30 pages) ,
- Quick installation (2 pages) ,
- Specifications (2 pages)

Related Manuals for Linksys BEFCMU10


Summary of Contents for Linksys BEFCMU10
- Page 1 INKSYS BEFCMU10 ver. 3 User Manual LINKSYS BEFCMU10 ver. 3 Cable Modem User’s Manual...
-
Page 2: For Installation
INKSYS BEFCMU10 ver. 3 User Manual Safety Notes For Installation Use only the type of power source indicated on the marking labels. Use only the power adapter supplied with the product. Do not overload wall outlet or extension cords as this may increase the risk of electric shock or file. If the power cord is frayed, replace it with a new one. - Page 3 INKSYS BEFCMU10 ver. 3 User Manual NOTE This equipment has been tested and found to comply with the limits for a Class B digital device, pursuant to part 15 of the FCC Rules.These limits are designed to provide reasonable protection against harmful interference in a residential installation.This equipment generates, uses and can radiate radio frequency...
-
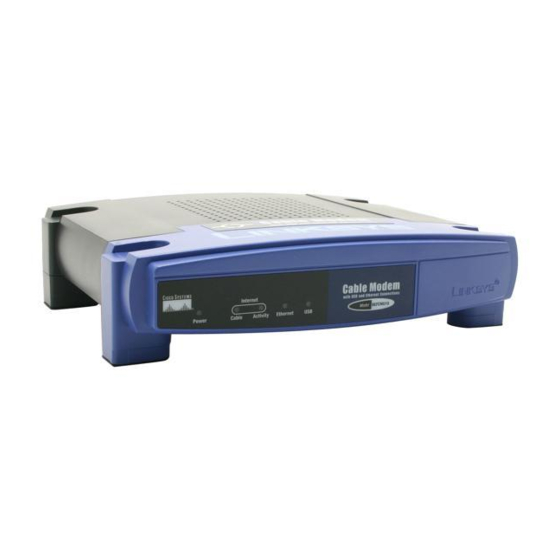
Page 4: Physical Outlook
INKSYS BEFCMU10 ver. 3 User Manual 1.1 Physical Outlook The following illustration shows the front panel of the INKSYS BEFCMU10 VER. 3 Cable Modem. LED Indicators The LEDs on the front panel are described in the table below (from left to right):... - Page 5 INKSYS BEFCMU10 ver. 3 User Manual CABLE︰ F-Connector...
-
Page 6: Connecting The Cable Modem To Your Computer
INKSYS BEFCMU10 ver. 3 User Manual 2.1 Connecting the Cable Modem to Your Computer Follow the steps below for proper installation: 1. Make sure your computer meets the system requirements. 2. Connect a coaxial cable (supplied by the local Cable Television Company) to the CABLE connector on the modem. - Page 7 INKSYS BEFCMU10 ver. 3 User Manual Follow the steps below for proper installation: 1. Make sure your computer meets the system requirements. 2. Connect a coaxial cable (supplied by the local Cable Television Company) to the CABLE connector on the modem.
-
Page 8: Usb Driver Installation
INKSYS BEFCMU10 ver. 3 User Manual 3.1 USB Driver Installation 1. Wait for the cable modem is running in the operational state (registration O.K.). Plug the USB cable into your PC USB port. You will see the next page. Click the “Next” button. - Page 9 INKSYS BEFCMU10 ver. 3 User Manual 4. Select “The updated driver...” and click the “Next” button. 5. Click the “Next” button. 6. Installation has been completed here. Click the “Finish” button.
- Page 10 INKSYS BEFCMU10 ver. 3 User Manual 7. The system will ask you to restart your computer. Click “Yes” to complete the installation. 1. Wait for the cable modem is running in the operational state (registration O.K.). Plug the USB cable into your PC USB port.
- Page 11 INKSYS BEFCMU10 ver. 3 User Manual 3. Select “Search for a suitable driver for my device“ and click the “Next” button. 4. Insert the driver CD into CD-ROM. Select “CD-ROM drive” and clicks the “Next” button. 5. Click the “Next” button.
-
Page 12: Uninstall Usb Driver
INKSYS BEFCMU10 ver. 3 User Manual 6. Installation has been completed here. Click the “Finish” button. 3.2 Uninstall USB Driver 1. Click “Start” button on your computer’s taskbar, point to “Settings”, and then click “Control Panel”. 2. Select Add/Remove Programs. -
Page 13: Setting Tcp/Ip On Client Pc
INKSYS BEFCMU10 ver. 3 User Manual 3.3 Setting TCP/IP on Client PC After you successfully complete the network interface card (Ethernet card) installation task, you need to make sure the TCP/IP communications protocol used by the Ethernet card is installed and correctly configured on your system. - Page 14 INKSYS BEFCMU10 ver. 3 User Manual 4. The Select Network Component Type dialog box will show up. Click ”Protocol”, and then click ”Add”. 5. You will see the Select Network Protocol dialog box. Click “Microsoft” in the “Manufactures:” list, and then click “TCP/IP” in the “Network Protocols:” list. Click “OK”.
- Page 15 INKSYS BEFCMU10 ver. 3 User Manual 6. You will be directed back to the Network dialog box, and on the “Configuration” tab, the entry that includes TCP/IP -> followed by the Ethernet card installed in your computer will appear in the list of installed network components.
- Page 16 INKSYS BEFCMU10 ver. 3 User Manual 8. In the TCP/IP Properties dialog box, please follow the directions below: Click “IP Address” tab to bring it to the front, and then click “Obtain an IP address automatically” on the tab. 9. Click “Gateway” to bring it to the front. On this tab, leave the “New gateway:” blank. If there is the entry in the “Installed gateway:”...
- Page 17 INKSYS BEFCMU10 ver. 3 User Manual 11. The Copying Files dialog box will pop up and the system will start copying files from Windows. At the first time you will be asked to insert the Windows 98 CD-ROM into the CD-ROM drive during the files copying, and follow the instructions when they show up, then click “OK”.
- Page 18 INKSYS BEFCMU10 ver. 3 User Manual Click “Start” button on your computer’s taskbar, point to “Settings”, and then click ”Network and Dial-up Connections”. The Network and Dial-up Connections window will show up. Double-click “Local Area Connection” icon in the Network and Dial-up Connections window.
- Page 19 INKSYS BEFCMU10 ver. 3 User Manual Click “Internet Protocol (TCP/IP)” and then click “Properties”. The Internet Protocol (TCP/IP) Properties dialog box appears. Click “Obtain an IP address automatically”. Click “Obtain DNS server address automatically”. Click “OK” to close the dialog box.
-
Page 20: Dhcp Server
INKSYS BEFCMU10 ver. 3 User Manual Windows will appear the System Settings Change dialog box and ask you if you would like to restart your computer. Click “Yes”. 3.4 DHCP Server PC connected to the cable modem can automatically get a private IP address from the DHCP server of cable modem before cable modem is on line. - Page 21 INKSYS BEFCMU10 ver. 3 User Manual Enter “winipcfg“ in the “Open“ field. Click “OK“ to execute the winipcfg and show the “IP Configuration“ window. Select the “Ethernet adapter“ to show the IP address. Press “Release“ and “Renew“ if the PC is not accessing the Internet.
- Page 22 INKSYS BEFCMU10 ver. 3 User Manual The Run dialog box appears. Type “cmd” in the “Open” field, and then click “OK” to execute the command. You will enter the dos mode, type “ipconfig”, press “Enter” on your keyboard, and you will see the IP address your computer get from the cable modem.
- Page 23 INKSYS BEFCMU10 ver. 3 User Manual Type “ipconfig /renew”, and press “Enter” on your keyboard to renew the IP. You can repeat the steps until your computer gets the correct IP. 1. Click “Apple menu“, point to “Control Panels“, and click “TCP/IP” to open the “TCP/IP”...
-
Page 24: Renew Pc Ip Address
INKSYS BEFCMU10 ver. 3 User Manual 2. If the iMac gets an invalid IP, select “Using DHCP Server” in “Configure” field. Click the “Close box” at the upper left corner to close the “TCP/IP” window. 3. Click the “Save” in the prompted message box. - Page 25 INKSYS BEFCMU10 ver. 3 User Manual Click “Start“, point to “Run“, and click to open the “Run“ windows. Enter winipcfg in the “Open“ field. Click “OK“ to execute the winipcfg and show the “IP Configuration“ window. Select the “Ethernet adapter“ to show the IP address. Press “Release“ and “Renew“ to get a new IP address from your ISP’s server.
-
Page 26: Accessing Internet
INKSYS BEFCMU10 ver. 3 User Manual For making sure that you can get into Internet successfully, please make sure the following first. 1. Make sure the connection (through Ethernet or USB) between the cable modem and your computer is OK. - Page 27 INKSYS BEFCMU10 ver. 3 User Manual Once your host PC is properly configured, please proceed as follows: Start your web browser and type the private IP address of the cable modem in the URL field: 192.168.100.1. Type the IP address as the figure shown below.
- Page 28 INKSYS BEFCMU10 ver. 3 User Manual...
- Page 29 INKSYS BEFCMU10 ver. 3 User Manual...
- Page 30 INKSYS BEFCMU10 ver. 3 User Manual If the suggested solutions in this section do not resolve your issue, contact your system administrator or Internet service provider. Can I use the same cable line for TV and cable modem? A. Yes, the TV and cable modem uses the cable line. You need a splitter to use them at the same time. Ask Cable Company to install the splitter for you to avoid signal degradation.
-
Page 31: Appendix: Specification
BEFCMU10 ver. 3 uses the advanced PHY (A-TDMA/S-CDMA) technologies to support higher bandwidth in the upstream. BEFCMU10 ver. 3 can inter-operate with any DOCSIS compliant headend equipment. The IP traffic can transfer between BEFCMU10 ver. 3 and DOCSIS compliant headend equipment. - Page 32 INKSYS BEFCMU10 ver. 3 User Manual headend equipment Management & Maintenance Support Web pages and private DHCP server for • status monitoring SNMP v1/v2c/v3 Management • Remote secured operating firmware downloading • Reset To Default Settings by RESET Push Button •...
- Page 33 INKSYS BEFCMU10 ver. 3 User Manual S-CDMA: 1280/2560/5120 Ksym/sec Maximum Bit Rate 42.88Mbps/256QAM 30.72Mbps/64QAM 30.34Mbps/64QAM Forward Error Correction (FEC) RS(128,122)/Trellis Reed Solomon Signal to Noise Ratio (SNR) >30 Bit Error Rate (BER) 1×10 @ C/N=23.5dB, 64QAM with FEC 1×10 @ C/N=30dB,...
- Page 34 INKSYS BEFCMU10 ver. 3 User Manual Orange ON - Error Cable LED| Activity LED (Green color) • Blink - Scanning D/S channels - D/S channel acquired / , Start ranging process Blink - Ranging complete , start DHCP /TFTP/ToD/ Registration...
- Page 35 INKSYS BEFCMU10 ver. 3 User Manual Power Consumption Less than 9.5W • Standards & Protocols: Standards DOCSIS 1.0/1.1/2.0 Compliant • IEEE 802.3 • IEEE 802.3u • v1.1 • Protocols UDP/TCP/IP • DHCP • • ICMP • • SNMP v1/v2c/v3 •...
- Page 36 INKSYS BEFCMU10 ver. 3 User Manual Humidity 20% ~ 90% Non-condensing • Certification: Standards DOCSIS / WHQL • Safety UL 1950 • FCC Part 15 Class B • CE Class B • VCCI Class B •...