Table of Contents
Advertisement
Quick Links
Advertisement
Table of Contents

Related Manuals for Linksys CG7500


Summary of Contents for Linksys CG7500
- Page 1 USER GUIDE AC1900 | 24x8 CABLE MODEM ROUTER Model CG7500...
-
Page 2: Table Of Contents
System Status .................... 14 Status ............................14 Configuration ....................16 Connectivity ..........................16 Wi-Fi ............................. 19 External Storage ........................23 Security ............................26 Administration ......................... 29 Parental Controls ..................33 Troubleshooting ..................34 Specifications ..................... 37 Linksys GG7500 ........................37 Environmental .......................... 37... -
Page 3: Product Overview
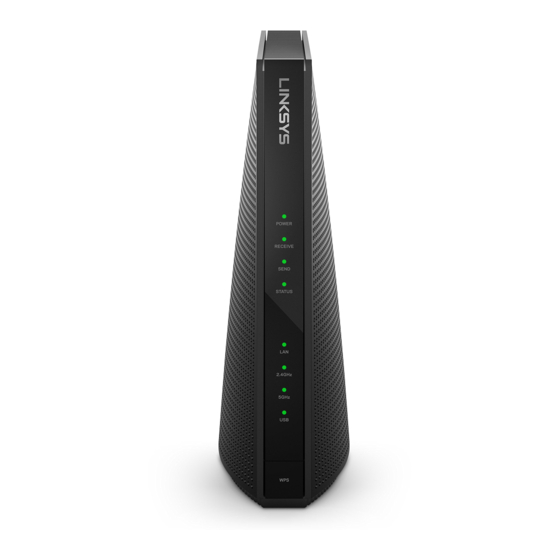
Product Overview Front view From top to bottom Power----- -Lights up green when the modem router is powered on. Receive— Light blinks green while the modem router is searching for a connection over the cable network. Light is solid green when the modem router is receiving data from the cable network. - Page 4 5 GHz Wi-Fi—Light is solid green when broadcasting 5 GHz signal. Light blinks when the modem router is actively sending or receiving data over the network. USB----- -Light is solid green when the modem router is connected to a device through the USB port.
-
Page 5: Back
Back From top to bottom USB port----- -Connect and share a USB drive on your network or on the internet. Reset button----- -Press and hold for about five seconds to reset the modem router to factory defaults. Ethernet ports— Connect the modem router to computers and other devices with ethernet cables (also called network cables). -
Page 6: Installation
Installation Setup Disconnect any modems or modem routers before setting up your new modem router. 1. Connect a coaxial cable to the cable port on the modem router and a wall jack. 2. Connect the power adapter to the modem router and plug into a power source. - Page 7 3. Connect to the secure Wi-Fi name on the sticker in the Quick Start Guide that came with your modem router. There is also a sticker on the bottom of the modem router. (You can change these details later.) Select the option to automatically connect to this network in the future.
-
Page 8: Setup Wizard
Setup Wizard Accept the License Terms and click Next. Choose an internet service provider, activate your modem router and click Next. Create a Wi-Fi name and password and click Next. - Page 9 Create an admin password and click Next. Write down your settings somewhere you’ll remember and click Save. Click Done and get online.
- Page 10 When your modem router is ready, the top four lights (power, receive, send, status) will be solid. Advanced users can select “I want to skip the Setup and configure the router manually.”...
- Page 11 If you choose to manually set up the modem router, you will need to have the following information available for activation: • Account number of your broadband subscription • Phone number linked with your account • Serial number of the modem router (on the back of the unit) •...
-
Page 12: Browser-Based Utility
If you would like to change the modem router’s advanced settings, use the browser-based utility. For more help with the utility, click the Help link in the upper-right corner of the screen or go to our support website www.linksys.com/support/cg7500. How to access the browser-based utility 1. -
Page 13: How To Use The Browser-Based Utility
How to use the browser-based utility Navigate the utility by using the tabs along the top of the screen and the corresponding specific menus down the left side of the screen. If you change any settings on a screen, you must click the Save button at the bottom of the screen to apply your changes. -
Page 14: System Status
System Status Status Status > Overview Overview tells you how long the router has been working since its last restart (Router Uptime), and how long it has been connected to the internet (Internet Uptime) in that period. This screen also shows your Wi-Fi name and password, and some details on any Wi- Fi devices managed by Parental Controls. - Page 15 Status > Wi-Fi The Wi-Fi screen provides detail about all Wi-Fi bands, including Guest Wi-Fi. Clicking the Wireless Clients button displays details about any connected Wi-Fi devices.
-
Page 16: Configuration
Configuration Connectivity Connectivity > Local Network Your router ships with the most common settings, and several settings are configured during setup. You may never have to change these settings. LAN IP Address The router's IP address on your Wi-Fi. If you change this address, you’ll have to reconnect your devices to your router. -
Page 17: Wan Information
Static DNS 1-3 Domain Name System (DNS) is how the internet translates a domain or website name into an internet address, or URL, that you can access. Your ISP will provide at least one DNS server IP address. You can enter up to three. WINS Windows Internet Naming Services manages each computer’s interaction with the internet. - Page 18 Option This section is for advanced users. Connectivity > Advanced Routing Click Add to assign a specific IP address, subnet mask, and gateway address to a specific device. Click Apply. Connectivity > Connected Devices Information about devices connected to your Wi-Fi.
-
Page 19: Wi-Fi
Wi-Fi Wi-Fi > Wi-Fi Settings Wi-Fi Name Personalize the Wi-Fi name that appears in the list of available networks. Broadcast Wi-Fi Name Allows Wi-Fi devices to detect your Wi-Fi name when they survey the local area for available Wi-Fi. Not broadcasting your Wi-Fi name does not improve your Wi-Fi security. Network Mode Select the standard your Wi-Fi supports. - Page 20 Wi-Fi > MAC Filtering MAC filtering is a way to allow or deny access to your network by identifying specific MAC addresses. It is not a good substitute for a secure Wi-Fi password. If you enable MAC Filtering, Wi-Fi Protected Setup will be disabled automatically. MAC Filters Select Enabled to begin filtering Wi-Fi devices by MAC address.
-
Page 21: Push Button
Wi-Fi > Wi-Fi Protected Setup Wi-Fi Protected Setup makes it easy to add devices to your Wi-Fi without having to enter a Wi-Fi name and password. To use Wi-Fi Protected Setup, the device you want to connect must support it. WPS Enabled If you uncheck this box, you can't use Wi-Fi Protected Setup to connect devices to your Wi-Fi, and the Wi-Fi Protected Setup push button on your router will also be disabled. - Page 22 Wi-Fi > Guest Access Guest Access is a way to share internet access. Guests can get online, but they can’t see or access other connected devices. You can turn guest access on and off, give it a name and password, and set the number of guest devices allowed. When you set up your router, a secure guest network was created automatically on the router's 2.4 GHz/5 GHz band.
-
Page 23: External Storage
External Storage External Storage > Status Click Eject before physically disconnecting a USB disk from the modem router. This prevents the possible loss of data, which may occur if you remove the disk while it is transferring data. External Storage > Folder Access You can decide who has access to external storage connected by USB to your modem router. - Page 24 External Storage > FTP Server You can access the folders on your storage device remotely from anywhere you have an internet connection using an FTP (File Transfer Protocol) server. You can access the content using a web browser or FTP software. Server Name -- - Personalized the name of your FTP server.
- Page 25 include digital media players, gaming consoles with a built-in media player, and digital picture frames. You can specify which folders are used by the media server, add and disabled/delete folders, and specify how often the folders are scanned for new content. Media Server Select to share media.
-
Page 26: Security
Security Security > Firewall The firewall, which protects your Wi-Fi from internet threats, is enabled by default. Security > DMZ The Demilitarized Zone (DMZ) feature can be used to expose a web server, mail server, or web camera to the internet so anyone can access it. This feature is not recommended because it presents significant security risks to the device that you designate for the DMZ. - Page 27 Security > DDNS The DDNS feature lets you configure a domain name for your home network, which you can use to easily find your network on the internet. This is useful if you want to remotely access a USB drive or web camera over the internet. Select your DDNS service and complete the fields with information provided to you by your DDNS provider.
- Page 28 Protocol Select the protocol to use. Device IP Address Enter the IP address you have reserved for the computer you want to forward internet traffic to. Status Select to use the port forwarding. If you don't want to use port forwarding but want to keep the information in the table, unselect the checkbox.
-
Page 29: Administration
Security > Port Range Triggering Port range triggering allows the modem router to watch outgoing data for specific port numbers. The cable modem remembers the IP address of the device that sends the data so returning data is routed back to the proper device. This is useful when using a USB or Bluetooth headset for online chat and gaming. - Page 30 Allows you to change the modem router password. Use it to access modem router settings and features such as Guest Access and Parental Controls. To change the password, first enter the old password, then type a new password and confirm it. Click Save. Be sure to write down this password and keep it somewhere safe.
- Page 31 Select to allow remote access to the modem router from any external IP address. Deselect to specify an external IP address or range of IP addresses allowed to remotely access your modem router. Administration > Gateway Function UPnP (Universal Plug and Play) allows devices connected to Wi-Fi to discover each other and automatically create working configurations.
- Page 32 Administration > Device Reset Restart the Modem Router Restarts your modem router by turning it off and then on again. All devices connected to your modem router will be disconnected. They will reconnect automatically when the restart finishes. Reset to Factory Default Settings Resets all modem router settings to how they were before you set it up.
-
Page 33: Parental Controls
Parental Controls Use Parental Controls to manage internet use by blocking access per device. You also can block specific sites per device. Once you turn on Parental Controls, click Block Internet onnected Devices Never, Always Specific Access next to a device in the C table. -
Page 34: Troubleshooting
Troubleshooting DOCSIS Provisioning This screen provides details on the provisioning of your modem router. Diagnostics Use diagnostics to aid in troubleshooting your modem router's connectivity. Ping Check whether a destination IP/URL is available. Traceroute Trace the routing path to the destination IP/URL. Abort Stop ping test or traceroute test. - Page 35 DOCSIS WAN The DOCSIS WAN screen shows a DOCSIS overview, and downstream/upstream activity overview. Click Reset FEC Counters to start counting new errors (Correcteds/Uncorrectables). DOCSIS Event The DOCSIS event log chronicles DOCSIS errors that generated log entries.
- Page 36 Report The report shows details about your router and its current network settings. This information can be very helpful if you have to call your ISP or Linksys Support for help with your Internet connection or router. The following buttons are available for both the Devices and Report pages: Refresh Redisplays the most current information.
-
Page 37: Specifications
Specifications Linksys CG7500 Model Name AC1900 | 24x8 Cable Modem Router Model Number CG7500 Switch Port Speed 10/100/1000 Mbps (Gigabit Ethernet) Radio Frequency 2.4 GHz and 5 GHz # of Antennas 6 internal Ports Cable, Power, USB 2.0, Ethernet (1-4) - Page 38 Visit linksys.com/support/ for award-winning technical support. BELKIN, LINKSYS and many product names and logos are trademarks of the Belkin group of companies. Third-party trademarks mentioned are the property of their respective owners.
- Page 39 Return Materials Authorization (RMA) number and we’ll tell you where to send the limit or exclude any right you have against the person who sold the Belkin, Linksys or WeMo product to you if that person may have additional rights under consumer laws.