Table of Contents
Advertisement
Quick Links
Advertisement
Table of Contents

Related Manuals for Breville VBM003


Summary of Contents for Breville VBM003
- Page 2 introduction A home made loaf costs less than half the price of a premium branded shop-bought loaf. Home made means cheaper, but it also means that you have the satisfaction of knowing exactly what goes into the food you and your family eat, and where it comes from. Your bread maker will automatically mix, knead and bake giving you delicious fresh bread with the minimum of fuss.
-
Page 3: Product Safety
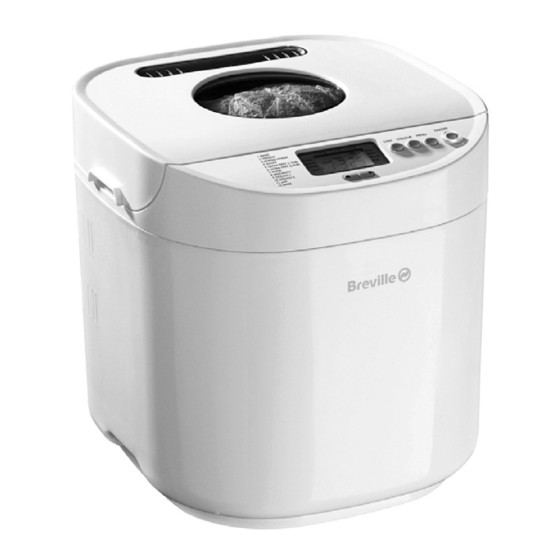
product safety Please read these instructions before operating the appliance and retain them for future use. This product is not suitable for use by children, and may not be suitable for persons requiring supervision unless they receive instruction by a competent person on how to safely use the product. - Page 4 features Body Control panel and display Viewing window Ventillation slots Removable bread pan Kneading/mixing paddle Measuring cup Measuring spoon Due to our policy of continuous improvement, the actual product may differ slightly from the one illustrated in these instructions.
- Page 6 contrl panel and display LCD display 2, 3 Timer adjust buttons Used when setting the delay timer to increase or decrease the time Loaf Selects the loaf size 1, 1.5 or 2lb (450, 680 or 900g) Colour Selects the crust colour Light, Medium or Dark. When used with programs 1, 2 or 3, selecting Rapid activates the quick cook mode.
- Page 7 r t y...
-
Page 8: Control Panel And Display
control panel and display On/Off This button is used for starting and stopping the selected baking program. To start a program, press the On/Off button once. A short beep will sound, the colon (:) in the time display will flash and the program will start. All the other buttons on the control panel will be deactivated except the On/Off button when the program has begun. - Page 9 Jam: Use this setting to make sweet and savoury jams. The process is a simple case of mixing and heating. Bake: This setting will use your bread maker’s oven to bake for one hour. Baking can be controlled manually by pressing the start/pause button to stop the function at any time.
-
Page 10: Using Your Bread Maker
using your bread maker Before first use Do not immerse the bread maker or power cord and plug in water or any other liquid. Before using your breadmaker for the first time, wash the inside of the bread pan and the kneading paddle with hot, soapy water. - Page 12 using your bread maker Ultra Fast bread program The Ultra Fast program (5 and 6) can bake a loaf within in about 1 hour. Please note that you must use hot water of 48—50ºC. Use a cooking thermometer to measure the temperature.
- Page 13 When the timer is set, press the On/Off button. The display will start to count down the time to completion. The breadmaker will automatically start mixing the ingredients at precisely the right moment and your bread will be ready at the desired time. Once you have pressed the On/Off button you cannot alter the timer.
- Page 14 program times Number Description 1.0lb (450g) 1.5lb (680g) 2.0lb (900g) Basic 3:13 3:18 3:25 French 3:30 3:32 3:35 Wholewheat 3:43 3:45 3:48 Sweet 3:17 3:22 3:27 Ultra Fast (1.5lb) 0:58 Ultra Fast (2.0lb) 0:58 Pasta Total program time 0:23 Speciality Total program time 1:20 Dough 1 Total program time 1:30...
- Page 15 Rapid Keep warm Timer Delay 1.0lb 1.5lb 2.0lb 2:12 2:17 2:24 60 min 2:30 2:32 2:35 60 min 2:28 2:30 2:33 60 min 60 min 60 min 60 min 60 min 60 min...
-
Page 16: Hints And Tips
hints and tips General Always add the ingredeients in the order shown in the recipe. It’s important to keep the yeast away from the liquids. Use the ingredients at room temperature (20º to 25ºC). The temperature can affect yeast activity and will affect the quality of the bread. Important measuring tips Each ingredient in the loaf of bread plays a specific role, so it is extremely important to measure the ingredients correctly to get the best results. - Page 17 Dry Ingredients Use the spoon or cup provided (don’t use tableware spoons or cups). Put the dry ingredients loosely into the spoon or cup and level off with a flat knife. This is particularly important with flour. Do not pack dry ingredients down into the cup, unless otherwise stated in the recipe.
- Page 18 ingredients used in bread making Yeast Yeast is a vital ingredient when bread making, without it the bread will not rise. Your bread maker maintains the optimum temperature for the yeast to take effect, during the bread making process. Only use instant or fast acting yeast - sometimes called easy bake. Some yeast may require the use of a bread improver.
- Page 19 recipes Important note If your bread isn’t coming out the way you like, try changing the recipe slightly. Don’t be afraid to experiment and before long you’ll be baking perfect loaves each and every time. Basic White Bread - Program 1 Ingredients 1.0lb (540g) 1.5lb (680g)
- Page 20 recipes Wholemeal Bread - Program 3 Ingredients 1.0lb (540g) 1.5lb (680g) 2.0lb (900g) Water (tepid) 285ml 410ml 500ml Butter Milk powder ¾ tbsp 1 tbsp 1¼ tbsp Caster sugar ¾ tsp 1 tsp 1 tsp Salt 1 tsp 1½ tsp 2 tsp Strong white bread flour 125g...
- Page 21 Ultra Fast 1.5lb (680g) - Program 5 Ingredients Quantity Water (warm 45-50ºC) 255ml Sunflower oil 2 tbsp Milk powder 2 tbsp Caster sugar 1⅓ tbsp Salt 1 tsp Strong white bread flour 375g Fast action yeast 3 tsp Ultra Fast 2.0lb (900g) - Program 6 Ingredients Quantity Water (warm 45-50ºC)
- Page 22 recipes Pasta - Program 7 Ingredients Quantity Strong plain flour 500g Medium eggs Salt ½ tsp Water 125ml Variations Tomato - add 1 tbsp concentrated tomato paste Spinach - add 100g of cooked spinach Speciality - Program 8 Soda Bread Ingredients Quantity Buttermilk...
- Page 23 Dough 1 - Program 9 Pizza dough Ingredients Quantity Water (warm 45-50ºC) 280ml Olive oil 2 tbsp Salt 1 tsp Caster sugar 2 tsp Strong white bread flour 450g Fast action yeast 1½ tsp Dough 2 - Program 10 Breadsticks Ingredients Quantity Water (warm 45-50ºC)
- Page 24 recipes Jam - Program 11 Orange Ingredients Quantity Oranges Lemons Sugar 160g Pectin 2 tbsp Strawberry Ingredients Quantity Strawberries 190g Lemon juice 2 tsp Sugar 130g Pectin 1 tbsp...
-
Page 25: Troubleshooting
troubleshooting Dough does not rise enough • Liquids are too hot (above 105°F/40°C). • Inactive yeast or not enough yeast. • Ingredients are too cold. • Too much salt. Salt can be used to control the effect of the yeast within the dough. Too much salt may make the yeast inactive. - Page 26 troubleshooting Sticky bread which slices unevenly • Always use a serrated bread knife. • Allow bread to cool longer before slicing. Bread shape and height varies with each use • Ensure accurate measurement of ingredients. • Room temperature and length of the timer cycle not constant. The bread has a floured corner •...
- Page 27 cleaning Always ensure the bread maker is switched off, has cooled down and is unplugged from the mains supply before cleaning. Do not immerse the bread maker or power cord and plug in water or any other liquid. Do not use abrasive cleaning materials (e.g. steel wool) or cleaning agents, to clean any part of this bread maker.
-
Page 28: Connection To The Mains Supply
connection to the mains supply This appliance must be earthed. This appliance is fitted with either a moulded or rewirable BS1363, 13 amp plug. The fuse should be rated at 5 amps and be ASTA approved to BS1362. If the fuse in a moulded plug needs to be changed, the fuse cover must be refitted. The appliance must not be used without the fuse cover fitted. -
Page 29: After Sales Service
after sales service These appliances are built to the very highest of standards. There are no user serviceable parts. Follow these steps if the unit fails to operate: Check the instructions have been followed correctly. Check that the fuse has not blown. Check that the mains supply is functional. - Page 30 guarantee This product is guaranteed for a period of 1 year from the date of purchase against mechanical and electrical defects. This guarantee is only valid if the appliance is used solely for domestic purposes in accordance with the instructions provided, that it is not connected to an unsuitable electricity supply, dismantled or interfered with in any way or damaged through misuse.
- Page 32 VBM003_Iss_6 04/10 92987-5...