Table of Contents
Advertisement
Quick Links
Advertisement
Table of Contents

Related Manuals for Idex Knight Control Guard ACCS


Summary of Contents for Idex Knight Control Guard ACCS
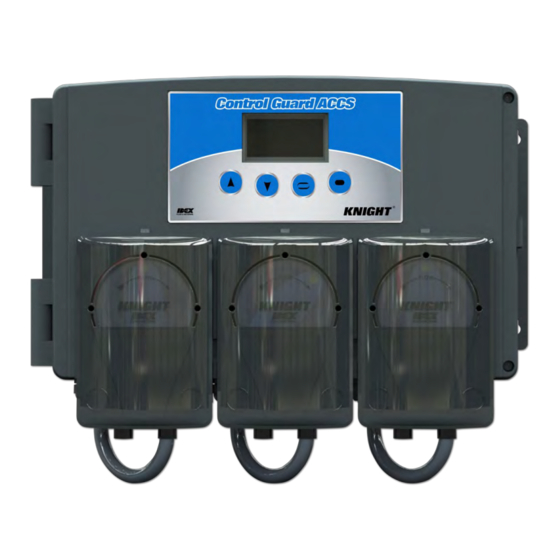
- Page 1 Control Guard ACCS Instruction Manual 0901180 Rev: B (09/16) Page 1...
-
Page 2: Table Of Contents
TABLE OF CONTENTS Safety Precautions ....................3 Specifications ....................... 3 Indication For Use ....................4 Installation ......................5-6 Language Selection ....................7 System Programming ................... 8 System Settings Menu ..................9-11 Sensor Settings Menu ................... 12-13 Pump Settings Menu ..................14-22 Error Screens ..................... -
Page 3: Safety Precautions
SAFETY PRECAUTIONS Wear protective clothing and eye protection whenever operating this system. Wear protective clothing and eye wear when dispensing chemicals. Observe safe handling instructions (MSDS) provided on chemical container or as supplied by chemical manufacturer. To avoid severe or fatal shock, physical injury, always disconnect main power when servicing the unit. ... -
Page 4: Indication For Use
INDICATION FOR USE The Control Guard ACCS (Advanced Chemical Concentration System) is designed with ease of setup and use in mind. By utilizing flow meter technology, the ACCS measures high concentrations of caustic, acid, rinse water or other liquids with an extremely high degree of accuracy (+/- 2%) thereby ensuring precise chemical feed control. The Control Guard offers multiple 4-20 mA analog inputs which provide the flexibility of being utilized by any “Off the Shelf”... -
Page 5: Installation
PRE-INSTALLATION CHECKLIST Before beginning the installation, make sure you have the tools and materials listed below: Flat and Phillips screwdrivers Suitable wire for power / signals (check local codes) Drill and drill bits Dry wall inserts and mounting screws ... - Page 6 INSTALLATION (13) Hang unit and tighten all four (14) Loosen two cover screws. (15) Pull gently on cover latch mounting screws. (right side) to open unit. (16) Note the location of main (17) Feed main power wires (18) See main power connection power terminal block.
-
Page 7: Language Selection
PRIMING PUMPS Use the ▲ and ▼ keys to highlight the pump you ►PRIME PUMPS PRIME want to prime. Press the ENTER key. CONFIGURATION ►PUMP 1 DIAGNOSTICS PUMP 2 PUMP 3 ______________________________ ______________________________ ▲ ▼ ◄ | ENTER ▲ ▼ ◄... -
Page 8: System Programming
SYSTEM PROGRAMMING The system operates using a 4 button key design. The key functions are controlled via the firmware and are specific to each screen. The main 4 keys are MENU, UP, DOWN and ENTER. The ENTER key is used to move the cursor and select within the menu functions. -
Page 9: System Settings Menu
SYSTEM SETTINGS MENU ►SYSTEM SETTINGS Use the ▲ and ▼ key to highlight SYSTEM SET- SENSOR SETTINGS TINGS, then press ENTER. PUMP SETTINGS ______________________________ ▲ ▼ EXIT | ENTER USB Functions ►USB FUNCTIONS ►SAVE REPORT TO USB Use the USB FUNCTIONS to save reports, download SYSTEM ID = 00 LOAD SETUP FROM USB a setup file created on the PC application to the ma-... - Page 10 Saving Setup With SAVE SETUP TO USB highlighted press the SAVE REPORT TO USB SAVE SETUP TO USB enter key. The screen will change to light green and LOAD SETUP FROM USB ARE YOU SURE? ►SAVE SETUP TO USB ask if you are sure you want to save the setup file to CLEAR REPORT DATA the USB.
- Page 11 System ID Use the ENTER key to move the cursor (▲) to the USB FUNCTIONS ►SYSTEM ID = 00 setting you want to change. Use the ▲ and ▼ keys to DATE & TIME SYSTEM ID = 00 make changes. Once you get to the last setting press PASSWORD UNITS = U.S.
-
Page 12: Sensor Settings Menu
SENSOR SETTINGS MENU Highlight SENSOR SETTINGS, then press ENTER. SYSTEM SETTINGS SENSOR SETTINGS Use ▲ and ▼ to highlight the probe you wish to ►SENSOR SETTINGS ►PROBE 1 change, then press ENTER. PUMP SETTINGS PROBE 2 PROBE 3 MORE SETTINGS Choose the MORE SETTINGS option to skip the probe settings and go directly to analog inputs. - Page 13 Engineering Units If using an analog sensor, you can specify what units ANALOG 1 SETTINGS that the device measures (pH for example). Use ▲ ANALOG 1 ENG. UNITS: and ▼ to change the letters of the engineering units, ►ENG. UNITS: ▲...
-
Page 14: Pump Settings Menu
PUMP SETTINGS MENU SYSTEM SETTINGS Use the ▲ and ▼ key to highlight PUMP SETTINGS, SENSOR SETTINGS ►PUMP SETTINGS then press ENTER. ______________________________ ▲ ▼ EXIT | ENTER Prime Pumps Use the ▲ and ▼ keys to highlight the pump you ►PRIME PUMPS PRIME want to prime. - Page 15 Pump Settings PRIME PUMPS Use the ▲ and ▼ highlight the pump you wish to CALIBRATE PUMPS ►PUMP 1 change, then press ENTER. PUMP 2 PUMP 3 ______________________________ ▲ ▼ ◄ | ENTER Pump Name To change pump names use the ENTER key to move PUMP 1 SETTINGS PUMP 1 ►NAME=PUMP 1...
- Page 16 DC Speed This setting allows you to control the speed of the PUMP 1 SETTINGS PUMP 1 ►DC SPEED=100% pump to match the requirements of the application. DC SPEED=100% TIMEOUT=000 SECS SENSOR=NONE ▲ NOTE: This is only for the cover mounted peri- staltic pumps.
- Page 17 DC Speed This setting allows you to control the speed of the PUMP 1 SETTINGS PUMP 1 ►DC SPEED=100% pump to match the requirements of the application. DC SPEED=100% VOLUME=0000.0 OZS DELAY=00 SECS ▲ LOCKOUT=00 MINS MORE SETTINGS ______________________________ ______________________________ ◄...
- Page 18 Repeat Cycle Mode Use the ▲ and ▼ key to highlight REPEAT CYCLE, PUMP 1 SETTINGS NAME=PUMP 1 then press ENTER. ►MODE=REPEAT CYCLE SIGNAL=0 METERING=TIME MORE SETTINGS ______________________________ ◄ ▲ ▼ | ENTER Signal PUMP 1 SETTINGS PUMP 1 NAME=PUMP 1 This setting tells the system which of the available MODE=REPEAT CYCLE SIGNAL=0...
- Page 19 Charge Volume With CHARGE VOL selected, press the ENTER key. PUMP 1 SETTINGS PUMP 1 DC SPEED=100% To change the charge volume setting use the ► and ►CHRG VOL=0000.0 OZS CHRG VOL=0000.0 OZS ◄ keys to move the cursor (▲) to the number you RECHRG TIME=000 MINS ▲...
- Page 20 Probe Mode Use the ▲ and ▼ key to highlight PROBE, then PUMP 1 SETTINGS NAME=PUMP 1 press ENTER. ►MODE=PROBE SIGNAL=0 METERING=TIME MORE SETTINGS ______________________________ ◄ ▲ ▼ | ENTER Signal PUMP 1 SETTINGS PUMP 1 This setting tells the system which of the available NAME=PUMP 1 SIGNAL=0 MODE=PROBE...
- Page 21 Setpoint To change the concentration setpoint use the ► and PUMP 1 SETTINGS PUMP 1 DC SPEED=100% ◄ keys to move the cursor (▲) to the number you SETPOINT=0000.0000MS SENSOR=NONE want to change. Use the ▲ key to change the num- ►SETPOINT=0000.000MS ▲...
- Page 22 Pulse Off This setting controls how long the pump will be OFF PUMP 1 SETTINGS PUMP 1 ►PULSE OFF=5 SECS during the pulse feed stage of operation. PULSE OFF=5 SECS TEMP. MIN=000.0⁰F ▲ TEMP. MAX=000.0⁰F ______________________________ ______________________________ ◄ ▲ ▼ | ENTER ◄...
-
Page 23: Error Screens
OPERATION ERROR SCREENS Missing Calibration Error PUMP NAME If any of the pumps are not calibrated prior to opera- CALIBRATE PUMP tion you will get a “CALIBRATE PUMP” error screen in red showing which pump is missing the calibration. Press any key to continue. Go into the main menu and calibrate pumps. -
Page 24: Pc Application Programming
PC APPLICATION The Control Guard ACCS can be programmed using the front panel on the machine or by programming a system setup file using the PC software application and uploading the settings to the machine using a USB device. The preferred method is to use the pc software tool as it will save time and allow you to use previously programmed files saved on your computer. - Page 25 System Settings Screen (1) System ID: – The system ID will be used to manage each specific system on each site with varying system run parameters. When downloading a setup file to the machine from a USB drive you must have the system ID in the machine set to the matching system ID from the PC application setup file created.
- Page 26 Sensor Settings Screen (4) Inductive Probes: Each probe can have its own unique name. You have a maximum of 12 characters. (5) Analog Inputs: Name: Each analog input can have its own unique name. You have a maximum of 12 characters. Eng Units: Specify the Engineering units that each analog device will measure.
- Page 27 Pump Settings Screen (8) Signal Mode: This mode runs the pump to deliver a single dosage of chemical when triggered by an input signal. Volume: The amount of chemical that will be dispensed. Delay (secs): – The delay time is the time that the system will delay the start of the pump activation after the input signal has been applied.
- Page 28 Copying Setup Files from PC to USB device Once you have completed all of your system settings and saved them to the PC application, you are now ready to transfer the setup file to the system. (1) Insert your USB device into your computer. (2) Click on “Copy Setup to USB Drive”...
- Page 29 Copying Files from USB device to PC Once you have saved setup and/or report files from your system you are now ready to upload the files to your PC application. (1) Insert your USB device into your computer. (2) Click on “Copy Files from USB Drive” from the PC application home page. (3) Select the drive letter for your USB device.
- Page 30 Setup Report The setup report shows all programmed settings for each pump that is used. Use this report to verify all of the system settings in a single view. You can also confirm that the settings are correct for your application. (1) Report Header: Shows the date report was created, what time period is covered, system ID number and units.
- Page 31 Summary Reports This report provides a summary of chemical usage for each pump. The information provided can be used for many uses such as inventory tracking, cost and billing, or consumption due to various field conditions. (1) Report Header: Shows the date report was created, and what time period is covered. (2) Pump Info: Shows the total cycles and volume used for each pump.
- Page 32 Cycle Report This report shows tracking of chemical usage and temperature readings by individual pump. The information is tracked by date and time and also shows any error messages tracked which allows this report to be a helpful tool in diagnosing any operational problems.
- Page 33 Exporting to Excel Format Anytime a report is open for viewing you can choose to save the file in an Excel format by simply clicking on the “Save to Excel File” button located in the upper left of the report viewer. The Excel version of the report appears in the System Files directory in the column marked Excel Reports.
-
Page 34: System Dimensions
SYSTEM DIMENSIONS Main Cabinet (all models) Page 34 0901180 Rev: B (09/16) -
Page 35: Wiring Diagrams
0901180 Rev: B (09/16) Page 35... - Page 36 Page 36 0901180 Rev: B (09/16)
- Page 37 0901180 Rev: B (09/16) Page 37...
- Page 38 Page 38 0901180 Rev: B (09/16)
- Page 39 WIRING DIAGRAM FOR CONNECTING A LOW LEVEL SWITCH Note: the low level inputs are for dry contacts (no voltage) 0901180 Rev: B (09/16) Page 39...
- Page 40 Page 40 0901180 Rev: B (09/16)
- Page 41 WIRING DIAGRAM FOR CONNECTING A 4-20MA DEVICE 0901180 Rev: B (09/16) Page 41...
- Page 42 Page 42 0901180 Rev: B (09/16)
-
Page 43: Exploded View Drawings
0901180 Rev: B (09/16) Page 43... - Page 44 Page 44 0901180 Rev: B (09/16)
- Page 45 0901180 Rev: B (09/16) Page 45...
- Page 46 Page 46 0901180 Rev: B (09/16)
- Page 47 0901180 Rev: B (09/16) Page 47...
- Page 48 Page 48 0901180 Rev: B (09/16)
- Page 49 0901180 Rev: B (09/16) Page 49...
-
Page 50: Troubleshooting
TROUBLESHOOTING Symptom Indication Things to Check Verify main supply voltage Verify power cord plugged into outlet No Power Blank (black) display Verify main power to main terminal block both before and after the fuse Verify 5A fuse not blown Calibration error Red display with error message Calibrate pump per steps in programming section Chemical container empty... -
Page 51: Declaration Of Conformity
0901180 Rev: B (09/16) Page 51... -
Page 52: Warranty Information
DISCLAIMER Knight LLC does not accept responsibility for the mishandling, misuse, or non-performance of the described items when used for purposes other than those specified in the instructions. For hazardous materials information consult label, MSDS, or Knight LLC. Knight products are not for use in potentially explosive environments. Any use of our equipment in such an environment is at the risk of the user, Knight does not accept any liability in such circumstances.