Grizzly G4003 Owner's Manual
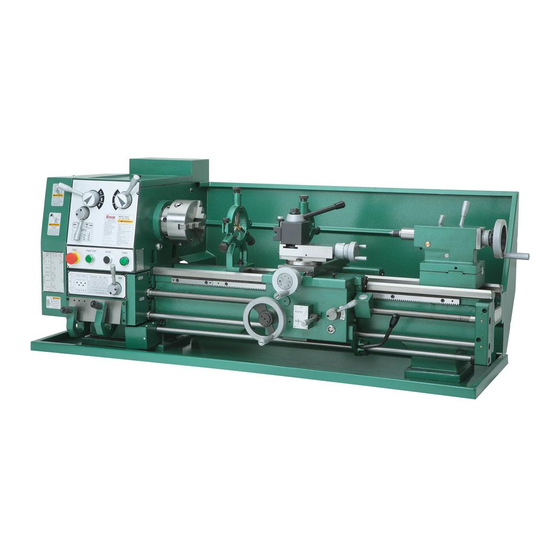
Gear-head lathe
Hide thumbs
Also See for G4003:
- Manual insert (55 pages) ,
- Owner's manual (64 pages) ,
- Parts list (19 pages)
Table of Contents
Advertisement
MODEL G4003
GEAR-HEAD LATHE
OWNER'S MANUAL
(For models manufactured since 6/20)
COPYRIGHT © JANUARY, 2000 BY GRIZZLY INDUSTRIAL, INC., REVISED MARCH, 2021 (BL)
WARNING: NO PORTION OF THIS MANUAL MAY BE REPRODUCED IN ANY SHAPE
OR FORM WITHOUT THE WRITTEN APPROVAL OF GRIZZLY INDUSTRIAL, INC.
#0350 PRINTED IN CHINA
V5.03.21
Advertisement
Table of Contents

Related Manuals for Grizzly G4003


Summary of Contents for Grizzly G4003
- Page 1 OWNER'S MANUAL (For models manufactured since 6/20) COPYRIGHT © JANUARY, 2000 BY GRIZZLY INDUSTRIAL, INC., REVISED MARCH, 2021 (BL) WARNING: NO PORTION OF THIS MANUAL MAY BE REPRODUCED IN ANY SHAPE OR FORM WITHOUT THE WRITTEN APPROVAL OF GRIZZLY INDUSTRIAL, INC.
- Page 2 This manual provides critical safety instructions on the proper setup, operation, maintenance, and service of this machine/tool. Save this document, refer to it often, and use it to instruct other operators. Failure to read, understand and follow the instructions in this manual may result in fire or serious personal injury—including amputation, electrocution, or death.
-
Page 3: Table Of Contents
Table of Contents INTRODUCTION ..........2 SECTION 5: ADJUSTMENTS ......29 Machine Description ........2 Gibs .............. 29 Contact Info............ 2 Steady/Follow Rest ........30 Manual Accuracy ........... 2 Tailstock ............31 Machine Data Sheet ........3 SECTION 6: MAINTENANCE ......33 SECTION 1: SAFETY ........ -
Page 4: Introduction
We want your feedback on this manual. What did you like about it? Where could it be improved? Please take a few minutes to give us feedback. Grizzly Documentation Manager P.O. Box 2069 Bellingham, WA 98227-2069 Email: manuals@grizzly.com Model G4003 (Mfd. Since 6/20) -
Page 5: Machine Data Sheet
MACHINE DATA SHEET Customer Service #: (570) 546-9663 · To Order Call: (800) 523-4777 · Fax #: (800) 438-5901 MODEL G4003 12" X 36" GEAR‐HEAD, CAM LOCK SPINDLE, LATHE Product Dimensions: Weight................................917 lbs. Width (side-to-side) x Depth (front-to-back) x Height................61 x 23 x 23 in. - Page 6 Paint Type/Finish............................Epoxy Fluid Capacities Headstock Capacity..........................3.5 qt. Headstock Fluid Type..............ISO 32 (eg. Grizzly T23963, Mobil DTE Light) Gearbox Capacity........................... 1 – 2 Pumps Gearbox Fluid Type............. ISO 68 (SB1365, Grizzly T23962, Mobil Vactra 2) Apron Capacity............................0.5 qt.
- Page 7 Oil Can Toolbox Accessories Recommended: G4005 Lathe Stand for G4003 T10556 Taper Attachment Kit for G4002/G4003/G4003G Model G4003 (Mfd. Since 6/20) The information contained herein is deemed accurate as of 3/4/2021 and represents our most recent product specifications. Model G4003 PAGE 3 OF 3 Due to our ongoing improvement efforts, this information may not accurately describe items previously purchased.
-
Page 8: Section 1: Safety
Never operate under the influence of drugs or injury or blindness from flying particles. Everyday alcohol, when tired, or when distracted. eyeglasses are NOT approved safety glasses. Model G4003 (Mfd. Since 6/20) - Page 9 Make sure they are properly installed, you experience difficulties performing the intend- undamaged, and working correctly BEFORE ed operation, stop using the machine! Contact our operating machine. Technical Support at (570) 546-9663. Model G4003 (Mfd. Since 6/20)
-
Page 10: Additional Safety For Metal Lathes
CLEARING CHIPS. Metal chips can be razor MEASURING WORKPIECE. To reduce risk of sharp. Avoid clearing them by hand or with a rag. Use a brush or vacuum instead. entanglement, never measure rotating workpieces. Model G4003 (Mfd. Since 6/20) -
Page 11: Additional Chuck Safety
The Model G4003 was specifically designed As with all power tools, there is danger for turning operations. Do not modify and/ associated with the Model G4003. Use the or use this LATHE for any other purpose. tool with respect and caution to lessen the... -
Page 12: Section 2: Power Supply
To reduce the risk of these hazards, avoid over- loading the machine during operation and make sure it is connected to a power supply circuit that meets the requirements in the following section. -10- Model G4003 (Mfd. Since 6/20) - Page 13 If the plug does not fit the available receptacle, or the machine must be reconnected for use on a different type of circuit, the reconnection must be made by a qualified electrician and comply with all local codes and ordinances. -11- Model G4003 (Mfd. Since 6/20)
-
Page 14: Power Connection
Attach insulated crimp-on wire terminals to the wires of the power cord. Securely connect the incoming ground to the PE terminal and the two incoming hot leads to the L and N terminals. Close and secure the electrical cabinet. -12- Model G4003 (Mfd. Since 6/20) -
Page 15: Unpacking
–Hex Nuts M6-1 ......... 8 • Precision Level ..........1 • Lifting Straps (rated for at least 1300 lbs.) ..2 • Forklift/Power Lifting Device (rated for at least 1300 lbs.) .............1 • Bench or Stand Mounting Hardware ............As Needed -13- Model G4003 (Mfd. Since 6/20) -
Page 16: Cleanup
Repeat Steps 2–3 as necessary until clean, Figure 5. T23692 Orange Power Degreaser. then coat all unpainted surfaces with a quality metal protectant to prevent rust. -14- Model G4003 (Mfd. Since 6/20) -
Page 17: Site Considerations
Only install in an Shadows, glare, or strobe effects that may distract access restricted location. or impede the operator must be eliminated. 61" Keep Workpiece Loading 23" Area Unobstructed Figure 6. Minimum working clearances. -15- Model G4003 (Mfd. Since 6/20) -
Page 18: Section 3: Assembly & Setup
Recommended Oil Type. Always place a piece of plywood over the The Model G4003 lathe is shipped without oil. ways of the lathe before removing or install- You must fill the headstock and apron with oil, and ing a chuck. This helps by covering the... - Page 19 Figure 8. Finally, tighten all three cams. The chuck is heavy and can be awkward to handle. Be aware that when removing or installing a chuck a finger pinch situation exists. -17- Model G4003 (Mfd. Since 6/20)
-
Page 20: Live Center
To remove the live center, back the tailstock barrel all the way into the tailstock casting. The live cen- ter will pop out. Be sure to catch it when it comes out to avoid damaging the tip. -18- Model G4003 (Mfd. Since 6/20) -
Page 21: Follow Rest
4-Jaw Chuck the shoulder, it will be necessary to face and shoulder the back plate again. The 4-jaw chuck supplied with the G4003 is not mounted to the back plate. Assembly of the back plate components is also required. Make note of the reference lines on each of the 3-jaw chuck studs. -
Page 22: Section 4: Controls
“C”. Move the right-hand selector knob until its indicator arrow is pointed at the “3”. Figure 12. Speed shifting levers. -20- Model G4003 (Mfd. Since 6/20) -
Page 23: Feed Direction
The feed rod can be selected by rotating the handle to the left as in Figure 15. Use this posi- The G4003 Metal Lathe can cut left or right while tion for all feeding operations. When the lever is feeding or threading and across both ways for fac- positioned straight up, no drive device is selected ing operations. -
Page 24: Feed Rate Chart
“1” position. Figure 18. Feed lever in neutral position. Please note that when either of the two selector levers are left in the down position, the drive train after this point is in neutral. -22- Model G4003 (Mfd. Since 6/20) -
Page 25: Thread Selection
Thread Selection While other thread pitches may be achieved, the G4003 comes with a chart that requires no gear changes for cutting inch threads. To achieve a desired thread pitch in inches, it is Inch thread selection: necessary to determine the quick-change lever positions. - Page 26 An indicator mark is positioned near the rim of the dial. The dial is mounted on a shaft that has a worm gear mount- ed at its opposite end. Figure 22. Dial indicator chart. -24- Model G4003 (Mfd. Since 6/20)
- Page 27 The chart in Figure 23 lists 30 metric threads that ment of the left hand quick change lever. Move the lever to the corresponding loca- can be cut on the G4003. Five ranges are used on tion. the left hand quick change selector and 6 on the right hand quick change selector.
-
Page 28: Carriage Controls
G Gear. Tighten the cap screw at the center. Pivot the bracket until the middle gear is in Cross Slide mesh with gear F and tighten the nut below. Handwheel Carriage Handwheel Figure 26. Handwheel locations. Figure 25. Gear placement. -26- Model G4003 (Mfd. Since 6/20) -
Page 29: Tool Post & Holder
Tool post - A quick change tool post and 2 tool dial can be adjusted by holding the handwheel holders are supplied with the Model G4003. with one hand and turning the dial with the other. Figure 28 shows tool post and a holder with optional bit. -
Page 30: Tailstock Controls
Figure 29. Detail of tailstock controls. Always make sure the power switch is in the “off” position and the spindle control lever is in the neutral position before plugging in power cord. Figure 30. Carriage control lever in neutral. -28- Model G4003 (Mfd. Since 6/20) -
Page 31: Section 5: Adjustments
SECTION 5: ADJUSTMENTS Gibs There are three main gib adjustments for the Model G4003. They are: the cross-slide gib, the compound slide gib and the saddle gib. Cross-slide Gib - The gib on the cross-slide is adjusted by the two screws located at each end. -
Page 32: Steady/Follow Rest
When tightening the jam nuts, hold the ting pressure from the tool bit. setscrew’s position using an Allen® wrench. Square Head Bolt Lock Nuts Figure 34. Steady rest lock nuts. Figure 33. This bolt locks the apron in place. -30- Model G4003 (Mfd. Since 6/20) -
Page 33: Tailstock
Tailstock The tailstock on the Model G4003 is aligned at the factory with the headstock. It is recommended that you take the time to ensure that the tailstock is aligned to your own desired tolerances. To align the tailstock: Center drill a 6'' long piece of bar stock on both ends. - Page 34 See Figure 39. Turn another .010'' off of the stock and check for taper. Repeat as neces- sary until the desired amount of accuracy is achieved. -32- Model G4003 (Mfd. Since 6/20)
-
Page 35: Section 6: Maintenance
Headstock..Grizzly T23963 (or ISO 32 equiv.) Apron ....Grizzly T23962 (or ISO 68 equiv.) Ball Oilers ..Grizzly T23963 (or ISO 32 equiv.) Oil Ports ..Grizzly T23963 (or ISO 32 equiv.) Leadscrew ..Grizzly T23962 (or ISO 68 equiv.) Bed Ways .. -
Page 36: Bearing Preload
See Figure 45. Apron: Use Grizzly T23962 or an ISO 68 equiva- lent. The drain plug is located underneath the apron. The fill plug is located on top of the apron. -
Page 37: Section 7: Accessories
Figure 48. T10556 Taper Attachment. T23962—ISO 68 Moly-D Way Oil, 5 gal. T23963—ISO 32 Moly-D Machine Oil, 5 gal. Figure 46. G4005 Lathe Stand for G4003. T26685—ISO 32 Moly-D Machine Oil, 1 gal. Moly-D oils are some of the best we've found for T26419—Syn-O-Gen Synthetic Grease... -
Page 38: Section 8: Wiring
Technical source. Support at (570) 546-9663. The photos and diagrams included in this section are best viewed in color. You can view these pages in color at www.grizzly.com. -36- Model G4003 (Mfd. Since 6/20) -
Page 39: Electrical Cabinet Wiring Diagram
GSC1-1801 110V JZC3-40D 110V 22NC 22NC 14NO 24NO 34NO 44NO U2 Z1 Z2 Ground Z1 Z2 PE PE To Power To Motor To Control To Spindle Source Panel Switches READ ELECTRICAL SAFETY -37- Model G4003 (Mfd. Since 6/20) ON PAGE 36! -
Page 40: Motor & Control Panel Wiring Diagram
Cabinet Start Capacitor 150MFD 250VAC Spindle Switch 6-15 Plug (As Recommended) Ground Electrical Cabinet Electrical Cabinet Electrical Cabinet Control Panel Stop Button Jog Button Power Lamp Power Button READ ELECTRICAL SAFETY -38- Model G4003 (Mfd. Since 6/20) ON PAGE 36! -
Page 41: Section 9: Parts
FUSE HOLDER P4003004 RESET BUTTON 55V2 P4003055V2 CONTROL PANEL PLATE V2.03.07 P4003050 THERMAL PROT. BLOCK P4003933 FUSE 2 AMP P4003051 TRANSFORMER BUY PARTS ONLINE AT GRIZZLY.COM! -39- Model G4003 (Mfd. Since 6/20) Scan QR code to visit our Parts Store. -
Page 42: Headstock
Headstock BUY PARTS ONLINE AT GRIZZLY.COM! -40- Model G4003 (Mfd. Since 6/20) Scan QR code to visit our Parts Store. - Page 43 BALL BEARING 6004 OPEN 1104B P40031104B O-RING 15 X 2.65 P4003153 CAP SCREW M6-1 X 12 1105 P40031105 CAP SCREW M8-1.25 X 30 BUY PARTS ONLINE AT GRIZZLY.COM! -41- Model G4003 (Mfd. Since 6/20) Scan QR code to visit our Parts Store.
- Page 44 HANDLE 1115 P40031115 BOSS 1110 P40031110 BOSS 1116 P40031116 SHIFTER 1111 P40031111 KEY 5 X 5 X 15 1117 P40031117 COLLAR BUY PARTS ONLINE AT GRIZZLY.COM! -42- Model G4003 (Mfd. Since 6/20) Scan QR code to visit our Parts Store.
-
Page 45: Change Gear Train
P4003237 EXT RETAINING RING 35MM P4003206 WASHER 938V2 P4003938V2 GEAR 35T V2.08.05 P4003208 BALL BEARING 6003-2RS P4003945 GEAR 36T P4003209 SPACER BUY PARTS ONLINE AT GRIZZLY.COM! -43- Model G4003 (Mfd. Since 6/20) Scan QR code to visit our Parts Store. -
Page 46: Quick Change Gearbox
Quick Change Gearbox BUY PARTS ONLINE AT GRIZZLY.COM! -44- Model G4003 (Mfd. Since 6/20) Scan QR code to visit our Parts Store. - Page 47 CAP SCREW M8-1.25 X 8 P4003334 SHIFT YOKE P4003372 GEAR 15T P4003335 CAP SCREW M6-1 X 12 P4003373 GEAR 24T P4003336 WASHER P4003374 SHAFT BUY PARTS ONLINE AT GRIZZLY.COM! -45- Model G4003 (Mfd. Since 6/20) Scan QR code to visit our Parts Store.
-
Page 48: Apron
Apron BUY PARTS ONLINE AT GRIZZLY.COM! -46- Model G4003 (Mfd. Since 6/20) Scan QR code to visit our Parts Store. - Page 49 WASHER P4003471 KEY 5 X 5 X 20 P4003435 CAP SCREW M6-1 X 40 1104 P40031104 OIL WINDOW 12MM P4003436 SHAFT BUY PARTS ONLINE AT GRIZZLY.COM! -47- Model G4003 (Mfd. Since 6/20) Scan QR code to visit our Parts Store.
-
Page 50: Saddle
Saddle BUY PARTS ONLINE AT GRIZZLY.COM! -48- Model G4003 (Mfd. Since 6/20) Scan QR code to visit our Parts Store. - Page 51 P4003540 GEAR 13T P4003519 CAP SCREW M8-1.25 X 25 P4003541 CAP SCREW M6-1 X 8 P4003520 WIPER P4003542 DIAL P4003521 SCREW BUY PARTS ONLINE AT GRIZZLY.COM! -49- Model G4003 (Mfd. Since 6/20) Scan QR code to visit our Parts Store.
-
Page 52: Compound Rest
COMPOUND REST P4003610 COMPOUND REST LEADSCREW P4003640 P4003611 THRUST BEARING 8101 P4003641 COMPRESSION SPRING 1 X 5 X 12 P4003612 BRACKET BUY PARTS ONLINE AT GRIZZLY.COM! -50- Model G4003 (Mfd. Since 6/20) Scan QR code to visit our Parts Store. -
Page 53: Tailstock
Tailstock BUY PARTS ONLINE AT GRIZZLY.COM! -51- Model G4003 (Mfd. Since 6/20) Scan QR code to visit our Parts Store. - Page 54 FLAT WASHER 12MM P4003712 CAP SCREW M6-1 X 20 P4003726 HEX NUT M12-1.75 P4003713 HAND WHEEL P4003727 P4003714 HANDLE P4003728 INDEX BUY PARTS ONLINE AT GRIZZLY.COM! -52- Model G4003 (Mfd. Since 6/20) Scan QR code to visit our Parts Store.
-
Page 55: Motor Assembly
FLAT WASHER 12MM P4003813 FLAT WASHER 10MM P4003819 HEX BOLT M10-1.5 X 30 P4003814 HEX BOLT M10-1.5 X 30 P4003820 V-BELT A29 BUY PARTS ONLINE AT GRIZZLY.COM! -53- Model G4003 (Mfd. Since 6/20) Scan QR code to visit our Parts Store. -
Page 56: Feed Rod Leadscrew
COMPRESSION SPRING 7020 P4003948 SPINDLE SWITCH ARM P4003911 HANDLE P4003949 SPINDLE SWITCH BOX P4003912 BRACKET P4003950 BUTTON HD CAP SCR M4-.7 X 45 BUY PARTS ONLINE AT GRIZZLY.COM! -54- Model G4003 (Mfd. Since 6/20) Scan QR code to visit our Parts Store. -
Page 57: Bed
ROLL PIN 5 X 24 1010 P40031010 HEX NUT M12-1.75 1004 P40031004 CAP SCREW M6-1 X 14 1011 P40031011 SPLASH GUARD 46" BUY PARTS ONLINE AT GRIZZLY.COM! -55- Model G4003 (Mfd. Since 6/20) Scan QR code to visit our Parts Store. -
Page 58: Labels & Cosmetics
Safety labels help reduce the risk of serious injury caused by machine hazards. If any label comes off or becomes unreadable, the owner of this machine MUST replace it in the original location before resuming operations. For replacements, contact (800) 523-4777 or www.grizzly.com. BUY PARTS ONLINE AT GRIZZLY.COM! -56- Model G4003 (Mfd. -
Page 59: Warranty & Returns
WARRANTY & RETURNS Grizzly Industrial, Inc. warrants every product it sells for a period of 1 year to the original purchaser from the date of purchase. This warranty does not apply to defects due directly or indirectly to misuse, abuse, negligence, accidents, repairs or alterations or lack of maintenance.