HIKVISION 8 Series User Manual
Video intercom demo case
Hide thumbs
Also See for 8 Series:
- User manual (18 pages) ,
- User manual (25 pages) ,
- User manual (25 pages)
Table of Contents
Advertisement
Advertisement
Table of Contents

Related Manuals for HIKVISION 8 Series


Summary of Contents for HIKVISION 8 Series
- Page 1 Video Intercom Demo Case User Manual...
- Page 2 Trademarks and other Hikvision marks are the property of Hikvision and are registered trademarks or the subject of applications for the same by Hikvision and/or its affiliates. Other trademarks mentioned in this manual are the properties of their respective owners. No right of license is given to use such trademarks without express permission.
- Page 3 Video Intercom Demo Case·User Manual Safety Instruction These instructions are intended to ensure that user can use the product correctly to avoid danger or property loss. The precaution measure is divided into Warnings and Cautions: Warnings: Neglecting any of the warnings may cause serious injury or death. Cautions: Neglecting any of the cautions may cause injury or equipment damage.
- Page 4 Video Intercom Demo Case·User Manual Exposing the equipment to direct sun light, low ventilation or heat source such as heater or radiator is forbidden (ignorance can cause fire danger). Do not aim the device at the sun or extra bright places. A blooming or smear may occur otherwise (which is not a malfunction however), and affecting the endurance of sensor at the same time.
-
Page 5: Table Of Contents
Video Intercom Demo Case·User Manual Table of Contents 1 Demo Case Overview ................... 1 1.1 Devices Overview ........................1 1.2 Default Parameters ........................1 2 Getting Started ..................... 3 2.1 Activate Indoor Station ......................3 2.2 Quick Operation ........................3 2.3 Configure Sub Module Address .................... -
Page 6: Demo Case Overview
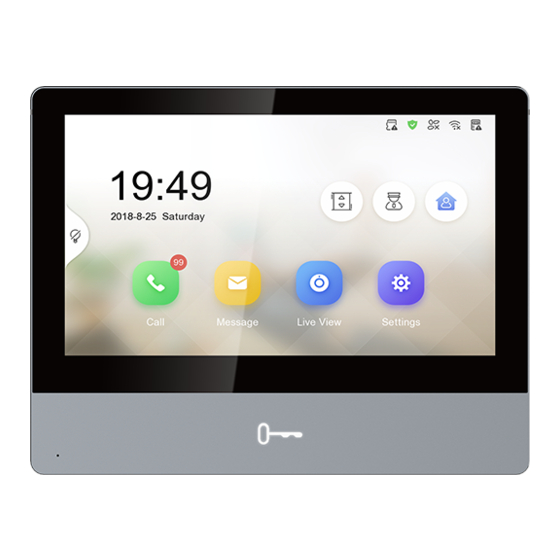
Video Intercom Demo Case·User Manual 1 Demo Case Overview 1.1 Devices Overview The demo case displays 3 groups of indoor station and door station. See Figure 1-1 for the default calling relationship among these video intercom devices. Figure 1-1 Intercom Application Diagram 1.2 Default Parameters In the demo case, video intercom devices are divided into 3 groups by default. - Page 7 Video Intercom Demo Case·User Manual Door Station DS-KD8003-IME1/ 192.0.0.64 Surface Nametag Module DS-KD-KK Indicator Module DS-KD-IN Indoor Station DS-KH6320-WTE1 192.0.0.66 Door Station DS-KD8003-IME1/ 192.0.0.64 Surface Nametag Module DS-KD-KK Indicator Module DS-KD-IN Door Station DS-KD8003-IME1/ 192.0.0.65 Surface Nametag Module DS-KD-KK Indicator Module DS-KD-IN Keypad Module DS-KD-KP...
-
Page 8: Getting Started
Video Intercom Demo Case·User Manual 2 Getting Started 2.1 Activate Indoor Station You can only configure and operation the device after creating a password for the device activation. Steps: 1. Power on the device. It will enter the activation page automatically. 2. - Page 9 Video Intercom Demo Case·User Manual Figure 2-2 Wizard-Network Settings 1). Edit Local IP, Subnet Mask and Gateway parameters. 2). Enable DHCP, the device will get network parameters automatically. 3. Configure the indoor station and tap Next. Figure 2-3 Wizard-Settings page 1).
-
Page 10: Configure Sub Module Address
Video Intercom Demo Case·User Manual Figure 2-4 Wizard-Related Devices Settings 1). Tap the door station in the list to link. If the door station is inactive, the system will pop up the dialog to activate the door station. 2). Tap to pop up the Network Settings page. - Page 11 Video Intercom Demo Case·User Manual The sub module address and corresponding switch status as below. DIP Switch Digit Digit 1 Digit 2 Digit 3 Digit 4 Module Address...
-
Page 12: Video Intercom Function
Video Intercom Demo Case·User Manual 3 Video Intercom Function 3.1 Video Intercom Function of Group 1 and Group 2 For group 1, there are one 8-series indoor station and module door station. For group 2, there are one 6-series indoor station and module door station. Before you begin: Make sure you have configured the room No. -
Page 13: Video Intercom Function Of Group 3
Video Intercom Demo Case·User Manual Figure 3-1 Calling from Door Station Tap to answer the call, and tap to reject the call. Tap Unlock tab or the button to unlock the door. Tap tab to capture the snapshots. 3.2 Video Intercom Function of Group 3 For group 3, there are 5 modules of door station and 3 accessory packages. -
Page 14: Issue Card
Video Intercom Demo Case·User Manual Make sure you have configured the room No. of the device. 3.2.2 Issue Card You cannot open door by swiping the card until you have issue the card. Issue Card via Main Card: You can swipe card to issue it after swiping the main card in advance. -
Page 15: Video Intercom Function Among Indoor Stations
Video Intercom Demo Case·User Manual 3.3 Video Intercom Function Among Indoor Stations When 2 indoor stations are connected to the same door station, these 2 indoor stations can call each other. Steps: 1. Set the No. of the door station. Here we take the D series door station (DS-KD8003-IME1/Surface) as example, and the default No. - Page 16 Video Intercom Demo Case·User Manual 4. Start video intercom with the indoor station. 1) On the home page, tap Dial tab to enter the resident calling page. Figure 3-3 Calling page 2) Enter the Room No., 1-1-1-401 or 401. If 2 indoor stations are connected to the same door station, the community No., the building No., and the unit No.
-
Page 17: Live View
Video Intercom Demo Case·User Manual 4 Live View For network indoor stations, you can get the live view of the added door stations on the live view page of the indoor station. Before you start: Make sure both the door station and the indoor stations are well-connected. ... - Page 18 Video Intercom Demo Case·User Manual During the live view of door station, tap Unlock tab to open the door. Tap to call the door station.
-
Page 19: Remote Operation Via Mobile Client
Video Intercom Demo Case·User Manual 5 Remote Operation via Mobile Client You can configure and operate the device via Hik-Connect mobile client. 5.1 Set Up Mobile Client Before you start: Make sure your mobile device has been connected to network. Steps: 1. -
Page 20: Add Device To Mobile Client Via Serial No
Video Intercom Demo Case·User Manual Tap Settings -> -> Hik-Connect Service to enable Hik-Connect Service before you add the indoor station to the client. Scan the QR code and edit the Verification Code on the page. Figure 5-2 Hik-Connect Server Settings 5.2.2 Add Device to Mobile client via Serial No. - Page 21 Video Intercom Demo Case·User Manual UD14348B...