
Related Manuals for Makita CRU03


Summary of Contents for Makita CRU03
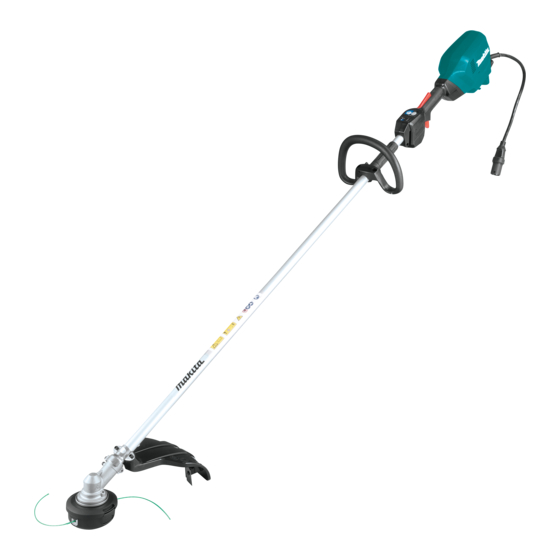
- Page 1 INSTRUCTION MANUAL MANUAL DE INSTRUCCIONES Battery Powered Grass Trimmer Corta Césped a Batería CRU03 IMPORTANT: Read Before Using. IMPORTANTE: Lea antes de usar.
-
Page 2: Specifications
ENGLISH (Original instructions) SPECIFICATIONS Model: CRU03 Handle type Loop handle No load speed 3: 0 - 6,000 /min (at each rotation speed level) 2: 0 - 4,600 /min 1: 0 - 4,000 /min Overall length 1,783 mm (70-1/4″) (without cutting tool) Nylon cord diameter 2.0 - 2.3 mm (0.08″... - Page 3 Intended use of the tool Work overalls protect against injury from flying stones and debris. It is strongly recom- Use right tool. The cordless string trimmer mended that the user wears work overalls. is only intended for cutting grass and light weeds.
- Page 4 Do not use a cutting tool which is not recom- the terminal gets wet or liquid enters inside of bat- mended by Makita. tery, the battery may be short circuited and there is a risk of overheat, fire, or explosion.
- Page 5 17. Cutting elements continue to rotate after the Use only the manufacturer's recommended motor is switched off. replacement parts and accessories. 18. Do not operate power tools in explosive atmo- Inspect and maintain the tool regularly, espe- spheres, such as in the presence of flammable cially before/after use.
- Page 6 Only use genuine Makita batteries. Use of non-genuine Makita batteries, or batteries that have been altered, may result in the battery bursting causing fires, personal injury and damage. It will also void the Makita warranty for the Makita tool and charger. 6 ENGLISH...
-
Page 7: Parts Description
PARTS DESCRIPTION Speed indicator ADT indicator Caution lamp Main power button (ADT = Automatic Torque Drive Technology) Reverse button Plug Lock-off lever Switch trigger Handle Protector 7 ENGLISH... -
Page 8: Functional Description
Main power switch FUNCTIONAL DESCRIPTION Tap the main power button to turn on the tool. To turn off the tool, press and hold the main power button until the speed indicator goes off. WARNING: Always be sure that the tool is switched off and the portable power pack is disconnected from the tool before adjusting or checking function on the tool. - Page 9 Automatic Torque Drive Technology When you turn on the Automatic Torque Drive Technology (ADT), the tool runs at optimum rotation speed and torque for the condition of grass being cut. To start ADT, press and hold the reverse button until the ADT indicator turns on.
-
Page 10: Electronic Function
Hex wrench storage NOTE: During the reverse rotation, the tool operates only for a short period of time and then automatically stops. NOTE: Once the tool is stopped, the rotation returns CAUTION: Be careful not to leave the hex to regular direction when you start the tool again. wrench inserted in the tool head. -
Page 11: Operation
NOTE: Turn the tool upside down so that you can replace the cutting tool easily. Nylon cutting head NOTICE: Be sure to use genuine Makita nylon cutting head. ► 1. Cord 2. Holder Wear the shoulder harness of the portable power pack and lock the buckle on the waist belt. -
Page 12: Starting The Operation
Insert the plug of the tool into the socket of the Starting the operation portable power pack. When inserting, align the triangle marking on both the CAUTION: Before operation, finish adjusting plug and the socket. the working position by following the instructions in the section for the working position. - Page 13 Wear the shoulder harness of the portable power Correct handling of the tool pack and lock the buckle on the waist belt. WARNING: Always position the tool on your right-hand side. Correct positioning of the tool allows for maximum control and will reduce the risk of seri- ous personal injury.
-
Page 14: Cleaning The Tool
Never use gasoline, benzine, thinner, alcohol or the like. Discoloration, deformation or cracks may result. To maintain product SAFETY and RELIABILITY, repairs, any other maintenance or adjustment should be performed by Makita Authorized or Factory Service Centers, always using Makita replacement parts. 14 ENGLISH... - Page 15 95-M10L 3 m (9 ft) 100 mm (3-15/16″) 80 mm (3-1/8″) 15 ENGLISH...
- Page 16 B&F ECO 4L 3 m (9 ft) 100 mm (3-15/16″) 80 mm (3-1/8″) 16 ENGLISH...
-
Page 17: Troubleshooting
Before asking for repairs, conduct your own inspection first. If you find a problem that is not explained in the manual, do not attempt to dismantle the tool. Instead, ask Makita Authorized Service Centers, always using Makita replace- ment parts for repairs. -
Page 18: Especificaciones
ESPAÑOL (Instrucciones originales) ESPECIFICACIONES Modelo: CRU03 Tipo de mango Mango redondo Velocidad sin carga 3: 0 - 6 000 r/min (en cada nivel de la velocidad de rotación) 2: 0 - 4 600 r/min 1: 0 - 4 000 r/min Longitud total 1 783 mm (70-1/4″) - Page 19 10. Manténgase alerta - Preste atención a lo que está haciendo. Utilice el sentido común. No utilice el aparato cuando esté cansado. Almacene los aparatos que no use en interiores. 12. Mantenga los dedos alejados del gatillo inte- rruptor cuando no opere la herramienta y cuando pase de una posición de operación a otra.
- Page 20 En condiciones de mal uso, podría escapar 21. Si el cartucho de batería se moja, drene el líquido de la batería; evite el contacto. Si toca agua que se haya acumulado en el interior el líquido accidentalmente, enjuague con agua. y luego límpielo con un paño seco.
- Page 21 No utilice una herramienta de corte que no sea 18. No utilice las herramientas eléctricas en recomendada por Makita. atmósferas explosivas, tal como en la presen- cia de líquidos, gases o polvo inflamables. Las No utilice la herramienta cuando haya mal herramientas eléctricas crean chispas que pueden...
- Page 22 Revise si hay sujetadores que estén sueltos o Símbolos piezas dañadas, tal como grietas en el cabezal de corte de nailon. A continuación se muestran los símbolos utilizados Siga las instrucciones para la lubricación y para la herramienta. el cambio de los accesorios si aplica para el caso.
- Page 23 Makita, o de baterías alteradas, puede ocasio- nar que las baterías exploten causando un incendio, lesiones personales y daños. Asimismo, esto inva- lidará la garantía de Makita para la herramienta y el cargador Makita. Consejos para alargar al máximo la vida útil de la batería...
-
Page 24: Descripción De Las Piezas
DESCRIPCIÓN DE LAS PIEZAS Indicador de velocidad Indicador de ADT Luz indicadora de Botón de encendido (ADT = Automatic precaución principal Torque Drive Technology (Tecnología de acciona- miento automático de torsión)) Botón de inversión Enchufe Palanca de desbloqueo Gatillo interruptor Mango Protector 24 ESPAÑOL... -
Page 25: Descripción Del Funcionamiento
Protección contra el DESCRIPCIÓN DEL sobrecalentamiento de la FUNCIONAMIENTO herramienta o la batería Si la herramienta o el cartucho de batería se sobreca- ADVERTENCIA: Asegúrese siempre de que lientan, la herramienta se detendrá automáticamente. la herramienta esté apagada y la unidad portátil Cuando la herramienta se sobrecalienta, la luz indi- de alimentación eléctrica esté... -
Page 26: Ajuste De Velocidad
Indicador de Modo Velocidad de PRECAUCIÓN: Antes de conectar la unidad velocidad rotación portátil de alimentación eléctrica a la herramienta, Alto 0 - 6 000 r/min compruebe siempre que el gatillo interruptor se accione debidamente y que regrese a la posi- ción de apagado una vez que se suelte. -
Page 27: Montaje
Botón de inversión para la Función eléctrica eliminación de residuos Control de velocidad constante ADVERTENCIA: Apague la herramienta y La función de control de velocidad permite una rotación desconecte la unidad portátil de alimentación constante independientemente de las condiciones de eléctrica de la herramienta antes de quitar la carga. -
Page 28: Instalación Del Protector
Almacenamiento de la llave Allen Instalación del protector (hexagonal) ADVERTENCIA: Nunca utilice la herramienta sin el protector ilustrado en su lugar. El no seguir PRECAUCIÓN: Tenga cuidado de no dejar esta indicación podría causar lesiones personales la llave hexagonal insertada en el cabezal de la graves. -
Page 29: Operación
AVISO: Asegúrese de utilizar un cabezal de corte jale el cable hacia afuera, asegúrese de fijar el cable en de nailon original de Makita. los sujetadores tal como se muestra en la figura. ► 1. Cable 2. Sujetador ► 1. Cabezal de corte de nailon 2. Eje 3. Llave hexa- Colóquese el arnés para el hombro de la unidad... - Page 30 Ajuste la longitud del cable mediante el sujetador, Instale el/los cartucho(s) de batería a la unidad como sea necesario. portátil de alimentación eléctrica. ► 1. Unidad portátil de alimentación eléctrica ► 1. Sujetador 2. Cartucho de batería La longitud del cable está debidamente ajustada NOTA: Consultar el manual de instrucciones de su cuando: unidad portátil de alimentación eléctrica para instruc-...
- Page 31 Inserte el enchufe de la herramienta en el enchufe Manipulación correcta de la hembra de la unidad portátil de alimentación eléctrica. herramienta Cuando lo inserte, alinee la marca triangular tanto en el enchufe como en el enchufe hembra. ADVERTENCIA: Siempre coloque la herra- mienta de su lado derecho.
-
Page 32: Mantenimiento
Para mantener la SEGURIDAD y FIABILIDAD del pro- ducto, las reparaciones, y cualquier otra tarea de man- tenimiento o ajuste deberán ser realizadas en centros de servicio autorizados o de fábrica Makita, empleando siempre repuestos Makita. ► 1. Área de corte más eficaz... - Page 33 95-M10L 3 m (9 ft) 100 mm (3-15/16″) 80 mm (3-1/8″) 33 ESPAÑOL...
- Page 34 B&F ECO 4L 3 m (9 ft) 100 mm (3-15/16″) 80 mm (3-1/8″) 34 ESPAÑOL...
-
Page 35: Resolución De Problemas
Antes de solicitar alguna reparación, primero realice una inspección por su cuenta. Si detecta algún problema que no esté explicado en el manual, no intente desensamblar la herramienta. En vez de esto, solicite la reparación a un centro de servicio autorizado de Makita, usando siempre piezas de repuesto Makita. Estado de la anomalía Causa probable (avería) - Page 36 Makita Corporation 3-11-8, Sumiyoshi-cho, 885764-942 Anjo, Aichi 446-8502 Japan CRU03-1 EN, ESMX www.makita.com 20191107...