Makita DKP181 Instruction Manual
Cordless
Hide thumbs
Also See for DKP181:
- Instruction manual (144 pages) ,
- Instruction manual (112 pages) ,
- Instruction manual (112 pages)
Table of Contents
Advertisement
Advertisement
Table of Contents

Related Manuals for Makita DKP181


Summary of Contents for Makita DKP181
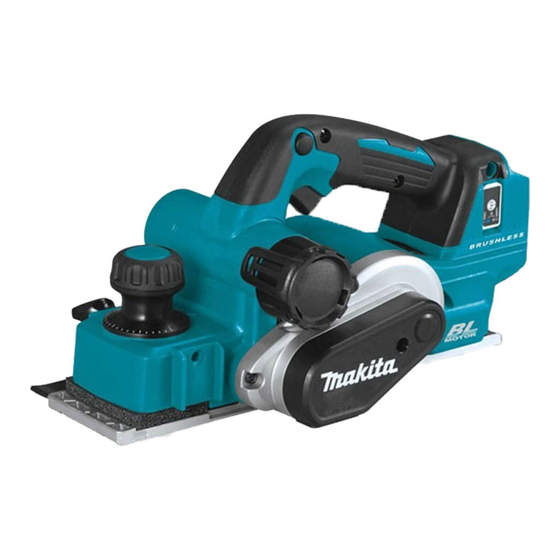
- Page 1 INSTRUCTION MANUAL Cordless Planer DKP181 Read before use.
-
Page 2: Specifications
SPECIFICATIONS Model: DKP181 Rated voltage D.C. 18 V Planing width 82 mm Planing depth 3 mm Shiplapping depth 25 mm No load speed 12,000 min Overall length 366 mm Net weight 3.3 - 3.6 kg • Due to our continuing program of research and development, the specifications herein are subject to change without notice. •... -
Page 3: Ec Declaration Of Conformity
Do not abuse the cord. Never use the cord for WARNING: The vibration emission during carrying, pulling or unplugging the power tool. actual use of the power tool can differ from the Keep cord away from heat, oil, sharp edges declared value(s) depending on the ways in which or moving parts. - Page 4 Battery tool use and care Recharge only with the charger specified by the manufacturer. A charger that is suitable for one type of battery pack may create a risk of fire when used with another battery pack. Use power tools only with specifically desig- nated battery packs. Use of any other battery packs may create a risk of injury and fire. When battery pack is not in use, keep it away from other metal objects, like paper clips, coins, keys, nails, screws or other small metal objects, that can make a connection from one...
- Page 5 Follow your local regulations relating to imbalance will cause vibration and shorten tool life. disposal of battery. 16. Use only Makita blades specified in this manual. 12. Use the batteries only with the products 17. Always use the correct dust mask/respirator for specified by Makita.
-
Page 6: Functional Description
25. When storing the wireless unit, keep it in the The tool is equipped with a tool/battery protection sys- supplied case or a static-free container. tem. This system automatically cuts off power to the 26. Do not insert any devices other than Makita motor to extend tool and battery life. The tool will auto- wireless unit into the slot on the tool. matically stop during operation if the tool or battery is 27. Do not use the tool with the lid of the slot dam- placed under one of the following conditions. -
Page 7: Overheat Protection
Overheat protection Indicating the remaining battery capacity When the tool is overheated, the tool stops automati- cally, and the battery indicator blink about 60 seconds. In this situation, let the tool cool down before turning the Only for battery cartridges with the indicator tool on again. Blinking Overdischarge protection When the battery capacity becomes low, the tool stops automatically. If the product does not operate even when the switches are operated, remove the batteries... -
Page 8: Adjusting Depth Of Cut
High torque ing the lock-off button. A switch in need of repair mode may result in unintentional operation and serious personal injury. Return tool to a Makita service center for proper repairs BEFORE further usage. Overload alert To prevent the switch trigger from being accidentally pulled, a lock- off button is provided. To start the tool, depress the lock-off button and pull the switch trigger. -
Page 9: Removing Or Installing Planer Blades
Use gloves or rags to protect your fingers or hands when removing or installing the blades. CAUTION: Use only the Makita wrench pro- ► 1 . Screw 2. Adjusting plate 3. Conventional planer vided to remove or install the blades. Failure to do... - Page 10 Tighten two screws on the adjusting plate while For tool with mini planer blades the adjusting plate being pressed. To remove the mini planer blades from the tool, loosen the installation bolts one turn with the box wrench. ► 1 . Box wrench 2. Installation bolt Slide and remove the mini planer blade from the belt side of the tool. Using the haft of the box wrench makes it easier and safety. ► 1 .
- Page 11 Loosen the screws one turn on the adjusting plate. Slip the heel of the adjusting plate into the groove of the drum. ► 1 . Screw 2. Adjusting plate 3. Set plate ► 1 . Drum groove 2. Heel 3. Drum plate 4. Installation Clean out all chips or foreign matter adhering bolt to the set plate with adjusting plate and the mini Screw all the installation bolts with the box planer blade. wrench. Place the mini planer blade on the blade gauge so that the blade edge is perfectly flush with the Then install the mini planer blade.
- Page 12 For the correct planer blade setting Your planing surface will end up rough and uneven, unless the blade is set properly and securely. The blade must be mounted so that the cutting edge is absolutely level, that is, parallel to the surface of the rear base. Refer to some examples below for proper and improper settings. Planing surface Blade setting Cause Correct setting Although this side view cannot show it, the edge of the blades run perfectly parallel to rear base surface Gouging at start Both blade edges fails to protrude enough in relation to rear base line.
-
Page 13: Planing Operation
Dust bag Connecting a vacuum cleaner When you wish to perform clean planing operation, Optional accessory connect a Makita vacuum cleaner to your tool. Connect Attach the dust bag onto the chip discharge opening. a hose of the vacuum cleaner to the chip discharge The chip discharge opening is tapered. When attaching opening as shown in the figures. the dust bag, push it onto the chip discharge opening firmly as far as it will go to prevent it from coming off during operation. - Page 14 The speed and depth of cut determine the kind of finish. Draw a cutting line on the workpiece. Align the blade The tool keeps cutting at a speed that will not result in edge with the cutting line. jamming by chips. For rough cutting, the depth of cut Adjust the shiplapping depth using a depth guide. can be increased, while for a good finish you should When planing, move the tool with the edge fence flush reduce the depth of cut and advance the tool more with the side of the workpiece.
- Page 15 When doing a great amount of chamfering, place an Chamfering edge of chamfering rule so that it contacts workpiece and make many passes of planing as shown in the figure. To make a chamfering cut as shown in the figure, align one of three "V" grooves in the front base with the edge ► 1 . Edge of chamfering rule of the workpiece and plane it.
- Page 16 Tool registration for the vacuum cleaner ► 1 . Lid NOTE: A Makita vacuum cleaner supporting the Insert the wireless unit to the slot and then close wireless activation function is required for the tool the lid. registration.
- Page 17 Set the stand-by switch on the vacuum cleaner to NOTE: The wireless activation lamps finish blinking "AUTO". in green after 20 seconds elapsed. Press the wireless activation button on the tool while the wireless acti- vation lamp on the cleaner is blinking. If the wireless activation lamp does not blink in green, push the wire- less activation button briefly and hold it down again.
- Page 18 Push the wireless activation button on the tool Pull the switch trigger of the tool. Check if the vacuum briefly. The wireless activation lamp will blink in blue. cleaner runs while the switch trigger is being pulled. To stop the wireless activation of the vacuum cleaner, push the wireless activation button on the tool. NOTE: The wireless activation lamp on the tool will stop blinking in blue when there is no operation for 2 hours. In this case, set the stand-by switch on the...
- Page 19 If the cancellation is performed successfully, the wire- Cancelling tool registration for the less activation lamps will light up in red for 2 seconds vacuum cleaner and start blinking in blue. NOTE: The wireless activation lamps finish blinking in Perform the following procedure when cancelling the red after 20 seconds elapsed. Press the wireless acti- tool registration for the vacuum cleaner.
- Page 20 Troubleshooting for wireless activation function Before asking for repairs, conduct your own inspection first. If you find a problem that is not explained in the manual, do not attempt to dismantle the tool. Instead, ask Makita Authorized Service Centers, always using Makita replace- ment parts for repairs. State of abnormality Probable cause (malfunction) Remedy Install the wireless unit correctly. The wireless activation lamp does The wireless unit is not installed into the tool. The wireless unit is improperly installed not light/blink. into the tool. Gently wipe off dust and dirt on the terminal of the The terminal of the wireless unit and/or the slot is dirty.
-
Page 21: Maintenance
For conventional planer blades only CAUTION: These accessories or attachments Always keep your blades sharp for the best perfor- are recommended for use with your Makita tool specified in this manual. The use of any other mance possible. Use the sharpening holder to remove nicks and produce a fine edge. accessories or attachments might present a risk of injury to persons. Only use accessory or attachment... - Page 24 Jan-Baptist Vinkstraat 2, Makita Europe N.V. 3070 Kortenberg, Belgium 3-11-8, Sumiyoshi-cho, Makita Corporation Anjo, Aichi 446-8502 Japan 885743A229 www.makita.com 20190809...