Makita DVC660 Instruction Manual
Cordless backpack vacuum cleaner
Hide thumbs
Also See for DVC660:
- Instruction manual (117 pages) ,
- Instruction manual (52 pages) ,
- Instruction manual (81 pages)
Table of Contents
Advertisement
Quick Links
Advertisement
Table of Contents

Related Manuals for Makita DVC660


Summary of Contents for Makita DVC660
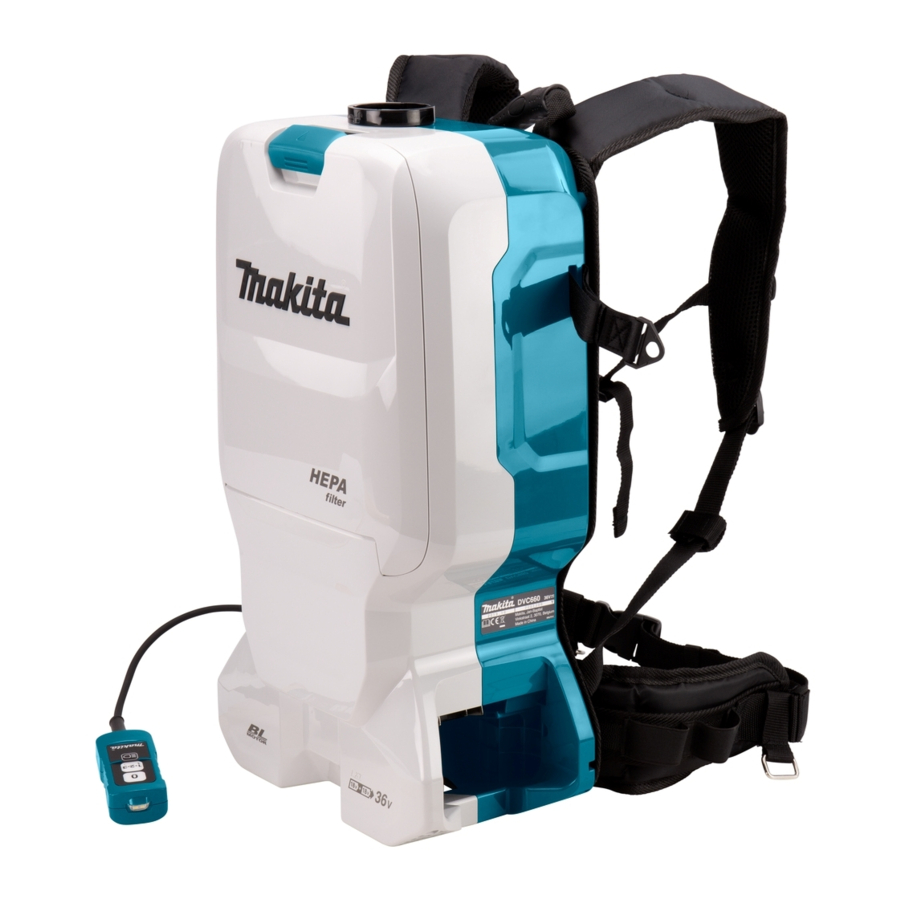
- Page 1 INSTRUCTION MANUAL Cordless Backpack Vacuum Cleaner DVC660 Read before use.
-
Page 2: Specifications
SPECIFICATIONS Model: DVC660 Capacity Filter bag 6.0 L Dust bag 5.5 L Maximum air volume With hose ø28 mm x 1.0 m 2.0 m /min With hose ø32 mm x 1.0 m 2.2 m /min Vacuum 110 hPa Dimensions (L x W x H) -
Page 3: Ec Declaration Of Conformity
Never use the cleaner outdoors in the rain. Vibration Do not use close to heat sources (stoves, etc.). Do not block cooling vents. These vents per- The vibration total value (tri-axial vector sum) deter- mit cooling of the motor. Blockage should be mined according to EN60335-2-69: carefully avoided otherwise the motor will burn Work mode: operation without load... - Page 4 Keep handles dry, clean and free from oil and have been altered, may result in the battery bursting grease. causing fires, personal injury and damage. It will Important safety instructions for also void the Makita warranty for the Makita tool and charger. battery cartridge Tips for maintaining maximum Before using battery cartridge, read all instruc-...
-
Page 5: Functional Description
Appliance / battery protection system FUNCTIONAL DESCRIPTION The appliance is equipped with a appliance / battery protec- tion system. This system automatically cuts off power to the motor to extend appliance and battery life. The appliance CAUTION: will automatically stop during operation if the appliance or Always be sure that the appli- battery is placed under one of the following conditions: ance is switched off and the battery cartridge is... -
Page 6: Adjusting Belts
Press the check button on the battery cartridge to indi- Adjusting belts cate the remaining battery capacity. The indicator lamps light up for a few seconds. The tightness of the shoulder belts, upper and lower belts can be adjusted. Put your arms through the shoul- Indicator lamps Remaining der belts first then fasten the lower and upper belts. capacity To tighten, pull the end of the strap as illustrated. -
Page 7: Led Light
Carrying hook LED light Always grab the carrying hook when handling the vac- LED light is installed in the head of the switch box to uum cleaner body. ease the operations in dark places. Press button to turn the light on. To turn off, press button again. - Page 8 The loop on the lower belt can be used for carrying Dust beating system nozzles as illustrated. Dust goes down when you pull the lever or walk with wearing the cleaner. This system helps the cleaner maintaining the suction power. ► 1 .
- Page 9 Follow the procedures below, depending on the Assembling nozzle and wand type of the extension wand : NOTE: The slide-type extension wand and the ring- Optional accessory type extension wand are not compatible with each NOTE: The type of the nozzle and wand included in other.
- Page 10 For the ring-type extension wand For the aluminum bending pipe / aluminum straight Shoulder the vacuum cleaner body then twist and insert pipe the extension wand into the bent pipe assembly. To (Only for the model with ø38 mm hose and front cuff 38) disconnect, twist and extract it.
-
Page 11: Connecting The Tool
Connecting the tool NOTE: If the bent pipe assembly is attached to the hose, remove it beforehand. To connect a tool to the cleaner, the dedicated hose and/or additional parts are required. Depending on your cleaner model, you need to replace the hose and/or prepare additional parts. - Page 12 When using ø38 mm hose with front cuff 38 Twist and insert the joint or the front cuff to the inlet part on the hose, depending on the tool that you are going to connect. Connect the front cuff to the tool's extraction outlet. ► 1 . Hose 2. Bent pipe assembly 3. Sleeve Installing filter bag / dust bag Optional accessory CAUTION:...
- Page 13 Insert the filter bag into the slit on the upper side of the room as illustrated. ► 1 . Slit 2. Filter bag Unlock the latch by lifting the bottom side. Push When using the dust bag, insert the brim of the dust bag the grooved area to lift the front latching side. Pull the into the slit.
-
Page 14: Operation
Align the hole of the filter bag with the hose cuff Shoulder the vacuum cleaner body and fas- and push the cardboard portion to the end. Make sure ten upper and lower belts. Adjust the tightness as that the rubber ring on the filter bag goes over the rim necessary. on the hose cuff. Press button to start vacuuming. If you want to change the suction power, press button until the desired suction power is selected. -
Page 15: Cleaning The Hepa Filter
Replace the filter bag when it becomes full. Open the lid To maintain product SAFETY and RELIABILITY, and take out the filter bag. Pull the strip on the side of the open- repairs, any other maintenance or adjustment should ing to shut the filter bag and dispose of the filter bag in whole. be performed by Makita Authorized or Factory Service Centers, always using Makita replacement parts. Cleaning the HEPA filter CAUTION: Do not use the vacuum cleaner without a filter or continue to use dirty or dam- aged filter. -
Page 16: Cleaning The Dust Bag
To install the filter, insert the side without the Cleaning the clog hooks into the groove then push in the filter until the hooks are secured with a click. When cleaning the clog, remove the hose or the exten- sion wand, or the bent pipe assembly to check inside. Removing/attaching the snap-on type bent pipe assembly To remove, pull the bent pipe assembly while pressing both of the tab on the hose end. -
Page 17: Removing The Board
The board is supported by three springs. Cleaning the room for filter bag/ If the springs came off from the board or the lever, dust bag reattach them as illustrated. When cleaning the room for filter bag/dust bag, remove and wipe the board inside. ► 1 . Spring for board 2. Spring for lever 3. Projection ► 1 . -
Page 18: Optional Accessories
OPTIONAL ACCESSORIES CAUTION: These accessories or attachments are recommended for use with your Makita prod- uct specified in this manual. The use of any other accessories or attachments might present a risk of injury to persons. Only use accessory or attachment for its stated purpose. If you need any assistance for more details regard- ing these accessories, ask your local Makita Service Center. - Page 20 Makita Europe N.V. Jan-Baptist Vinkstraat 2, 3070 Kortenberg, Belgium Makita Corporation 3-11-8, Sumiyoshi-cho, Anjo, Aichi 446-8502 Japan 885745-225 www.makita.com 20190802...