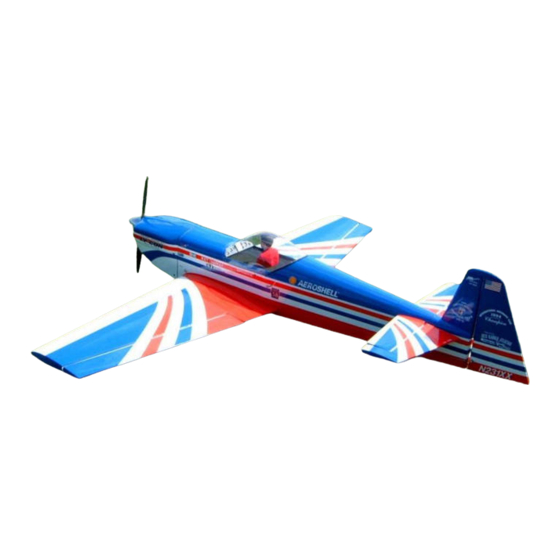
Lanier R/C CAP 232 Instruction Manual
Almost-ready-to-fly (arf)
Hide thumbs
Also See for CAP 232:
- Instruction manual (24 pages) ,
- Assembly instructions manual (22 pages) ,
- Owner's manual (17 pages)
Advertisement
Quick Links
Lanier R/C
CAP 232
CAP 232
ALMOST - - READY
ALMOST
READY - - T O
T O - - FLY (ARF)
FLY (ARF)
I n s t r u c t i o n M a n u a l
I n s t r u c t i o n M a n u a l
IMAA & IMAC Legal
IMAA & IMAC Legal
O v e r a l l f u s e l a g e l e n g t h : 7 9 - - 1 / 8 "
O v e r a l l f u s e l a g e l e n g t h : 7 9
1 / 8 "
R e q u i r e d E n g i n e S i z e : 1 . 5 0 t o 3 . 2 2 - - s t r o k e
R e q u i r e d E n g i n e S i z e : 1 . 5 0 t o 3 . 2 2
s t r o k e
1 . 6 0 t o 3 . 0 4 - - s t r o k e
1 . 6 0 t o 3 . 0 4
s t r o k e
F u s e l a g e L e n g t h : 5 9
F u s e l a g e L e n g t h :
5 9 - - 3 / 8 "
3 / 8 "
F l y i n g W e i g h t : 1 2 t o 1 7 l b s .
F l y i n g W e i g h t : 1 2 t o 1 7 l b s .
W i n g s p a n : 8 0 "
W i n g s p a n : 8 0 "
W i n g A r e a 1 2 6 5 s q . i n .
W i n g A r e a 1 2 6 5 s q . i n .
R a d i o : 4 - - c h a n n e l w i t h 5 S t a n d a r d S e r v o s
R a d i o : 4
c h a n n e l w i t h 5 S t a n d a r d S e r v o s
Lanier R/C, inc.
P.O. Box 458 Oakwood, GA
30566 Phone 770-532-6401
Fax 770-532-2163
Advertisement

Related Manuals for Lanier R/C CAP 232


Summary of Contents for Lanier R/C CAP 232
- Page 1 Lanier R/C CAP 232 CAP 232 ALMOST - - READY ALMOST READY - - T O T O - - FLY (ARF) FLY (ARF) I n s t r u c t i o n M a n u a l I n s t r u c t i o n M a n u a l IMAA &...
- Page 2 Lanier R/C PARTS LIST: 1 LEFT WING PANEL 14 ENGINE BOX BOTTOM 2 RIGHT WING PANEL 15 TRI-STOCK REINFORCEMENT 3 LEFT AILERON 16 HARDWARE PACKS: 4 RIGHT AILERON WING HARDWARE 5 FIBERGLASS COWL TAIL HARDWARE 6 ALUMINUM TUBE WING SPAR...
- Page 3 Lanier R/C Thank you for purchasing our Cap 232 ARF. Before you 3. Install a #6 flat washer on a #6 –32 x 1-3/4” Pan Hd. begin, please read through this manual and familiarize Screw. Insert the screw into to hole on the topside of the yourself with what you have to do.
- Page 4 Lanier R/C 6. Prepare the servo to be mounted in the servo well on them for the control horns. They are located very close to the the wing. Locate the threaded pushrods and thread a hex nut leading edge of the surfaces. Drill out each hole with a #28 on each each of each.
- Page 5 Lanier R/C 5. Mark the fuselage outline with a felt tip pen while stab is bolted in place. 3. Locate the Stab hold down bolt and remove it. At this time you should determine whether you want to keep it removable or glue in on permanently.
- Page 6 Lanier R/C #2 x ½” sheet metal screws (not supplied) Locate the short pushrods for the elevators and cut 3/8” off both ends of each one. A Dremel cut-off wheel works fine here. Mount a #4 hex nut on the end of each pushrod. Now mount a 4-40 clevis on the ends of each..
- Page 7 Lanier R/C 4. Mount the wheel axles on the landing gear struts. Tighten the lock nuts securely. L a n d i n g G e a r H a r d w a r e L a n d i n g G e a r H a r d w a r e 1.
- Page 8 Lanier R/C Locate the two wheel pants. Clean out the epoxy from 8. Mount the wheel pant to the landing gear. First slip a the ½” hole with a burring tool so that you have a nice round 5/32 wheel collar on the axle. Start the axle thru the ½” hole ½”...
- Page 9 Lanier R/C 6. Enlarge the four ¼” holes with a 5/16” drill bit. Install four, 10-32 T-nuts. 7. Apply thick CA to the edges of the T-nuts to hold them in place. Install ½” tri-stock balsa pieces to reinforce the firewall.
- Page 10 Lanier R/C M O U N T I N G T H E C O W L M O U N T I N G T H E C O W L Although the cowl comes painted, it needs more work on it before it is ready to install.
- Page 11 Lanier R/C 4 If you intend to install a pilot and instrument panel now is the time to do it. Paint the visible surface on the M O U N T I N G T H E C A N O P Y...
- Page 12 Lanier R/C 3. Glue the mount to the side of the engine box using thick CA or epoxy. Locate it 1-3/8” down from the top edge of the engine box side and 3-3/8” from the inside of the firewall to the front edge of the mount.
- Page 13 Lanier R/C 3. Locate the tank mount and the two tie straps. Thread Fuel Tank Parts the ties through the holes as shown and center them. Mix up some 5-min. epoxy and glue the mount to the engine box sides and wing tube housing. Center the mount over the tube housing keeping it parallel with the top edge of the fuselage.
- Page 14 Lanier R/C ¼” drill bit to recess the screw head f l ush with the wing surface. Slide the aluminum wing spar into the fuselage centering it. Now slide on a wing panel pushing it up against the fuselage. Grab the tube on the opposite side and push, with a twisting motion, inward to make sure it is bottomed keeping the wing panel against the fuselage.
- Page 15 Lanier R/C gun will take them out when used with care. Your Cap 232 is covered with UltraCote, the finest film covering available today! I n s t a l l i n g t h e R a d i o I n s t a l l i n g t h e R a d i o When using two servos on the elevator, a “Y”...
- Page 16 Lanier R/C (2) #6 – 32 x 1” Soc Hd. Cap screw (to hold wings on 14” plastic tie strap spar) firewall 4-1/8” x 4-13/16” birch ply engine box bottom 5-5/16” x 6-1/2” lite ply (laser T a i l...