AEG BPK552220M User Manual
Hide thumbs
Also See for BPK552220M:
- User manual (44 pages) ,
- User manual (44 pages) ,
- User manual (40 pages)
Table of Contents
Advertisement
Advertisement
Table of Contents

Related Manuals for AEG BPK552220M


Summary of Contents for AEG BPK552220M
- Page 1 BPK552220M User Manual Oven USER MANUAL...
- Page 2 Failure to strictly adhere to the requirements in this manual may result in personal injury, property damage and affect your ability to make a claim under the AEG manufacturer’s warranty provided with your product. Products must be used, installed and operated in accordance with this manual.
-
Page 3: Table Of Contents
15. WARRANTY ......................38 FOR PERFECT RESULTS Thank you for choosing this AEG product. We have created it to give you impeccable performance for many years, with innovative technologies that help make life simpler features you might not find on ordinary appliances. Please spend a few minutes reading to get the very best from it. -
Page 4: Children And Vulnerable People Safety
ENGLISH damages that are the result of incorrect installation or usage. Always keep the instructions in a safe and accessible location for future reference. 1.1 Children and vulnerable people safety This appliance can be used by children aged from 8 •... -
Page 5: Conditions Of Use
Before carrying out any maintenance, disconnect the • appliance from the power supply. WARNING: Ensure that the appliance is switched off • before replacing the lamp to avoid the possibility of electric shock. Do not use the appliance before installing it in the •... -
Page 6: Electrical Connection
ENGLISH • Do not pull the appliance by the • The electrical installation must have handle. an isolation device which lets you • Keep the minimum distance from disconnect the appliance from the other appliances and units. mains at all poles. The isolation •... - Page 7 – do not put aluminium foil directly abrasive cleaning pads, solvents or on the bottom of cavity of the metal objects. appliance. • If you use an oven spray, follow the – do not put water directly into the safety instruction on it's packaging.
-
Page 8: Product Description
ENGLISH maximum temperature operation household appliances only. Do not to a well ventilated area. use it for house lighting. • Small pets can also be highly sensitive • Before replacing the lamp, disconnect to the localized temperature changes the appliance from the power supply. in the vicinity of all Pyrolytic Ovens •... -
Page 9: Control Panel
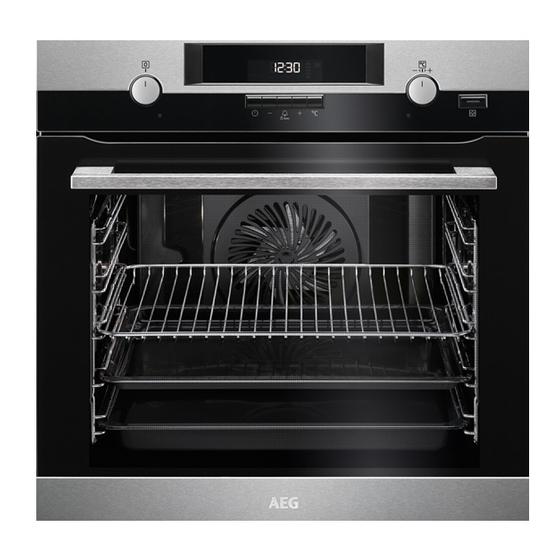
4.2 Accessories For roasting and grilling. Use the trivet only with the Wire shelf Grill- / Roasting pan. Food Sensor For cookware, cake tins, roasts. Grill- / Roasting pan To measure the temperature inside food. To bake and roast or as a pan to collect fat. -
Page 10: Before First Use
ENGLISH Sensor field / Button Function Description TEMPERATURE To check the oven temperature or the temperature of the core temperature sen- sor (if applicable). Use only while an oven function is in operation. PLUS STEAM To turn on the True Fan Cooking PLUS function. - Page 11 Oven function Application Oven function Application To bake on up to three This function is designed shelf positions at the to save energy during same time and to dry cooking. For the cooking Moist Fan Bak- food. instructions refer to Set the temperature 20 - "Hints and tips"...
-
Page 12: Fast Heat Up
ENGLISH 7.3 Setting a heating function 2. Set the function: 3. Press: Plus Steam 1. Turn the knob for the heating It works only with the function: True Fan functions to select a heating function. Cooking PLUS. 2. Turn the control knob to select the The indicator turns on. -
Page 13: Clock Functions
8. CLOCK FUNCTIONS 8.1 Clock functions table The display shows and the set hour. "00" flashes. Clock func- Application 3. Press to set the current tion minutes. 4. Press to confirm or the set time of To show or change the day will be saved automatically after time of day. -
Page 14: Using The Accessories
ENGLISH 8.5 Setting the TIME DELAY 1. Press again and again until function "00" flash in the display. 2. Press to set the seconds 1. Set a heating function. and than the minutes. 2. Press again and again until When the time you set is longer than starts to flash. - Page 15 When you use the core temperature Every time you put the core sensor for the first time, the default core temperature sensor in the temperature is 60 °C. socket, you need to set the While flashes, you can use the knob...
-
Page 16: Changing The Temperature
ENGLISH WARNING! There is a risk of burns as the core temperature sensor becomes hot. Be careful when you unplug it and remove it from the dish. Changing the temperature during the cooking You can change the temperature at any time during the cooking: 1. -
Page 17: Additional Functions
You can use the trivet to roast larger pieces of meat or poultry on one shelf position. 1. Put the trivet into the deep pan so that the supports of the wire shelf point up. Wire shelf and deep pan together:... -
Page 18: Hints And Tips
ENGLISH 10.2 Using the Function Lock the temperature in the oven is more than 40 °C.Turn the knob for the temperature You can turn on the Function Lock left or right to check the oven function only when the oven operates. temperature. - Page 19 11.2 Inner side of the door Food regeneration Use the second shelf position. On the inner side of the door you can Use 100 ml of water. find: Set the temperature to 110 °C. • the numbers of the shelf positions.
-
Page 20: Tips On Baking
ENGLISH 11.5 Tips on baking Baking results Possible cause Remedy The bottom of the cake The shelf position is incor- Put the cake on a lower shelf. is not baked sufficiently. rect. The cake sinks and be- The oven temperature is Next time set slightly lower oven comes soggy or streaky. - Page 21 Use the function: True Fan Cooking. Food Tempera- Time Use the baking tray. ture (°C) (min) Food Tempera- Time Fruit flans made of 160 - 170 40 - 80 ture (°C) (min) short pastry Cake with crumble 150 - 160...
- Page 22 ENGLISH Food Tempera- Time Food Tempera- Time ture (°C) (min) ture (°C) (min) Short pastry bis- 150 - 160 10 - 20 Pastries made of 80 - 100 120 - 150 cuits egg white / Mer- ingues Rolls, preheat 10 - 25 the empty oven Biscuits Preheat the empty oven.
- Page 23 Use the third shelf position. (°C) (min) Pasta gratin 200 - 220 45 - 55 Potato gratin 180 - 200 70 - 85 Moussaka 170 - 190 70 - 95 Lasagne 180 - 200 75 - 90 Cannelloni 180 - 200...
-
Page 24: Roasting Tables
ENGLISH Food Temperature Time (min) Shelf position (°C) 2 positions 3 positions Puff pastries 170 - 180 30 - 50 1 / 4 preheat the empty oven Biscuits made of 160 - 170 30 - 60 1 / 4 yeast dough Macaroons 100 - 120 40 - 80... - Page 25 Beef Food Quantity Function Temperature Time (min) (°C) Pot roast 1 - 1.5 kg Conventional 120 - 150 Cooking / Top / Bottom Heat Roast beef or fillet, per cm of thick- Turbo Grilling 190 - 200 5 - 6...
- Page 26 ENGLISH Food Quantity (kg) Temperature (°C) Time (min) Saddle / Hare leg, up to 1 30 - 40 preheat the empty oven Venison saddle 1.5 - 2 210 - 220 35 - 40 Haunch of venison 1.5 - 2 180 - 200 60 - 90 Poultry Use the function: Turbo Grilling.
-
Page 27: Frozen Foods
11.14 Frozen Foods Use the function: True Fan Cooking. Food Temperature (°C) Time (min) Shelf position Pizza, frozen 200 - 220 15 - 25 Pizza American, frozen 190 - 210 20 - 25 Pizza, chilled 210 - 230 13 - 25... - Page 28 ENGLISH Food Quantity (kg) Defrosting time (min) Further defrosting time (min) Cream, whip the 2 x 0.2 80 - 100 10 - 15 cream when still slightly frozen in pla- Gateau 11.16 Preserving - Bottom • The jars cannot touch each other. •...
- Page 29 11.17 Drying - True Fan Cooking Food Tempera- Time ture (°C) Cover trays with grease proof paper or baking parchment. Mushrooms 50 - 60 6 - 8 For a better result, stop the oven halfway Herbs 40 - 50...
- Page 30 ENGLISH Mutton / lamb Food core temperature (°C) Less Medium More Mutton leg Mutton saddle Roast lamb / Lamb leg Game Food core temperature (°C) Less Medium More Hare saddle / Venison saddle Hare leg / Hare, whole / Venison Poultry Food core temperature (°C) Less...
- Page 31 Casseroles - Sweet Food core temperature (°C) Less Medium More White bread casserole with / with- out fruit / Rice porridge casserole with / without fruit / Sweet noodle casserole 11.19 Information for test institutes Tests according to EN 60350 and IEC 60350.
-
Page 32: Care And Cleaning
ENGLISH Multilevel Baking. Biscuits Food Function Temperature Time Shelf position (°C) (min) 2 posi- 3 posi- tions tions Short bread / Pastry True Fan Cooking 25 - 45 1 / 4 1 / 3 / strips Small cakes, 20 per True Fan Cooking 23 - 40 1 / 4... -
Page 33: Cleaning The Cavity
12.2 Cleaning the cavity Install the removed accessories in the opposite sequence. embossment 12.4 Pyrolysis The cleaning procedure removes limestone residue from the cavity CAUTION! embossment after cooking with steam. Do not start the Pyrolysis if For the function: True Fan... -
Page 34: Cleaning Reminder
ENGLISH You can use the END function to delay 5. Put the door with the outer side the start of the cleaning. down on a soft cloth on a stable During the pyrolysis the oven lamp is off. surface. 5. To change the default length of the 6. -
Page 35: Troubleshooting
1. Turn off the oven. Wait until the oven is cooled down. A B C 2. Disconnect the oven from the mains. 3. Put a cloth on the bottom of the cavity. The top lamp 1. Turn the lamp glass cover to remove 2. - Page 36 ENGLISH Problem Possible cause Remedy The oven does not heat up. The fuse is blown. Make sure that the fuse is the cause of the malfunction. If the fuse is blown again and again, contact a quali- fied electrician. The lamp does not operate. The lamp is defective.
- Page 37 Problem Possible cause Remedy There is no good cooking You did not fill the cavity Refer to "Activating the performance using the func- embossment with water. function: True Fan Cooking tion: True Fan Cooking PLUS". PLUS. You want to activate the You did not select the heat- Refer to "Activating the...
-
Page 38: Energy Efficiency
ENGLISH Problem Possible cause Remedy The appliance is activated The demo mode is activa- 1. Deactivate the oven. and does not heat up. The ted. 2. Press and hold the but- fan does not operate. The display shows "Demo". 3. The first digit on the dis- play and Demo indicator start to blink. -
Page 39: Warranty
This document sets out the terms and this warranty; conditions of the product warranties ‘you’ means the purchaser of the for AEG Appliances. It is an important Appliance not having purchased document. Please keep it with your the Appliance for re-sale, and proof of purchase documents in a safe ‘your’... - Page 40 ENGLISH defective. Electrolux may, in its In addition, Electrolux is not absolute discretion, choose whether liable under this warranty if: the remedy offered for a valid – the Appliance has been, or warranty claim is repair or Electrolux reasonably believes replacement.
-
Page 41: Environmental Concerns
Consumer exchange information in relation to Guarantee Act does not apply. you to enable Electrolux to meet its 11. Confidentiality: You accept that if obligations under this warranty. you make a warranty claim, Electrolux and its agents including ASC may... - Page 42 www.aeg.com/au...