Advertisement
Quick Links
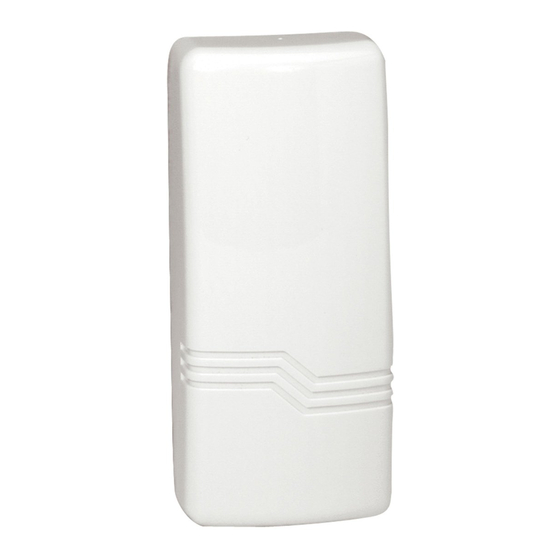
ADEMCO 5817CBXT
Installation Instructions
General Information
The 5817CBXT is a universal contact-monitoring transmitter that can be used with household and commercial fire and burglary-initiating devices
such as door/window contacts, motion and glassbreak detectors, sprinkler water flow switches, tamper switches, post indicator valves, manual pull
stations, and remote duct detectors. The 5817CBXT has three unique input loops (zones).
Loop 1: Supervised and typically used for high-priority alarm reporting such as commercial fire or burglary. It requires a 470K ohm end-of-line
resistor (PN EOLR 470K) to be placed across the sensor. Short circuit reports as loop 1; open circuit reports as loop 4 (tamper). Response
time is approx. 320mS.
Loop 2: Built-in, normally closed reed switch (used in conjunction with a magnet).
Loop 3: Normally closed household burglary loop. Response time is approx. 320mS.
Loop 4: Tamper loop (automatically enrolled) contains two tamper switches. A built-in cover tamper switch is activated when the cover is removed.
A unit tamper switch is activated if the unit is separated from its mounting plate.
1
Programming
The 5817CBXT has a built-in serial number that must be enrolled in the control panel prior to its usage in the alarm system. Assign loops 1-3 to
individual zones respectively. Refer to the control panel's installation instructions for specific programming procedure.
When programming the 5817CBXT transmitter, set as Input Type "RF" (i.e., supervised RF) (mandatory for UL installations).
NOTE: DIP switch 1 must be set to OFF during enrollment.
2
Mounting
• Signal strength may vary from location to location. Before mounting the transmitter permanently, conduct Go/No Go tests (see control's
instructions) to verify adequate signal strength from this location.
• When a satisfactory location is found, remove the battery and proceed with installation.
IMPORTANT: Do not mount the transmitter on or near metal objects, as this may affect transmission range. It is also good practice to
avoid locating the transmitter near wiring such as AC, telephone, HVAC, computer data cables, etc.
1. Remove the tamper switch hold down tab from the mounting
plate and set it aside. It will be needed if not using the mounting
plate.
2. Remove the transmitter's cover using the flat blade of a small
screwdriver in the pry-off slot and twisting. To replace the cover,
engage the hooks along the top edge and snap shut.
3. Disengage the mounting plate from the case back by inserting
the blade of a small screwdriver into the mounting plate release hole
(see Figure 3) and pushing the locking tab out (see Figure 1). Slide
the mounting plate downward along the case back.
4. For Concealed Wiring: Feed the wires through the concealed
wiring entry hole at the bottom corner of the mounting plate (and/or
case back).
For Surface Wiring: Remove the knockout slot in the case back
(near loop 3 terminal block).
Do not connect the wiring to the terminal block(s) yet.
5. If Using the Mounting Plate (for easy removal later for servicing):
a. Install the mounting plate in the location determined, with its case-
holding posts pointing up. Use two flat head dry-wall screws.
NOTE: To ensure proper operation of the unit's back tamper, the
screws must be anchored to a wall stud or other solid wood
material.
b. Attach the case back to the mounting plate by sliding the keyhole
slots in the case back down onto the mounting plate's holding
posts. The locking tab clicks as the case back locks in place.
If Not Using the Mounting Plate:
a. Make note of the location of the tamper switch hold-down as shown
in Fig. 1 for the proper placing of the hold-down tab in Fig. 2.
b. Remove the PC board from the case back. Slide a small flat
bladed screwdriver between the case back and PC board near
the board hold-down clip and carefully pry the board out.
c. In the area that was marked, install the hold-down tab with a 5/8"
flat head dry-wall screw. The tab must be aligned with the
corresponding slot in the case back as shown in Figure 2. The tab
as well as the case back must be anchored to a wall stud or other
solid wood material.
Wireless Commercial/Household Transmitter
Figure 1. Mounting Plate
Figure 3. 5817CBXT Transmitter, Top Cover Removed
NOTE: For UL commercial and household fire installations, only one
initiating device may be connected to this transmitter. For UL commercial
burglary installations, multiple initiating devices may be used as long as
the devices all serve the same function, such as door/window contacts,
motion or glassbreak detectors. All initiating devices must be located
within the same room.
No more than one wire per terminal may be connected.
Use only 14-22AWG wire.
Figure 2. Case Back
Advertisement

Summary of Contents for Honeywell ADEMCO 5817CBXT
-
Page 1: General Information
ADEMCO 5817CBXT Wireless Commercial/Household Transmitter Installation Instructions General Information The 5817CBXT is a universal contact-monitoring transmitter that can be used with household and commercial fire and burglary-initiating devices such as door/window contacts, motion and glassbreak detectors, sprinkler water flow switches, tamper switches, post indicator valves, manual pull stations, and remote duct detectors. - Page 2 WARRANTY Go to: http://www.security.honeywell.com/hsc/resources/wa/ DOCUMENTATION AND ONLINE SUPPORT Go to: http://www.security.honeywell.com/hsc/resources/MyWebTech/ 2 Corporate Center Drive, Suite 100 P.O. Box 9040, Melville, NY 11747 Ê800-18448nŠ Copyright 2014 Honeywell International Inc. 800-18448 5/14 Rev. B www.honeywell.com/security...


