
Related Manuals for Makita XLC01


Summary of Contents for Makita XLC01
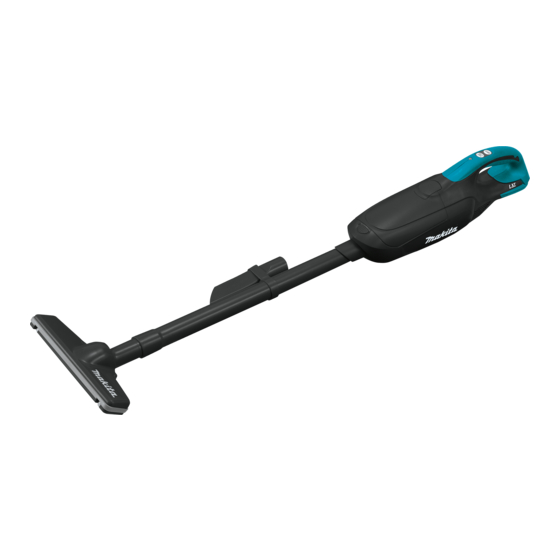
- Page 1 INSTRUCTION MANUAL MANUAL DE INSTRUCCIONES Cordless Cleaner Aspiradora Inalámbrica XLC01 IMPORTANT: Read Before Using. IMPORTANTE: Lea antes de usar.
-
Page 2: Specifications
ENGLISH (Original instructions) SPECIFICATIONS Model XLC01 Capacity with a dust bag 0.50 L with a paper pack 0.33 L Overall length 1,004 mm (39-1/2") Rated voltage D.C. 18 V Standard battery cartridges BL1815N BL1820B BL1830 / BL1840B BL1850B BL1860B BL1830B Continuous use (Approx.) -
Page 3: Additional Safety Rules
Do not pick up anything that is burn- Do not expose a battery pack or ing or smoking, such as cigarettes, appliance to fire or excessive tem- matches, or hot ashes. perature. Exposure to fire or tem- perature above 130 °C may cause Do not use without dust bag and/or explosion. - Page 4 (2) battery, and (3) product using Use the batteries only with the prod- battery. ucts specified by Makita. Installing Do not disassemble battery the batteries to non-compliant products cartridge. may result in a fire, excessive heat, If operating time has become explosion, or leak of electrolyte.
-
Page 5: Functional Description
Use of non-genuine Makita batteries, or batteries that DESCRIPTION have been altered, may result in the battery bursting causing fires, personal injury and damage. It will also void the Makita warranty for the Makita tool and CAUTION: charger. • Always be sure that the tool is switched off and... - Page 6 NOTE: Depending on the conditions of use and the CAUTION: ambient temperature, the indication may differ slightly • Always install the battery cartridge fully until the red indi- from the actual capacity. cator cannot be seen. If not, it may accidentally fall out of the tool, causing injury to you or someone around you.
- Page 7 ASSEMBLY CAUTION: • When closing the front cover, be careful not to pinch your fingers. CAUTION: • Always be sure that the tool is switched off and the battery cartridge is removed before carrying out any work on the tool. Disposing of Dust CAUTION: •...
- Page 8 There is no distinction between the upper and Installing dust bag lower sides of the dust bag. You may insert its protrusion of any side into the lower groove of the dust stopper. ► 1. Upper side of dust stopper 2. Lower side of dust stopper Overlap the frame of dust stopper with that of the Use the dust stopper when installing dust bag.
- Page 9 Place the entire cloth part of the dust bag inside Use the dust stopper also when installing paper pack. the tool itself. Be careful not to take the upper side for the lower side by mistake because they are different each other. ►...
-
Page 10: Operation
Overlap the frame of dust stopper with that of the OPERATION paper pack. CAUTION: • To connect attachments, such as nozzle, twist-insert attachment in direction of arrow to ensure secure connection during use. To dis- connect attachment, twist-extract also in direc- tion of arrow. -
Page 11: Maintenance
Nozzle + Extension wand (Straight pipe) Cleaning without nozzle The extension wand fits in between the nozzle and the You can pick up powder and dust without nozzle. cleaner itself. This arrangement is convenient for clean- ing a floor while standing erect. ►... - Page 12 Removing and installing the sponge Cleaning filter From time to time wipe off the outside (cleaner body) of ► 1. Sponge filter the cleaner using a cloth dampened in soapy water. Clean out also the suction opening, dust bag/paper To remove the sponge filter, remove the dust bag or pack mounting area and the dust stopper.
-
Page 13: Optional Accessories
NOTE: • Do not attempt to repair cleaner by yourself. To maintain product SAFETY and RELIABILITY, repairs, any other maintenance or adjustment should be performed by Makita Authorized or Factory Service Centers, always using Makita replacement parts. OPTIONAL ACCESSORIES CAUTION: •... -
Page 14: Especificaciones
ESPAÑOL (Instrucciones originales) ESPECIFICACIONES Modelo XLC01 Capacidad con una bolsa recolectora 0,50 l con un empaque de papel 0,33 l Longitud total 1 004 mm (39-1/2") Tensión nominal 18 V c.c. Cartuchos de batería estándar BL1815N BL1820B BL1830 / BL1840B BL1850B BL1860B BL1830B Uso continuo (Aprox.) - Page 15 No recoja nada que se esté que- En condiciones de mal uso, podría mando o desprenda humo, tal escapar líquido de la batería; evite como cigarros, fósforos o cenizas tocarlo. Si lo toca accidentalmente, calientes. enjuague con agua. Si el líquido entra en contacto con los ojos, No lo utilice sin la bolsa recolectora solicite adicionalmente atención...
-
Page 16: Reglas De Seguridad Adicionales
REGLAS DE No obstruya el orificio de flujo de entrada ni los orificios de ventilación. SEGURIDAD Este aparato no se destina para utilizarse por personas (incluyendo niños) cuyas capacidades físicas, ADICIONALES sensoriales o mentales sean dife- rentes o estén reducidas o carezcan Este aparato está... - Page 17 Asimismo, esto inva- corriente, sobrecalentamiento, lidará la garantía de Makita para la herramienta y el posibles quemaduras e incluso una cargador Makita. descompostura.
-
Page 18: Descripción Del Funcionamiento
Para quitar el cartucho de batería, deslícelo de la herra- DESCRIPCIÓN DEL mienta mientras desliza el botón sobre la parte delan- tera del cartucho. FUNCIONAMIENTO Para colocar el cartucho de batería, alinee la lengüeta sobre el cartucho de batería con la ranura en la carcasa y deslice en su lugar. - Page 19 Luz indicadora de la batería Luces indicadoras Capacidad restante Iluminadas Apagadas Parpadeando 75% a 100% 50% a 75% 25% a 50% 0% a 25% Cargar la batería. La batería pudo haber ► 1. Botón “OFF” de apagado 2. Botón HIGH/LOW funcionado para volúmen ALTO/BAJO de aire 3.
- Page 20 Saque tanto el tope para el polvo color naranja, como la bolsa recolectora de polvo en conjunto al mismo tiempo. ► 1. Cubierta frontal 2. Botón Presione el botón y abra la cubierta frontal. Abrirla ► 1. Tope para polvo hasta escuchar un clic permite un tope conve- niente en esa posición.
- Page 21 Use el tope para el polvo al colocar la bolsa recolectora. Empalme el marco del tope para el polvo con el Tenga cuidado de no confundir el lado superior con el de la bolsa recolectora. lado inferior debido a que éstos son diferentes entre sí. ►...
- Page 22 Inserte la parte saliente de la bolsa de papel para Instalación del empaque de papel polvo en la ranura del tope para el polvo tal como se muestra en la ilustración. Despliegue la entrada del empaque de papel ► 1. Ranura inferior antes de ajustarlo sobre el tope para el polvo.
-
Page 23: Operación
Coloque el tope para el polvo y la bolsa de papel para polvo de manera conjunta en la cavidad de la aspiradora, en la misma dirección de la flecha en el tope para el polvo. Insértelos por completo en las ranuras de la cavidad de la aspiradora. Aspirado (succión) Boquilla Inserte la boquilla para aspirar mesas, escritorios, mue-... -
Page 24: Mantenimiento
Boquilla de esquina MANTENIMIENTO Coloque la boquilla de esquina para aspirar esquinas y hendiduras en autos y muebles. PRECAUCIÓN: • Asegúrese siempre de que la herramienta esté apagada antes de intentar realizar una inspec- ción o mantenimiento. Luego del uso NOTA: •... - Page 25 ► 1. Pared acanalada Lave la bolsa recolectora en agua enjabonada cuando esta se haya tapado con el polvo o cuando disminuya Presione todo el borde del filtro de esponja contra la la potencia de la aspiradora. Déjela secar por completo pared hueca en el interior del área donde va colocada antes de usar.
-
Page 26: Accesorios Opcionales
No intente reparar la aspiradora usted mismo(a). Para mantener la SEGURIDAD y FIABILIDAD del producto, las reparaciones, y cualquier otra tarea de manteni- miento o ajuste deberán ser realizadas en Centros de Servicio Autorizados por Makita, empleando siempre repues- tos Makita. - Page 28 Para reducir la exposición a estos productos químicos: trabaje en un área bien ventilada y póngase el equipo de seguridad indicado, tal como las máscaras contra polvo que están especialmente diseñadas para filtrar partículas microscópicas. Makita Corporation 3-11-8, Sumiyoshi-cho, 885263A932 Anjo, Aichi 446-8502 Japan...