Table of Contents
Advertisement
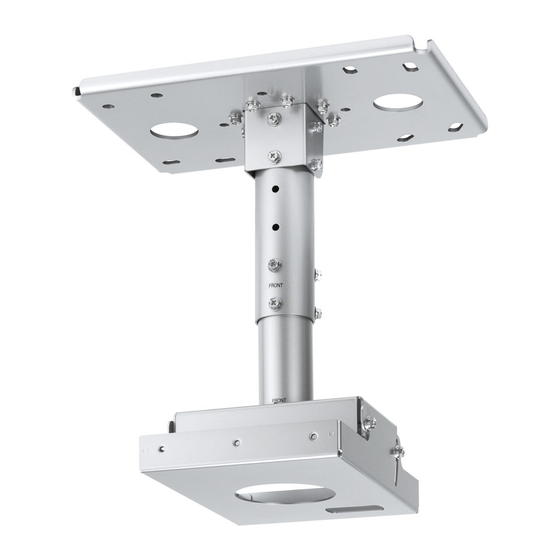
* The figure above shows a combination of this product and the separately sold ET-PKD120B projector mount bracket.
* Unless specified otherwise, the ET-PKD120B is used in the illustrations of the projector mount bracket in these instructions.
Thank you for purchasing this Panasonic product.
■ To customers
The "Installation Instructions" is intended for use by installation personnel. Be sure to employ certified personnel to perform
the installation.
After installation, have the installation personnel return these "Installation Instructions" to you, and save it for future use.
When moving or removing the projector, give this manual to the certified personnel and have them perform the procedure.
■ To installation personnel
Read the "Installation Instructions" thoroughly and then perform the operation correctly and safely.
Be sure to read through the section entitled "Read this first!" (page 3) before proceeding with the installation.
After installation, return these "Installation Instructions" to the customer.
Installation Instructions
Ceiling Mount Bracket (for High Ceilings)
Model No.
ET-PKD120H
TQZJ535-2
Advertisement
Table of Contents

Related Manuals for Panasonic ET-PKD120H


Summary of Contents for Panasonic ET-PKD120H
- Page 1 * The figure above shows a combination of this product and the separately sold ET-PKD120B projector mount bracket. * Unless specified otherwise, the ET-PKD120B is used in the illustrations of the projector mount bracket in these instructions. Thank you for purchasing this Panasonic product. ■ To customers The “Installation Instructions”...
-
Page 2: Table Of Contents
Contents Read this first! ....................3 Product description ................... 4 Installation ......................6 Setting up the screen ......................6 Screws tightening torques ....................6 Preparing the attachment plate ..................6 Installing the attachment plate to the ceiling ............... 7 Installing the brackets to the projector ................10 Suspending the projector .................... -
Page 3: Read This First
Electric shocks may result from contact with any metal objects inside the ceiling. ■ Panasonic disclaims all liability for any accidents or any damage caused by the installation of the ceiling mount bracket using methods that are not described in these Installation Instructions or methods that do not use the parts specified in these Instructions. -
Page 4: Product Description
Product description This is a ceiling mount bracket for installing projectors. Use this together with the projector mount bracket (sold separately). ■ Applicable projector mount bracket ET-PKE300B, ET-PKD130B, ET-PKD120B * Products other than the above may be supported. Refer to the installation instructions for your projector mount bracket. ■... - Page 5 Product description (continued) ■ The user must also obtain the following parts. (commercially-available) Installation work Required parts Page Installing to a Ceiling mount bolt (× 4), Hex nut (× 16), Flat washer (× 16), Installing the wooden structure Spring washer (× 8) attachment plate to the ceiling Installing to a...
-
Page 6: Installation
Installation After checking the height, width, and structure of the installation location, determine the appropriate positions for setting up the screen and installing the projector. Setting up the screen Set up the screen according to the specified method in a position which takes into account the projection distance and angle and the type of screen being used. -
Page 7: Installing The Attachment Plate To The Ceiling
Installation (continued) ■ Joining the adjustment poles 1 and 2 Insert the adjustment pole 1 into the adjustment pole 2, align the holes, and secure them with the supplied six captive washer hex head bolts (M6 × 16). z Align the “FRONT” inscription on the adjustment pole 1 with that on the adjustment pole 2. - Page 8 Installation (continued) ■ Installing the attachment plate Depending on whether it is installed on a concrete or wooden ceiling structure, there are two different installation methods. Carry out by the appropriate installation method which is suited to each ceiling. Attention z Make sure to use the ceiling mount bolts, hex nuts, flat washers, spring washers, anchoring nuts or curled plugs for M10.
- Page 9 Installation (continued) Installing to a concrete structure 1) Attach the anchoring nuts or curled plugs to a concrete ceiling and securely fix the four ceiling mount bolts. (Refer to page 7 for attachment Anchoring nut or curled positions.) plug z When installing anchoring nuts or curled plugs, strictly adhere to the installation instructions supplied by the manufacturer of the nuts so that Concrete ceiling...
-
Page 10: Installing The Brackets To The Projector
Installation (continued) Installing the brackets to the projector Install the angle adjusting bracket to the projector mount bracket (sold separately) that is pre-installed to the projector (sold separately). Note z The illustration depicts an ET-PKD120B projector mount bracket as an example. The installation procedure is the same for other projector mount bracket models. - Page 11 Installation (continued) Pole base To the screen (Front) 2) Insert the temporarily fastened captive washer hex “FRONT” inscription head bolts on either side into the hook section of the angle adjusting bracket. Attention z Hold the projector firmly until the captive washer Hook hex head bolts are securely placed in the hook part of the angle adjusting bracket.
-
Page 12: Attaching The Wire Rope To The Ceiling
Installation (continued) Attaching the wire rope to the ceiling Attach the other end of the wire rope attached to the projector to the ceiling. *These instructions assume installation in a concrete ceiling and use of M8 ceiling bolts, anchor nuts and curled plugs. -
Page 13: Adjusting The Installation Angle
Adjusting the installation angle z This ceiling mount bracket allows adjustment through horizontal rotation, and horizontal and vertical tilt. Adjustments should be carried out in order to make the center of the projector lens perpendicularly to the surface of the projection screen. z While referring to the operating instructions for the projector, project a picture onto the screen and then adjust the picture size and focus. - Page 14 Adjusting the installation angle (continued) ■ If the picture is tilted to the right or left (horizontal tilt adjustment) z Adjust to the position where the picture is not tilted by loosening the captive washer hex bolts fixing the projector mount bracket and the angle adjusting bracket (three locations in front and rear), and rotating the projector.
-
Page 15: Specifications
Specifications Height (from center of projector 451.5 mm - 531.5 mm (17-25/32" - 20-15/16") lens to ceiling) Range of Horizontal swing angle ±5° adjustment Vertical tilt angle 5° upward, 17° downward Horizontal tilt angle ±5° Width: 370 mm (14-9/16") External dimensions Height: 331 mm - 411 mm (13-1/32"... - Page 16 Panasonic Corporation Web Site : https://panasonic.net/cns/projector/ © Panasonic Corporation 2013 SS0513NK2048 -PJ Printed in Japan...