Table of Contents
Advertisement
Quick Links
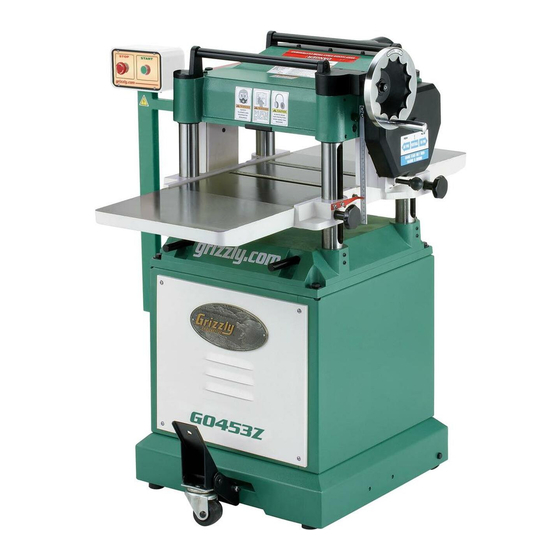
MODEL G0453Z/G0454Z
15" & 20" MOBILE PLANER
w/SPIRAL CUTTERHEAD
OWNER'S MANUAL
Model G0454Z Shown
COPYRIGHT © APRIL, 2009 BY GRIZZLY INDUSTRIAL, INC., REVISED JUNE, 2018 (HE)
WARNING: NO PORTION OF THIS MANUAL MAY BE REPRODUCED IN ANY SHAPE
OR FORM WITHOUT THE WRITTEN APPROVAL OF GRIZZLY INDUSTRIAL, INC.
(FOR MODELS MANUFACTURED SINCE 1/09) #TS11416 PRINTED IN CHINA
Advertisement
Table of Contents

Related Manuals for Grizzly G0453Z


Summary of Contents for Grizzly G0453Z
- Page 1 CUTTERHEAD OWNER'S MANUAL Model G0454Z Shown COPYRIGHT © APRIL, 2009 BY GRIZZLY INDUSTRIAL, INC., REVISED JUNE, 2018 (HE) WARNING: NO PORTION OF THIS MANUAL MAY BE REPRODUCED IN ANY SHAPE OR FORM WITHOUT THE WRITTEN APPROVAL OF GRIZZLY INDUSTRIAL, INC.
- Page 2 This manual provides critical safety instructions on the proper setup, operation, maintenance, and service of this machine/tool. Save this document, refer to it often, and use it to instruct other operators. Failure to read, understand and follow the instructions in this manual may result in fire or serious personal injury—including amputation, electrocution, or death.
-
Page 3: Table Of Contents
Machine Description ........2 Cleaning & Protecting ........28 Identification ........... 3 Lubrication ........... 29 Internal Components........4 G0453Z Machine Data Sheet ......5 SECTION 7: SERVICE ........31 G0454Z Machine Data Sheet ......7 Troubleshooting ........... 31 Rotating/Replacing ........34 SECTION 1: SAFETY ........ -
Page 4: Introduction
After the workpiece is completely free from the at www.grizzly.com. Any updates to your model outfeed roller, the depth of cut is increased and of machine will be reflected in these documents the workpiece is passed through the planer again. -
Page 5: Identification
If you have never used this type of machine or equipment before, WE STRONGLY RECOMMEND that you read books, review industry trade magazines, or get formal training before beginning any projects. Regardless of the content in this section, Grizzly Industrial will not be held liable for accidents caused by lack of training. -
Page 6: Internal Components
D. Chip Deflector: Directs chips into the dust along. hood. Planer Table: Provides a smooth and level E. Cutterhead: Holds the indexable car- path for the workpiece as it moves through bide inserts that remove material from the the planer. workpiece. Model G0453Z/G0454Z (Mfg. 1/09+) -
Page 7: G0453Z Machine Data Sheet
G0453Z Machine Data Sheet MACHINE DATA SHEET Customer Service #: (570) 546-9663 · To Order Call: (800) 523-4777 · Fax #: (800) 438-5901 MODEL G0453Z 15" 3 HP 240V PLANER WITH SPIRAL CUTTERHEAD Product Dimensions: Weight................................655 lbs. Width (side-to-side) x Depth (front-to-back) x Height............... 32-1/2 x 42 x 45-7/8 in. - Page 8 The information contained herein is deemed accurate as of 6/12/2018 and represents our most recent product specifications. Model G0453Z PAGE 2 OF 3 Due to our ongoing improvement efforts, this information may not accurately describe items previously purchased. Model G0453Z/G0454Z (Mfg. 1/09+)
-
Page 9: G0454Z Machine Data Sheet
The information contained herein is deemed accurate as of 6/12/2018 and represents our most recent product specifications. Model G0454Z PAGE 1 OF 3 Due to our ongoing improvement efforts, this information may not accurately describe items previously purchased. Model G0453Z/G0454Z (Mfg. 1/09+) - Page 10 The information contained herein is deemed accurate as of 6/12/2018 and represents our most recent product specifications. Model G0454Z PAGE 2 OF 3 Due to our ongoing improvement efforts, this information may not accurately describe items previously purchased. Model G0453Z/G0454Z (Mfg. 1/09+)
-
Page 11: Section 1: Safety
Be aware of running machinery. Never operate under the dust hazards associated with each workpiece influence of drugs or alcohol, when tired, or when material, and always wear a NIOSH-approved distracted. respirator to reduce your risk. Model G0453Z/G0454Z (Mfg. 1/09+) - Page 12 Contact our Technical Support Department at around flammables, or in poorly-lit areas. Keep (570) 546-9663. work area clean, dry, and well lighted to mini- mize risk of injury. -10- Model G0453Z/G0454Z (Mfg. 1/09+)
-
Page 13: Additional Safety Instructions For Planers
Use this machine with respect and caution to decrease the risk of operator injury. If normal safety precautions are overlooked or ignored, serious personal injury may occur. -11- Model G0453Z/G0454Z (Mfg. 1/09+) -
Page 14: Section 2: Circuit Requirements
This machine draws the following amps under source. If you must use an extension cord: maximum load: • Model G0453Z: Use at least a 12 gauge cord G0453Z Amp Draw ....... 15 Amps that does not exceed 50 feet in length. G0454Z Amp Draw........ 25 Amps •... -
Page 15: Section 3: Setup
Use this and other machinery with caution and respect. Failure to do so could result in serious per- sonal injury, damage to equipment, or poor work results. -13- Model G0453Z/G0454Z (Mfg. 1/09+) -
Page 16: Inventory
C. Foot Pedal ..........1 D. Handwheel ..........1 E. Caster ............1 Extension Wings ........2 G0453Z Hardware and Tools (not shown) • Set Screws M8-1.25 x 20 (Wings) ....4 • Hex Bolts M8-1.25 x 30 (Wings) ....6 •... -
Page 17: Clean Up
Children and visitors may be seriously injured if unsuper- vised around this machine. Lock entrances to the shop or disable start switch or power connection to prevent unsupervised use. Figure 5. Cleaner/degreasers available from Grizzly. -15- Model G0453Z/G0454Z (Mfg. 1/09+) -
Page 18: Lifting & Moving Planer
Figure 7. Lifting the planer with a forklift. Tip: When positioning the lift forks, place shop rags or cardboard between the forks and the cabi- net stand to avoid scratching the paint. -16- Model G0453Z/G0454Z (Mfg. 1/09+) - Page 19 Model G0453Z: Attach the dust hood to the holes and secure it with the hex nut. top of the planer with (3) M6-1 x 10 hex bolts,...
-
Page 20: Dust Collection
To check the gearbox oil reservoir: Remove the gearbox fill plug (see Figure 12). DO NOT operate the Model G0453Z/G0454Z without an adequate dust collection system. This planer creates substantial amounts of wood dust while operating. Failure to use a dust collection system can result in short and long-term respiratory illness. -
Page 21: Test Run
—If the machine does start (with the OFF button pushed in), immediately disconnect power to the machine. The OFF button safety feature is not working correctly. This safety feature must work properly before proceeding with regular operations. Call Tech Support for help. -19- Model G0453Z/G0454Z (Mfg. 1/09+) -
Page 22: Re-Tension V-Belts
Table height chain tension (Page 37). • Chip breaker height (Page 38). • • Pressure bar height (Page 38). • Infeed/outfeed roller height (Page 38). Roller spring tension (Page 41). • Chip deflector positioning (Page 41). • -20- Model G0453Z/G0454Z (Mfg. 1/09+) -
Page 23: Section 4: Operations
Regardless of the content in this section, Grizzly Industrial will not be held liable for accidents caused by lack of training. -21- Model G0453Z/G0454Z (Mfg. 1/09+) -
Page 24: Operation Overview
• When possible, plane both faces of the it to the infeed table and makes as many workpiece so that they will be parallel with passes as necessary, then turns the planer one another. OFF. -22- Model G0453Z/G0454Z (Mfg. 1/09+) -
Page 25: Workpiece Inspection
• Large/Loose Knots: Loose knots can become dislodged during the planing opera- tion. Large knots can cause kickback and machine damage. Always choose workpieces that do not have large/loose knots when plan- ing. -23- Model G0453Z/G0454Z (Mfg. 1/09+) -
Page 26: Wood Hardness
Red Mahogany 2697 • Push the knob in to use the high feed rate Rosewood 1780 (30 FPM for Model G0453Z, and 20 FPM for Red Pine 1630 Model G0454Z). Sugar Maple 1450 •... -
Page 27: Depth Of Cut
Use this and other machinery with caution and respect. Failure to do so could result in serious per- sonal injury, damage to equipment, or poor work results. -25- Model G0453Z/G0454Z (Mfg. 1/09+) - Page 28 Lower the table all the way to give yourself room to work. Loosen the set screws above each of the four roller adjustment hex bolts—two on each side (see Figure 19). Set Screws Adjustment Hex Bolts Figure 19. Bed roller height controls. -26- Model G0453Z/G0454Z (Mfg. 1/09+)
-
Page 29: Section 5: Accessories
⁄ ". 250 lb. capacity. These super heavy-duty roller stands feature con- venient hand knobs for fast height adjustment. G8983 G8985 Figure 23. G1029Z 2HP dust collector. G8984 Figure 21. SHOP FOX Roller Stands. ® -27- Model G0453Z/G0454Z (Mfg. 1/09+) -
Page 30: Section 6: Maintenance
Check/repair/replace worn or damaged wires. • Resolve any other unsafe condition. Every 40 Hours of Operation: • Lubricate the table columns and leadscrews (Page 29). • Clean/vacuum the dust buildup from inside the cabinet and off motor. -28- Model G0453Z/G0454Z (Mfg. 1/09+) -
Page 31: Lubrication
The bearings are standard sizes and can be replaced through Grizzly (refer to the Parts Column Dust Breakdowns beginning on Page 46 for bearing Sleeve identification). - Page 32 Use shop rags to clean away any debris and grime, then brush on a light coat of SAE 30W oil Fill Plug to the chain and sprockets. Figure 30. Gearbox fill plug. Figure 28. Drive chain and sprockets. -30- Model G0453Z/G0454Z (Mfg. 1/09+)
-
Page 33: Section 7: Service
1. Replace/realign belts with a matched set. vibration or noisy 2. V-belt(s) worn or loose. 2. Inspect/replace belts with a new matched set. operation. 3. Pulley loose. 3. Realign/replace shaft, pulley, setscrew, and key. 4. Motor mount loose/broken. 4. Tighten/replace. -31- Model G0453Z/G0454Z (Mfg. 1/09+) - Page 34 5. Properly adjust the bed roller height (Page 25). 5. Bed rollers set too high or low; not even with each other. 6. Misaligned chip breaker. 6. Adjust both sides of chip breaker to the correct height (Page 38). -32- Model G0453Z/G0454Z (Mfg. 1/09+)
- Page 35 3. Increase depth of cut (Page 25). Inconsistent chip 1. Chips are not being properly expelled from 1. Use an adequate dust collection system; adjust the marks. around the cutterhead. chip deflector in or out, depending upon your setup (Page 41). -33- Model G0453Z/G0454Z (Mfg. 1/09+)
-
Page 36: Rotating/Replacing
Torx screw, and the surrounding area. The carbide inserts are very sharp and can quickly cut your hands. ALWAYS use cau- tion and heavy leather gloves when handling these parts to reduce the risk of personal injury. -34- Model G0453Z/G0454Z (Mfg. 1/09+) -
Page 37: V-Belt Tensioning/Replacement
Remove the front cabinet panel to access the motor, as shown in Figure 32. When the V-belts are correctly tensioned, make sure the motor mount hex nuts are tight, then replace the cabinet cover and the belt cover. -35- Model G0453Z/G0454Z (Mfg. 1/09+) -
Page 38: Pulley Alignment
DISCONNECT PLANER FROM POWER! Remove both cabinet covers and the belt cover, then use the straightedge to check pul- ley alignment, as shown in Figure 34. Figure 34. Checking pulley alignment. -36- Model G0453Z/G0454Z (Mfg. 1/09+) -
Page 39: Table Height Chain Tension
Page 30 for detailed instructions). system underneath the table, as shown in Figure 35. Idler Sprocket Lock Bolts Figure 35. Table height idler sprocket and lock bolts (viewed from underneath the planer base). -37- Model G0453Z/G0454Z (Mfg. 1/09+) -
Page 40: Feed Rollers, Chip Breaker & Pressure Bar Heights
Figure 37. Using a Rotacator to find BDC. Move the feed speed knob to the neutral 0.040" 0.020" position to allow the infeed roller to freely rotate. (Bottom Dead Center) Figure 36. Planer component recommended clearances (illustration is not to scale). -38- Model G0453Z/G0454Z (Mfg. 1/09+) - Page 41 7–10 for the outfeed roller, but adjust it until & Set Screw it is 0.020" below the BDC of the cutterhead insert. Figure 40. Example of adjusting the pressure bar height. 13. Re-install the belt cover, top cover, and the dust hood. -39- Model G0453Z/G0454Z (Mfg. 1/09+)
- Page 42 Steps 6–8 above for each change in detailed instructions). distance as specified on Page 38. Place the wood blocks along the sides of the table, as illustrated in Figure 41. 36" Figure 41. Wood blocks properly positioned on the planer table. -40- Model G0453Z/G0454Z (Mfg. 1/09+)
-
Page 43: Roller Spring Tension
— If the distance measured in Step 3 is not equal to ⁄ ", then loosen the four hex bolts that secure the chip deflector and adjust the gap to ⁄ ". Figure 42. Roller spring tension adjustment cap screws. -41- Model G0453Z/G0454Z (Mfg. 1/09+) -
Page 44: Scale Calibration
& Pointer planer. DO NOT operate the planer if the anti-kickback fingers are not operating cor- rectly. Failure to heed this warning could result in serious personal injury. Figure 44. Table height scale. -42- Model G0453Z/G0454Z (Mfg. 1/09+) -
Page 45: Section 8: Wiring
The photos and diagrams included in this section are best viewed in color. You can view these pages in color at www.grizzly.com. -43- Model G0453Z/G0454Z (Mfg. 1/09+) -
Page 46: G0453Z Wiring Diagram
13no (from behind) Contactor NHD C09-D 220V 14no OL Relay NHD NTH17 14-17A MAN AUTO MAGNETIC SWITCH ASSEMBLY Start Capacitor MS1-09D 250MFD 250VAC Ground Capacitor 220V 40MFD 450VAC MOTOR READ ELECTRICAL SAFETY -44- Model G0453Z/G0454Z (Mfg. 1/09+) ON PAGE 43! -
Page 47: G0454Z Wiring Diagram
13no (from behind) Contactor NHD C25-D 220V 14no OL Relay NHD NTH-28 24-28A MAN AUTO MAGNETIC SWITCH ASSEMBLY Start Capacitor MS1-35D 300MFD 300VAC Ground Capacitor 220V 60MFD 400VAC MOTOR READ ELECTRICAL SAFETY Model G0453Z/G0454Z (Mfg. 1/09+) -45- ON PAGE 43! -
Page 48: Section 9: Parts
SECTION 9: PARTS G0453Z Headstock Breakdown 48-1 48-2 77-1 79-1 -46- Model G0453Z/G0454Z (Mfg. 1/09+) - Page 49 G0453Z Headstock Parts List REF PART # DESCRIPTION REF PART # DESCRIPTION P0453Z001 HANDLE P0453Z059 PHLP HD SCR M6-1 X 12 P0453Z002 HEX NUT M12-1.75 P0453Z060 CUT LIMIT PLATE P0453Z003 FLAT WASHER 12MM P0453Z061 FLAT HD SCR M6-1 X 8...
-
Page 50: G0453Z Table
EXTENSION WING P0453Z204 ECCENTRIC SHAFT P0453Z211 LOCK WASHER 8MM P0453Z205 SET SCREW M6-1 X 16 P0453Z212 FLAT WASHER 8MM P0453Z206 P0453Z213 HEX BOLT M8-1.25 X 30 P0453Z207 WEDGE DOG P0453Z214 SET SCREW M8-1.25 X 20 -48- Model G0453Z/G0454Z (Mfg. 1/09+) -
Page 51: G0453Z Columns
FLAT WASHER 8MM P0453Z312 LEADSCREW B P0453Z328 LIFTING BAR P0453Z313 LEAD NUT P0453Z329 EXT RETAINING RING 15MM P0453Z314 CAP SCREW M6-1 X 20 P0453Z330 CHAIN 12.7A X 134 P0453Z315 BUSHING P0453Z331 COLUMN SEAL P0453Z316 GEAR -49- Model G0453Z/G0454Z (Mfg. 1/09+) -
Page 52: G0453Z Gearbox
KEY 5 X 5 X 16 P0453Z419 EXT RETAINING RING 20MM P0453Z440 BALL BEARING 6204ZZ P0453Z420 BALL BEARING 6201ZZ P0453Z441 GEAR D P0453Z421 PHLP HD SCR M6-1 X 8 P0453Z442 SET SCREW M6-1 X 20 -50- Model G0453Z/G0454Z (Mfg. 1/09+) -
Page 53: G0453Z Stand
G0453Z Stand Breakdown 551-2 551-4 518-1 518-5V2 518-3V2 518-4V2 518-2 551-5 551-1 551-3 518V2 551V2 507-1 526 527 549A -51- Model G0453Z/G0454Z (Mfg. 1/09+) - Page 54 G0453Z Stand Parts List PART # DESCRIPTION PART # DESCRIPTION P0453Z501 STAND ASSEMBLY P0453Z531 SHAFT 12MM P0453Z502 BACK CABINET COVER P0453Z532 HEX BOLT M8-1.25 X 50 P0453Z503 FRONT CABINET COVER P0453Z533 FLAT WASHER 8MM P0453Z504 PHLP HD SCR M6-1 X 20 P0453Z534 HEX NUT M8-1.25...
-
Page 55: G0453Z Label Placement
MUST maintain the original location and readability of the labels on the machine. If any label is removed or becomes unreadable, REPLACE that label before using the machine again. Contact Grizzly at (800) 523-4777 or www.grizzly.com to order new labels. -53-... -
Page 56: G0454Z Headstock
G0454Z Headstock Breakdown 53-1 53-2 34 35 84-1 85-1 -54- Model G0453Z/G0454Z (Mfg. 1/09+) - Page 57 SPIRAL CUTTERHEAD ASSY 20" P0454Z094 HEX BOLT M6-1 X 16 53-1 P0454Z053-1 FLAT HD TORX T20 M6-1 X 15 P0454Z095 FLAT WASHER 6MM 53-2 P0454Z053-2 INDEXABLE INSERT 14 X 14 X 2 P0454Z096 INFEED ROLLER SPROCKET -55- Model G0453Z/G0454Z (Mfg. 1/09+)
- Page 58 STAR KNOB M8-1.25 P0454Z104 CUTTER PULLEY FLAT WASHER 8MM P0454Z115 OIL LEVEL LABEL P0454Z105 HEX BOLT M8-1.25 X 25 P0454Z118 DRIVER BIT TORX T20 P0454Z106 BELT GUARD P0454Z119 L-WRENCH TORX T20 P0454Z107 FLANGE BOLT M6-1 X 10 -56- Model G0453Z/G0454Z (Mfg. 1/09+)
-
Page 59: G0454Z Table
EXTENSION WING P0454Z204 ECCENTRIC SHAFT P0454Z211 LOCK WASHER 8MM P0454Z205 SET SCREW M6-1 X 12 P0454Z212 FLAT WASHER 8MM P0454Z206 P0454Z213 HEX BOLT M8-1.25 X 35 P0454Z207 WEDGE DOG P0454Z214 SET SCREW M8-1.25 X 20 -57- Model G0453Z/G0454Z (Mfg. 1/09+) -
Page 60: G0454Z Columns
DUST BOOT SEAL P0454Z314 CAP SCREW M8-1.25 X 20 P0454Z331 PHLP HD SCR M5-.8 X 10 P0454Z315 LEADSCREW BUSHING P0454Z332 DUST BOOT P0454Z316 COLUMN GEAR P0454Z333 CHAIN 08A-1 X 66 P0454Z317 KEY 4 X 4 X 12 -58- Model G0453Z/G0454Z (Mfg. 1/09+) -
Page 61: G0454Z Gearbox
KEY 5 X 5 X 16 P0454Z419 EXT RETAINING RING 20MM P0454Z440 BALL BEARING 6204ZZ P0454Z420 BALL BEARING 6201ZZ P0454Z441 GEAR D P0454Z421 PHLP HD SCR M6-1 X 8 P0454Z442 SET SCREW M6-1 X 20 -59- Model G0453Z/G0454Z (Mfg. 1/09+) -
Page 62: G0454Z Stand
G0454Z Stand Breakdown 517-5 517-1 517-3 517-4 517-2 550-2 550-4 550-5 550-1 550-3 549A 533 534 -60- Model G0453Z/G0454Z (Mfg. 1/09+) - Page 63 528-1 P0454Z528-1 HEX NUT 3/8-16 565V2 P0454Z565V2 E-STOP BUTTON 3-ARROW V2.01.11 P0454Z529 EXT RETAINING RING 9MM P0454Z566 TAP SCREW #10 X 3/8 P0454Z530 FLAT WASHER 12MM 567V2 P0454Z567V2 POWER CORD 12G 3W 72" L6-30P V2.08.12 -61- Model G0453Z/G0454Z (Mfg. 1/09+)
-
Page 64: G0454Z Label Placement
MUST maintain the original location and readability of the labels on the machine. If any label is removed or becomes unreadable, REPLACE that label before using the machine again. Contact Grizzly at (800) 523-4777 or www.grizzly.com to order new labels. -62-... - Page 65 Would you recommend Grizzly Industrial to a friend? _____ Yes _____No Would you allow us to use your name as a reference for Grizzly customers in your area? Note: We never use names more than 3 times. _____ Yes _____No 10.
- Page 66 FOLD ALONG DOTTED LINE Place Stamp Here GRIZZLY INDUSTRIAL, INC. P.O. BOX 2069 BELLINGHAM, WA 98227-2069 FOLD ALONG DOTTED LINE Send a Grizzly Catalog to a friend: Name_______________________________ Street_______________________________ City______________State______Zip______ TAPE ALONG EDGES--PLEASE DO NOT STAPLE...
-
Page 67: Warranty And Returns
WARRANTY AND RETURNS Grizzly Industrial, Inc. warrants every product it sells for a period of 1 year to the original purchaser from the date of purchase. This warranty does not apply to defects due directly or indirectly to misuse, abuse, negligence, accidents, repairs or alterations or lack of maintenance.