Table of Contents

Related Manuals for Cisco ISA3000-4C-K9


Summary of Contents for Cisco ISA3000-4C-K9
- Page 1 Cisco ISA 3000 Hardware Installation Guide March 2018 Americas Headquarters Cisco Systems, Inc. 170 West Tasman Drive San Jose, CA 95134-1706 http://www.cisco.com Tel: 408 526-4000 800 553-NETS (6387) Fax: 408 527-0883 Text Part Number:...
- Page 2 OR ITS SUPPLIERS HAVE BEEN ADVISED OF THE POSSIBILITY OF SUCH DAMAGES. Cisco and the Cisco logo are trademarks or registered trademarks of Cisco and/or its affiliates in the U.S. and other countries. To view a list of Cisco trademarks, go to this URL: www.cisco.com/go/trademarks.
-
Page 3: Table Of Contents
1-22 1 GB Removable SD Flash Memory Card 1-22 Alarm Ports 1-23 Installing the Cisco ISA 3000 Industrial Security Appliance 2-25 C H A P T E R Equipment, Tools, and Connections 2-25 Items Shipped with your Cisco ISA 3000... - Page 4 Contents Technical Specifications 4-45 C H A P T E R Device Specifications 4-45 MIB Information 4-46 Cisco ISA3000 Industrial Security Appliance Hardware Installation Guide...
- Page 5 Cisco ISA 3000 Industrial Security Appliance. Audience This guide is intended for people who have a high level of technical ability, although they may not have experience with Cisco software. Cisco ISA 3000 Industrial Security Appliance Hardware Installation Guide...
-
Page 6: Organization
Cisco ISA 3000 Industrial Security Appliance Hardware Installation Guide Organization This guide is organized into the following chapters. Chapter Name Description Chapter 1 Chapter 1, “Product Overview” Describes the security appliance models and the hardware features available. Chapter 2 Chapter 2, “Installing the Cisco ISA Lists the items shipped with the security 3000 Industrial Security Appliance”... -
Page 7: Safety Warnings
Cisco ISA 3000 Industrial Security Appliance Hardware Installation Guide Safety Warnings Caution If this product will be installed in a hazardous location, read the Getting Started/Printed Document of Compliance included in the package. IMPORTANT SAFETY INSTRUCTIONS Warning This warning symbol means danger. You are in a situation that could cause bodily injury. Before you work on any equipment, be aware of the hazards involved with electrical circuitry and be familiar with standard practices for preventing accidents. - Page 8 Cisco ISA 3000 Industrial Security Appliance Hardware Installation Guide Warnung WICHTIGE SICHERHEITSHINWEISE Dieses Warnsymbol bedeutet Gefahr. Sie befinden sich in einer Situation, die zu Verletzungen führen kann. Machen Sie sich vor der Arbeit mit Geräten mit den Gefahren elektrischer Schaltungen und den üblichen Verfahren zur Vorbeugung vor Unfällen vertraut. Suchen Sie mit der am Ende jeder Warnung angegebenen Anweisungsnummer nach der jeweiligen Übersetzung in den übersetzten Sicherheitshinweisen, die zusammen mit diesem Gerät...
- Page 9 Cisco ISA 3000 Industrial Security Appliance Hardware Installation Guide Varning! VIKTIGA SÄKERHETSANVISNINGAR Denna varningssignal signalerar fara. Du befinner dig i en situation som kan leda till personskada. Innan du utför arbete på någon utrustning måste du vara medveten om farorna med elkretsar och känna till vanliga förfaranden för att förebygga olyckor.
- Page 10 Cisco ISA 3000 Industrial Security Appliance Hardware Installation Guide Aviso INSTRUÇÕES IMPORTANTES DE SEGURANÇA Este símbolo de aviso significa perigo. Você se encontra em uma situação em que há risco de lesões corporais. Antes de trabalhar com qualquer equipamento, esteja ciente dos riscos que envolvem os circuitos elétricos e familiarize-se com as práticas padrão de prevenção de...
- Page 11 Cisco ISA 3000 Industrial Security Appliance Hardware Installation Guide Cisco ISA 3000 Industrial Security Appliance Hardware Installation Guide...
-
Page 12: Related Documentation
Cisco ISA 3000 Industrial Security Appliance Hardware Installation Guide Hot surface. Statement 1079 Warning Related Documentation ISA 3000 product page http://www.cisco.com/c/en/us/support/security/industrial-security-appliance-3000/model.html ASA documentation • Compatibility Matrix http://www.cisco.com/c/en/us/td/docs/security/asa/compatibility/asamatrx.html • Navigating the Cisco ASA Series Documentation http://www.cisco.com/c/en/us/td/docs/security/asa/roadmap/asaroadmap.html Cisco ISA 3000 Industrial Security Appliance Hardware Installation Guide... -
Page 13: Searching Cisco Documents
Obtaining Documentation and Submitting a Service Request For information on obtaining documentation, submitting a service request, and gathering additional information, see the monthly What’s New in Cisco Product Documentation, which also lists all new and revised Cisco technical documentation, at: http://www.cisco.com/en/US/docs/general/whatsnew/whatsnew.html... - Page 14 Cisco ISA 3000 Industrial Security Appliance Hardware Installation Guide Cisco ISA 3000 Industrial Security Appliance Hardware Installation Guide...
-
Page 15: Product Overview
C H A P T E R Product Overview This chapter provides an overview of the features available for the Cisco ISA 3000 and contains the following sections: • General Description, page 1-15 • SKU Information, page 1-21 • Hardware Overview, page 1-21... -
Page 16: Chapter 1 Product Overview
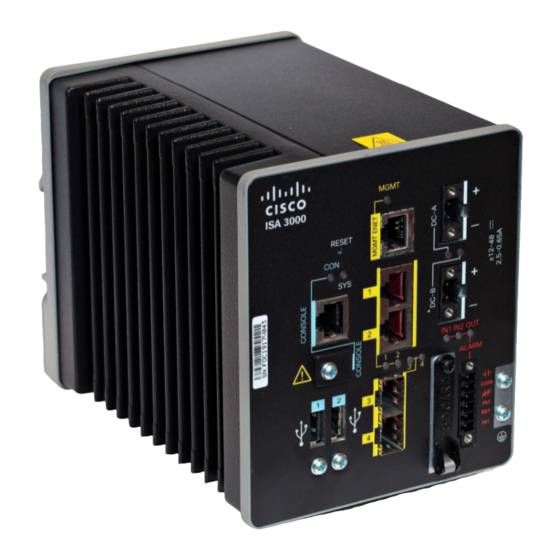
Chapter 1 Product Overview General Description Figure 1-1 Cisco ISA 3000 Copper SKU Cisco ISA 3000 Industrial Security Appliance Hardware Installation Guide 1-16... - Page 17 Chapter 1 Product Overview General Description Figure 1-2 Cisco ISA 3000 Fiber SKU Cisco ISA 3000 Industrial Security Appliance Hardware Installation Guide 1-17...
- Page 18 Chapter 1 Product Overview General Description Figure 1-3 shows the front panel details of the Cisco ISA 3000. Figure 1-3 Cisco ISA 3000 Front Panel 10 RJ45 10/100/100 BaseT Connectors 1&2 Reset Pinhole Access 11 On the ISA-3000-2C2F SKU, these are the Console LED SFP sockets.
- Page 19 Chapter 1 Product Overview General Description LEDs The following table describes the LEDs for the Cisco ISA3000. Table 1-1 LED Descriptions Activity Description System Power Status Off — No power Green Steady on — Normal operation Green Flashing — Boot up phase Red Flashing —...
-
Page 20: Leds
Management 1/1 in the configuration. Console Port The Cisco ISA 3000 can be configured through a web interface, or through the console port. The console port is either a RJ45 or a Mini USB connector. A standard management cable (Part number 72-3383-01) can be used to convert the RJ45 to DB9 connector. -
Page 21: Console Port
ISA-3000-2C2F Fiber SKU with 2x1GbE SFP and 2x10/100/1000Base-T with a management port. Hardware Overview This section provides an overview of the following hardware features for the Cisco ISA3000. • Hardware Features for the Cisco ISA 3000, page 1-21 • Reset Button, page 1-22 •... -
Page 22: Hardware Overview
1 GB Removable SD Flash Memory Card The Cisco ISA 3000 has a removable SD flash memory slot (referred to as SD). This is primarily to allow easy updates, copying of logs and crash-dumps. The device does not come with a removable SD flash memory card installed, this is an optional spare item, Cisco part number SD-IE-1GB=. -
Page 23: Power Supply
After the card is installed, close the guard door and fasten the captive screw using a Phillips screwdriver to keep the door in place. Alarm Ports The Cisco ISA 3000 has alarm ports as shown in Figure 1-3. There are two conditions that generate an alarm: •... -
Page 24: Alarm Ports
When the CPU temperature returns to a normal condition, the Alarm Out LED turns off. Note The critical range of temperature is not configurable. It is hard coded as below -40°C or above 105°C. Cisco ISA 3000 Industrial Security Appliance Hardware Installation Guide 1-24... -
Page 25: Equipment, Tools, And Connections
C H A P T E R Installing the Cisco ISA 3000 Industrial Security Appliance This chapter describes the equipment and the procedures for successfully installing the Cisco ISA 3000 and contains the following sections: • Equipment, Tools, and Connections, page 2-26 •... -
Page 26: C H A P T E R 2 Installing The Cisco Isa 3000 Industrial Security Appliance
Installing the Cisco ISA 3000 This section describes how to install the Cisco ISA 3000. This device can be installed on a table top or other flat horizontal surface mounted on a wall or DIN rail. -
Page 27: Installing A Din Rail
Installing the Cisco ISA 3000 Ground Connection, page 2-30 Installing a DIN Rail You can use either the 7.5-mm or the 15-mm thick DIN rail for the Cisco ISA 3000. Secure the DIN rail to the mounting surface approximately every 7.8 inches (200 mm) and use end-anchors appropriately. -
Page 28: Removing The Device From A Din Rail
Figure 2-1 ISA 3000 Rear Din Mount To attach the Cisco ISA 3000 to a DIN rail, follow these steps. Step 1 Position the rear panel of the device directly in front of the DIN rail, making sure that the DIN rail fits in the space between the two hooks near the top of the device and the spring-loaded latch near the bottom. -
Page 29: Mounting The Isa 3000 In A Rack
(#1). Step 2 Attach The device to the DIN rail built into the mounting bracket (#2) in the same manner as described Installing a DIN Rail. Cisco ISA 3000 Industrial Security Appliance Hardware Installation Guide 2-29... -
Page 30: Installing The Cisco Isa 3000 Ground Connection
Crimp the ground wire to the ring terminal using the wire crimper. See Figure 2-3. Figure 2-3 Crimping the Ring Terminal Step 4 Slide the ground screw through the terminal. Cisco ISA 3000 Industrial Security Appliance Hardware Installation Guide 2-30... - Page 31 Connect the other end of the ground wire to a known reliable earth ground point at your site. Step 8 Move on to the next chapter for instructions on connecting Ethernet devices and a network. Cisco ISA 3000 Industrial Security Appliance Hardware Installation Guide 2-31...
- Page 32 Chapter 2 Installing the Cisco ISA 3000 Industrial Security Appliance Installing the Cisco ISA 3000 Cisco ISA 3000 Industrial Security Appliance Hardware Installation Guide 2-32...
-
Page 33: Preparing To Connect The Cisco Isa 3000
Connecting Alarm Circuits, page 3-40 Preparing to Connect the Cisco ISA 3000 Before you connect the Cisco ISA 3000 to the devices, install the ISA 3000 according to the instructions Chapter 2, “Installing the Cisco ISA 3000 Industrial Security Appliance”. -
Page 34: Connecting A Pc To The Isa 3000 For Configuration
This section describes connecting to the console port. Refer to documentation that is provided for your operating system for connecting through the management port. To connect a PC to the console port on the Cisco ISA 3000 and access the CLI, follow these steps: Step 1 Choose which console connection will be used. -
Page 35: Usb Ports
Figure 3-2 mini-USB Cover Step 3 Connect the mini-USB side of a cable to the USB Console port on the Cisco ISA 3000. Step 4 Connect the opposite end of the mini-USB cable to the USB port on your PC. - Page 36 Measure two strands of twisted-pair copper wire long enough to connect the power converter to the DC power source. For DC connections from the power converter to the DC source, use 18 to 20 AWG (2.6mm) twisted-pair copper wire. Cisco ISA 3000 Industrial Security Appliance Hardware Installation Guide 3-36...
- Page 37 Use a ratcheting torque flathead screwdriver to torque the power connector captive screws (above the installed wire leads) to 2 in-lb (0.23 N-m). See Figure 3-6. Note Do not over-torque the power connector’s captive screws. The torque should not exceed 2 inch-lbs (0.23 N-m). Cisco ISA 3000 Industrial Security Appliance Hardware Installation Guide 3-37...
- Page 38 4 through 8 using the second power connector. Attaching the DC Power Connectors to the Device To attach the power connectors to the front panel of the device, follow these steps: Cisco ISA 3000 Industrial Security Appliance Hardware Installation Guide 3-38...
-
Page 39: Verifying Connections
For example, use tie wraps to secure the wires to the rack. Verifying Connections To verify that all devices are properly connected to the Cisco ISA 3000, first turn on all the connected devices, then check the LEDs. To verify Cisco ISA 3000 operation, refer to the following table:... -
Page 40: Connecting Alarm Circuits
An alarm output and the common wiring connection are required to complete a single alarm output circuit. The alarm connectors are on the device panel and are detailed in Table 3-2 Cisco ISA 3000 Industrial Security Appliance Hardware Installation Guide 3-40... - Page 41 Insert the exposed wires for the external alarm device into the connections based on an alarm input or output circuit setup. For example, to wire an alarm input circuit, complete the IN1 and REF connections in Figure 3-7 Cisco ISA 3000 Industrial Security Appliance Hardware Installation Guide 3-41...
- Page 42 IN1 and REF connections complete the circuit. The second alarm device circuit is wired as an alarm output circuit that works on a normally open contact basis; the NO and COM connections complete the circuit. Cisco ISA 3000 Industrial Security Appliance Hardware Installation Guide 3-42...
- Page 43 Insert the alarm connector into the receptacle on the device front panel. Step 2 Use a ratcheting torque flathead screwdriver to tighten the captive screws on the sides of the alarm 2 in-lb (0.23 N-m). connector. Torque to Cisco ISA 3000 Industrial Security Appliance Hardware Installation Guide 3-43...
- Page 44 Chapter 3 Connecting the ISA 3000 Connecting Alarm Circuits Cisco ISA 3000 Industrial Security Appliance Hardware Installation Guide 3-44...
-
Page 45: Device Specifications
Ultimate disposal of this product should be handled according to all national laws and Warning regulations. Statement 1040 Device Specifications Table 4-1 lists the operational limits of the Cisco ISA 3000. Operating the device outside of the limits specified is not supported. Table 4-1 Cisco ISA 3000 Specifications Description... -
Page 46: C H A P T E R 4 Technical Specifications
MIB Information MIBs supported for the device can be seen by going to the SNMP configuration guide URL: http://www.cisco.com/c/en/us/td/docs/security/asa/asa94/configuration/general/asa-general-cli/monitor -snmp.html From there you can find the network management MIBS URL: http://www.cisco.com/public/sw-center/netmgmt/cmtk/mibs.shtml Cisco ISA 3000 Industrial Security Appliance Hardware Installation Guide 4-46...