
Related Manuals for GE Druck DPI 800


Summary of Contents for GE Druck DPI 800
- Page 1 ® Advanced Test Equipment Rentals www.atecorp.com 800-404-ATEC (2832) Sensing Druck DPI 800/802 Pressure indicator and Pressure loop calibrator User manual - K335...
- Page 2 10 a, b, c DPI 802/802P K335 Issue 3...
-
Page 3: Table Of Contents
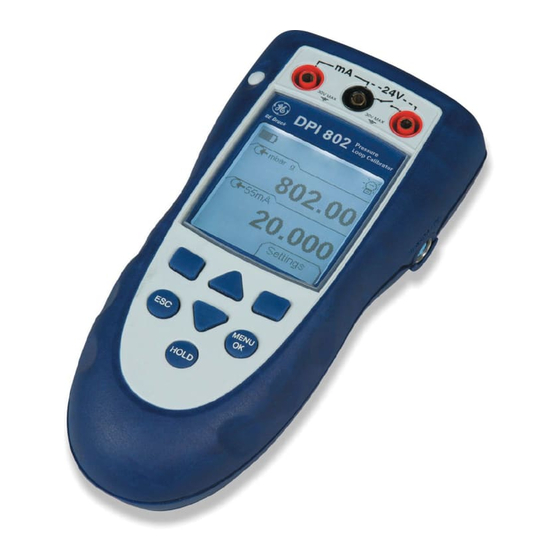
Table of Contents Introduction The DPI 800 Pressure Indicator and DPI 802 Pressure Loop Introduction ................. 1 Calibrator are part of the Druck DPI 800 series of hand held Safety ..................2 instruments. Marks and symbols on the instrument ......... 2 The DPI 800 series uses Intelligent Digital Output Sensor To start .................. -
Page 4: Safety
Safety To start Before you use the instrument, make sure that you read To start - Location of items … and understand all the related data. This includes: all local Item Description safety procedures, the instructions for the UMM (if On or off button. -
Page 5: Items On The Display
To start - Power on or off To start - Items on the display To turn the instrument on or off, press (A1 - item [1]). The Item Description instrument does a self test and then shows the applicable DPI 802/802P only. Task indication for the switch test. data. -
Page 6: Select A Task (Measure)
To start - Select a task (Measure) To start - Set up the settings When the instrument is set up (Table 1), use the Select Task When the task is set up (Table 2/3), use the Settings menu menu to select the applicable task. to adjust the measurement operation. -
Page 7: Edit Functions
Operation Table 4: (Part of table) Menu options - Settings This section gives examples of how to connect and use the Options Description instrument. Before you start: (If applicable) To select and set up the filter values to give a •... -
Page 8: Communications Port Connections
Operation - Communications port connections Operation - Leak test Use the communications port (A1 - item [9]) to attach an To do a leak test on a pressure system: IDOS Universal Measurement Module (UMM). 1. Connect the instrument (Figure 3) and, if necessary, When you attach the cable from a UMM (Figure 8), the adjust the Set Up (Table 1). -
Page 9: Switch Test
Operation - Switch test 4. For each calibration point, apply an applicable pressure and wait for the pressure system to stabilize. DPI 802/802P only. To do tests on a pressure switch: 5. Before you disconnect the instrument, isolate and 1. Connect the instrument (Figure 4) and, if necessary, bleed the system. -
Page 10: Ma Measurements
Operation - mA measurements Operation - UPM Pressure measurements DPI 802/802P only. To measure a current: Read all the instructions supplied with the UPM and then use the specified procedures to connect it (Figure 8). 1. Connect the instrument (Figure 7) and, if necessary, adjust the Set Up (Table 1). -
Page 11: Maintenance
IDOS ... UMM only. To calibrate the specified IDOS UMM. Refer to the user manual for the IDOS UMM. Note: GE can provide a calibration service that is traceable DPI 802/802P only. To calibrate the mA input. to international standards. -
Page 12: Procedures (Pressure P1/P2)
Calibration - Procedures (Pressure P1/P2) 5. Make sure that the error is in the specified limits: 1. Connect the instrument to the pressure standard • Standard accuracy: (Figure 2). The specified accuracy (refer to “Specification data”) includes an allowance for temperature changes, reading 2. -
Page 13: Specification Data
Specification data All accuracy statements are for one year. Specification - General Languages English [Default] BS EN 61326-1:1998 + A2:2001 Operating 14 … 122°F (-10 … 50°C) Safety Electrical - BS EN 61010:2001; temperature Pressure Equipment Directive - Class: Sound Engineering Practice (SEP);... -
Page 14: Electrical Connectors (A2)
Table 10: DPI 800 series pressure connections Ranges Pressure connections Pressure connections (One IDOS range) (Two IDOS ranges) g/d: ≤ 30 psi g (2 bar g) 1/8 NPT female (+ port) + 1/8 NPT female reference Two 1/8 NPT female (+ port) + 10-32 UNF reference Standard or Premier port OR port OR... -
Page 15: Customer Service
Customer Service Visit our web site: www.gesensing.com...