
Related Manuals for Breville Control Grip


Summary of Contents for Breville Control Grip
- Page 1 Control Grip ™ Instruction Book - BSB510XL BSB510XL_IB_B16.indd 1 7/11/2016 1:33 PM...
-
Page 2: Table Of Contents
RECOMMENDS hazard for young children, SAFETY FIRST remove and safely discard the protective cover fitted At Breville we are very safety to the power plug of this conscious. We design and appliance. manufacture consumer products with the safety of you, •... - Page 3 • Always ensure that the use of attachments not attachments are securely sold or recommended by fitted onto the motor body Breville may cause fire, before operation. Follow electric shock or injury. the instructions provided in this book. BSB510XL_IB_B16.indd 3...
- Page 4 • Always ensure the • Keep hands and utensils appliance is unplugged away from the moving from the power outlet blending blade and before attempting to chopping bowl blade assemble any of the while blending/chopping attachments. to prevent the possibility of severe injury to •...
- Page 5 • Avoid contacting moving • Strictly follow the care parts. and cleaning instructions described in this book. • To turn the appliance off, release the trigger switch • This appliance is for and remove the plug from household use only. the power outlet.
- Page 6 Immediately cease from pulling, tripping or use of the appliance becoming entangled with a and visit www.Breville. longer cord. com or call Breville If an extension cord is Consumer Support at used, (1) the marked 1-866-BREVILLE for electrical rating of the...
- Page 7 BREVILLE ASSIST PLUG ® Your Breville appliance comes with a unique Assist Plug, conveniently ® designed with a finger hole to ease removal from the power outlet. FOR HOUSEHOLD USE ONLY SAVE THESE INSTRUCTIONS BSB510XL_IB_B16.indd 7 7/11/2016 1:33 PM...
-
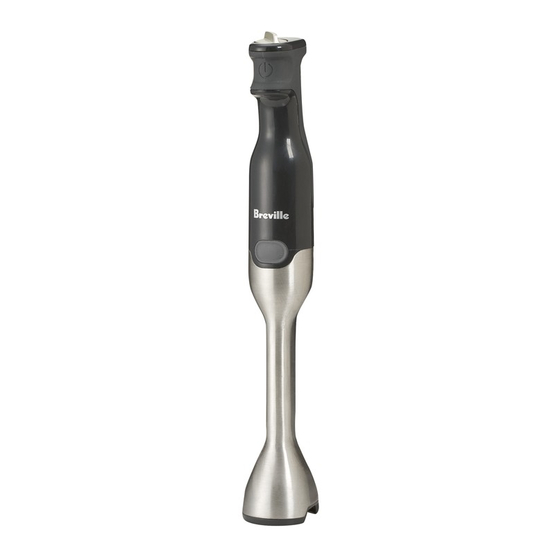
Page 8: Components
Components A. Motor body G. Stainless steel chopping blade B. Speed control dial H. Chopping bowl lid C. Control grip trigger switch I. Blending jug D. Blending shaft J. Whisk E. Stainless steel blending blade K. Dual-purpose storage lid and anti-slip mat F. -
Page 9: Functions
IMMERSION BLENDER Functions To attach the blending shaft Hold the blending shaft with the blades down, and align the top end of the blending shaft with BEFORE FIRST USE the corresponding end of the motor body and • Remove any packaging material and push until the blending shaft ‘clicks’... - Page 10 4. Place the blending shaft as deeply as Recommendations when using as an possible into the blending jug and press the immersion blender trigger switch to turn the stick blender on. • The stick blender mixes foods and liquids The button must be held for the required rapidly, therefore it is easy to over-process.
- Page 11 MINI CHOPPER To attach the chopping blade, chopping bowl and chopping bowl lid Remove the blending shaft from the motor body (follow the instructions on page 10 “To detach the blending shaft”). Place the chopping blade onto the metal pivot pin in the base of the chopping bowl.
- Page 12 WHISK 6. Ensure the blade has completely stopped before removing the lid from the chopping bowl. Carefully remove the chopping blade To attach the whisk and use a spatula to scrape off any attached Remove blending shaft from motor body food back into the chopping bowl.
- Page 13 4. Place the whisk into the blending jug Recommendations when using the stick and press the trigger switch to turn the blender with the whisk attachment whisk on. The button must be held for the • Do not allow the whisk to hit the bottom or required duration of operation.
-
Page 14: Care & Cleaning
WHISK Care & Cleaning Remove the power plug from power outlet before cleaning. Remove the motor body from whisk. The whisk can be hand washed in hot soapy water, rinsed and dried thoroughly after MOTOR BODY each use. Alternatively, the whisk can also be Remove the power plug from power outlet washed in the dishwasher. -
Page 15: Food Preparation Guide
Food Preparation Guide FOOD TYPE ATTACHMENT SPEED DURATION INSTRUCTIONS TYPE SETTING Milkshakes, smoothies, Blending shaft mid to 30 seconds Use Chilled milk. Blend until cocktails, fruit frappes maximum desired consistency is achieved. Soups, dips, baby food Blending shaft mid to 30 seconds Blend until smooth. - Page 16 Control Grip Manuel d'instructions - BSB510XL BSB510XL_IB_B16.indd 16 7/11/2016 1:33 PM...
- Page 17 IMPORTANTES Table des MESURES DE matières SÉCURITÉ 17 Breville vous recommande la sécurité avant tout LISEZ TOUTES LES 23 Composants INSTRUCTIONS AVANT 24 Fonctions USAGE ET CONSERVEZ- 29 Entretien & nettoyage LES À TITRE DE 30 Guide de préparation des aliments RÉFÉRENCE.
- Page 18 • Afin de vous protéger • Ne laissez pas le cordon contre les chocs pendre d’une table ou électriques, n’immergez d’un comptoir, entrer en pas le cordon, la fiche ou contact avec des surfaces le corps du moteur dans chaudes ou se nouer. l’eau ou tout autre liquide.
- Page 19 L’utilisation autre liquide chaud. d’accessoires non vendus • Ne touchez pas aux ni recommandés par surfaces chaudes de Breville peut causer un l'appareil. Utilisez les risque d’incendie, de poignées ou boutons de chocs électriques ou de l'appareil. blessure.
- Page 20 • Lorsque vous mélangez • Ne soulevez pas l'appareil des liquides, et hors du récipient durant particulièrement des l'opération. Assurez- liquides chauds, utilisez vous que la touche de un contenant profond ou commande est relâchée traitez de petites quantités et que le moteur est à...
- Page 21 • Cet appareil est conçu ou contactez le Service pour une utilisation à la clientèle de Breville domestique seulement. au 1-866-BREVILLE Ne l’utilisez que dans le pour fins d'examen, cadre recommandé dans de réparation ou...
- Page 22 INSTRUCTIONS SUR LE FICHE ASSIST ® COURT CORDON BREVILLE Votre appareil Breville est Votre appareil Breville est muni d'un court cordon muni d'une fiche exclusive d'alimentation qui réduit Assist conçue spéciale- ® le risque de blessures ou ment avec un anneau pour dommages pouvant résult-...
- Page 23 Composants A. Corps du moteur G. Lame à hacher en acier inoxydable B. Cadran régulateur de vitesse H. Couvercle du bol hachoir C. Touche de commande I. Récipient à mélanger D. Pied-mélangeur J. Fouet E. Lame à mélanger en acier inoxydable K.
- Page 24 MÉLANGEUR À MAIN Fonctions Pour attacher le pied-mélangeur Maintenez le pied-mélangeur avec les lames vers le bas, et alignez l'extrémité supérieure AVANT LA PREMIÈRE UTILISATION avec l'extrémité correspondante du corps • Retirez tout matériel d'emballage et étiquettes du moteur et poussez jusqu'à ce que le pied promotionnelles.
- Page 25 4. Placez le pied-mélangeur aussi Recommandations pour utiliser comme profondément que possible dans le mélangeur à main récipient à mélanger et appuyez sur la • Le mélangeur à main mélange très touche de commande pour démarrer rapidement les aliments et les liquides. Il l'appareil.
- Page 26 MINI-HACHOIR Pour assembler la lame à hacher, le bol hachoir et son couvercle Retirez le pied-mélangeur du corps du moteur (suivez les instructions à la page 25 ''Pour détacher le pied-mélangeur'). Placez la lame à hacher sur le pivot de métal situé...
- Page 27 FOUET Pour détacher le bol hachoir et son couvercle Veillez à ce que la touche de commande soit Pour attacher le fouet relâchée et l'appareil débranché de la prise murale. Retirez le pied-mélangeur du corps du moteur (suivez les instructions à la page 25 'Pour Maintenez le corps du moteur avec une main détacher le pied-mélangeur').
- Page 28 4. Plongez le fouet dans les aliments et Recommandations pour utiliser le mélangeur appuyez sur la touche de commande pour à main avec le fouet le faire démarrer. La touche doit être tenue • Ne laissez pas le fouet heurter le fond ou les durant toute la durée de l'opération.
- Page 29 FOUET Entretien & Débranchez l'appareil avant de le nettoyer. nettoyage Retirez le corps du moteur du fouet. Le fouet peut être lavé à l'eau chaude savonneuse, rincé et asséché correctement après chaque usage. CORPS DU MOTEUR Ou encore, vous pouvez le laver dans le lave- Débranchez l'appareil de la prise murale avant vaisselle.
- Page 30 Guide De Préparation Des Aliments TYPE D'ALIMENT TYPE RÉGLAGE DURÉE INSTRUCTIONS D'ACCESSOIRE VITESSE Laits frappés, boissons Pied-mélangeur moyenne à 30 sec. Utilisez du lait froid. Mélangez fouettées, cocktails, élevée jusqu'à consistance désirée. boissons frappées aux fruits Soupes, trempettes, Pied-mélangeur moyenne à 30 sec.
- Page 31 BSB510XL_IB_B16.indd 31 7/11/2016 1:33 PM...
- Page 32 Web: www.breville.ca/support Breville is a registered trademark of Breville Pty. Ltd. A.B.N. 98 000 092 928. Copyright Breville Pty. Ltd. 2016. Due to continued product improvement, the products illustrated/photographed in this booklet may vary slightly from the actual product.